Love this? Save it for later!
Share the inspiration with your friends
“You won’t believe what I found tucked away in the back of my local bakery’s recipe box,” my friend Jenna said as she handed me a slightly crumpled yellowed index card. It was covered in smudged handwriting and titled “Graduation Diploma Sugar Cookies.” I was instantly curious. We were gearing up for my cousin’s graduation party, and honestly, I wasn’t planning anything fancy with the desserts. But here I was, holding what looked like a secret weapon for making celebration cookies that would steal the show.
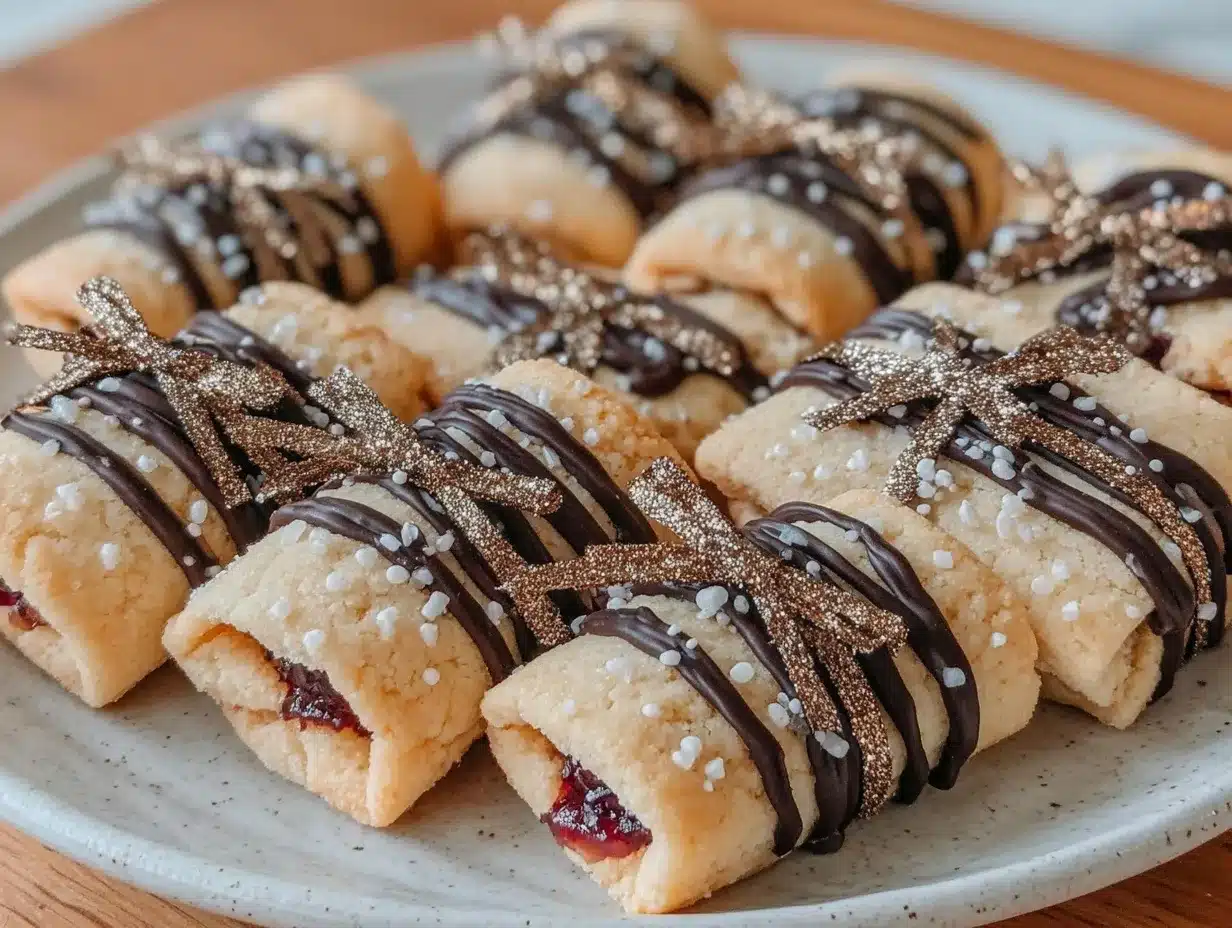
The recipe came from a retired pastry chef who once worked for high-profile events in the city. Jenna had snagged it during a community bake sale years ago, and it had been her go-to ever since. What caught my attention wasn’t just the cookie dough—it was the elegant black and gold icing instructions that made those cookies look like little diplomas, perfect for the occasion.
Let me tell you, I wasn’t expecting much at first. After all, sugar cookies and icing can sometimes feel basic or even a bit bland. But as I mixed the dough, rolled it out, and carefully piped the black and gold details, something clicked. The cookies tasted buttery with just the right hint of vanilla, and the icing had this smooth, glossy finish that felt almost luxurious. I ended up making a mess of the kitchen (don’t ask about the gold dust everywhere), but the smile on my cousin’s face when she saw those diploma-shaped treats? Worth every crumb.
Maybe you’ve been there—wondering if you can pull off something that looks impressive but isn’t complicated. These Perfect Graduation Diploma Sugar Cookies with Elegant Black and Gold Icing are exactly that kind of recipe, and honestly, they’ve become a staple for every graduation celebration in my family since. Let me tell you why this recipe stuck with me and why you might love it too.
Why You’ll Love This Recipe
After testing this recipe multiple times and tweaking the icing technique, I can say this is the kind of graduation cookie that makes a party feel special without hours of fuss. Here’s why it’s become a favorite:
- Quick & Easy: The dough comes together in under 15 minutes, and with a bit of practice, the icing decoration only takes about 20 more minutes for a batch.
- Simple Ingredients: No need for fancy or hard-to-find items—most are pantry staples or easy to grab at any grocery store.
- Perfect for Celebrations: Whether it’s a graduation party, an academic milestone, or even a themed event, these cookies fit the bill beautifully.
- Crowd-Pleaser: Kids love the fun diploma shape, and adults appreciate the elegant black and gold icing that makes the cookies feel upscale.
- Unbelievably Delicious: The buttery texture of the cookie combined with the smooth, slightly sweet royal icing is just next-level comfort food.
What sets this apart from other sugar cookie recipes is the balance between the soft, tender crumb and the crisp edges. The black and gold icing isn’t just for looks—it’s made with a special technique that gives it a rich, shiny finish that stays perfect for days. Honestly, it’s the kind of cookie you close your eyes to savor, and then want to make again right away.
This recipe has become my go-to when I want to impress without stress. Plus, you can totally customize the colors, but the black and gold combo? It just screams graduation success, sophistication, and a little bit of fun glittery flair.
What Ingredients You Will Need
This recipe uses simple, wholesome ingredients to deliver a buttery cookie base with smooth, elegant icing. Most you probably have on hand already, and they come together without any fuss.
- For the Sugar Cookie Dough:
- 2 ¾ cups (345g) all-purpose flour, sifted for light texture
- 1 teaspoon baking powder
- ½ teaspoon salt
- 1 cup (227g) unsalted butter, softened (I like using Land O Lakes for a creamy taste)
- 1 ½ cups (300g) granulated sugar
- 1 large egg, room temperature
- 1 ½ teaspoons pure vanilla extract (real vanilla makes a big difference)
- 2 tablespoons whole milk (adds tenderness)
- For the Royal Icing:
- 3 cups (360g) powdered sugar, sifted
- 2 large egg whites or 4 tablespoons pasteurized egg whites (for safety and smooth texture)
- 1 teaspoon lemon juice or clear vanilla extract (for mild flavor)
- Black gel food coloring (I recommend AmeriColor for vibrant black)
- Edible gold dust or gold luster dust (for that elegant shimmer)
- 2-3 tablespoons water (to adjust consistency)
Most of these ingredients serve clear roles: the flour and baking powder give structure; butter and sugar create the perfect balance of richness and sweetness; egg and vanilla add moisture and flavor. For the icing, powdered sugar with egg whites forms the glossy, pipeable royal icing base. The gel colors and gold dust bring the diploma design to life with that signature black and gold look. If you prefer dairy-free options, swap the butter for plant-based margarine and the milk for almond milk without much difference in texture.
Equipment Needed
- Mixing bowls (medium and large sizes)
- Electric hand mixer or stand mixer (helps create fluffy dough and smooth icing)
- Measuring cups and spoons (for precise ingredient amounts)
- Rolling pin (a lightly floured wooden or silicone one works best)
- Diploma-shaped cookie cutter or rectangular cutter with rounded edges
- Parchment paper or silicone baking mats (to prevent sticking and ease cleanup)
- Piping bags with small round tips (sizes #1 or #2 for fine details)
- Small bowls or cups for coloring icing
- Clean paintbrush or small food-safe brush (for applying edible gold dust)
If you don’t have a stand mixer, a good-quality hand mixer will do just fine. For piping bags, disposable ones are budget-friendly and easy to clean up. I once tried piping the black icing with a zip-top bag and a tiny hole cut at the corner—it worked in a pinch but was definitely messier. Investing in a few reusable piping tips makes a huge difference for those precise lines and text.
Preparation Method
- Mix Dry Ingredients: In a medium bowl, whisk together 2 ¾ cups sifted flour, 1 teaspoon baking powder, and ½ teaspoon salt. Set aside. This step ensures even distribution and light texture.
Time: 5 minutes. - Cream Butter and Sugar: In a large bowl, beat 1 cup softened butter and 1 ½ cups granulated sugar with an electric mixer on medium speed until fluffy and pale—usually about 3 to 4 minutes. This step is key for tender cookies.
Tip: Don’t rush this or the cookies can turn dense. - Add Egg and Vanilla: Beat in 1 large egg and 1 ½ teaspoons vanilla extract until just combined. Scrape down the bowl as needed to keep everything mixed evenly.
Time: 2 minutes. - Incorporate Dry Ingredients and Milk: Gradually add the flour mixture to the butter mixture in three additions, alternating with 2 tablespoons of milk. Mix on low speed until dough just comes together. Avoid overmixing to prevent tough cookies.
Visual Cue: The dough should be soft but not sticky. - Chill the Dough: Shape the dough into a disk, wrap in plastic wrap, and refrigerate for at least 1 hour. This relaxes the gluten and makes rolling easier.
Pro Tip: I often chill it overnight for better flavor and easier handling. - Preheat Oven and Prepare Baking Sheets: Set oven to 350°F (175°C). Line baking sheets with parchment paper or silicone mats to prevent sticking and ensure even baking.
Tip: You can bake two sheets at once but rotate halfway through. - Roll and Cut Cookies: On a lightly floured surface, roll chilled dough to about ¼ inch (6 mm) thickness. Use your diploma-shaped cookie cutter to cut out cookies and transfer to baking sheets with a spatula.
Note: If dough warms up and gets sticky, pop it back in the fridge for 10 minutes. - Bake: Bake cookies for 8-10 minutes, or until edges just start to turn golden. Watch carefully to avoid overbaking.
Texture Check: Cookies should be firm but still soft in the center. - Cool Completely: Let cookies cool on baking sheets for 5 minutes, then transfer to wire racks to cool fully before icing. Warm cookies will melt the royal icing.
- Prepare Royal Icing: In a clean bowl, beat together 3 cups powdered sugar, 2 egg whites, and 1 teaspoon lemon juice until smooth and glossy (about 5 minutes). Adjust consistency with water—thicker for outlining, thinner for flooding.
Tip: Divide icing into two bowls; color one black and leave the other white or pale gold. - Decorate Cookies: Use piping bags with fine tips to outline each cookie with black icing. Once outlines dry slightly (10-15 minutes), flood the inside with thinned icing. Use a small brush to lightly dust edible gold luster on edges or scrollwork for that graduation flair.
Patience: Let each layer dry before adding details to avoid blurring. - Dry and Store: Allow decorated cookies to dry completely at room temperature (4-6 hours or overnight). Store in airtight containers separated by parchment paper to keep fresh.
Cooking Tips & Techniques
Creating these Perfect Graduation Diploma Sugar Cookies got me thinking about the little things that make a big difference. Here are some tips I learned the hard way:
- Don’t Skip Chilling: Chilled dough is easier to roll and cut cleanly. It also helps cookies keep their shape in the oven instead of spreading out.
- Measure Flour Correctly: Scooping flour directly with a measuring cup can pack it down and cause dense cookies. I always spoon flour into my cup, then level it off.
- Practice Piping: If you’re new to royal icing, practice on parchment paper before decorating. It helps get comfortable with controlling the flow and pressure.
- Use Gel Food Coloring for Black: Liquid colors tend to thin out your icing. I’ve found AmeriColor black gel gives the richest color without affecting consistency.
- Layer Your Icing: Let the outline dry before flooding. It keeps colors crisp and prevents runny edges.
- Keep Icing Covered: Royal icing dries out quickly. Cover bowls with damp cloths or plastic wrap when not in use.
- Multitask Wisely: While cookies bake and cool, prep your icing or clean up. It keeps the workflow smooth and kitchen less chaotic.
Variations & Adaptations
This recipe is flexible enough to suit different tastes and dietary needs without losing its charm:
- Gluten-Free Version: Swap all-purpose flour for a 1:1 gluten-free baking blend. I’ve had success with Bob’s Red Mill gluten-free flour, but chilling the dough a bit longer helps with texture.
- Vegan Adaptation: Use vegan butter and replace the egg with a flax egg (1 tablespoon ground flaxseed + 3 tablespoons water, chilled). For royal icing, substitute egg whites with aquafaba (chickpea water) whipped until stiff.
- Color Customization: Instead of black and gold, try navy and silver for a different graduation vibe, or school colors to make it personal.
- Alternative Shapes: If you don’t have a diploma cutter, rectangular or scroll-shaped cookies work well with this icing style.
- Flavor Twists: Add a teaspoon of almond extract to the dough or swap vanilla with lemon extract for a bright twist.
Once, I tried adding finely chopped edible flowers on top of the icing before it dried—looked stunning but was a bit tricky to eat! Still, it was a fun experiment that guests loved.
Serving & Storage Suggestions
These cookies are best served at room temperature, letting the buttery flavor and smooth icing shine. Present them on a decorative platter or in gift boxes tied with a ribbon for a thoughtful graduation gift.
Pairing ideas include light refreshments like sparkling cider, coffee, or a mild tea. They also complement savory finger foods well, balancing out the sweetness.
Store cookies in an airtight container layered with parchment paper to prevent sticking. They keep well for up to 5 days at room temperature or up to 2 weeks refrigerated. For longer storage, freeze them in a sealed container for up to 3 months—just thaw at room temperature before serving.
Reheat is generally not recommended, as it can soften the icing. But if you want a softer cookie, warming gently for 5-10 seconds in the microwave can help. Just watch out for melting icing.
Flavors tend to mellow and blend after a day, making these cookies even more enjoyable the next day—if you can wait that long!
Nutritional Information & Benefits
Each cookie (about 3 inches) contains approximately:
| Calories | 180 |
|---|---|
| Fat | 9g |
| Carbohydrates | 24g |
| Protein | 2g |
| Sugar | 14g |
This recipe is gluten-rich but can be adapted for gluten-free diets. The key ingredients like butter and egg provide some protein and healthy fats, while powdered sugar and granulated sugar give the classic sweet taste.
From a wellness perspective, these cookies are an occasional treat that satisfies sweet cravings without complex additives. Using real vanilla and lemon juice in icing adds natural flavor without extra artificial ingredients.
For those with allergies, be mindful of egg and dairy content, and consider the vegan substitutions mentioned above. The recipe’s straightforward ingredients make it easy to tailor to your dietary needs.
Conclusion
These Perfect Graduation Diploma Sugar Cookies with Elegant Black and Gold Icing bring together a blend of simplicity, style, and deliciousness that makes any celebration feel a little more special. Whether you’re a novice baker or a seasoned pro, this recipe offers a chance to create something memorable without stress.
I love that these cookies combine classic buttery sugar cookie goodness with a touch of sophistication from the black and gold accents. It’s a recipe that’s become part of our family’s graduation traditions, and I hope it can be part of yours too.
Give them a try, add your own twists, and don’t forget to share your results—I’d love to hear how your graduation party turned out with these sweet diplomas in hand. Happy baking, and congratulations to all the graduates out there!
FAQs
How long do these sugar cookies stay fresh?
Stored in an airtight container at room temperature, these cookies stay fresh for about 5 days. Refrigerating can extend their life up to 2 weeks.
Can I make the dough ahead of time?
Absolutely! You can prepare the dough up to 3 days in advance and keep it wrapped in the fridge, or freeze it for up to 3 months.
What if I don’t have a diploma cookie cutter?
No worries! Use a rectangular or scroll-shaped cutter, or even a sharp knife to carefully cut the dough into diploma-like shapes.
Is royal icing necessary for these cookies?
Royal icing gives that smooth, glossy finish that holds decoration well. You can substitute with a simple glaze, but it won’t have the same polished look or durability.
How do I fix runny icing?
If your royal icing is too thin, add more powdered sugar a tablespoon at a time until you reach the right consistency. For outlining, it should hold its shape; for flooding, it should spread slowly without being watery.
For a fun variation, you might like trying the crispy garlic chicken recipe for your graduation party main course, or serve these cookies alongside a refreshing lemon herb salad to balance flavors beautifully.
Pin This Recipe!
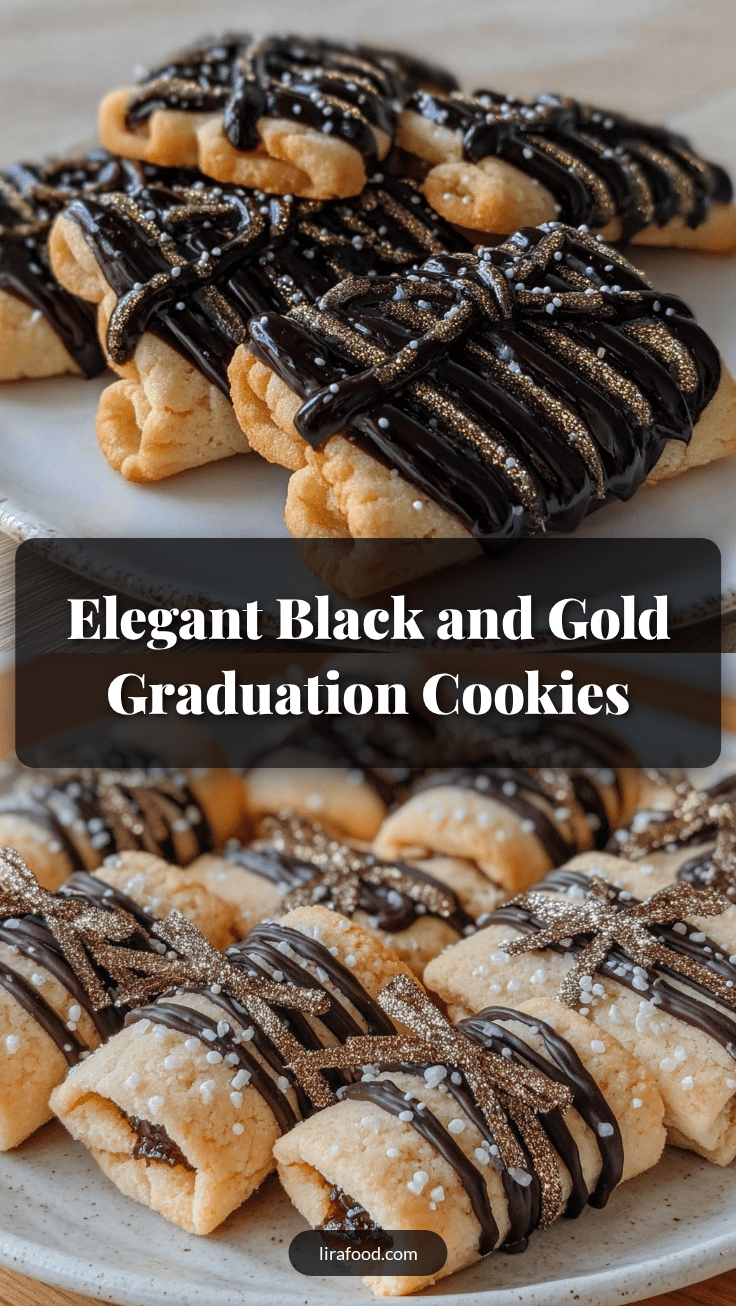
Perfect Graduation Diploma Sugar Cookies Easy Elegant Black Gold Icing Recipe
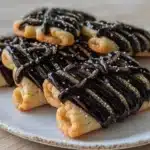
These buttery sugar cookies shaped like diplomas are decorated with elegant black and gold royal icing, perfect for graduation celebrations. The recipe is easy to follow and yields tender cookies with a smooth, glossy finish.
- Prep Time: 15 minutes
- Cook Time: 10 minutes
- Total Time: 1 hour 25 minutes
- Yield: 24 cookies 1x
- Category: Dessert
- Cuisine: American
Ingredients
- 2 ¾ cups (345g) all-purpose flour, sifted
- 1 teaspoon baking powder
- ½ teaspoon salt
- 1 cup (227g) unsalted butter, softened
- 1 ½ cups (300g) granulated sugar
- 1 large egg, room temperature
- 1 ½ teaspoons pure vanilla extract
- 2 tablespoons whole milk
- 3 cups (360g) powdered sugar, sifted
- 2 large egg whites or 4 tablespoons pasteurized egg whites
- 1 teaspoon lemon juice or clear vanilla extract
- Black gel food coloring
- Edible gold dust or gold luster dust
- 2–3 tablespoons water
Instructions
- Mix dry ingredients: whisk together flour, baking powder, and salt in a medium bowl; set aside.
- Cream butter and sugar: beat softened butter and granulated sugar with an electric mixer on medium speed until fluffy and pale, about 3-4 minutes.
- Add egg and vanilla: beat in egg and vanilla extract until just combined.
- Incorporate dry ingredients and milk: gradually add flour mixture in three additions alternating with milk; mix on low speed until dough just comes together.
- Chill the dough: shape dough into a disk, wrap in plastic wrap, and refrigerate for at least 1 hour.
- Preheat oven to 350°F (175°C) and line baking sheets with parchment paper or silicone mats.
- Roll and cut cookies: roll chilled dough to ¼ inch thickness and cut with diploma-shaped cookie cutter; transfer to baking sheets.
- Bake cookies for 8-10 minutes until edges start to turn golden; let cool on baking sheets for 5 minutes, then transfer to wire racks to cool completely.
- Prepare royal icing: beat powdered sugar, egg whites, and lemon juice until smooth and glossy; adjust consistency with water.
- Divide icing into two bowls; color one black and leave the other white or pale gold.
- Decorate cookies: outline cookies with black icing using piping bags; after outlines dry slightly, flood inside with thinned icing; dust edible gold luster on edges or scrollwork with a small brush.
- Allow decorated cookies to dry completely at room temperature for 4-6 hours or overnight.
- Store in airtight containers separated by parchment paper.
Notes
Chill dough for at least 1 hour or overnight for easier rolling and better flavor. Practice piping on parchment paper before decorating. Use gel food coloring for vibrant black icing. Let icing layers dry before adding details to avoid blurring. Store cookies in airtight containers with parchment paper between layers. Cookies keep fresh for 5 days at room temperature or up to 2 weeks refrigerated. Freeze for up to 3 months.
Nutrition
- Serving Size: 1 cookie (about 3 in
- Calories: 180
- Sugar: 14
- Fat: 9
- Carbohydrates: 24
- Protein: 2
Keywords: graduation cookies, sugar cookies, royal icing, diploma cookies, black and gold icing, celebration cookies, easy sugar cookies