Love this? Save it for later!
Share the inspiration with your friends
“It was a blistering July afternoon when the old boat’s cooler gave up on us — leaking everywhere, ruining our usual picnic spread. Honestly, I thought the snack time was doomed. That’s when my friend Mike, who’s more of a “grab-and-go” guy, pulled out this simple, no-fridge boat snack board he swore by. No ice, no fuss — just salami, hard cheese, and a few other goodies that somehow felt like a proper feast under the scorching sun. I remember the way the salty salami paired with the nutty, crumbly cheese, all while we rocked gently in the bay. It wasn’t fancy, but it was exactly what we needed. You know that feeling when a plan B turns out better than the original? Yeah, that was it.
That day, I learned that the best boat snacks don’t have to be complicated or high-maintenance. This Easy No-Fridge Boat Snack Board with Salami and Hard Cheese became my go-to for all water-bound outings — easy to pack, mess-free, and honestly, pretty satisfying. Maybe you’ve been there, staring at a soggy sandwich or melting cheese, wishing for something simpler but still tasty. Let me tell you, this snack board is not only practical but it’s also a little celebration on a plate.
So, whether you’re planning a day on the water, a picnic in the park, or just want a no-fuss snack that travels well, this recipe has your back. And yes, it’s perfect for those moments when the cooler fails but your appetite doesn’t.
Why You’ll Love This Recipe
After testing countless combinations, I can confidently say this Easy No-Fridge Boat Snack Board with Salami and Hard Cheese hits all the right notes. Here’s why it’s become a staple in my snack rotation:
- Quick & Easy: Comes together in under 10 minutes, which is perfect when you’re rushing to get to the dock or just want a fuss-free snack.
- Simple Ingredients: No need for specialty grocery store runs — most items are pantry staples or easy to find at any deli.
- Perfect for Outdoor Adventures: Whether you’re on a boat, hiking, or having a picnic, this board doesn’t require refrigeration, making it ideal for warm days.
- Crowd-Pleaser: Salami and hard cheese are fan favorites, loved by kids and adults alike — no picky eaters here!
- Unbelievably Delicious: The salty, savory salami combined with the rich, firm cheese creates a flavor and texture combo that’s honestly hard to beat.
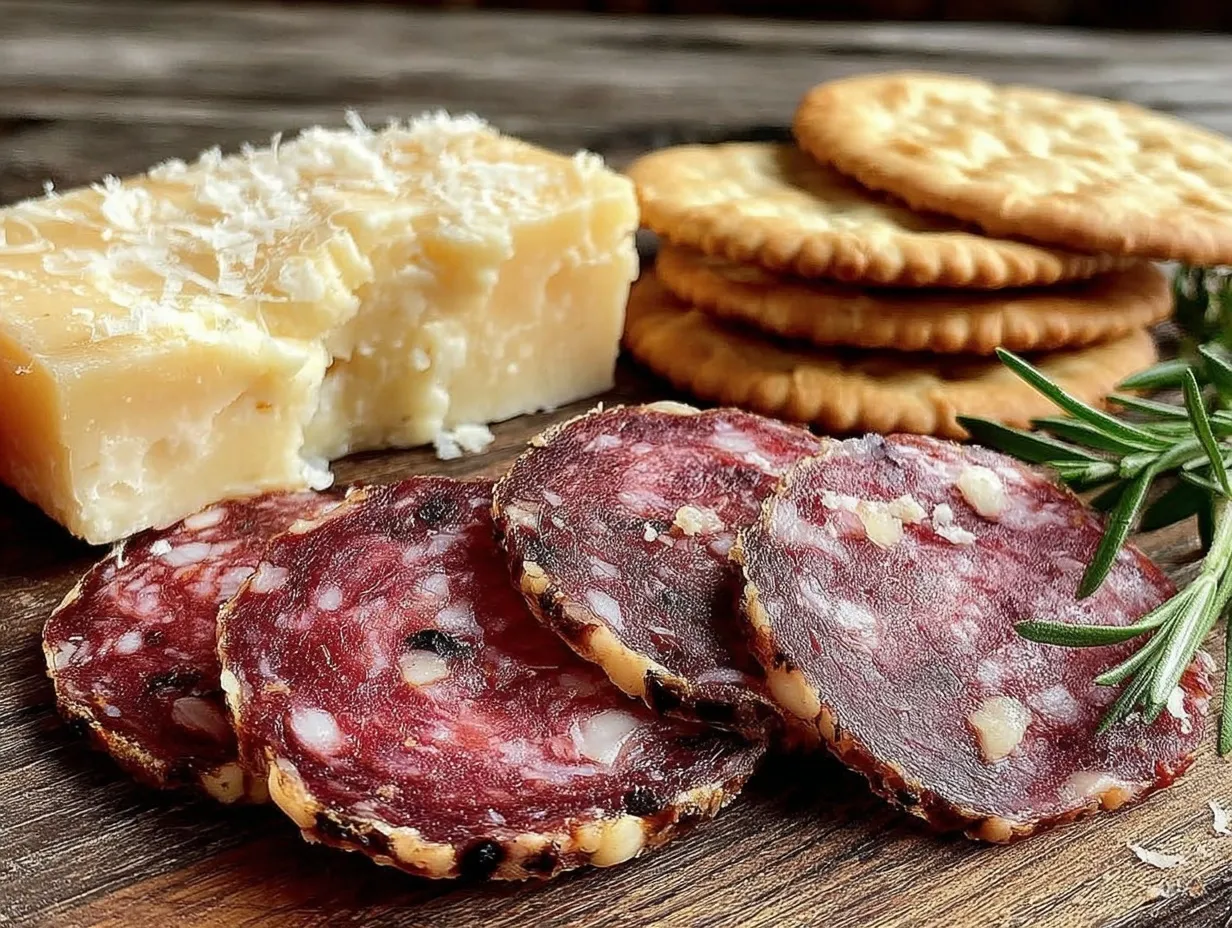
What makes this recipe stand out is the careful selection of ingredients that hold up without chilling. I prefer using a dry-cured salami like Felino or Soppressata because they keep their flavor and texture even in the heat. For cheese, a nice aged Manchego or Parmigiano-Reggiano works wonders — firm, flavorful, and no melting mess. These choices aren’t just random; they’re tried and tested picks that I keep coming back to, especially from my favorite local deli.
This snack board isn’t just food; it’s a little moment of joy while you’re out enjoying the sun and water. It’s comfort food made simple, with zero stress and tons of flavor. Trust me, once you try it, this will become your go-to for any outing where the fridge is just a dream.
What Ingredients You Will Need
This recipe uses simple, wholesome ingredients to deliver bold flavor and satisfying texture without the fuss. Everything here is easy to find, and many of these are pantry staples that you might already have. Feel free to mix and match based on what’s available or your taste preferences!
- Salami: 4-6 ounces (115-170g) of dry-cured salami, thinly sliced (I recommend Felino or Soppressata for best texture and flavor)
- Hard Cheese: 6 ounces (170g) of aged Manchego, Parmigiano-Reggiano, or aged Gouda, cut into bite-sized chunks or slices
- Crackers: A selection of sturdy crackers, about 1 cup (choose whole grain or artisan styles for more flavor)
- Olives: ½ cup (75g) of mixed olives, pitted (Kalamata or Castelvetrano add nice color and taste)
- Pickles or Cornichons: ½ cup (75g), for a tangy crunch
- Nuts: ¼ cup (30g) of roasted almonds or Marcona almonds (adds a buttery texture)
- Dried Fruit: ¼ cup (30g) of dried apricots or figs (optional, but adds a hint of sweetness)
- Fresh Fruit: A handful of grapes or apple slices (choose firm, crisp fruit for freshness)
- Mustard or Spicy Honey: A small bowl for dipping (adds a punch of flavor and balances the saltiness)
If you want a dairy-free or vegan option, feel free to swap the cheese with firm plant-based cheeses that hold up well without refrigeration. For a gluten-free board, pick gluten-free crackers or crispbreads.
Pro tip: When buying salami, look for vacuum-sealed packs for longer freshness, especially if you plan to take the board on longer trips. For cheese, aged varieties with lower moisture content are your best bet for no-fridge situations.
Equipment Needed
- Serving Board or Tray: A wooden cheese board, slate platter, or even a sturdy cutting board works perfectly for assembling the snack board.
- Sharp Knife: Essential for slicing the salami and cutting the cheese into bite-sized pieces.
- Small Bowls: For olives, nuts, and dips to keep the board tidy and organized.
- Cheese Knife or Spreader: Useful for spreading mustard or honey on crackers, though a regular butter knife works fine too.
- Reusable Containers or Zip Bags: For packing ingredients if you’re taking the snack board on the go — makes transport easy and mess-free.
If you don’t have a fancy cheese board, no worries. I’ve used simple wooden cutting boards or even a large plate with great success. The key is making it look inviting and easy to grab from. Investing in a quality cheese knife is worth it if you often prepare boards like this — it makes slicing smoother and safer.
Preparation Method
- Prepare the Ingredients (5-7 minutes): Start by slicing the salami thinly, about 1/8 inch (3 mm) thick. This thickness lets the flavor shine without being too chewy. Cut the hard cheese into bite-sized chunks or thin slices, roughly 1/2 inch (1.3 cm) pieces — you want easy-to-pick-up portions.
- Arrange the Board (5 minutes): Lay down your serving board or plate. Place small bowls for olives, nuts, and mustard/honey spread around the edges. This helps keep the flavors from mixing and makes the board look tidy.
- Layer the Salami and Cheese: Artistically arrange the salami slices in gentle folds or small piles around the board. Scatter the cheese pieces in clusters opposite the salami for visual balance.
- Add Crunch and Color: Fill in the gaps with crackers, placing them in small stacks or fanned out. Add the pickles or cornichons beside the olives for a tangy pop. Scatter nuts and dried fruit around for texture and bursts of sweetness.
- Freshen Up with Fruit: Place grapes or apple slices in small bunches around the board. This adds a refreshing contrast to the rich meats and cheeses. If you pack the board ahead, keep fresh fruit chilled separately and add just before serving.
- Final Touches: Place a small bowl of mustard or spicy honey on the board for dipping. If you like, add a few sprigs of fresh herbs like rosemary or thyme for a fragrant, pretty finish.
- Serve and Enjoy: This board is ready to eat immediately, no fridge needed. Perfect for snacking on the boat, at a picnic, or during a casual get-together.
Tip: If you’re packing this for a boat trip, wrap the board tightly with plastic wrap or use a large airtight container. Keep the board shaded and out of direct sun as much as possible to preserve freshness. The salami and hard cheese hold up well for several hours at room temperature, but avoid leaving them out longer than 4-5 hours in hot weather.
Cooking Tips & Techniques
Honestly, assembling a snack board like this is as close to cooking as it gets, but there are some tricks that make all the difference.
- Choose the Right Cheese: Hard cheeses with low moisture content are your best friends here. They don’t sweat or soften too much without refrigeration. If you want to experiment, aged Asiago or aged cheddar are great alternatives.
- Slice Salami Properly: Thin slices prevent overwhelming saltiness and make the meat easier to eat. If you buy a whole salami stick, chilling it briefly before slicing helps achieve cleaner cuts.
- Balance Flavors and Textures: Don’t just pile meats and cheese. The olives, nuts, and fruit add necessary layers of flavor and crunch. This variety keeps your taste buds interested.
- Avoid Soggy Crackers: Keep crackers separate until right before serving if your board includes juicy fruit or pickles to prevent them from getting soggy.
- Timing Matters: Assemble the board as close to serving time as possible. But if you need to prepare in advance, keep fresh items like fruit and crackers separate and add them last-minute.
- Don’t Overpack: Sometimes less is more. A clean, uncluttered board is more inviting and easier to enjoy on a boat or picnic.
In my early attempts, I once brought a soft Brie to the boat, and it turned into a melty disaster on the sun-soaked deck. Lesson learned: stick to the hard stuff for no-fridge outings!
Variations & Adaptations
This snack board is super adaptable based on your preferences or dietary needs. Here are some variations you might enjoy:
- Vegetarian Version: Skip the salami and add marinated artichoke hearts, roasted red peppers, or grilled vegetables. Swap cheese for aged halloumi or a firm vegan cheese.
- Spicy Kick: Include spicy soppressata or add pepperoncini peppers alongside the olives for a little zing.
- Seasonal Twist: In fall, swap fresh grapes for crisp apple slices and add spiced nuts; in summer, add fresh figs or cherries for sweetness.
- Gluten-Free Option: Use gluten-free crackers or crispbreads to keep the board accessible for all.
- Personal Favorite Variation: I love adding a small jar of fig jam alongside the mustard — it’s a sweet and savory combo that gets rave reviews every time.
You can swap ingredients easily depending on what you have on hand or what’s available locally. The key is balancing salty, savory, crunchy, and sweet elements for a satisfying bite every time.
Serving & Storage Suggestions
Serve this snack board at room temperature for the best flavor and texture. On a boat or picnic, just set it out and let everyone graze. It pairs wonderfully with crisp white wine, a light beer, or sparkling water with lemon for refreshment.
If you have leftovers (though unlikely!), wrap them tightly and refrigerate. Salami and hard cheeses keep well for up to a week when refrigerated. Crackers and nuts should be stored separately in airtight containers to maintain crunch.
Reheating isn’t necessary — in fact, this is best enjoyed cold or room temp. Flavors tend to develop nicely when the cheese and salami come to room temperature, making each bite more flavorful and aromatic.
Pro tip: If you want to prep the board ahead for a picnic, pack all components separately and assemble on-site to keep everything fresh and crisp.
Nutritional Information & Benefits
This snack board offers a balanced combination of protein, healthy fats, and fiber, making it a satisfying option for light meals or snacks. Salami provides protein and iron, while hard cheeses add calcium and fat-soluble vitamins.
Olives and nuts contribute heart-healthy fats and antioxidants, supporting overall wellness. Fresh fruit adds a touch of natural sweetness with vitamins and fiber, rounding out the plate.
For those mindful of dietary restrictions, this board is naturally gluten-free if you choose gluten-free crackers and can be adapted for low-carb or keto diets by skipping crackers and focusing on meat, cheese, and nuts.
Be aware that salami and cheese are higher in sodium, so it’s best enjoyed in moderation, especially if you’re watching salt intake.
Conclusion
This Easy No-Fridge Boat Snack Board with Salami and Hard Cheese has proven itself as a simple, reliable, and delicious option whenever refrigeration isn’t an option. It’s perfect for boat trips, picnics, or anytime you want a fuss-free snack that still feels special.
I love this recipe because it brings people together — no complicated prep, no stress, just good food shared outdoors. Feel free to customize it based on your favorite flavors or what you have on hand. Honestly, it’s so forgiving, it’s hard to go wrong.
Give it a try next time you’re packing for an adventure or just want a snack that travels well. And when you do, leave a comment below sharing your favorite tweaks or experiences — I’d love to hear how you make it your own!
Here’s to easy, tasty snacking wherever life takes you.
FAQs
Can I use soft cheeses for this snack board?
Soft cheeses like Brie or Camembert aren’t ideal for no-fridge situations because they melt quickly and can become messy. Stick to aged hard cheeses for best results.
How long can this snack board stay out without refrigeration?
Ideally, consume within 4-5 hours at room temperature, especially in warm weather, to keep the ingredients fresh and safe.
What are good substitutes for salami?
You can use other dry-cured meats like chorizo or prosciutto, but make sure they’re dry and firm to hold up without chilling.
Can I prepare this snack board ahead of time?
Yes! Prepare all ingredients separately, especially fresh fruit and crackers, and assemble the board just before serving to maintain freshness.
Is this snack board suitable for kids?
Absolutely! The flavors are kid-friendly, especially if you choose milder cheeses and less spicy salami. Just watch portion sizes and salt content.
For more snack inspiration that travels well, you might enjoy my Easy Picnic Charcuterie Board or the simple yet flavorful Homemade Italian Antipasto Platter. Both bring that same no-fuss, crowd-pleasing vibe—perfect for any outdoor gathering.
Pin This Recipe!
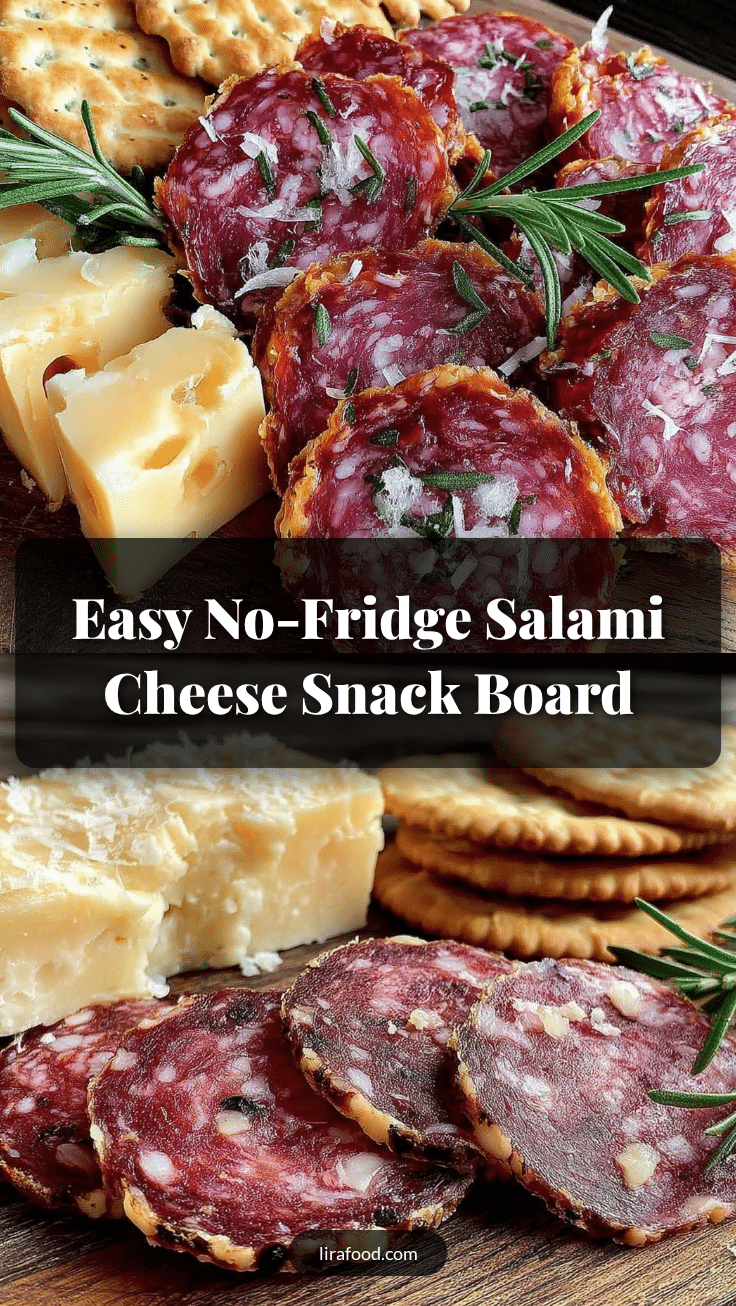
Easy No-Fridge Boat Snack Board with Salami and Hard Cheese

A simple, no-refrigeration snack board featuring dry-cured salami, aged hard cheese, and complementary snacks perfect for boat trips, picnics, or outdoor adventures.
- Prep Time: 7 minutes
- Cook Time: 0 minutes
- Total Time: 7 minutes
- Yield: 4 servings 1x
- Category: Snack
- Cuisine: American
Ingredients
- 4–6 ounces (115-170g) dry-cured salami, thinly sliced (Felino or Soppressata recommended)
- 6 ounces (170g) aged Manchego, Parmigiano-Reggiano, or aged Gouda, cut into bite-sized chunks or slices
- 1 cup sturdy crackers (whole grain or artisan styles preferred)
- ½ cup (75g) mixed olives, pitted (Kalamata or Castelvetrano recommended)
- ½ cup (75g) pickles or cornichons
- ¼ cup (30g) roasted almonds or Marcona almonds
- ¼ cup (30g) dried apricots or figs (optional)
- A handful of fresh grapes or apple slices
- Small bowl of mustard or spicy honey for dipping
Instructions
- Slice the salami thinly, about 1/8 inch (3 mm) thick.
- Cut the hard cheese into bite-sized chunks or thin slices, roughly 1/2 inch (1.3 cm) pieces.
- Lay down your serving board or plate and place small bowls for olives, nuts, and mustard/honey spread around the edges.
- Arrange the salami slices in gentle folds or small piles around the board.
- Scatter the cheese pieces in clusters opposite the salami for visual balance.
- Fill in gaps with crackers, placing them in small stacks or fanned out.
- Add pickles or cornichons beside the olives for a tangy pop.
- Scatter nuts and dried fruit around for texture and bursts of sweetness.
- Place grapes or apple slices in small bunches around the board; add fresh fruit just before serving if packed ahead.
- Place a small bowl of mustard or spicy honey on the board for dipping.
- Optionally, add fresh herbs like rosemary or thyme for a fragrant finish.
- Serve immediately at room temperature; no refrigeration needed.
Notes
Use dry-cured salami and aged hard cheeses to prevent melting and spoilage without refrigeration. Assemble close to serving time for best freshness. Keep crackers separate until serving to avoid sogginess. Consume within 4-5 hours at room temperature, especially in warm weather.
Nutrition
- Serving Size: Approximately 1/4 of
- Calories: 350
- Sugar: 4
- Sodium: 700
- Fat: 28
- Saturated Fat: 10
- Carbohydrates: 12
- Fiber: 2
- Protein: 15
Keywords: no-fridge snack board, boat snack, salami snack, hard cheese board, picnic snack, easy snack board, outdoor snack