Love this? Save it for later!
Share the inspiration with your friends
Introduction
“I never thought pickles could cause such a commotion,” my friend Jake joked as I handed him a plate of these crispy deep-fried pickles one Sunday afternoon. The story behind this recipe? It all started last summer at the state fair. You know that moment when the smell of fried food hits you like a warm, nostalgic punch? Well, that was me, standing in a long line, waiting to get my hands on a snack that seemed so simple but tasted unforgettable.
What struck me was how ordinary pickles transformed into this golden, crunchy delight—something I hadn’t quite mastered at home before. I remember the vendor, a cheerful woman named Lucy, tossing those pickles into sizzling oil with a practiced flick of her wrist. It was honestly mesmerizing. The batter was light but packed with a subtle kick of spices, and the pickles inside stayed juicy, tangy, and almost bubbly with flavor. Maybe you’ve been there, craving the exact taste but unsure how to get it just right in your kitchen.
After a few messy attempts (including one time when the batter clumped and my kitchen looked like a disaster zone), I finally nailed the technique. Now, these crispy deep-fried pickles are my go-to snack for game nights, casual get-togethers, or whenever I want a quick, crowd-pleasing treat. Let me tell you, they never last more than a few minutes once I set them down. It’s the kind of recipe that makes you close your eyes with satisfaction after the first bite—and I’m thrilled to share it with you today.
Why You’ll Love This Recipe
Honestly, this crispy deep-fried pickles recipe is all about replicating that county fair magic without the long lines or sticky fingers. Over multiple trials (and a few too many taste tests), I tweaked the batter and frying times to get the perfect crunch and tangy burst inside. Whether you’re a pickle fanatic or a fried-food newbie, this recipe hits all the right notes.
- Quick & Easy: Ready in under 30 minutes, making it perfect for last-minute snack cravings or casual parties.
- Simple Ingredients: Most are pantry staples, so no extra trips to specialty stores required.
- Perfect for Game Day: The ultimate finger food that disappears fast during any get-together.
- Crowd-Pleaser: Kids and adults alike keep coming back for more—trust me, I’ve hosted a few “tasting parties” where they vanished instantly.
- Unbelievably Delicious: The batter crisps up super light while locking in the pickle’s juicy tang, creating a flavor and texture combo that’s seriously addictive.
What makes this recipe stand out? Well, it’s the batter’s secret blend of spices and the double-dip technique that keeps the coating extra crunchy without overwhelming the pickle’s natural zing. I’ve tried versions that were too greasy or bland, but this one strikes that perfect balance every time. Plus, it’s flexible—whether you prefer dill, spicy, or bread-and-butter pickles, this recipe adapts.
Honestly, it’s comfort food with a twist, bringing together nostalgia and simplicity in a way that feels both satisfying and special. If you’ve ever longed to recreate that county fair favorite at home, this recipe is your ticket.
What Ingredients You Will Need
This recipe uses simple, wholesome ingredients to deliver bold flavor and satisfying texture without the fuss. Most of these are kitchen staples, and the pickles you choose really set the tone—whether classic dill or something a bit sweeter.
- Pickles: 16 ounces of dill pickle chips, drained well (I prefer Claussen for their crispness)
- Flour: 1 cup all-purpose flour (helps create that crispy shell)
- Cornstarch: 1/4 cup (adds extra crunch and lightness)
- Baking powder: 1 teaspoon (for a slight puff in the batter)
- Spices: 1 teaspoon garlic powder, 1 teaspoon smoked paprika, 1/2 teaspoon cayenne pepper (adjust cayenne to your heat preference)
- Salt & Pepper: 1/2 teaspoon salt, 1/4 teaspoon black pepper
- Eggs: 2 large eggs, beaten (room temperature)
- Milk: 1/2 cup whole milk (or dairy-free alternative like oat milk works fine)
- Oil for frying: About 4 cups vegetable or canola oil (neutral oils with high smoke points are best)
- Dipping sauce (optional): Ranch dressing or spicy aioli for serving
Tip: For a gluten-free version, swap the all-purpose flour with a gluten-free blend and double-check your baking powder for gluten content. In warmer months, you can try substituting fresh sliced pickles or even quick-pickled cucumbers for a different twist.
Equipment Needed
- Deep-fryer or heavy-bottomed pot: A deep fryer makes frying easier and safer, but a large pot with a thermometer works just as well.
- Cooking thermometer: Essential for keeping the oil at the perfect 350°F (175°C) to avoid soggy or burnt pickles.
- Mixing bowls: One for dry ingredients, one for wet (eggs and milk).
- Tongs or slotted spoon: For safely lowering and removing pickles from hot oil.
- Wire rack or paper towels: To drain excess oil after frying (wire racks help keep them crisp).
- Measuring cups and spoons: For precise ingredient amounts.
If you don’t have a deep-fryer, no worries—just use a heavy-bottomed pot and monitor oil temperature carefully. I’ve used an electric deep fryer and a cast-iron Dutch oven with great results. Just remember to never leave hot oil unattended and always fry in small batches for even cooking.
Preparation Method
- Drain the pickles thoroughly: Lay the 16 ounces of pickle chips on paper towels and press gently to remove extra moisture. This step is crucial—too much liquid can cause the oil to splatter and the batter to slide right off. Let them sit for about 10 minutes.
- Mix dry ingredients: In a medium bowl, whisk together 1 cup all-purpose flour, 1/4 cup cornstarch, 1 teaspoon baking powder, 1 teaspoon garlic powder, 1 teaspoon smoked paprika, 1/2 teaspoon cayenne pepper, 1/2 teaspoon salt, and 1/4 teaspoon black pepper. This blend is what gives the batter its signature flavor and crunch.
- Prepare wet ingredients: In a separate bowl, beat 2 large eggs with 1/2 cup whole milk until smooth and combined. If you find the batter too thick later, you can add a tablespoon more milk, but keep it slightly thick for better coating.
- Heat the oil: Pour about 4 cups of vegetable oil into your deep fryer or pot. Heat to 350°F (175°C). Use a thermometer to monitor temperature carefully—too hot and the batter burns; too cool and the pickles soak up oil and get greasy.
- Coat the pickles: Working in batches, dip pickle chips directly into the wet egg mixture, then dredge them thoroughly in the dry flour mixture. For extra crunch, you can double-dip: after the first flour coat, dip again in egg, then back in flour. I usually do a single dip for a lighter crust, but the double dip is a fun experiment.
- Fry the pickles: Carefully place battered pickles into hot oil using tongs, frying about 3-4 at a time to avoid overcrowding. Fry for 2-3 minutes, or until golden brown and crispy. They should float to the top and sizzle nicely—watch that color closely!
- Drain and rest: Remove fried pickles with a slotted spoon and transfer to a wire rack or paper towels to drain excess oil. This keeps them crispy instead of soggy.
- Serve warm: Best enjoyed right away with a side of ranch or your favorite dipping sauce. But if you need a moment, keep them warm in a 200°F (93°C) oven for up to 15 minutes without losing crispness.
Pro tip: If your batter gets too thick as you go, loosen it with a splash of milk. And don’t forget to occasionally stir the oil gently to prevent sticking or uneven frying. Also, keep a small plate handy for tasting—just saying!
Cooking Tips & Techniques
One of the trickiest parts about making crispy deep-fried pickles is getting the batter just right. Too thin, and it slips off; too thick, and it feels heavy and doughy.
I learned to balance this by mixing the dry ingredients well and maintaining the oil temperature strictly at 350°F (175°C). If the oil is cooler, the pickles soak up too much grease, becoming limp instead of crisp. If it’s hotter, the batter burns before the inside warms through.
Another tip: don’t overcrowd your fryer. Fry in small batches so the oil temperature doesn’t drop suddenly. That’s a rookie mistake I made once, and the whole batch turned into soggy blobs.
For consistent results, drain pickles well before battering to avoid splattering. I also recommend drying your pickles on paper towels for at least 10 minutes. That step really helped me get a crunchier finish.
When it comes to spices, the cayenne pepper and smoked paprika add a subtle smoky heat that sets this recipe apart. You can adjust the cayenne to your heat tolerance—start with half if you’re sensitive.
Lastly, multitasking helps a lot here: prep your dipping sauce while the oil heats, and set up your draining station before frying. That way, you won’t feel rushed or overwhelmed.
Variations & Adaptations
If you want to switch things up, here are some ideas that worked well for me and friends:
- Spicy Kick: Add a pinch of chili powder or cayenne to the flour mixture for extra heat. Pair with a spicy chipotle ranch dip.
- Gluten-Free: Use a gluten-free flour blend and cornstarch combo. I’ve had success with Bob’s Red Mill gluten-free flour.
- Beer Batter: Replace the milk and eggs with 1 cup of your favorite beer and 1 cup flour for a bubbly, richer crust. Great for a pub-style snack night.
- Pickle Variations: Try bread-and-butter pickles for a sweeter crunch or spicy pickles for more bite.
- Baking Option: For a lighter version, coat pickles as usual and bake at 425°F (220°C) for 15-20 minutes, flipping halfway until golden and crisp.
One time, I tried using dill pickle spears instead of chips—while the large size made frying a bit trickier, the flavor was a hit with my family. It’s fun to experiment with your favorite pickle shapes and brands.
Serving & Storage Suggestions
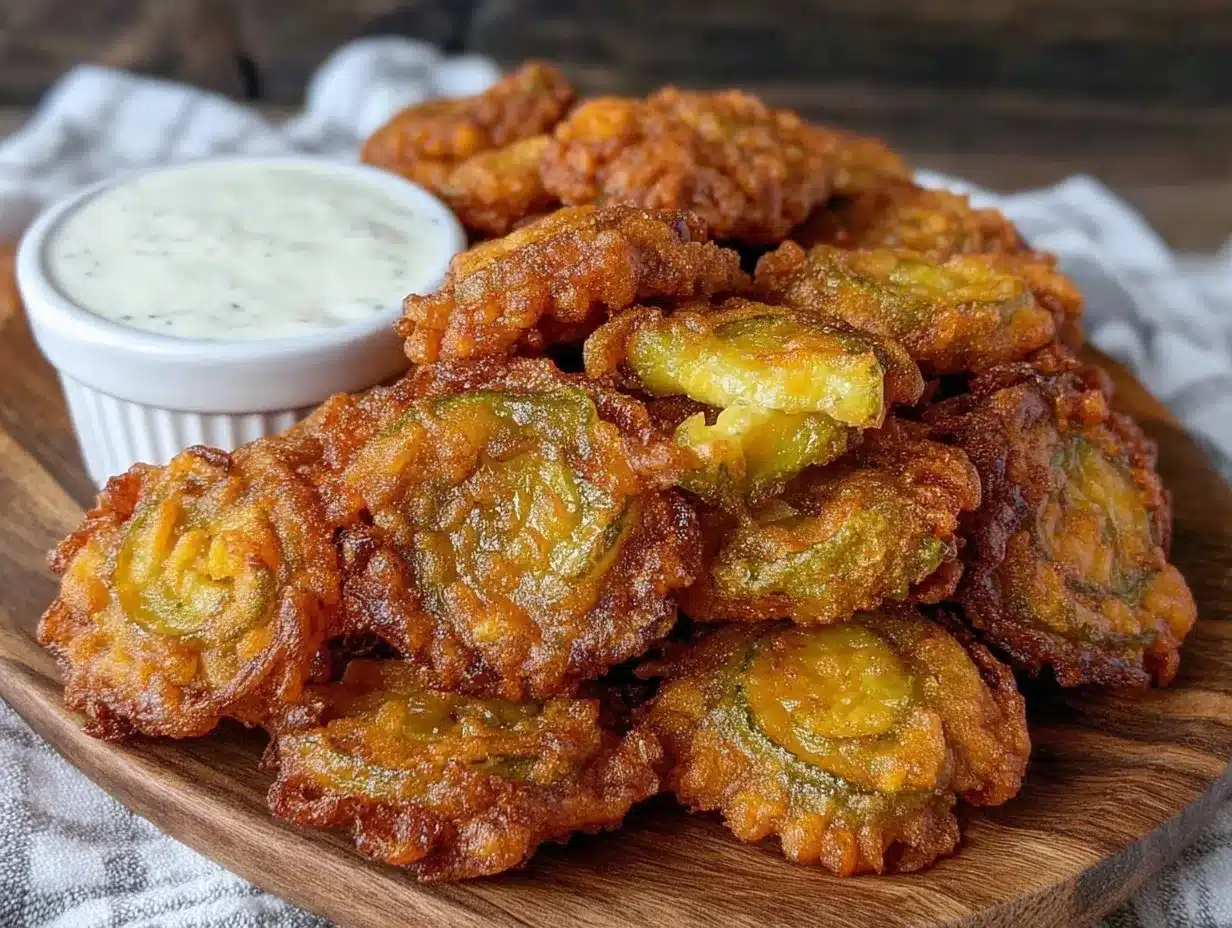
These crispy deep-fried pickles are best served hot and fresh for maximum crunch. I love plating them on a rustic wooden board with a few ramekins of ranch and spicy aioli for dipping.
They pair wonderfully with cold beer, lemonade, or even a crisp white wine if you’re feeling fancy. For a fuller meal, try serving alongside crispy garlic chicken or a fresh garden salad to balance the richness.
If you have leftovers (which is rare!), store them in an airtight container in the refrigerator for up to 2 days. To reheat, place them on a wire rack in a 375°F (190°C) oven for 5-7 minutes to regain crispness. Avoid microwaving—it makes them soggy.
Interestingly, the flavors meld a bit more after resting, so if you make them ahead, the dip flavors develop nicely, but the crunch will suffer. Fresh is definitely best.
Nutritional Information & Benefits
Each serving of these crispy deep-fried pickles (about 6 pieces) contains roughly 250 calories, with 15 grams of fat, 25 grams of carbohydrates, and 3 grams of protein. Keep in mind, the oil content varies based on frying technique, so draining well helps keep calories in check.
Pickles themselves are low in calories and provide some vitamin K and antioxidants from the cucumbers. The use of garlic powder and paprika adds a modest boost of flavor compounds with anti-inflammatory benefits.
If you choose gluten-free flour or bake instead of fry, the recipe can fit into various dietary needs. Just watch the dipping sauces if you’re managing sugar or sodium intake.
Overall, this snack balances indulgence with some nutrients from the pickles, making it a treat you can enjoy guilt-free every now and then.
Conclusion
Honestly, these crispy deep-fried pickles bring a little county fair joy right into your kitchen. They’re simple, fun to make, and deliver that perfect combo of tangy, crunchy, and savory that keeps people coming back for more. Whether you’re sharing them at a party or sneaking bites on a quiet night, this recipe makes fried pickles approachable and delicious.
Feel free to tweak the spices or batter to suit your taste—part of the fun is making it your own. I keep coming back to this recipe because it’s reliably tasty and sparks that happy nostalgic feeling every time.
Let me know how your batch turns out, or if you try a unique variation! I love hearing your stories and tips. Happy frying and enjoy that crispy crunch!
FAQs
What type of pickles are best for deep-frying?
Dill pickle chips that are firm and well-drained work best. Claussen brand is a favorite for its crisp texture. Avoid soggy or overly brined pickles.
Can I use frozen pickles for this recipe?
It’s not recommended because frozen pickles tend to release excess moisture, making the batter soggy and difficult to fry crisp.
How do I know when the oil is the right temperature?
Use a cooking thermometer to maintain 350°F (175°C). If you don’t have one, drop a small bit of batter in the oil; it should sizzle and float quickly without browning too fast.
Can I make these ahead of time?
They’re best fresh but can be prepped and stored un-fried for a few hours. Reheat in a hot oven to restore crunch if fried earlier.
What’s a good dipping sauce for deep-fried pickles?
Classic ranch dressing is a favorite, but spicy aioli, blue cheese dip, or even a simple sriracha mayo add great flavor contrast.
Pin This Recipe!
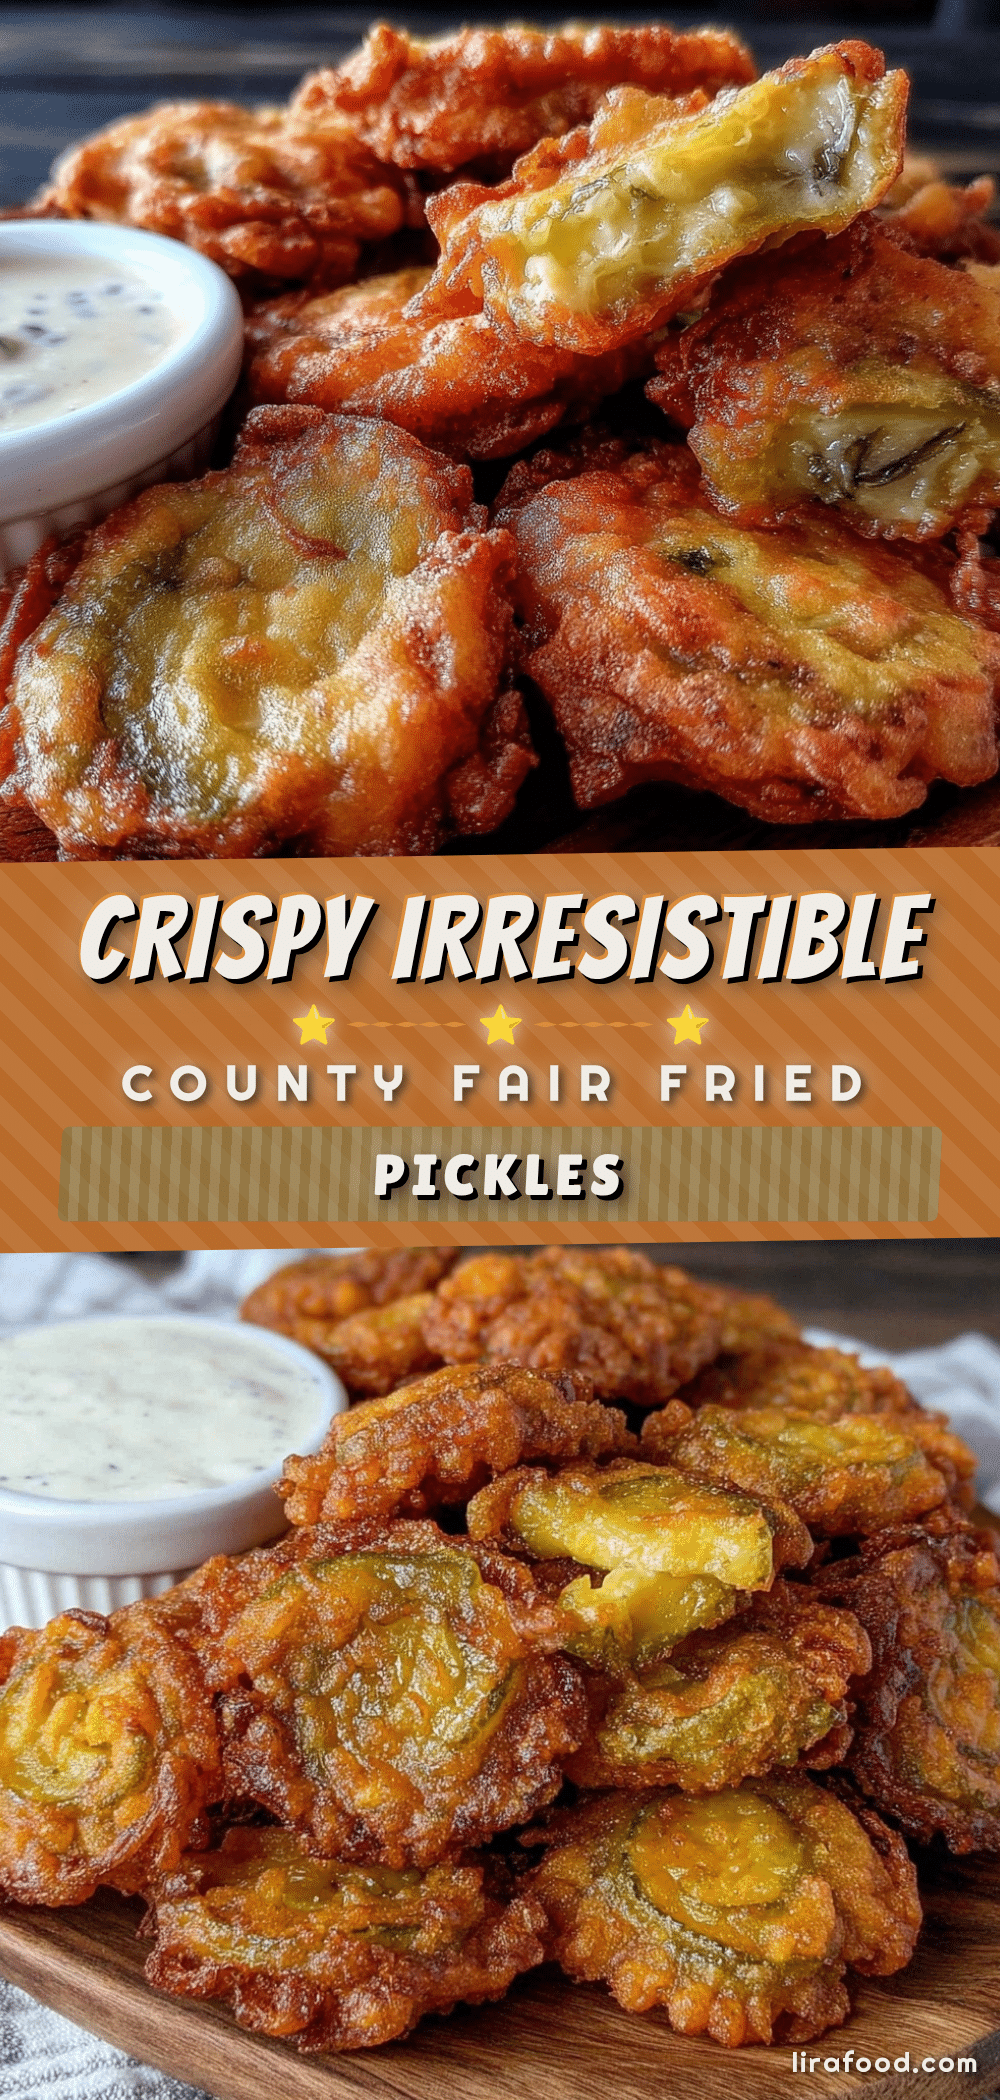
Crispy Deep-Fried Pickles Recipe Easy Like County Fair Favorite

This recipe recreates the nostalgic county fair favorite of crispy deep-fried pickles with a light, flavorful batter and juicy tangy pickles inside. Perfect for quick snacks, game days, or casual get-togethers.
- Prep Time: 15 minutes
- Cook Time: 10 minutes
- Total Time: 25 minutes
- Yield: 4 servings 1x
- Category: Snack
- Cuisine: American
Ingredients
- 16 ounces dill pickle chips, drained well
- 1 cup all-purpose flour
- 1/4 cup cornstarch
- 1 teaspoon baking powder
- 1 teaspoon garlic powder
- 1 teaspoon smoked paprika
- 1/2 teaspoon cayenne pepper (adjust to taste)
- 1/2 teaspoon salt
- 1/4 teaspoon black pepper
- 2 large eggs, beaten (room temperature)
- 1/2 cup whole milk (or dairy-free alternative like oat milk)
- About 4 cups vegetable or canola oil for frying
- Optional: Ranch dressing or spicy aioli for dipping
Instructions
- Drain the pickles thoroughly by laying them on paper towels and pressing gently to remove extra moisture. Let sit for about 10 minutes.
- In a medium bowl, whisk together the flour, cornstarch, baking powder, garlic powder, smoked paprika, cayenne pepper, salt, and black pepper.
- In a separate bowl, beat the eggs with the milk until smooth and combined. Add a tablespoon more milk if batter is too thick.
- Heat about 4 cups of vegetable oil in a deep fryer or heavy-bottomed pot to 350°F (175°C), using a thermometer to monitor temperature.
- Working in batches, dip pickle chips into the wet egg mixture, then dredge thoroughly in the dry flour mixture. For extra crunch, double-dip by repeating the egg and flour coating.
- Carefully place battered pickles into hot oil using tongs, frying 3-4 at a time to avoid overcrowding. Fry for 2-3 minutes until golden brown and crispy.
- Remove fried pickles with a slotted spoon and transfer to a wire rack or paper towels to drain excess oil.
- Serve warm immediately with ranch or your favorite dipping sauce. Keep warm in a 200°F (93°C) oven for up to 15 minutes if needed.
Notes
Drain pickles well to avoid oil splatter and soggy batter. Maintain oil temperature at 350°F for best crispness. Fry in small batches to prevent temperature drop. Double-dip batter for extra crunch. Reheat leftovers in oven to restore crispness; avoid microwaving.
Nutrition
- Serving Size: About 6 pieces per s
- Calories: 250
- Sugar: 2
- Sodium: 600
- Fat: 15
- Saturated Fat: 3
- Carbohydrates: 25
- Fiber: 1
- Protein: 3
Keywords: deep-fried pickles, crispy pickles, county fair food, fried snacks, appetizer, game day food, easy snack