Love this? Save it for later!
Share the inspiration with your friends
The summer I turned thirty, I was waiting for my car to get a routine oil change at this tiny, dusty garage on a quiet street. Honestly, I wasn’t expecting much besides the usual hum of engines and muffled radio. But then the owner, a quiet man named Joe who barely spoke a word about anything except tools, suddenly started talking about this “red velvet flag cake” he bakes every Fourth of July. I mean, Joe was the last person I’d think of when it comes to baking—he was more grease-stained overalls than apron. But there he was, describing exactly how to make the perfect red velvet flag cake with cream cheese frosting, like it was some well-kept secret handed down through generations.
He even pulled out a little notebook, all worn and stained, and showed me the recipe he scribbled decades ago from a local diner. I was half-distracted, trying not to get grease on my phone, but something about the way he talked—the pride in that cracked, handwritten page—made me want to try it right away. Maybe you’ve been there, where a recipe comes from the most unlikely place, and suddenly it feels like a treasure.
That day, I forgot to ask him why it’s called the “flag” cake, but I did remember the way he emphasized the cream cheese frosting, calling it the “crowning glory.” It’s been my go-to ever since, especially when I want a dessert that looks stunning but doesn’t stress me out in the kitchen. Let me tell you, this perfect red velvet flag cake with cream cheese frosting stays with you—the kind of cake that makes you pause, close your eyes, and savor every bite. And honestly, if Joe the mechanic can nail it, so can you.
Why You’ll Love This Recipe
After making this perfect red velvet flag cake with cream cheese frosting more times than I can count, I’m convinced it’s one of those rare recipes that hits all the right notes. Here’s why it stands out in my kitchen—and probably will in yours too:
- Quick & Easy: This recipe comes together in about an hour, perfect for busy weeknights or last-minute celebrations when you need an impressive dessert without the fuss.
- Simple Ingredients: No need to track down exotic items; you likely already have everything in your pantry or fridge, from cocoa powder to buttermilk.
- Perfect for Celebrations: Whether it’s Independence Day, birthdays, or just a cozy weekend, the flag design makes it a showstopper that’s fun to share.
- Crowd-Pleaser: Kids and adults alike rave about the tender crumb and that tangy cream cheese frosting—always a hit at gatherings.
- Unbelievably Delicious: The balance between the subtle cocoa flavor and the rich, creamy frosting is pure comfort food magic.
What makes this recipe different? It’s not just the layering or the color contrast—the trick is in the perfectly balanced buttermilk batter and the homemade cream cheese frosting that’s neither too sweet nor too tangy. Plus, the flag pattern isn’t just decorative; it’s a nostalgic nod to summer barbecues and fireworks that adds a bit of festive flair.
Honestly, this cake isn’t just another red velvet recipe—it’s the one that brings back those relaxed, sun-soaked afternoons, where dessert feels like a celebration of simple joys. I bet once you try making this, it’ll have a spot on your dessert table for years to come.
What Ingredients You Will Need
This perfect red velvet flag cake uses straightforward, wholesome ingredients to create a luscious texture and vibrant color without fuss. Most are pantry staples, and a few are dairy items that add richness and moisture to the cake. Here’s what you’ll want to gather before getting started:
- For the Cake Batter:
- All-purpose flour – 2 ½ cups (312g), sifted for a light, tender crumb
- Granulated sugar – 2 cups (400g) for balanced sweetness
- Unsweetened cocoa powder – 2 tablespoons (15g), preferably Dutch-processed for deep color
- Baking soda – 1 teaspoon
- Salt – 1 teaspoon to enhance flavors
- Buttermilk – 1 ½ cups (360ml), room temperature (adds tang and moistness)
- Vegetable oil – 1 cup (240ml), neutral flavor keeps cake moist
- Large eggs – 2, room temperature (helps with structure)
- White vinegar – 1 tablespoon (mild acidity brightens color)
- Pure vanilla extract – 2 teaspoons, high-quality (adds warmth)
- Red food coloring – 2 tablespoons (gel or liquid, depending on preference for vibrant hue)
- For the Cream Cheese Frosting:
- Cream cheese – 16 ounces (450g), softened (I recommend Philadelphia brand for smooth texture)
- Unsalted butter – ½ cup (115g), softened (adds richness)
- Powdered sugar – 4 cups (480g), sifted to avoid lumps
- Pure vanilla extract – 1 teaspoon
- Pinch of salt (balances sweetness)
Substitution tips: Use almond flour for a gluten-free option, but note the texture will be denser. For dairy-free, swap buttermilk with a mixture of almond milk and lemon juice, and use dairy-free cream cheese and butter alternatives in the frosting. When fresh buttermilk is scarce, a quick homemade version with milk and vinegar works just fine.
Equipment Needed
To make this perfect red velvet flag cake, here’s what you’ll need in your kitchen arsenal:
- Two 9-inch (23cm) round cake pans, preferably non-stick or lined with parchment paper
- Mixing bowls – at least one large for the batter and one medium for the frosting
- Electric mixer or stand mixer – makes cream cheese frosting smooth and easy; a hand whisk can work but takes more effort
- Measuring cups and spoons – for precise ingredient amounts
- Rubber spatula – great for folding ingredients gently and scraping bowls
- Cake leveler or serrated knife – optional but recommended for even layers
- Offset spatula or butter knife – for spreading frosting cleanly
- Cooling racks – to cool the cakes completely before frosting
Budget-friendly tip: If you don’t have two cake pans, bake one layer at a time, adjusting baking time accordingly. I’ve also had success with glass pans, but watch the baking time as it may vary slightly. For frosting, a sturdy wooden spoon and some elbow grease can substitute a mixer in a pinch.
Preparation Method
- Preheat and Prep: Preheat your oven to 350°F (175°C). Grease and line two 9-inch cake pans with parchment paper. This prevents sticking and helps the cakes release easily. (5 minutes)
- Mix Dry Ingredients: In a large bowl, sift together 2 ½ cups (312g) all-purpose flour, 2 cups (400g) granulated sugar, 2 tablespoons (15g) cocoa powder, 1 teaspoon baking soda, and 1 teaspoon salt. Whisk to combine. This ensures even distribution of ingredients and prevents lumps. (5 minutes)
- Combine Wet Ingredients: In a separate bowl, whisk 1 ½ cups (360ml) buttermilk, 1 cup (240ml) vegetable oil, 2 large eggs, 1 tablespoon white vinegar, 2 teaspoons vanilla extract, and 2 tablespoons red food coloring until smooth and uniform in color. (5 minutes)
- Make the Batter: Slowly pour the wet ingredients into the dry ingredients, stirring gently with a spatula until just combined. Avoid overmixing to keep the cake tender. The batter will be thick and vibrant red. (3 minutes)
- Divide and Bake: Pour the batter evenly into the prepared pans. Smooth the tops with a spatula. Bake in the preheated oven for 30–35 minutes, or until a toothpick inserted into the center comes out clean. Rotate pans halfway through baking for even cooking. (30–35 minutes)
- Cool Completely: Remove the cakes from the oven and let them cool in the pans on a wire rack for 10 minutes. Then, run a knife around the edges, invert the cakes onto the rack, and peel off the parchment. Let cool completely before frosting to prevent melting. (1 hour)
- Prepare the Frosting: Using an electric mixer, beat 16 ounces (450g) softened cream cheese and ½ cup (115g) softened unsalted butter until smooth and fluffy. Gradually add 4 cups (480g) powdered sugar, mixing on low speed to avoid a sugar cloud. Add 1 teaspoon vanilla extract and a pinch of salt. Beat until creamy and spreadable. (10 minutes)
- Assemble the Flag Cake: Slice each cake layer horizontally to create four thin layers total. Place one layer on your serving plate and spread an even layer of cream cheese frosting. Repeat with the next two layers, stacking carefully. Use the remaining frosting to cover the top and sides evenly. (15 minutes)
- Create the Flag Design: For the flag stripes, use thin strips of the red velvet cake or pipe red-tinted frosting stripes. The blue field can be represented by a small square of blueberries or blue-tinted frosting in the corner. This step is where you personalize your cake with a festive touch. (10 minutes)
- Chill and Serve: Chill the assembled cake for at least 30 minutes to set the frosting. Bring to room temperature before serving for the best texture and flavor. (30 minutes)
Pro tip: If your cream cheese frosting feels too soft, chill it briefly before frosting. Also, if the cake layers crumble a bit, that just means homemade goodness—press gently when assembling to keep it neat.
Cooking Tips & Techniques
Here are some nuggets of wisdom from my own kitchen trials with this perfect red velvet flag cake recipe:
- Measure Flour Correctly: Spoon and level the flour instead of scooping directly from the bag. Too much flour can dry out the cake.
- Use Room Temperature Ingredients: Eggs, buttermilk, and cream cheese blend better when not cold, giving a smoother batter and frosting.
- Don’t Skip the Buttermilk: It adds tang and reacts with baking soda for that tender crumb and vibrant color. No buttermilk? Mix milk with a dash of lemon juice and wait 5 minutes.
- Mix Gently but Thoroughly: Overmixing can make the cake tough, but under-mixing leaves lumps. Aim for a smooth batter with no streaks.
- Check Oven Temperature: Ovens vary, so keep an eye on your cakes after 25 minutes to avoid overbaking.
- Make the Frosting Ahead: Cream cheese frosting tastes best after a few hours in the fridge but soften it slightly before spreading.
- Layer & Chill: Chilling between layers helps keep the cake stable and the frosting neat, especially if you’re new to cake decorating.
One time, I forgot to add the vinegar, and the cake was a bit flat and less vibrant—lesson learned! Also, piping the frosting stripes requires a steady hand, but even a rustic design looks charming.
Variations & Adaptations
This red velvet flag cake recipe is versatile and open to your own spin. Here are some ways you can mix it up:
- Dietary Options: Swap all-purpose flour for gluten-free flour blends to suit gluten sensitivities. Use coconut cream cheese and vegan butter for a dairy-free version.
- Seasonal Flavors: Add a teaspoon of cinnamon or espresso powder to the batter for a subtle warm twist. In summer, fresh strawberries or raspberries can replace the blueberries for the flag design.
- Flavor Twists: Incorporate a teaspoon of almond extract into the frosting or mix in finely chopped nuts for crunch. I once tried a lemon cream cheese frosting that gave the cake a fresh zing.
- Alternative Shapes: Make cupcakes with the same batter and swirl cream cheese frosting on top for handheld flag-themed treats.
- Cooking Method: This cake also works well in a bundt pan, though the flag design will be less distinct. Adjust baking time to about 45 minutes.
I personally like to add a tablespoon of finely grated orange zest to the frosting on occasion—it brightens the whole cake and surprises guests!
Serving & Storage Suggestions
This perfect red velvet flag cake is best served at room temperature so the cream cheese frosting shines with its creamy texture. When presenting, slice generously and pair with a cold glass of milk or a lightly brewed cup of coffee to balance the sweetness.
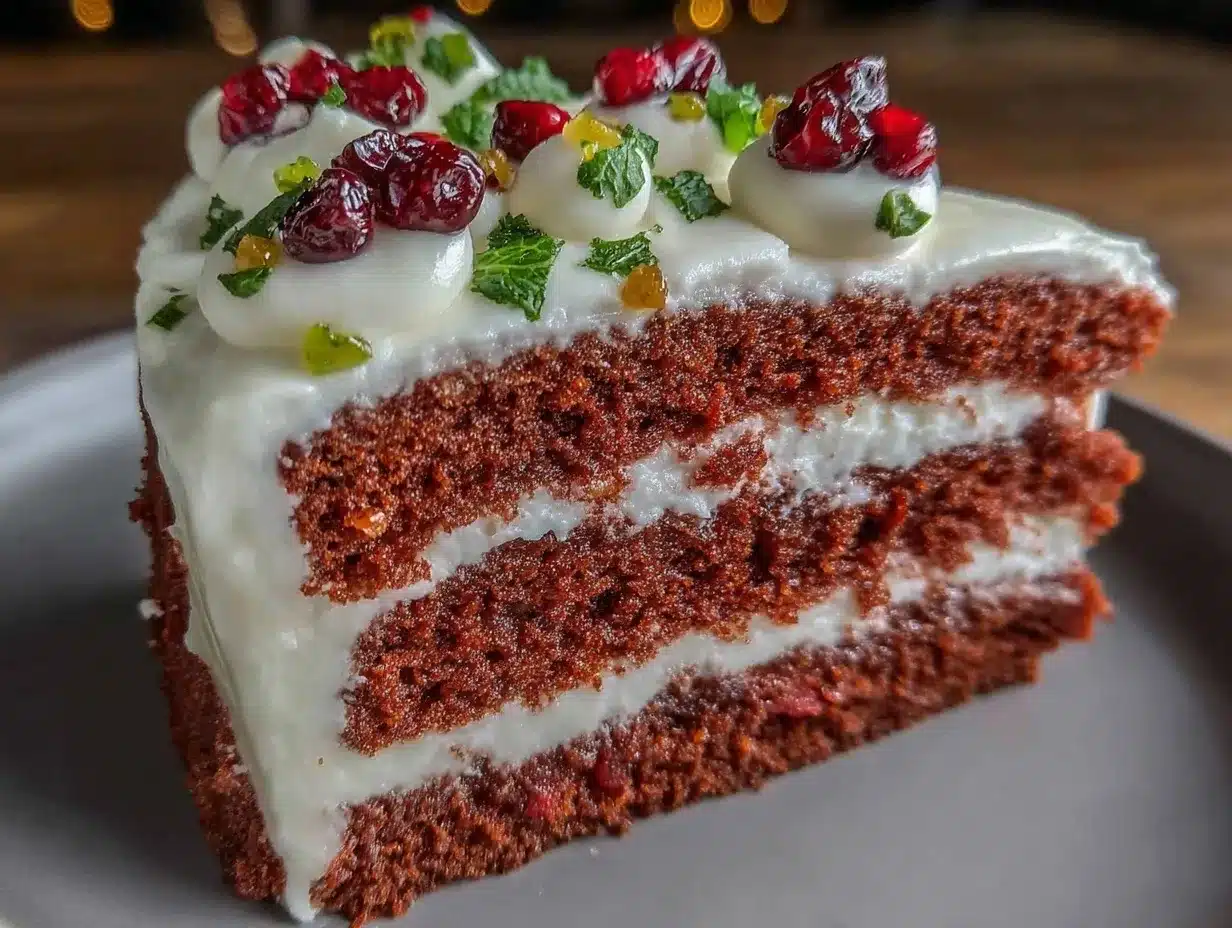
For a festive touch, place fresh berries alongside the slices—blueberries, raspberries, or even pomegranate seeds mimic the flag colors perfectly. This cake is also a stellar centerpiece for holiday brunches or summer barbecues.
To store, wrap the cake tightly with plastic wrap or keep it in an airtight container in the refrigerator. It stays fresh for up to 4 days. You can freeze individual slices wrapped well for up to 2 months. When ready to eat, thaw in the fridge overnight and bring to room temperature before serving.
Reheating frosting-covered cake isn’t recommended, but letting chilled cake sit out for 30 minutes before serving will restore the soft texture. Flavors tend to deepen after a day, so if you can wait, it’s worth it!
Nutritional Information & Benefits
Each slice of this perfect red velvet flag cake with cream cheese frosting offers a comforting balance of carbohydrates, fats, and proteins, with roughly 350–400 calories per serving depending on slice size. The buttermilk adds calcium and vitamin B12, while cream cheese provides a dose of protein and healthy fats.
This recipe can be modified for gluten-free or dairy-free diets to accommodate various needs. The cake itself is moderate in sugar, considering the rich frosting, so it’s best enjoyed as an occasional treat.
From a wellness perspective, I appreciate that this cake uses real ingredients without artificial additives, and the homemade frosting is free from preservatives. It’s a sweet reminder that comfort food can be made with care and simple ingredients.
Conclusion
The perfect red velvet flag cake with cream cheese frosting is more than just a dessert—it’s a slice of joyful tradition, a dash of color on your table, and a recipe that’s approachable for all skill levels. Whether you’re celebrating a special occasion or simply craving something sweet, this cake brings warmth and smiles every time.
Feel free to make it your own by adjusting flavors, decorating with seasonal fruits, or trying out the variations I mentioned. Honestly, I keep coming back to this one because it’s just that reliable and delicious.
If you give this recipe a try, I’d love to hear how it turned out or what personal twists you added. Don’t hesitate to share your thoughts and photos—your kitchen stories make this recipe even richer. Happy baking, and may your kitchen smell as inviting as mine does every time I make this cake!
FAQs
Can I make this red velvet flag cake ahead of time?
Yes! You can bake the cake layers a day ahead and store them wrapped tightly in plastic wrap at room temperature or in the fridge. Assemble and frost the next day for best results.
What if I don’t have buttermilk?
Simply mix 1 ½ cups (360ml) of milk with 1 tablespoon lemon juice or white vinegar and let it sit for 5 minutes. This homemade buttermilk substitute works great in this recipe.
How do I get the red color without food coloring?
Natural alternatives like beet juice or powdered freeze-dried strawberries can add color, but the traditional red velvet hue usually requires red food coloring for that vibrant effect.
Can I make this cake gluten-free?
Yes, use a trusted gluten-free flour blend that measures cup-for-cup like all-purpose flour. The texture might be slightly different but still delicious.
What’s the best way to store leftover cake?
Keep leftover cake in an airtight container in the fridge for up to 4 days. For longer storage, freeze slices wrapped in plastic wrap and foil for up to 2 months.
Pin This Recipe!
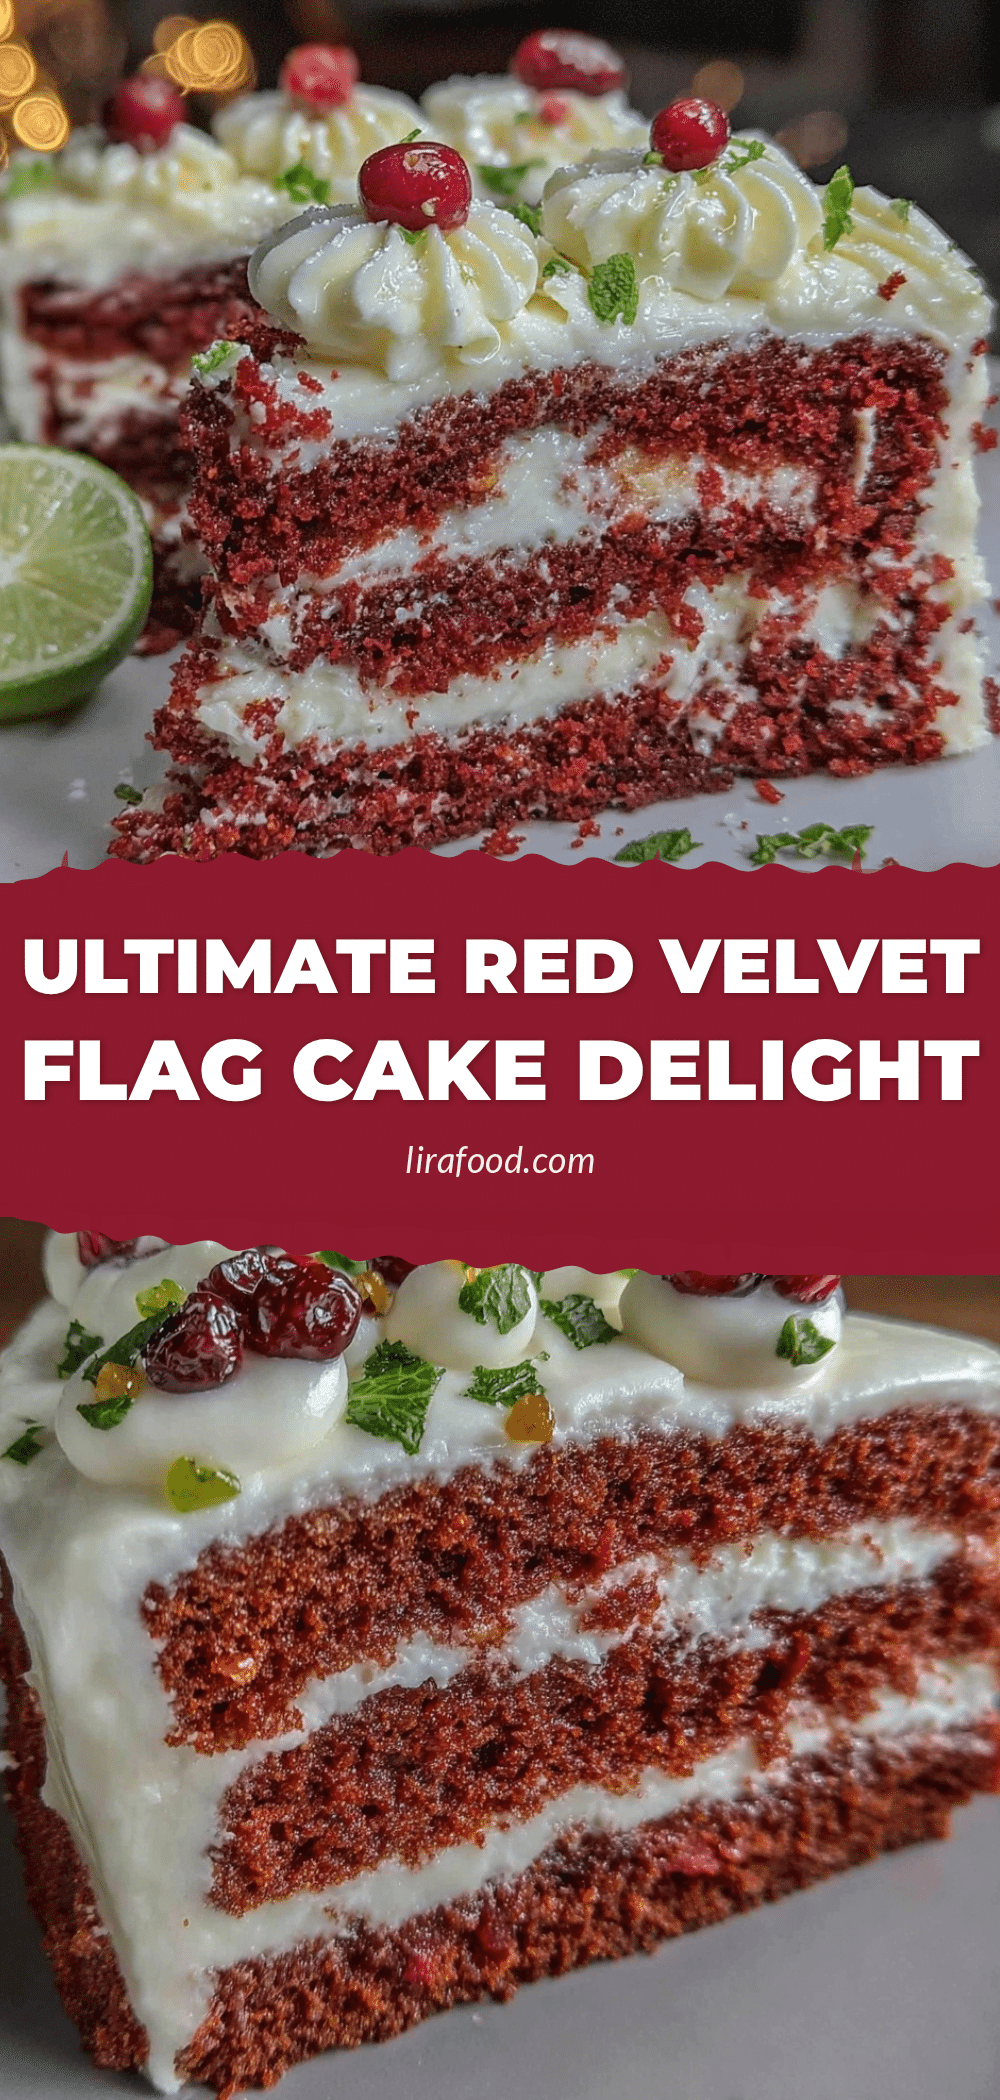
Perfect Red Velvet Flag Cake Recipe Easy Homemade Cream Cheese Frosting
A quick and easy red velvet flag cake with a tender crumb and tangy homemade cream cheese frosting, perfect for celebrations and gatherings.
- Prep Time: 23 minutes
- Cook Time: 30-35 minutes
- Total Time: 1 hour 53 minutes
- Yield: 12 servings 1x
- Category: Dessert
- Cuisine: American
Ingredients
- 2 ½ cups (312g) all-purpose flour, sifted
- 2 cups (400g) granulated sugar
- 2 tablespoons (15g) unsweetened cocoa powder, preferably Dutch-processed
- 1 teaspoon baking soda
- 1 teaspoon salt
- 1 ½ cups (360ml) buttermilk, room temperature
- 1 cup (240ml) vegetable oil
- 2 large eggs, room temperature
- 1 tablespoon white vinegar
- 2 teaspoons pure vanilla extract
- 2 tablespoons red food coloring (gel or liquid)
- 16 ounces (450g) cream cheese, softened
- ½ cup (115g) unsalted butter, softened
- 4 cups (480g) powdered sugar, sifted
- 1 teaspoon pure vanilla extract
- Pinch of salt
Instructions
- Preheat oven to 350°F (175°C). Grease and line two 9-inch cake pans with parchment paper. (5 minutes)
- In a large bowl, sift together flour, sugar, cocoa powder, baking soda, and salt. Whisk to combine. (5 minutes)
- In a separate bowl, whisk buttermilk, vegetable oil, eggs, white vinegar, vanilla extract, and red food coloring until smooth. (5 minutes)
- Slowly pour wet ingredients into dry ingredients, stirring gently with a spatula until just combined. Avoid overmixing. (3 minutes)
- Pour batter evenly into prepared pans. Smooth tops and bake for 30–35 minutes or until a toothpick comes out clean. Rotate pans halfway through. (30–35 minutes)
- Cool cakes in pans on wire rack for 10 minutes. Run a knife around edges, invert onto rack, peel off parchment, and cool completely. (1 hour)
- Beat cream cheese and butter until smooth and fluffy. Gradually add powdered sugar on low speed. Add vanilla and salt. Beat until creamy. (10 minutes)
- Slice each cake layer horizontally to create four thin layers. Spread frosting between layers and cover top and sides evenly. (15 minutes)
- Create flag design using thin strips of red velvet cake or pipe red-tinted frosting stripes; use blueberries or blue-tinted frosting for the blue field. (10 minutes)
- Chill assembled cake for at least 30 minutes to set frosting. Bring to room temperature before serving. (30 minutes)
Notes
Use room temperature ingredients for best results. Avoid overmixing batter to keep cake tender. Chill frosting if too soft before spreading. For gluten-free, substitute flour with almond or gluten-free flour blends. For dairy-free, use almond milk with lemon juice and dairy-free cream cheese and butter alternatives. The flag design can be personalized with seasonal fruits or colored frosting.
Nutrition
- Serving Size: 1 slice
- Calories: 375
- Sugar: 38
- Sodium: 320
- Fat: 18
- Saturated Fat: 7
- Carbohydrates: 50
- Fiber: 1
- Protein: 4
Keywords: red velvet cake, cream cheese frosting, flag cake, Fourth of July dessert, easy red velvet, homemade frosting, celebration cake