Love this? Save it for later!
Share the inspiration with your friends
My dad did not trust apples in bread. He made that very clear the first time I mentioned wanting to try an apple fritter bread recipe. “Apples belong in pie,” he said, with the kind of certainty that only a man who has been making the same pie crust for forty years can have. “Or eaten out of hand. Not baked into bread.” I almost believed him. Almost.
But here’s the thing—I had been thinking about those apple fritters from the farmer’s market, the ones with the craggy, golden-brown edges and that thin glaze cracking as you bit in. I wanted that experience in a sliceable form. Something you could have with coffee on a Tuesday morning without making a mess of powdered sugar on your shirt.
So I ignored his advice (sorry, Dad) and started experimenting. The first loaf came out too dense. The second one had apples that sank to the bottom like little fruity anchors. The third? Well, the third loaf disappeared before it even finished cooling on the counter. My dad took a slice, chewed slowly, and said, “Okay. This is different.” Coming from him, that’s practically a standing ovation.
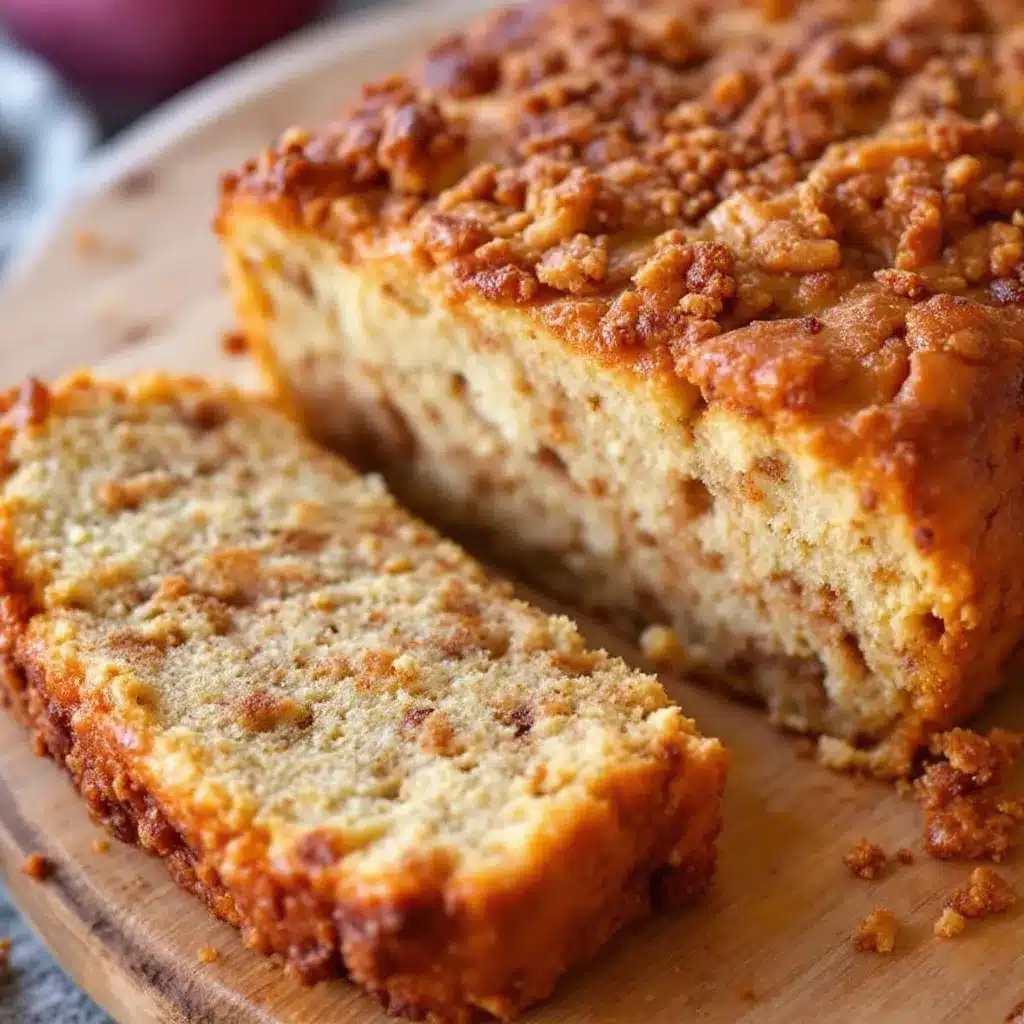
This cinnamon apple fritter bread has that same caramelized edge you love from a fritter, but in a tender, sliceable loaf that doesn’t require standing over hot oil. It’s the kind of recipe that makes your kitchen smell like autumn even in the middle of July. And honestly? It might just convert a few apple skeptics along the way.
Why You’ll Love This Recipe
Let me tell you why this particular loaf has earned a permanent spot in my baking rotation. I’ve tested this recipe more times than I care to admit, and every single version taught me something new about getting that perfect fritter texture in bread form.
Quick & Easy : From start to finish, you’re looking at about an hour and fifteen minutes. Most of that is hands-off baking time, which means you can sip your coffee and watch the loaf work its magic.
Simple Ingredients : Butter, sugar, eggs, flour, apples, cinnamon—you probably have most of this in your kitchen right now. No special trips to three different stores.
Perfect for Fall Mornings : This bread was practically made for crisp October mornings with a hot cup of coffee. But honestly? It works just as well in June.
Crowd-Pleaser : I brought this to a brunch last month and watched three different people ask for the recipe before the first cup of coffee was empty.
Unbelievably Delicious : The combination of tender apple chunks, swirls of cinnamon sugar, and that thin, crackly glaze creates something that’s more than the sum of its parts.
What makes this recipe different from the dozens of apple breads out there is the technique. Instead of just stirring apples into the batter, we layer them with a cinnamon-sugar mixture, creating those signature fritter-like pockets of caramelized goodness throughout the loaf. It’s not just another apple bread—it’s the one you’ll actually want to make again.
This is comfort food that feels special without being fussy. The kind of bread that makes you close your eyes after the first bite, because it tastes exactly like a perfect fall morning should taste.
What Ingredients You Will Need
This recipe relies on simple, everyday ingredients that work together to create something surprisingly special. Most of these are pantry staples, which makes this the kind of bread you can decide to make on a whim.
- All-purpose flour : 2 cups (240g). Spoon and level it—don’t scoop directly from the bag or you’ll end up with dense bread.
- Granulated sugar : 1 cup (200g). Regular white sugar works perfectly here.
- Brown sugar : 1/2 cup (100g), packed. Light or dark both work, but dark gives deeper flavor.
- Unsalted butter : 1/2 cup (113g), softened. I prefer Challenge or Kerrygold for the rich flavor they bring.
- Large eggs : 2, at room temperature. Cold eggs can seize the butter mixture.
- Buttermilk : 1/2 cup (120ml). Adds tenderness and helps activate the baking soda.
- Vanilla extract : 2 teaspoons. Pure, not imitation—it makes a difference here.
- Baking powder : 1 1/2 teaspoons. Make sure it’s fresh.
- Baking soda : 1/2 teaspoon. Check the expiration date.
- Salt : 1/2 teaspoon. Balances the sweetness.
- Ground cinnamon : 2 tablespoons total. Divided between the batter and the swirl.
- Apples : 2 medium (about 300g). I use Honeycrisp or Fuji—they hold their shape without turning mushy.
- Powdered sugar : 1 cup (120g). For the glaze.
- Milk or heavy cream : 2-3 tablespoons. Adjust for desired glaze consistency.
For the apples, look for firm, slightly tart varieties that won’t break down during baking. Granny Smith works too if you prefer more tartness. If you’re in a pinch, Gala or Braeburn are fine choices.
You can substitute the buttermilk with regular milk mixed with 1/2 tablespoon of lemon juice or vinegar, let it sit for 5 minutes. For a dairy-free version, use plant-based butter and oat milk with a splash of apple cider vinegar.
Equipment Needed
Nothing too fancy here—this is a straightforward bake that doesn’t require specialized equipment. Here’s what you’ll need:
- 9×5-inch loaf pan : Glass, metal, or ceramic all work. I prefer a light-colored metal pan for even browning.
- Parchment paper : For easy removal. Trust me on this one.
- Mixing bowls : One large, one medium.
- Hand mixer or stand mixer : A hand mixer works fine. You can also do this by hand with some elbow grease.
- Whisk : For dry ingredients.
- Spatula : Silicone is ideal for folding.
- Sharp knife and cutting board : For dicing the apples.
- Measuring cups and spoons : Accuracy matters in baking.
- Cooling rack : Essential for even cooling.
- Small saucepan or microwave-safe bowl : For the glaze.
If you don’t have a loaf pan, you can use an 8×8 square pan—just reduce the baking time by about 10-15 minutes and check for doneness earlier. No mixer? A wooden spoon and some determination will get the job done, though it takes a bit more effort.
Preparation Method
Let’s walk through this step by step. I’ve included all the little details that make the difference between good bread and great bread.
- Preheat and prep : Set your oven to 350°F (175°C). Line your 9×5-inch loaf pan with parchment paper, leaving overhang on the long sides. This makes lifting the bread out so much easier.
- Mix the dry ingredients : In a medium bowl, whisk together 2 cups flour, 1 1/2 teaspoons baking powder, 1/2 teaspoon baking soda, 1/2 teaspoon salt, and 1 tablespoon cinnamon. Set aside.
- Cream the butter and sugars : In a large bowl, beat 1/2 cup softened butter with 1 cup granulated sugar and 1/2 cup packed brown sugar until light and fluffy—about 3 minutes with a hand mixer. You want it to look pale and almost cloud-like.
- Add eggs and vanilla : Beat in 2 eggs one at a time, then add 2 teaspoons vanilla. Scrape down the bowl. The mixture might look slightly curdled at this point—that’s normal.
- Alternate dry and wet : Add the flour mixture in three additions, alternating with the 1/2 cup buttermilk. Start and end with flour. Mix just until combined—overmixing will make the bread tough.
- Prepare the apple filling : In a small bowl, mix 1 tablespoon cinnamon with 1/4 cup granulated sugar. Peel and dice your 2 apples into 1/2-inch cubes. Toss them with half the cinnamon-sugar mixture.
- Layer the batter : Spread half the batter into the prepared pan. Sprinkle half the apple mixture over it. Drizzle with a little extra cinnamon sugar. Add the remaining batter, then top with the rest of the apples and cinnamon sugar.
- Create the swirl : Use a butter knife to gently swirl the batter and apples together. Just a few figure-eight motions—you want streaks, not a fully mixed batter.
- Bake : Place in the preheated oven and bake for 55-65 minutes. At the 40-minute mark, tent loosely with foil if the top is browning too quickly. The bread is done when a toothpick inserted in the center comes out clean or with just a few moist crumbs.
- Cool : Let the bread cool in the pan for 15 minutes, then lift it out using the parchment overhang. Transfer to a wire rack to cool completely before glazing.
A few things to watch for: If your apples release a lot of liquid while sitting, drain them slightly before adding to the batter. And if the top cracks while baking? That’s actually a good sign—it means the bread rose properly and those cracks will catch the glaze beautifully.
Cooking Tips & Techniques
After making this bread more times than I care to admit, I’ve learned a few things the hard way. Here are the tips that actually matter.
Room temperature ingredients matter : I know, I know—every recipe says this. But here’s why: cold butter won’t cream properly with sugar, and cold eggs can cause the butter mixture to seize up. Take everything out of the fridge 30 minutes before you start. Your future self will thank you.
Don’t overmix the batter : This is the number one mistake I see. Mix until the flour just disappears into the batter. Those last few streaks? Fold them in gently by hand. Overmixing develops gluten and gives you tough, dense bread instead of tender, cake-like crumb.
Use the right apple : I learned this one the hard way. Soft apples like McIntosh or Red Delicious will basically dissolve into the batter, leaving you with apple-flavored bread but no actual apple chunks. Honeycrisp, Fuji, or Granny Smith hold their shape and give you those lovely pockets of fruit.
Check for doneness early : Every oven runs differently. Start checking at 50 minutes. A toothpick should come out clean or with just a few moist crumbs attached. If you see wet batter, give it another 5 minutes.
Let it cool before glazing : I know it’s tempting to pour that glaze on while the bread is still warm, but it will just melt and soak in. Wait until the bread is completely cool—about an hour—for that beautiful, crackly glaze layer.
One mistake I made early on: I tried to rush the creaming process. The butter and sugar need a full 3 minutes of beating to incorporate enough air for a light texture. Set a timer if you have to.
Variations & Adaptations
This recipe is wonderfully adaptable. Here are some variations I’ve tried and loved:
Apple Cinnamon Walnut : Fold 1/2 cup toasted, chopped walnuts into the batter along with the apples. The crunch adds a lovely contrast to the tender crumb.
Caramel Apple Version : Drizzle 1/4 cup caramel sauce over the top of the batter before baking, then swirl it in gently. It creates these gooey pockets of caramel throughout the bread.
Gluten-Free Option : Substitute the all-purpose flour with a 1:1 gluten-free baking blend. I’ve had good results with King Arthur’s Measure for Measure. Add 1/2 teaspoon xanthan gum if your blend doesn’t include it.
Dairy-Free Adaptation : Use plant-based butter and substitute the buttermilk with oat milk mixed with 1 tablespoon lemon juice. The texture is slightly less tender but still delicious.
Spiced Apple Bread : Add 1/2 teaspoon nutmeg, 1/4 teaspoon allspice, and a pinch of cloves to the cinnamon mixture. This gives it a more complex, chai-like warmth.
I once tried a version with pears instead of apples—it worked surprisingly well. Just make sure the pears are firm and not overly ripe, or they’ll turn to mush.
If you’re looking for another comforting baked good, you might enjoy this sour cream coffee cake with walnut streusel—it has that same tender crumb and cinnamon warmth.
Serving & Storage Suggestions
This bread is best served slightly warm or at room temperature. If you can wait, let it cool completely, then warm individual slices in the microwave for 10-15 seconds. The glaze gets slightly melty, and the apples soften just a bit more.
For serving, I like to slice it thick—about 1-inch slices—and serve with a pat of salted butter on top. The saltiness balances the sweetness perfectly. A drizzle of honey or a dollop of whipped cream works too if you’re feeling fancy.
This bread pairs beautifully with coffee, chai, or a cold glass of milk. For a brunch spread, serve it alongside scrambled eggs and fresh fruit.
Storage : Keep the bread in an airtight container at room temperature for up to 3 days. The glaze might soften slightly, but the flavor actually improves after day one.
Freezing : Wrap the cooled, unglazed loaf tightly in plastic wrap, then foil. Freeze for up to 3 months. Thaw overnight in the fridge, then bring to room temperature before glazing and serving.
Reheating : For individual slices, microwave for 10-15 seconds. For a half-loaf, wrap in foil and warm in a 300°F oven for 10-15 minutes.
The flavors actually deepen after a day or two. The cinnamon mellows and melds with the apple, and the crumb becomes even more tender. If you can resist eating it all on day one, you’re in for a treat on day two.
Nutritional Information & Benefits
Here’s the approximate nutritional breakdown per slice (based on 10 slices):
| Nutrient | Amount per Slice |
|---|---|
| Calories | 310 |
| Total Fat | 12g |
| Saturated Fat | 7g |
| Cholesterol | 55mg |
| Sodium | 210mg |
| Total Carbohydrates | 48g |
| Dietary Fiber | 2g |
| Sugars | 32g |
| Protein | 4g |
This bread contains gluten, dairy, and eggs. It’s not suitable for vegan or gluten-free diets unless you use the substitutions mentioned above.
The apples provide a modest amount of fiber and vitamin C, while the cinnamon offers anti-inflammatory properties. Is this a health food? No. But it’s a comfort food made with real ingredients, and there’s something to be said for that.
For a lighter option, you can reduce the sugar by 1/4 cup and use applesauce instead of half the butter. The texture will be slightly different—more like a muffin than a cake—but still delicious.
Conclusion
This cinnamon apple fritter bread has become my go-to for fall mornings, lazy weekends, and anytime I want my kitchen to smell like comfort. It’s the kind of recipe that looks impressive but comes together with minimal fuss—exactly what a good home recipe should be.
What I love most about this bread is how adaptable it is. Swap the apples for pears, add nuts, drizzle caramel—make it your own. The basic technique is solid, and once you’ve made it once, you’ll start seeing possibilities everywhere.
If you give this recipe a try, I’d love to hear about it. Drop a comment below and tell me how it turned out, what variations you tried, or if you managed to convert any apple skeptics in your life. And if you’re looking for another cozy breakfast treat, this chamomile honey French toast is absolutely worth trying.
Happy baking, friends. May your kitchen smell like cinnamon and apples, and may your loaf disappear before it’s fully cool.
Frequently Asked Questions
Can I use frozen apples for this recipe?
You can, but thaw and drain them first. Frozen apples release a lot of liquid, which can make the bread soggy. Pat them dry with paper towels before tossing with the cinnamon sugar.
Why did my bread sink in the middle?
This usually happens when the batter is overmixed or the oven temperature is too low. Overmixing develops too much gluten, causing the bread to rise quickly then collapse. Make sure your oven is properly preheated to 350°F.
Can I make this into muffins instead?
Absolutely. Divide the batter among 12 greased muffin cups and bake at 350°F for 18-22 minutes. The glaze works perfectly on muffins too.
How do I know when the bread is done?
Insert a toothpick into the center. If it comes out clean or with just a few moist crumbs, it’s done. If you see wet batter, give it another 5 minutes. The top should be golden brown and spring back when lightly pressed.
Can I skip the glaze?
You can, but the glaze really adds to the fritter experience. It creates that signature crackly top that makes this bread special. If you want to reduce sugar, try a light dusting of powdered sugar instead.
Pin This Recipe!
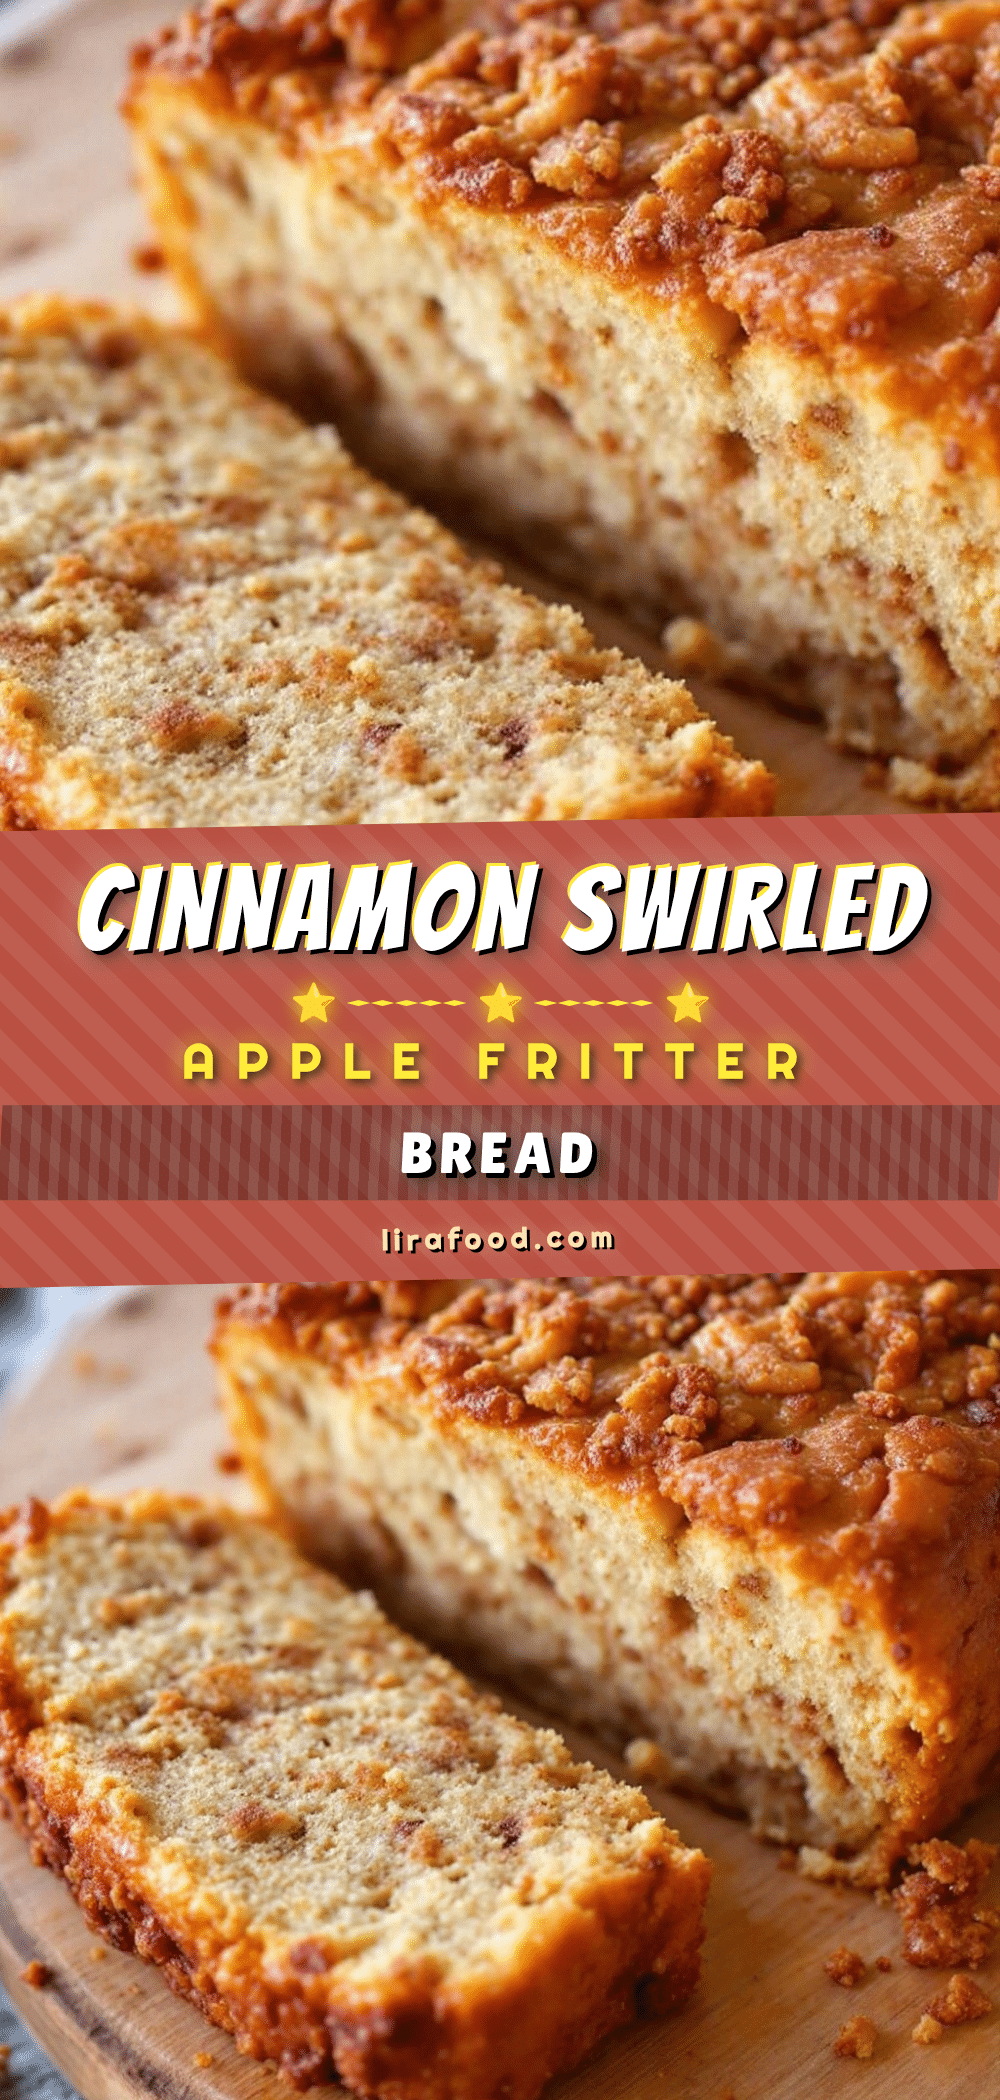
Easy Cinnamon Apple Fritter Bread Recipe
This cinnamon apple fritter bread has that same caramelized edge you love from a fritter, but in a tender, sliceable loaf that doesn’t require standing over hot oil. It’s the kind of recipe that makes your kitchen smell like autumn even in the middle of July.
- Prep Time: 15 minutes
- Cook Time: 55-65 minutes
- Total Time: 1 hour 15 minutes
- Yield: 10 servings 1x
- Category: Dessert
- Cuisine: American
Ingredients
- 2 cups (240g) all-purpose flour
- 1 cup (200g) granulated sugar
- 1/2 cup (100g) brown sugar, packed
- 1/2 cup (113g) unsalted butter, softened
- 2 large eggs, at room temperature
- 1/2 cup (120ml) buttermilk
- 2 teaspoons vanilla extract
- 1 1/2 teaspoons baking powder
- 1/2 teaspoon baking soda
- 1/2 teaspoon salt
- 2 tablespoons ground cinnamon, divided
- 2 medium apples (about 300g), peeled and diced (Honeycrisp or Fuji recommended)
- 1 cup (120g) powdered sugar
- 2–3 tablespoons milk or heavy cream
Instructions
- Preheat oven to 350°F (175°C). Line a 9×5-inch loaf pan with parchment paper, leaving overhang on the long sides.
- In a medium bowl, whisk together 2 cups flour, 1 1/2 teaspoons baking powder, 1/2 teaspoon baking soda, 1/2 teaspoon salt, and 1 tablespoon cinnamon. Set aside.
- In a large bowl, beat 1/2 cup softened butter with 1 cup granulated sugar and 1/2 cup packed brown sugar until light and fluffy, about 3 minutes with a hand mixer.
- Beat in 2 eggs one at a time, then add 2 teaspoons vanilla. Scrape down the bowl.
- Add the flour mixture in three additions, alternating with the 1/2 cup buttermilk. Start and end with flour. Mix just until combined.
- In a small bowl, mix 1 tablespoon cinnamon with 1/4 cup granulated sugar. Peel and dice 2 apples into 1/2-inch cubes. Toss them with half the cinnamon-sugar mixture.
- Spread half the batter into the prepared pan. Sprinkle half the apple mixture over it. Drizzle with a little extra cinnamon sugar. Add the remaining batter, then top with the rest of the apples and cinnamon sugar.
- Use a butter knife to gently swirl the batter and apples together with a few figure-eight motions.
- Bake for 55-65 minutes. At the 40-minute mark, tent loosely with foil if the top is browning too quickly. The bread is done when a toothpick inserted in the center comes out clean or with just a few moist crumbs.
- Let the bread cool in the pan for 15 minutes, then lift it out using the parchment overhang. Transfer to a wire rack to cool completely before glazing.
- For the glaze: whisk together 1 cup powdered sugar and 2-3 tablespoons milk or heavy cream until smooth. Drizzle over cooled bread.
Notes
Room temperature ingredients matter for proper creaming. Don’t overmix the batter to avoid tough bread. Use firm apples like Honeycrisp, Fuji, or Granny Smith that hold their shape. Check for doneness starting at 50 minutes. Let bread cool completely before glazing for a crackly glaze layer. Store in an airtight container at room temperature for up to 3 days. Freeze unglazed loaf for up to 3 months.
Nutrition
- Serving Size: 1 slice
- Calories: 310
- Sugar: 32
- Sodium: 210
- Fat: 12
- Saturated Fat: 7
- Carbohydrates: 48
- Fiber: 2
- Protein: 4
Keywords: apple fritter bread, cinnamon apple bread, fall baking, apple bread recipe, easy apple bread, quick bread


