Love this? Save it for later!
Share the inspiration with your friends
I figured arranging raw vegetables into a recognizable human skeleton would take about twenty minutes of careful planning and steady hands. It took exactly four minutes for that assumption to collapse under the weight of a toddler’s chaotic energy and a bag of baby carrots that refused to stay straight. I was standing in my kitchen, holding a celery stalk that looked less like a rib and more like a limp noodle, wondering if I had lost my mind entirely. The internet promised spooky perfection, but my reality was a pile of crunchy, watery produce that looked nothing like a skeleton.
Honestly, I wanted to just order pizza. Who needs a DIY art project when you can have pepperoni? But then the kids started asking if the “spooky snack” was ready, and I realized I had already bought all the ingredients. So, I stopped trying to be an artist and started playing with food. I broke the carrots. I bent the celery. I used a potato peeler to make bone shapes that were definitely not symmetrical but were undeniably edible.
This Easy Halloween Veggie Skeleton Platter with Ranch Dip isn’t about surgical precision. It’s about embracing the mess. It’s about realizing that a crooked skull with googly eyes is somehow cuter than a perfect anatomical diagram. You know how it goes—the best holiday moments are rarely the ones that look like the magazine covers. They are the ones where you laugh because the skeleton’s arm fell off as soon as you tried to dip a carrot stick into it.
The secret isn’t in the assembly. It’s in the ranch. That creamy, herby dip is the glue that holds the whole chaotic event together, both literally and figuratively. Once I stopped stressing over the “how” and focused on the “yum,” the whole thing came together in ten minutes flat. It turned out to be the hit of the party, mostly because the kids loved pretending their snacks were actually bones. Let’s face it, if they are eating vegetables because they look like a skeleton, I will take the win every single time.
Why You’ll Love This Recipe
Let’s be real for a second. Getting kids—or even adults—to eat a plate of raw vegetables without complaining is usually a battle you don’t want to start on a Tuesday night. This recipe changes the game entirely by tapping into something primal: the love of a good scare, mixed with the comfort of a familiar dip. It’s not just a snack; it’s an experience. I’ve tested this platter at three different Halloween parties now, and the results are consistently the same. People stop what they are doing. They stare at the plate. Then, they pick up a “bone” and dip it, laughing as they do.
Here is why this veggie skeleton platter has earned a permanent spot in my rotation:
* **Quick & Easy**: You don’t need to chop anything into perfect rounds. Roughly broken veggies work better for the “bone” look anyway. From fridge to plate, this takes less than ten minutes. It is perfect for busy weeknights or last-minute trick-or-treat drop-offs when you need to look prepared but actually aren’t.
* **Simple Ingredients**: No fancy grocery trips needed. You likely already have carrots, celery, cucumbers, and ranch dressing in your kitchen. If you don’t have ranch, a quick homemade version takes two minutes. This isn’t a recipe that requires a trip to a specialty store for hard-to-find items.
* **Perfect for Halloween Parties**: Whether it’s a classroom swap, a office potluck, or a cozy dinner at home, this platter fits the theme perfectly. It’s visually striking without being overly complicated. It screams “Halloween” without screaming “I spent hours on this.”
* **Crowd-Pleaser**: Always gets rave reviews from kids and adults alike. The kids love the novelty of eating “bones,” and the adults love that it’s a guilt-free snack option. It bridges the gap between healthy eating and fun festivities.
* **Unbelievably Delicious**: The texture and flavor combo is next-level comfort food. The crunch of the carrot contrasts with the cool, creamy ranch. The celery adds a nice bitter note that balances the saltiness of the dip. It’s satisfying in a way that chips and pretzels just can’t match.
What makes this recipe different from the rest is the deliberate imperfection. Most skeleton veggie tutorials tell you to use a mandoline to slice cucumbers into perfect rib shapes. I say forget that. Use a potato peeler for flat “ribs.” Break the carrots by hand for irregular lengths. This approach makes the skeleton look rustic and fun, rather than stiff and clinical. It’s the kind of recipe that makes you close your eyes after the first bite and realize you’re actually enjoying vegetables. It’s comfort food reimagined—healthier, faster, but with the same soul-soothing satisfaction. It’s perfect for impressing guests without stress, or turning a simple snack into something memorable.
What Ingredients You Will Need
This recipe uses simple, wholesome ingredients to deliver bold flavor and satisfying texture without the fuss. The key here is choosing vegetables that are crisp and sturdy enough to hold their shape when dipped. You want items that have a high water content for that refreshing crunch, but enough structural integrity to be picked up by hand. I usually stick to the classic “skeleton colors”—white, orange, and green—which naturally fit the theme without needing artificial food coloring.
Here is what you need to gather before you start assembling your spooky snack:
**For the Skeleton Structure:**
* **Carrots**: Medium-sized, peeled. I prefer peeling them to remove the outer skin, which can sometimes be tough or bitter. Leave them whole or break them into 4-inch lengths. The irregular breaks look more like real bones.
* **Celery**: 3-4 large stalks. These are essential for the rib cage. You will peel long, thin strips off the stalks to create the ribs. Look for bright green stalks that snap cleanly when bent.
* **Cucumbers**: 1 large English cucumber or Persian cucumber. These provide the “skull” and “limbs.” The dark green skin adds visual contrast, but you can peel them if you prefer a uniform look.
* **Red Bell Pepper**: 1 small pepper. This is for the “eyes” or decorative details. It adds a pop of color and a sweet crunch that balances the savory ranch.
* **Googly Eyes**: Optional but recommended. These plastic candy eyes are cheap and add that instant spooky factor. If you can’t find them, cherry tomatoes work well too, though they get soggy faster.
**For the Ranch Dip:**
* **Sour Cream**: 1 cup. Full-fat is best for richness and stability. Low-fat versions can separate when dipped.
* **Mayonnaise**: 1/2 cup. Use a high-quality mayo like Hellmann’s or Duke’s for the smoothest texture.
* **Dry Ranch Dressing Mix**: 1 packet (about 1 ounce). I recommend Hidden Valley for the classic flavor profile. It contains all the dried herbs and spices you need.
* **Buttermilk**: 1/4 cup. Thins the mixture to a dip-able consistency. If you don’t have buttermilk, mix regular milk with a teaspoon of lemon juice and let it sit for five minutes.
* **Fresh Parsley**: 2 tablespoons, chopped. Adds a fresh, grassy note that cuts through the richness. If you don’t have fresh, 1 teaspoon of dried parsley works.
* **Garlic Powder**: 1/2 teaspoon. Enhances the savory depth.
* **Onion Powder**: 1/2 teaspoon. Adds a subtle sweetness and complexity.
* **Salt and Pepper**: To taste. Always season your dip. Start with 1/2 teaspoon of salt and adjust from there.
**Pro Tips for Ingredient Selection:**
* I personally prefer buying organic carrots when possible, as the peeling process is easier and the flavor is sweeter.
* For the celery, try to find stalks that are thick and juicy. Thin, stringy celery can be fibrous and unpleasant to chew.
* If you are making this for a large crowd, consider adding bell pepper strips in orange and white for extra variety. It keeps the color palette consistent while adding volume to the platter.
Equipment Needed
You don’t need a lot of fancy tools to pull this off, but having the right equipment makes the assembly process much smoother. The main challenge here is handling raw vegetables, so sharp knives and stable cutting boards are essential for safety and efficiency.
* **Large Cutting Board**: A sturdy board is necessary for breaking carrots and peeling celery. I prefer a large plastic board because it is easy to sanitize after handling raw veggies.
* **Sharp Chef’s Knife**: Essential for trimming the ends of the vegetables and slicing the bell pepper. A dull knife is more dangerous because it slips. Keep it sharp.
* **Vegetable Peeler**: This is your secret weapon. A standard Y-peeler works best for creating the thin “rib” strips from celery and cucumber. It’s safer and faster than trying to slice them with a knife.
* **Mixing Bowl**: A medium-sized bowl for whisking together the ranch dip. Glass or ceramic bowls are nice because you can see the consistency clearly.
* **Whisk**: A simple wire whisk is perfect for emulsifying the sour cream, mayo, and dry mix. It ensures there are no lumps of seasoning left in the dip.
* **Serving Platter**: A large, dark-colored platter works best. Black or dark blue makes the white and orange veggies pop visually. If you don’t have a large platter, a clean slate or even a large piece of cardboard covered in foil works in a pinch.
* **Small Serving Bowl**: For the ranch dip. Place this in the center of the skeleton or to the side.
**Maintenance and Budget Tips:**
* If you don’t have a vegetable peeler, you can use a knife, but be very careful. The peeler is worth the few dollars it costs because it makes the “ribs” look much more realistic.
* For the platter, if you are on a budget, use a large baking sheet lined with parchment paper. It gives you plenty of space to arrange the bones and is easy to clean up afterward.
* Always wash your vegetables thoroughly before starting. Even if you peel them, dirt can get under the skin. Use a produce wash or just cold water and a brush for the carrots.
Preparation Method
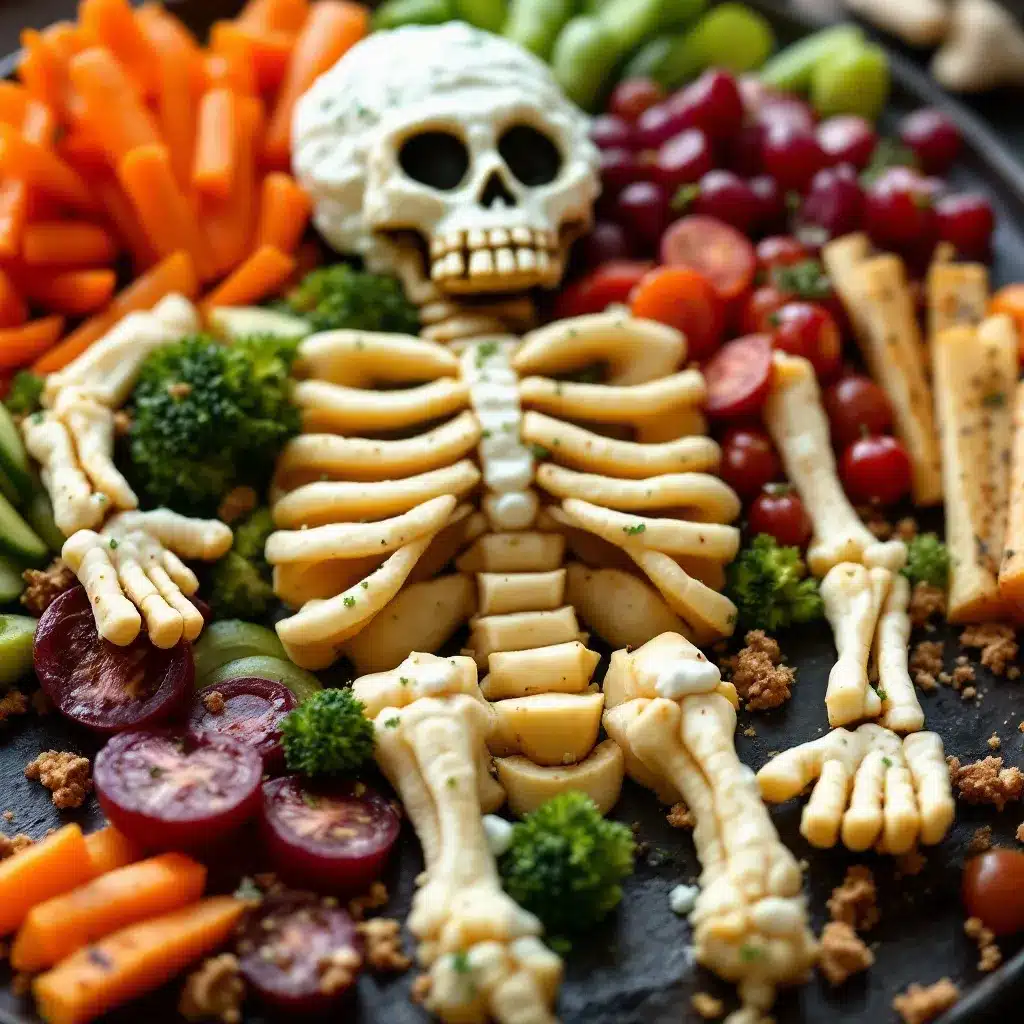
Getting the Easy Halloween Veggie Skeleton Platter with Ranch Dip ready is a process of assembly, not cooking. The goal is to create a visually appealing skeleton that is easy to eat. Here is how to break it down step-by-step, with time estimates and sensory cues to guide you.
**Step 1: Prepare the Ranch Dip (5 minutes)**
Start with the dip because it needs a moment to chill and let the flavors meld. In your mixing bowl, combine the sour cream, mayonnaise, buttermilk, garlic powder, onion powder, and dried parsley. Whisk until smooth. Sprinkle the dry ranch dressing mix over the top. Whisk again vigorously until fully incorporated. Taste the dip. It should be creamy, tangy, and savory. If it tastes too thick, add a splash more buttermilk. If it tastes bland, add a pinch more salt. Cover and refrigerate while you prep the veggies. This step ensures the dip is cold and ready when the veggies are assembled.
**Step 2: Prep the Carrot Bones (3 minutes)**
Take your carrots and peel them completely. Rinse them under cold water and pat them dry with a paper towel. Dry veggies hold dip better than wet ones. Now, break the carrots. Do not cut them with a knife. Use your hands to snap them into irregular pieces, about 4 to 6 inches long. The breaks should be jagged, not straight. This mimics the look of real bones. You will need about 8-10 pieces for a full skeleton. Arrange them on your platter to form the spine and limbs. The spine should be the longest piece, curving slightly. The limbs should branch off at angles.
**Step 3: Create the Rib Cage (5 minutes)**
This is the most critical part for the visual effect. Take your celery stalks and use the vegetable peeler to shave off long, thin strips from the side of each stalk. Aim for strips that are about 1/4 inch wide and 4-5 inches long. These are your ribs. Lay them parallel to each other on the platter, curving slightly to mimic the natural shape of a rib cage. They should overlap the carrot spine slightly. If a strip is too long, break it in half. The goal is a layered, textured look. Don’t worry about perfection; overlapping is good.
**Step 4: Assemble the Skull and Limbs (5 minutes)**
For the skull, cut a section of cucumber. A round slice about 1 inch thick works well. If you want a more defined skull shape, cut a longer piece and trim the sides to create a rounded top and a narrower bottom. Place it at the top of the spine. Use small pieces of red bell pepper for the eyes. Press them into the cucumber. If you are using googly eyes, press the plastic back into the cucumber so they stay put. For the arms and legs, use smaller carrot pieces or cucumber chunks. Attach them to the rib cage and spine using a dab of ranch dip as “glue.” This helps them stay in place while being dipped.
**Step 5: Final Arrangement and Chill (2 minutes)**
Step back and look at your skeleton. Does it look balanced? If one side is heavier, add more ribs or adjust the limbs. Place the bowl of ranch dip in the center of the chest or to the side. Sprinkle a little extra dried parsley around the dip bowl for garnish. If you have time, let the whole platter sit in the fridge for 10 minutes. This helps the veggies stay crisp and the dip stay cold. When you take it out, it should look spooky, inviting, and ready to eat.
**Troubleshooting Tips:**
* **Veggies are too wet**: If your carrots or cucumbers are dripping, pat them dry with paper towels before arranging. Wet veggies make the dip watery and the platter look messy.
* **Ribs are too stiff**: If the celery strips are curling up, lay them under a heavy book for a few minutes to flatten them out.
* **Skeleton falls apart**: Use more ranch dip as glue. A small dab at each joint is enough to hold the structure together during transport.
Cooking Tips & Techniques
There is no actual cooking involved, but there are techniques that separate a good skeleton platter from a great one. The biggest mistake people make is overthinking the geometry. A skeleton is not a math problem. It is a collection of bones. Embrace the asymmetry.
* **Break, Don’t Cut**: As mentioned, breaking carrots by hand creates organic, irregular shapes that look more like bones. Cutting creates uniform, artificial-looking sticks. Trust your hands.
* **Peel with Purpose**: When peeling the celery, hold the peeler at a slight angle. This creates thinner, more flexible strips that lay flat on the platter. If you peel straight down, you get thick, rigid pieces that stick up and look messy.
* **Use Dip as Glue**: This is a pro tip. The ranch dip acts as an edible adhesive. When attaching limbs or the skull, dab a small amount of dip on the connection point. This prevents the skeleton from falling apart when you pick it up. It also adds flavor to every bite.
* **Keep it Cold**: Temperature matters. Warm veggies are limp and unappetizing. Keep the platter in the fridge until the last possible moment. If you are serving at a party, place the platter on a larger tray filled with ice packs to keep everything crisp.
* **Color Contrast**: The visual impact comes from the contrast between the white celery ribs, orange carrots, and dark green cucumber. Ensure you use fresh, vibrant vegetables. Pale, old carrots will look grayish and unappealing. Choose bright orange ones for maximum spooky effect.
I once tried to make a skeleton out of zucchini because I ran out of carrots. It was a disaster. Zucchini is too soft and watery. It turned into mush within an hour. Stick to sturdy vegetables. Carrots, celery, and cucumber are your best friends here. They hold their shape and provide the necessary crunch.
Variations & Adaptations
While the classic veggie skeleton is a crowd-pleaser, there are plenty of ways to tweak this recipe to suit different dietary needs or flavor preferences. Here are a few variations I have tried with success.
* **Gluten-Free Option**: The dry ranch dressing mix is typically gluten-free, but always check the label. Some brands use wheat-based thickeners. If you are strictly gluten-free, use a certified gluten-free ranch mix or make your own from scratch using cornstarch. The veggies and dip are naturally gluten-free, so this is an easy swap.
* **Vegan Adaptation**: Swap the sour cream and mayo for vegan alternatives. I recommend using a cashew-based cream cheese for the sour cream substitute, as it has a similar tang and thickness. Use vegan mayo, which has become much better in recent years. The flavor profile will be slightly different, but still delicious.
* **Spicy Ranch Twist**: If you like a kick, add a diced jalapeño or a dash of cayenne pepper to the ranch dip. This adds a heat that contrasts nicely with the sweet carrots. It’s a fun twist for adults who want a little more spice in their snack.
* **Seasonal Vegetable Swap**: In the fall, you can add roasted pumpkin seeds as “eyes” or decorations. They add a nutty flavor and crunchy texture. You can also use cherry tomatoes for the eyes if you prefer a softer texture.
* **Mini Skeleton Skewers**: For a party favor, assemble mini skeletons on toothpicks or skewers. Use small baby carrots and thin celery strips. These are perfect for individual servings and reduce waste.
I once tried adding blue cheese to the dip for a “ghostly” flavor. It was too strong and overpowered the veggies. Stick to classic ranch. The simplicity is what makes this recipe work. Don’t overcomplicate it.
Serving & Storage Suggestions
Presentation is key for this recipe. Serve the platter on a dark surface to make the colors pop. A black slate or a dark blue platter works best. Place the ranch dip in the center of the chest, or to the side, depending on your layout. Garnish with a sprig of fresh parsley or a few extra celery leaves for a touch of greenery.
**Storage Instructions:**
* **Ranch Dip**: Store in an airtight container in the refrigerator for up to 3 days. The flavors will actually improve after a day as the herbs infuse the cream.
* **Veggies**: Store cut veggies in a sealed container with a paper towel to absorb excess moisture. They will stay crisp for 2-3 days. Do not assemble the skeleton more than a few hours before serving, as the dip will soften the veggies.
* **Reheating**: This recipe is best served cold. Do not reheat the veggies or the dip. Warm ranch is unappealing.
**Serving Suggestions:**
* Pair with a glass of crisp white wine or sparkling cider for a festive touch.
* Serve alongside other Halloween-themed snacks like popcorn or pretzels for a full spread.
* Great for lunchboxes or school parties. The healthy aspect makes it a favorite among parents.
The flavors develop over time, especially the dip. The garlic and onion powder meld with the cream, creating a deeper, more complex flavor. If you make it a day ahead, let the dip sit in the fridge to let the magic happen.
Nutritional Information & Benefits
This recipe is a nutrient-dense snack option. Vegetables are packed with vitamins, minerals, and fiber. Carrots are high in beta-carotene, which converts to vitamin A and supports eye health. Celery is low in calories and high in water content, making it hydrating and satisfying. Cucumbers provide vitamin K and antioxidants.
The ranch dip adds some fat and calories, but it also provides protein from the dairy. If you are watching your calorie intake, you can reduce the mayo and sour cream ratio or use a lighter version. However, the full-fat version is more satisfying and helps absorb the fat-soluble vitamins from the veggies.
This recipe is naturally gluten-free and can be made dairy-free or vegan with simple substitutions. It is a great way to get kids to eat their daily vegetable quota without them even realizing it. Plus, the fun presentation makes it feel like a treat rather than a chore.
Conclusion
The Easy Halloween Veggie Skeleton Platter with Ranch Dip is more than just a snack. It is a moment of joy in a season often filled with stress. It is a reminder that food can be fun, creative, and healthy all at once. I love this recipe because it requires no cooking skills, just a little bit of imagination and a willingness to embrace the mess.
I encourage you to customize it. Add your own twists, try different veggies, or make it your own. The beauty of this recipe is its flexibility. Share your creations with friends and family. Ask them to try it and see the smiles on their faces.
If you make this recipe, I would love to hear about it. Leave a comment below and let me know how your skeleton turned out. Did the ribs stay flat? Did the kids love it? Share your photos and stories. I read every comment and love seeing your creations.
Happy Halloween, and happy eating!
FAQs
Can I make this recipe ahead of time?
Yes, you can prepare the ranch dip and cut the vegetables a day in advance. Store them separately in airtight containers in the refrigerator. Assemble the skeleton just before serving to keep the veggies crisp and prevent the dip from making them soggy.
What if I can’t find googly eyes?
You can use cherry tomatoes, blueberries, or small pieces of red bell pepper for the eyes. They add a nice color contrast and are edible. Just press them gently into the cucumber skull so they stay in place.
Can I use other vegetables?
Absolutely. You can use bell peppers, radishes, or even cauliflower florets for extra texture. Stick to sturdy vegetables that hold their shape well. Avoid soft vegetables like zucchini or tomatoes, as they will get mushy quickly.
Is the ranch dip gluten-free?
Most dry ranch dressing mixes are gluten-free, but always check the label. If you are strictly gluten-free, use a certified gluten-free mix or make your own using gluten-free ingredients. The veggies and dairy are naturally gluten-free.
How long does the skeleton platter stay fresh?
Once assembled, the platter is best eaten within 2-3 hours. The dip will gradually soften the veggies, so it’s best to serve it fresh. If you need to store it, disassemble the skeleton and store the components separately.
Pin This Recipe!
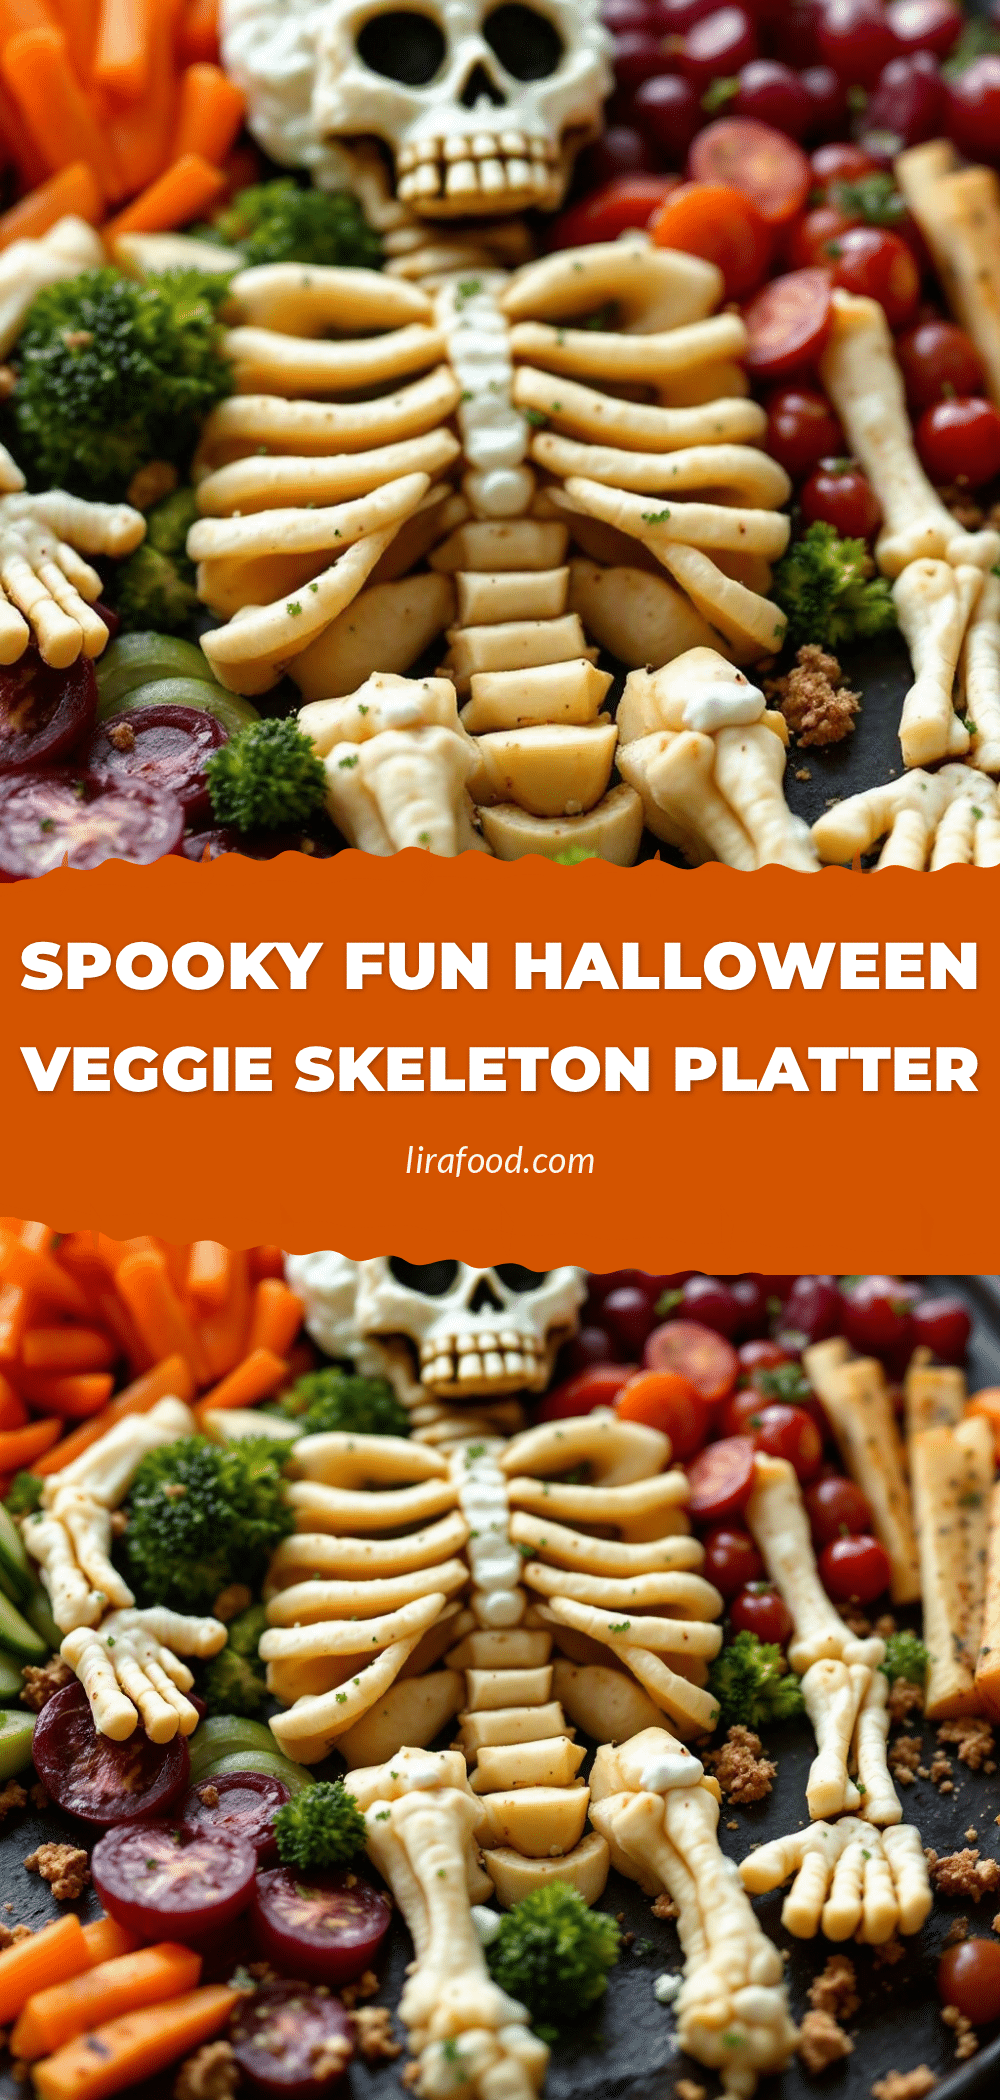
Easy Halloween Veggie Skeleton Platter with Ranch Dip
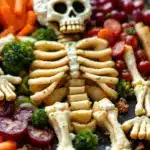
A fun, 10-minute Halloween snack featuring raw vegetables arranged into a skeleton shape with a creamy homemade ranch dip. Perfect for parties and kids.
- Prep Time: 10 minutes
- Cook Time: 0 minutes
- Total Time: 10 minutes
- Yield: 4 servings 1x
- Category: Appetizer
- Cuisine: American
Ingredients
- 3–4 large celery stalks
- Medium carrots, peeled and broken into 4-6 inch irregular pieces
- 1 large English or Persian cucumber
- 1 small red bell pepper
- Optional: Googly eyes or cherry tomatoes for decoration
- 1 cup full-fat sour cream
- 1/2 cup mayonnaise
- 1 packet (1 oz) dry ranch dressing mix
- 1/4 cup buttermilk
- 2 tablespoons fresh parsley, chopped
- 1/2 teaspoon garlic powder
- 1/2 teaspoon onion powder
- Salt and pepper to taste
Instructions
- In a mixing bowl, combine sour cream, mayonnaise, buttermilk, garlic powder, onion powder, and parsley. Whisk until smooth.
- Sprinkle in the dry ranch dressing mix and whisk vigorously until fully incorporated. Taste and adjust seasoning if needed.
- Cover the dip and refrigerate while preparing the vegetables.
- Peel carrots and break them by hand into irregular 4-6 inch pieces to resemble bones. Arrange on a platter to form the spine and limbs.
- Use a vegetable peeler to shave long, thin strips from celery stalks to create ribs. Lay them parallel on the platter, overlapping the spine.
- Cut a round slice of cucumber for the skull and place it at the top of the spine. Press red bell pepper pieces or googly eyes into the cucumber for eyes.
- Attach arms and legs using small carrot or cucumber pieces, securing them with a dab of ranch dip as ‘glue’.
- Place the bowl of ranch dip in the center of the skeleton or to the side. Garnish with extra parsley if desired.
- Chill the platter for 10 minutes before serving to keep veggies crisp and dip cold.
Notes
Break carrots by hand instead of cutting for a more realistic bone look. Use ranch dip as edible glue to keep the skeleton structure intact. Ensure vegetables are dry before assembling to prevent watery dip. Serve on a dark platter for better visual contrast.
Nutrition
- Serving Size: 1 skeleton platter w
- Calories: 280
- Sugar: 8
- Sodium: 450
- Fat: 22
- Saturated Fat: 8
- Carbohydrates: 18
- Fiber: 4
- Protein: 4
Keywords: Halloween snack, veggie platter, skeleton snack, ranch dip, healthy party food, kid-friendly recipes, easy appetizer