Love this? Save it for later!
Share the inspiration with your friends
 “Pass me the cinnamon sugar. And don’t skimp on it.”
That was my roommate, Sarah, yelling from the living room while I stood over a half-baked batch of cookies, wondering if I’d ruined Tuesday dinner. It wasn’t just any Tuesday. It was the kind of gray, drizzling afternoon where the only thing that makes sense is warm dough and bad decisions. I had tried to follow a “healthy” cookie recipe from a magazine that promised chewy centers and crisp edges. What I got was hard, cracker-like discs that tasted like regret and too much almond extract.
I tossed them in the trash (gently, because I still respect food) and decided to do it the old-fashioned way. No fancy flours, no xanthan gum, and definitely no health halo. Just butter, sugar, cream of tartar, and a whole lot of patience. I rolled the dough balls in that specific cinnamon-sugar mix that smells like a bakery window on a cold morning. I popped them into the oven at 375°F, watching through the glass as they spread just enough to look inviting but not enough to lose their shape.
When they came out, they were soft. Undeniably, dangerously soft. I let them cool on the pan for three minutes—long enough to set slightly, short enough to remain gooey—and then I took one bite. Sarah walked in, saw the crumbs on my chin, and sighed. “Finally,” she said. “Now we have cookies.”
That moment stuck with me. Not because it was dramatic, but because it was real. We all have those days where we want comfort, not complexity. These **Soft Chewy Small-Batch Snickerdoodles** are exactly that. They are for the nights when you don’t want to bake a whole cake (like the decadent salted caramel whiskey bundt cake I made last month, which took three hours and a lot of swearing). These cookies take twenty minutes of active time and deliver maximum satisfaction.
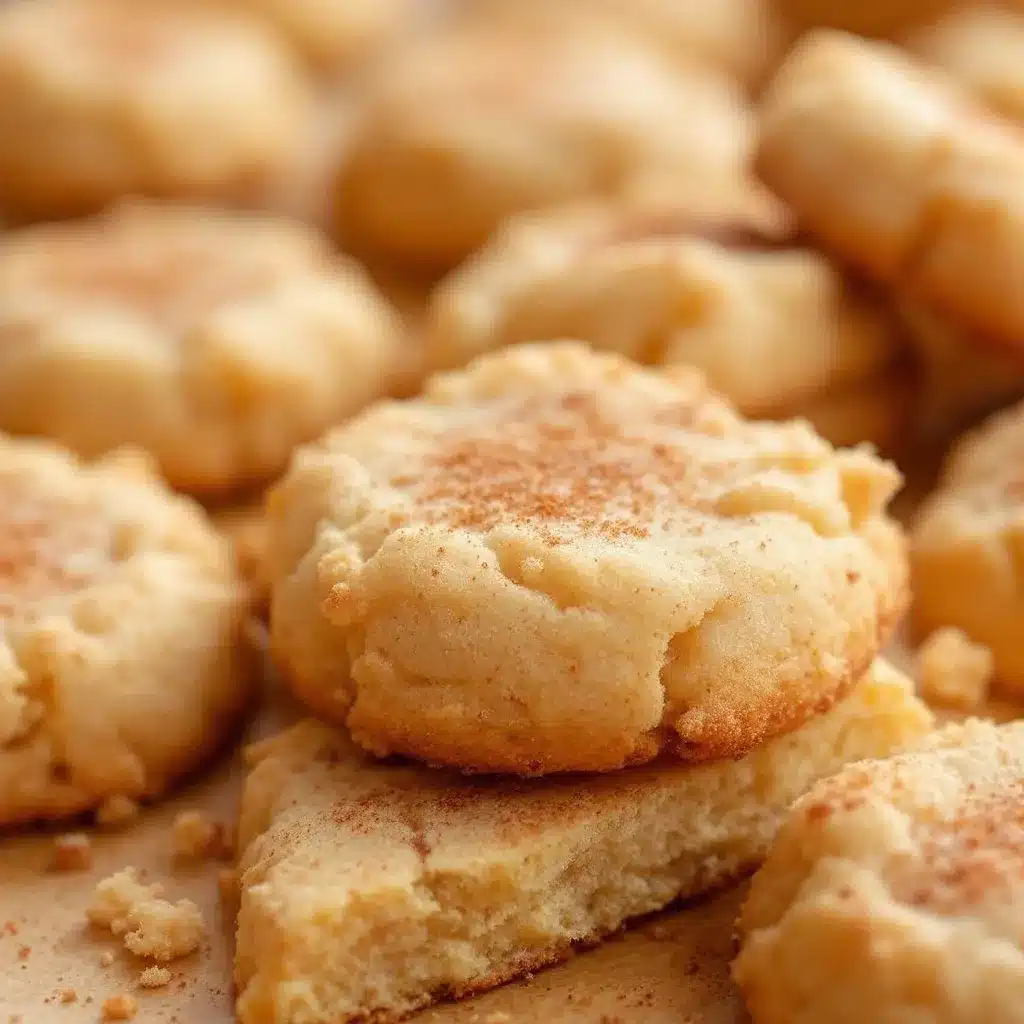
The magic really lies in that tangy bite from the cream of tartar. It’s what separates a snickerdoodle from a sugar cookie. It adds this slight sourness that cuts through the sweetness, making them addictive in the best way possible. I’ve tested this recipe so many times that I can close my eyes and know exactly when the dough is ready. It’s about texture, really. You want that crackly top, the pillowy middle, and the hint of spice that lingers on your tongue.
Honestly, baking a small batch is a lifesaver. You don’t have to eat a dozen cookies in one sitting to judge the recipe. You make a dozen, test one, and if it’s good, you’re done. If you need more, you make more. It’s low risk, high reward. And let’s be honest, having fresh cookies on hand means you don’t have to rely on store-bought boxes or impulse runs to the grocery store. It’s simple, it’s reliable, and it tastes like home.
## Why You’ll Love This Recipe
There is a specific kind of magic that happens when you combine cream of tartar with baking soda. It’s not just chemistry; it’s comfort. I’ve spent years tweaking cookie recipes, and I can tell you this one is the gold standard. It’s not just another version of a classic; it’s the version that actually works every single time, whether you’re a beginner or a seasoned baker who trusts their gut.
Here is why this recipe earns a permanent spot in your rotation:
* **Quick & Easy**: You can have these from start to finish in under 30 minutes. No chilling overnight, no complex laminations. Just mix, roll, and bake. It is perfect for those sudden cravings or when you need a last-minute treat for guests.
* **Simple Ingredients**: You likely have everything in your kitchen right now. Flour, sugar, butter, eggs, cream of tartar, baking soda, and cinnamon. No trip to a specialty store needed. If you need inspiration for other pantry staples, check out my guide on **classic homemade peanut butter cookies**, which also relies on simple, accessible ingredients.
* **Perfect for Small Batches**: Why bake 48 cookies when you only want 12? This recipe is scaled perfectly for two people or a single person with a sweet tooth. It reduces waste and ensures you always have fresh cookies, not stale ones sitting in the pantry.
* **Crowd-Pleaser**: These get rave reviews from everyone. Kids love the sweetness, adults appreciate the tangy balance. They are great for potlucks, cozy dinners, or just sharing with neighbors.
* **Unbelievably Delicious**: The texture is next-level. Crispy edges give way to a soft, chewy center that melts in your mouth. The cinnamon-sugar coating adds a delightful crunch with every bite.
* **The Tangy Twist**: What makes this different is the cream of tartar. It provides that signature snickerdoodle tang that sugar cookies lack. It’s a subtle flavor profile that feels sophisticated but is incredibly easy to achieve.
This recipe isn’t just good—it’s the kind that makes you close your eyes after the first bite. It’s comfort food reimagined for the modern, busy home cook. Perfect for impressing guests without stress, or turning a simple evening into something memorable. Plus, if you’re looking for other cozy treats, my **cozy cold cucumber soup** might be too savory for you, but my **creamy homemade vanilla ice cream** is the perfect pairing for these warm cookies.
## What Ingredients You Will Need
This recipe uses simple, wholesome ingredients to deliver bold flavor and satisfying texture without the fuss. The beauty of snickerdoodles is that they rely on a few key components to create that unique tang and chew. You don’t need fancy imports or hard-to-find items. Everything here is standard pantry fare, though the quality of your butter will make a noticeable difference in the final taste.
Here is what you need to get started:
* **All-Purpose Flour**: 1 ¾ cups (220g). This is the backbone of the cookie. Don’t use cake flour, as it will make them too delicate. I prefer King Arthur All-Purpose Flour for its consistent protein content, which helps with structure.
* **Cream of Tartar**: 2 teaspoons. This is the secret weapon. It reacts with the baking soda to create that tangy flavor and helps the cookies spread just right. It’s cheap and lasts forever in your pantry.
* **Baking Soda**: ½ teaspoon. Works in tandem with the cream of tartar. Make sure it’s fresh; old baking soda won’t give you the lift you need.
* **Salt**: ½ teaspoon. Just a pinch to balance the sweetness. Kosher salt is best for mixing into the dough.
* **Unsalted Butter**: ½ cup (113g), softened. This is crucial. Your butter should be soft enough to leave an indent when pressed but not melted. Softened butter creams better with sugar, creating air pockets that lead to a chewy texture. I use Land O’Lakes or local dairy butter for the best flavor.
* **Granulated Sugar**: ¾ cup (150g). For the dough. This provides sweetness and helps with browning.
* **Egg**: 1 large egg, room temperature. Room temperature ingredients emulsify better. Cold eggs can cause the butter to seize up.
* **Vanilla Extract**: 1 teaspoon. Pure vanilla is worth the extra cost. It adds depth and warmth. Avoid imitation vanilla if you can help it.
For the coating, which is half the fun:
* **Granulated Sugar**: 2 tablespoons. For rolling the dough balls.
* **Ground Cinnamon**: 1 teaspoon. Use a good quality cinnamon like McCormick or a local spice shop blend for a stronger aroma.
If you want to get fancy, you can add a pinch of nutmeg to the dough, but I keep it classic. Also, if you’re making a larger batch later, you can easily scale this up, but for now, stick to the small batch. It’s easier to manage. And if you’re curious about other cinnamon-heavy treats, my **cozy warm vanilla milk sleep drink with cinnamon and honey** uses a similar warm spice profile.
## Equipment Needed
You don’t need a lot of fancy gear to make these cookies. In fact, keeping it simple is part of the charm. Here is what you’ll need:
* **Mixing Bowls**: Two medium-sized bowls. One for wet ingredients, one for dry. Glass or stainless steel works best.
* **Hand Mixer or Stand Mixer**: A hand mixer is fine for this small batch. It’s quick and easy to clean. If you have a stand mixer, use the paddle attachment on medium speed.
* **Measuring Cups and Spoons**: Be precise with the cream of tartar and baking soda. Too much can make your cookies taste metallic.
* **Baking Sheets**: Standard half-sheet pans. I use rimmed baking sheets because they are more durable and prevent spills.
* **Parchment Paper**: Essential. It prevents sticking and makes cleanup a breeze. No need to grease the pan if you use parchment.
* **Cooling Rack**: Optional but recommended. Letting cookies cool on the pan can sometimes cause them to continue cooking and become too crisp. A rack allows air circulation.
* **Small Bowl for Coating**: Just a shallow dish for the cinnamon-sugar mix.
If you don’t have a hand mixer, you can use a wooden spoon, but it will take a bit more arm strength to cream the butter and sugar properly. Also, make sure your baking sheets are cool before adding new batches of dough. Hot pans will melt the butter too quickly, leading to flat, greasy cookies. I keep an extra sheet in the freezer just in case.
## Preparation Method
Making these cookies is straightforward, but attention to detail matters. Here is how to get it right.
1. **Preheat and Prep**: Preheat your oven to 375°F (190°C). Line your baking sheets with parchment paper. This ensures even baking and easy removal.
2. **Mix Dry Ingredients**: In a medium bowl, whisk together the flour, cream of tartar, baking soda, and salt. Whisking ensures that the leavening agents are evenly distributed, so you don’t get a bitter bite in one cookie and a bland one in another. Set aside.
3. **Cream Butter and Sugar**: In a large bowl, beat the softened butter and granulated sugar together. Use your mixer on medium-high speed for about 2-3 minutes. You want the mixture to look pale and fluffy. This step incorporates air, which is key for chewiness. Scrape down the sides of the bowl with a spatula to ensure everything is mixed evenly.
4. **Add Egg and Vanilla**: Beat in the egg and vanilla extract. Mix until just combined. Do not overmix here, or the cookies can become tough. The mixture should look smooth and glossy.
5. **Combine Wet and Dry**: Gradually add the dry ingredients to the wet mixture. Mix on low speed until the dough comes together. It should look like a soft, slightly sticky ball. If it’s too dry, add a teaspoon of milk. If it’s too wet, add a tablespoon of flour.
6. **Prepare Cinnamon Sugar**: In a small bowl, mix the 2 tablespoons of sugar with the 1 teaspoon of cinnamon. Stir until well combined. This is your coating.
7. **Roll the Dough**: Scoop out about 1.5 tablespoons of dough per cookie. Roll it into a ball between your palms. Then, roll the ball in the cinnamon-sugar mixture until it is fully coated. Place them on the prepared baking sheet, spacing them about 2 inches apart. They will spread.
8. **Bake**: Bake for 8-10 minutes. The edges should be set and lightly golden, but the centers should still look soft and slightly underdone. This is crucial. They will firm up as they cool.
9. **Cool**: Let the cookies sit on the baking sheet for 5 minutes. This allows them to set. Then, transfer them to a cooling rack to cool completely. Or, eat them warm, which is my preferred method.
## Cooking Tips & Techniques
I’ve made a few mistakes along the way, so you don’t have to. Here are some pro tips to ensure success.
* **Butter Temperature Matters**: If your butter is too cold, it won’t cream properly. If it’s too melted, your cookies will spread too much and become flat. Aim for “room temperature,” which means it should yield to gentle pressure but not be oily.
* **Don’t Overbake**: This is the biggest mistake people make. Snickerdoodles should look soft in the center when you take them out. They continue to cook on the hot pan. If you wait until they look done in the oven, they will be hard when they cool.
* **Chill the Dough (Optional)**: If your kitchen is very warm, chill the dough balls for 15-20 minutes before baking. This helps them hold their shape and results in a thicker cookie. I usually skip this for small batches, but it’s good to know.
* **Use Two Sheets**: Rotate your baking sheets halfway through baking if your oven has hot spots. This ensures even browning.
* **Fresh Leavening Agents**: Old baking soda or cream of tartar won’t work well. Check the dates on your containers. If your baking soda doesn’t fizz when you add vinegar, toss it.
I once tried to rush the creaming process and ended up with dense, flat cookies. It took a few tries to get the timing right. Now, I time the creaming step to ensure I get that fluffy texture. It’s worth the extra minute.
## Variations & Adaptations
While the classic recipe is perfect, there are ways to tweak it if you want something different.
* **Chocolate Chip Snickerdoodles**: Add ½ cup of semi-sweet chocolate chips to the dough. The tangy cinnamon pairs surprisingly well with chocolate.
* **Pumpkin Spice**: Add 2 tablespoons of pumpkin puree and a pinch of nutmeg and ginger to the dough for a fall twist. You may need to add a little more flour to compensate for the moisture.
* **Gluten-Free Option**: Substitute the all-purpose flour with a 1:1 gluten-free flour blend. Ensure it contains xanthan gum, or add ½ teaspoon to the dry mix. The texture will be slightly more crumbly but still delicious.
* **Vegan Adaptation**: Use vegan butter and a flax egg (1 tablespoon ground flaxseed mixed with 3 tablespoons water). The flavor will be slightly different, but the texture will still be good.
I tried adding white chocolate chips once, and it was too sweet. The semi-sweet chips balance the cinnamon better. Also, if you’re making a larger batch, you can double the recipe, but keep an eye on the oven, as larger batches may need slightly longer baking times. And if you’re looking for other cookie variations, my **classic retro gelatin salad recipe with cream cheese and lime** is a totally different vibe, but great for parties.
## Serving & Storage Suggestions
These cookies are best served slightly warm, with a glass of cold milk. The contrast of temperatures and textures is unbeatable. They are also great for gifting. Place them in a tin with parchment paper between layers to keep them fresh.
* **Storage**: Store in an airtight container at room temperature for up to 5 days. They stay soft if you keep them sealed.
* **Freezing**: You can freeze the dough balls for up to 3 months. Just bake them straight from frozen, adding a minute or two to the baking time. This is great for meal prep.
* **Reheating**: If they go soft, warm them in the microwave for 10 seconds. It brings back that fresh-baked texture.
The flavors actually meld and improve after a day or two. The cinnamon permeates the dough, making each bite richer. I often make them on Sunday and eat them throughout the week. They pair well with my **cozy warm vanilla milk sleep drink with cinnamon and honey** for a cozy evening.
## Nutritional Information & Benefits
While these are definitely a treat, they are made with simple ingredients. One cookie contains approximately 120 calories, 6g of fat, and 14g of carbohydrates. They are not a health food, but they are made with real ingredients, unlike many store-bought options.
* **Dietary Considerations**: This recipe contains gluten and dairy. For gluten-free, use a GF flour blend. For dairy-free, use vegan butter.
* **Allergens**: Contains eggs, gluten, and dairy.
* **Wellness Perspective**: Baking can be a form of mindfulness. The process of mixing and rolling is meditative. Plus, sharing homemade treats with loved ones boosts mood and connection.
## Conclusion
These **Soft Chewy Small-Batch Snickerdoodles** are more than just cookies. They are a reminder that simple things can be the most satisfying. You don’t need a lot of ingredients or fancy equipment. Just a little time and some love. I hope you try this recipe and find your own happy moments in the kitchen.
I’d love to hear how they turn out for you. Did you stick to the classic recipe, or did you add chocolate chips? Leave a comment below and let me know. And if you make them, tag me on social media. I love seeing your creations. Happy baking!
## FAQs
**Can I use margarine instead of butter?**
It’s not recommended. Butter has a lower water content and a different fat structure than margarine, which affects the texture and flavor. Butter gives you that rich, creamy taste and the proper spread. Margarine can make cookies greasy or too soft.
**Why are my snickerdoodles flat?**
This usually happens if the butter is too melted or if the baking soda/cream of tartar is old. Make sure your butter is softened, not melted. Also, check the expiration dates on your leavening agents.
**Can I double the recipe?**
Yes, you can. Just make sure you have enough baking sheet space. Bake in batches to ensure even cooking. Do not overload the pan, or the cookies will spread together.
**How do I know when the cookies are done?**
Look for set edges and a slightly soft center. They should not look raw, but they shouldn’t be golden brown all over either. They will firm up as they cool on the pan.
**Can I freeze the baked cookies?**
Yes, but they may lose some of their chewiness. It’s better to freeze the dough balls and bake them fresh. If you must freeze baked cookies, store them in an airtight container and thaw at room temperature.
Pin This Recipe!
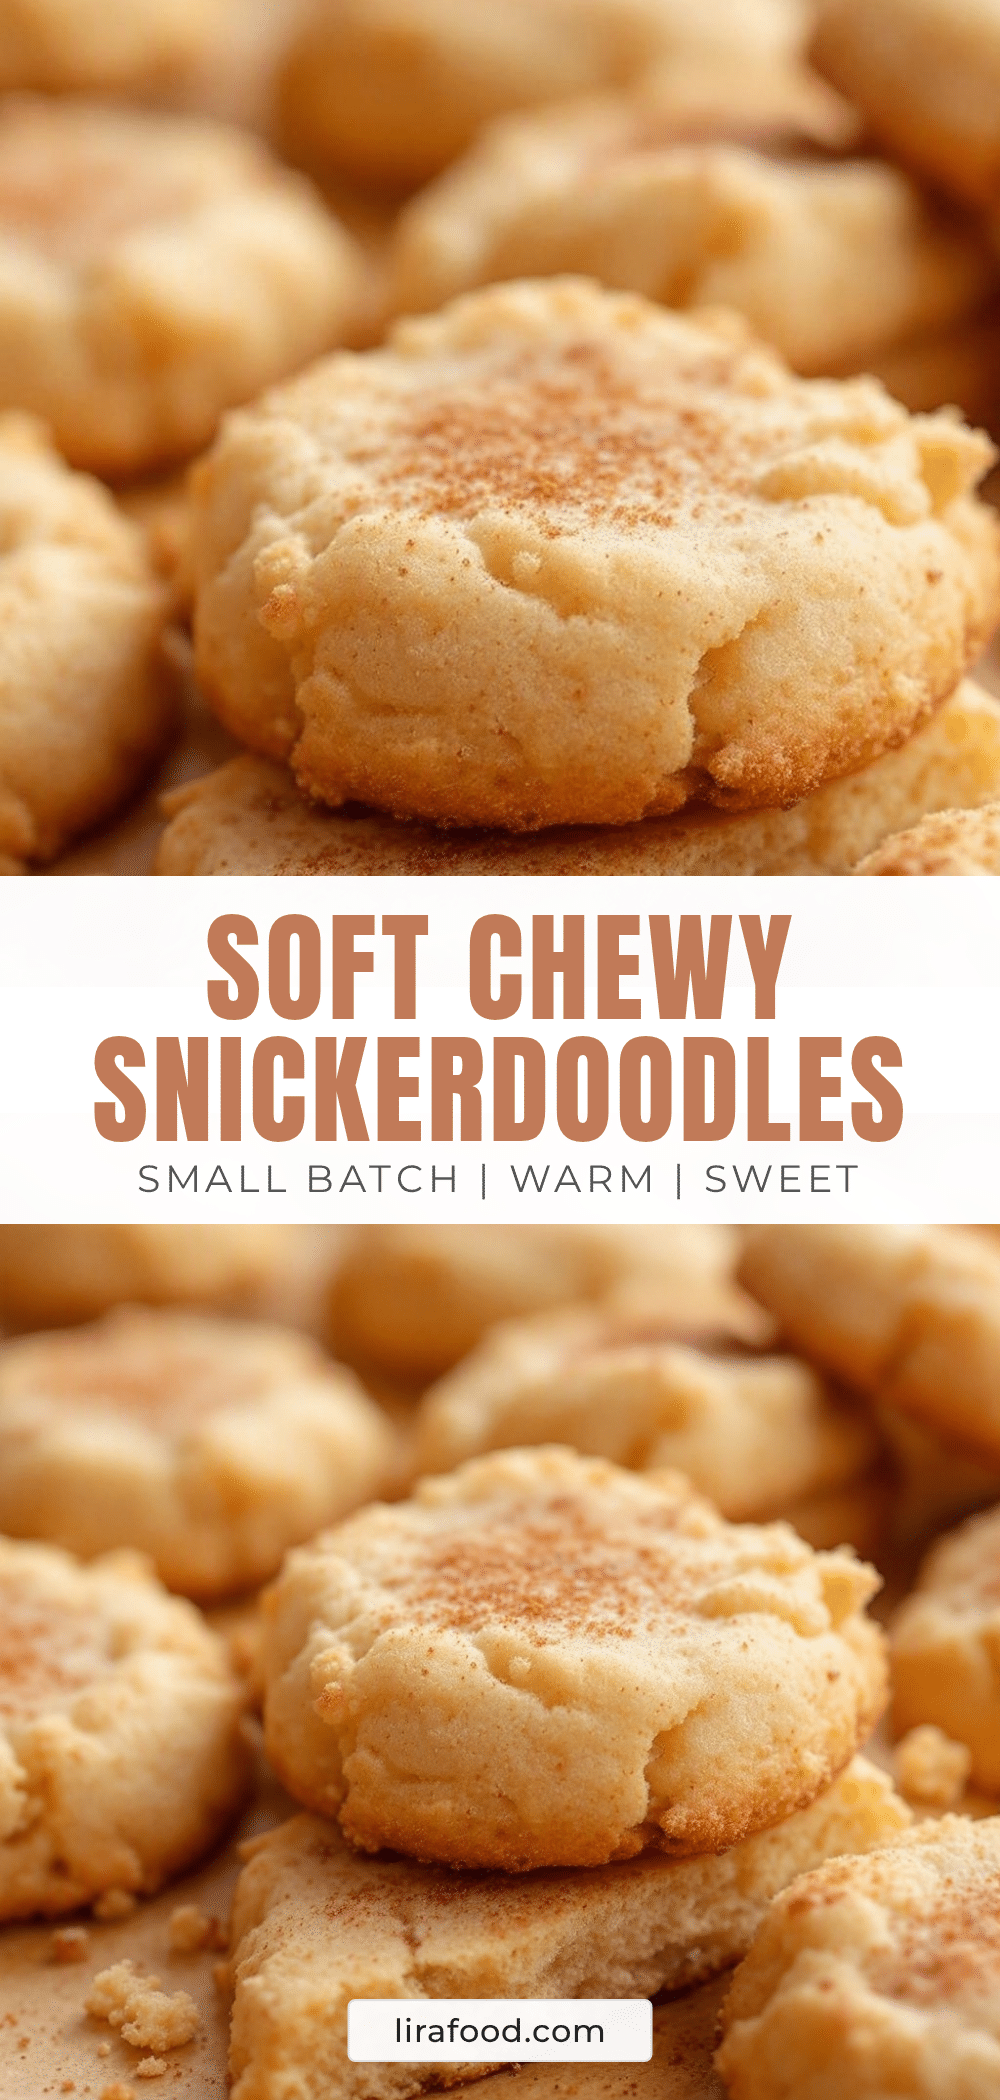
Soft Chewy Small-Batch Snickerdoodles
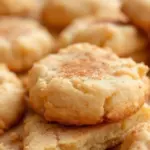
These soft, chewy small-batch snickerdoodles feature a tangy bite from cream of tartar and a crackly cinnamon-sugar coating. They are quick to make, require simple pantry ingredients, and deliver maximum comfort with minimal effort.
- Prep Time: 20 minutes
- Cook Time: 10 minutes
- Total Time: 30 minutes
- Yield: 12 cookies 1x
- Category: Dessert
- Cuisine: American
Ingredients
- 1 ¾ cups (220g) All-Purpose Flour
- 2 teaspoons Cream of Tartar
- ½ teaspoon Baking Soda
- ½ teaspoon Salt
- ½ cup (113g) Unsalted Butter, softened
- ¾ cup (150g) Granulated Sugar (for dough)
- 1 large Egg, room temperature
- 1 teaspoon Vanilla Extract
- 2 tablespoons Granulated Sugar (for coating)
- 1 teaspoon Ground Cinnamon
Instructions
- Preheat oven to 375°F (190°C) and line baking sheets with parchment paper.
- In a medium bowl, whisk together flour, cream of tartar, baking soda, and salt.
- In a large bowl, beat softened butter and ¾ cup sugar on medium-high speed for 2-3 minutes until pale and fluffy.
- Beat in the egg and vanilla extract until just combined and smooth.
- Gradually add dry ingredients to wet mixture on low speed until a soft dough forms.
- In a small bowl, mix 2 tablespoons sugar with cinnamon for the coating.
- Scoop 1.5 tablespoons of dough, roll into balls, and coat thoroughly in the cinnamon-sugar mixture.
- Place dough balls on baking sheets, spacing them 2 inches apart.
- Bake for 8-10 minutes until edges are set and lightly golden, but centers remain soft.
- Let cookies cool on the baking sheet for 5 minutes before transferring to a cooling rack.
Notes
Ensure butter is softened, not melted, to prevent flat cookies. Do not overbake; centers should look slightly underdone as they firm up while cooling. For best texture, serve slightly warm.
Nutrition
- Serving Size: 1 cookie
- Calories: 120
- Sugar: 10
- Sodium: 150
- Fat: 6
- Saturated Fat: 3.5
- Carbohydrates: 14
- Fiber: 0.5
- Protein: 1.5
Keywords: snickerdoodles, small batch cookies, soft chewy cookies, cinnamon sugar cookies, easy baking, cream of tartar cookies