Love this? Save it for later!
Share the inspiration with your friends
“I never thought a cake could feel like a hug,” my friend Maya said last summer as we gathered in her tiny apartment, the air buzzing with laughter and the scent of vanilla sugar.
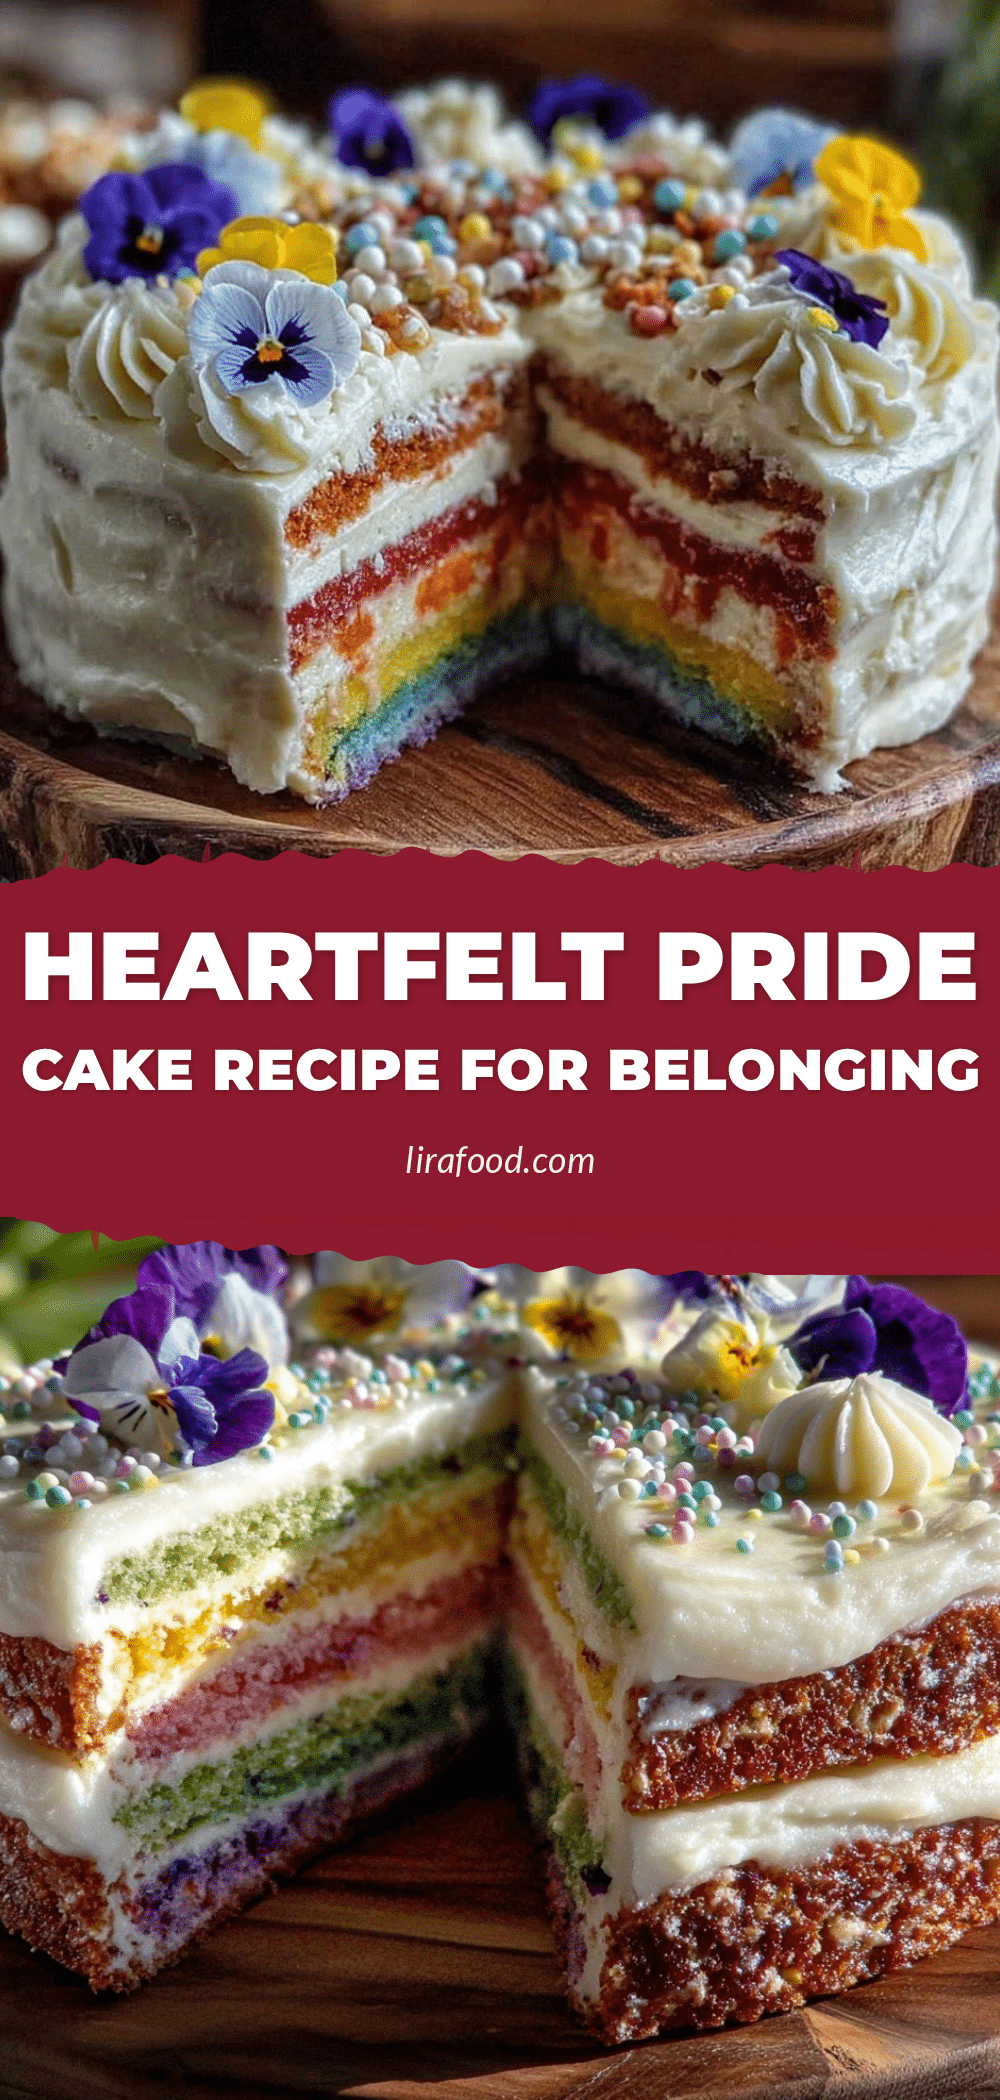
She wasn’t exaggerating. This Perfect Pride Rainbow Layer Cake was more than just a dessert; it was a celebration of belonging, color, and joy all baked into one. I first stumbled upon the idea during a community potluck in late June. Someone had brought this vibrant, multi-layered cake that looked like a slice of sunshine and rain after a storm. The colors were bold but inviting, and the frosting was so fluffy it felt like biting into a cloud. Honestly, I was skeptical about getting all those layers just right, but seeing the smiles it sparked — that was the real magic.
Maybe you’ve been there, too: searching for a way to mark a special day or show support without saying a word. This cake’s layers tell a story, each one a shade of pride and unity, perfect for any celebration that calls for togetherness. I’ll admit, my first attempt was a bit messy — one layer slid off the platter, and I forgot to add the lemon zest that brightens the frosting — but that imperfect, joyful mess is part of the charm. Since then, this cake has become a staple in my kitchen whenever we want to turn an ordinary afternoon into something memorable.
Let me tell you, if you’re looking for a dessert that’s as meaningful as it is delicious, this Perfect Pride Rainbow Layer Cake is your new go-to. It’s easy to make, visually stunning, and packed with flavors that make you want to take another bite — and another. So, grab your mixing bowl, and let’s get started on a cake that’s as vibrant as the people you’re celebrating.
Why You’ll Love This Recipe
After countless trials (and a few frosting fights), I’ve perfected this Perfect Pride Rainbow Layer Cake to be both stunning and surprisingly simple. It’s the kind of recipe that feels fancy but doesn’t demand hours of your time or obscure ingredients.
- Quick & Easy: Comes together in about 1 hour and 30 minutes, great for last-minute celebrations or spontaneous baking moods.
- Simple Ingredients: Uses pantry staples like all-purpose flour, sugar, and eggs — no fancy grocery store runs needed.
- Perfect for Celebrations: Whether it’s Pride Month, a birthday, or just a day to honor community, this cake’s colors speak louder than words.
- Crowd-Pleaser: Both kids and adults adore it — the balance of moist layers and creamy frosting wins hearts every time.
- Unbelievably Delicious: The vanilla cake base is soft and tender, while the buttercream frosting adds that silky, melt-in-your-mouth finish.
What makes this recipe stand out? It’s the technique I use to achieve perfectly even layers without the usual stress. Plus, I add a little vanilla bean paste for deeper flavor and a touch of lemon zest in the frosting that cuts through the sweetness just right. Honestly, this isn’t just another rainbow cake — it’s the version I keep coming back to when I want my celebrations to feel extra special and my guests to ask for seconds.
And here’s the thing: this cake isn’t just about taste or looks; it’s about making every slice a statement of joy and inclusion. If you’ve ever wanted to bake something that feels as good as it tastes, this is it.
What Ingredients You Will Need
This recipe combines everyday ingredients to create a vibrant cake that’s as tasty as it is colorful. Most of these are pantry staples, so you may already have everything on hand. The rainbow colors come from natural or food-grade colorings — your choice!
- For the Cake Layers:
- 2 ¾ cups (345g) all-purpose flour, sifted (I like King Arthur for consistency)
- 2 ½ teaspoons baking powder
- ½ teaspoon baking soda
- ½ teaspoon salt
- 1 cup (230g) unsalted butter, softened
- 1 ¾ cups (350g) granulated sugar
- 4 large eggs, room temperature
- 1 tablespoon pure vanilla extract or vanilla bean paste (adds depth)
- 1 cup (240ml) buttermilk, room temperature (use dairy-free milk with 1 tablespoon lemon juice if needed)
- Food coloring gels or natural colors in red, orange, yellow, green, blue, and purple
- For the Buttercream Frosting:
- 1 ½ cups (340g) unsalted butter, softened
- 5 cups (600g) powdered sugar, sifted
- 1 tablespoon vanilla extract or vanilla bean paste
- 2-3 tablespoons heavy cream or milk (or coconut milk for dairy-free)
- Zest of 1 lemon (optional but highly recommended for brightness)
- Pinch of salt
For best results, use fresh eggs and softened butter — I learned the hard way that cold butter makes frosting lumpy! If you want to swap for gluten-free flour, almond flour works well but expect a denser crumb. I usually grab my colors from a local baking shop, but natural beet powder and spirulina can be lovely alternatives if you prefer no artificial dyes.
Equipment Needed
Here’s what you’ll need to make this Perfect Pride Rainbow Layer Cake come to life without any hassle:
- Six 8-inch (20 cm) round cake pans (or fewer pans if you bake layers in batches)
- Parchment paper to line pans for easy release
- Electric mixer (stand or hand) for smooth batter and frosting
- Mixing bowls — several sizes to separate colored batters
- Rubber spatula and offset spatula for folding and frosting
- Cake turntable (optional but super helpful for even frosting)
- Cooling racks — at least one large enough for all layers
- Measuring cups and spoons (preferably kitchen scale for accuracy)
If you don’t have six cake pans, no worries! I’ve baked layers in two or three batches with great results. Using parchment paper makes cleanup a breeze. The cake turntable is a splurge that really helps with frosting, but a plate on a lazy Susan works in a pinch. Keep your mixer beaters clean between frosting steps to avoid color cross-contamination — trust me, it’s worth the extra rinse.
Preparation Method
- Preheat your oven to 350°F (175°C). Grease and line six 8-inch pans with parchment paper. If you have fewer pans, plan to bake in batches. This step takes about 10 minutes.
- Prepare the dry ingredients: In a medium bowl, whisk together 2 ¾ cups flour, baking powder, baking soda, and salt. Set aside.
- Cream the butter and sugar: Using an electric mixer, beat 1 cup softened butter and 1 ¾ cups sugar on medium speed until light and fluffy — about 3-4 minutes. This step is key for a tender crumb.
- Add eggs one at a time: Beat in four eggs, one by one, making sure each is fully incorporated before adding the next. Add the vanilla extract or paste at this stage.
- Alternate adding dry ingredients and buttermilk: With the mixer on low, add the dry ingredients in three additions, alternating with the buttermilk (1 cup), beginning and ending with the dry mix. Mix until just combined; don’t overmix or the cake will be tough.
- Divide batter evenly: Pour the batter into six small bowls (or as many as you have colors). Add a few drops of each food coloring to the bowls and stir gently until colors are vibrant and even.
- Pour into pans: Carefully spoon each colored batter into its prepared cake pan, smoothing the tops with a spatula. Tap the pans gently on the counter to release air bubbles.
- Bake the layers: Bake for 15-18 minutes, or until a toothpick inserted comes out clean. Rotate pans halfway through baking for even color and rise.
- Cool layers: Let cakes cool in pans for 10 minutes, then transfer to wire racks. Make sure layers are completely cool before frosting — patience here pays off.
- Make the buttercream: Beat 1 ½ cups softened butter until creamy. Gradually add 5 cups powdered sugar, mixing on low. Add vanilla, lemon zest, salt, and cream 1 tablespoon at a time until fluffy and spreadable.
- Assemble the cake: Place the purple layer on your serving plate or turntable. Spread an even layer of frosting on top. Repeat with blue, green, yellow, orange, then red layers, frosting between each. Use remaining frosting to coat the sides and top smoothly.
- Chill and serve: Chill the cake for at least 30 minutes to set the frosting before slicing. This helps keep those beautiful layers intact.
If you notice your frosting getting too soft while assembling, pop it in the fridge for 10 minutes. And hey, if a layer slips or crumbs appear, a little extra frosting can hide a multitude of sins. Trust me, every cake has its quirks!
Cooking Tips & Techniques
Making a multi-layer cake like this one can feel intimidating, but here are some tips to keep it stress-free and fun.
- Room Temperature Ingredients: Always use eggs and dairy at room temp — it helps the batter blend better and keeps cakes moist.
- Even Layers: Use a kitchen scale to divide batter evenly, or eyeball with measuring cups if you’re less precise. Smooth batter with an offset spatula and tap pans to remove air bubbles.
- Coloring: Gel food coloring is your best bet for vibrant layers without thinning the batter. Natural colors are lovely but may yield more muted hues.
- Frosting Consistency: The buttercream should be soft enough to spread but firm enough to hold shape. If it’s too stiff, add a splash of cream; too soft, add powdered sugar.
- Crumb Coat: Apply a thin layer of frosting to trap crumbs before the final coat. Chill for 15 minutes between coats for a smooth finish.
- Patience is Key: Cool layers fully before frosting. Warm cake melts buttercream, making it messy.
- Multitasking: Prepare frosting while cakes bake, and clean as you go to keep your space manageable.
I once skipped the crumb coat and ended up scraping frosting off to fix crumb specks — lesson learned the hard way! Also, don’t rush the cooling step; it’s tempting but worth the wait for that clean, polished look.
Variations & Adaptations
This Perfect Pride Rainbow Layer Cake can easily be tailored to suit different tastes, dietary needs, and occasions.
- Dairy-Free Version: Swap butter for a plant-based spread and use coconut or almond milk in the batter and frosting. The texture stays lovely!
- Chocolate Rainbow: Add ¼ cup (25g) cocoa powder to the dry ingredients for a subtle chocolate twist that complements the colors beautifully.
- Fruit-Infused Layers: Mix in finely grated lemon or orange zest to the batter for a citrus pop. Or swirl in pureed berries for natural color and flavor.
- Alternative Frosting: Cream cheese frosting adds a tangy contrast. Use 8 ounces (225g) cream cheese softened with ½ cup (115g) butter, then add powdered sugar and vanilla.
- Smaller Cake: Use 6-inch (15 cm) pans for a petite version perfect for intimate gatherings.
Last Pride, I made a version with lavender-infused frosting that everyone raved about — a subtle floral note that somehow made the celebration even sweeter. Feel free to experiment and make this cake your own.
Serving & Storage Suggestions
Serve this cake at room temperature to let the buttercream shine and the layers sing their colors. A sharp serrated knife warmed under hot water will slice through smoothly without squishing layers.
This cake pairs wonderfully with a fresh berry compote or a simple glass of sparkling lemonade for a refreshing counterpoint. For a cozy twist, a cup of chamomile tea is lovely alongside.
Store leftover cake covered in the fridge for up to 4 days. Let it come back to room temperature before serving to bring back that soft texture. You can also freeze individual layers wrapped tightly for up to 2 months — thaw overnight in the fridge before assembling.
Flavors tend to meld beautifully after a day, making the cake even more delightful when served the next afternoon. Honestly, sometimes I make it a day ahead just to let the frosting and cake get to know each other better!
Nutritional Information & Benefits
This Perfect Pride Rainbow Layer Cake is a treat worth savoring. Each slice provides energy from the balanced mix of fats, sugars, and protein.
Key ingredients like eggs and butter supply essential nutrients, while the lemon zest adds a tiny boost of vitamin C. You can lighten the recipe by swapping half the butter for applesauce or yogurt, reducing fat without losing moisture.
While this cake is not gluten-free unless modified, substitutions like almond flour work well for those with sensitivities. Keep in mind the frosting contains dairy and sugar, so it’s a dessert best enjoyed in moderation.
From a wellness perspective, celebrating with food that brings people together is just as nourishing as the ingredients inside. This cake is a sweet symbol of inclusion and joy — something good for the soul.
Conclusion
So, why try this Perfect Pride Rainbow Layer Cake? Because it’s more than a cake — it’s a slice of community, a bite of celebration, and a colorful expression of belonging.
Feel free to tweak the colors, flavors, or frosting to suit your style. I love how this recipe invites creativity and connection in equal measure. Every time I make it, I’m reminded that food is one of the simplest ways to say, “You belong here.”
If you bake this cake, I’d love to hear your twists and stories. Share your photos, favorite color combos, or frosting hacks in the comments below — let’s keep the celebration going!
Happy baking, and here’s to making every occasion as joyful as this cake tastes!
FAQs
How do I get perfectly even cake layers?
Use a kitchen scale to divide batter evenly between pans and smooth the tops with a spatula. Tapping pans on the counter helps release air bubbles and promotes even baking.
Can I make this cake ahead of time?
Yes! You can bake the layers a day or two ahead and store them wrapped in plastic wrap in the fridge. Assemble and frost the day you plan to serve for best freshness.
What if I don’t have six cake pans?
No problem. Bake the layers in batches using fewer pans, letting each batch cool before reusing the pans for the next colors.
Can I use natural food coloring instead of gels?
Absolutely! Beet powder, turmeric, and spirulina are good natural options but expect softer colors than gels provide.
How should I store leftovers?
Cover the cake tightly and store it in the fridge for up to 4 days. Bring to room temperature before serving to enjoy the best texture and flavor.
Pin This Recipe!
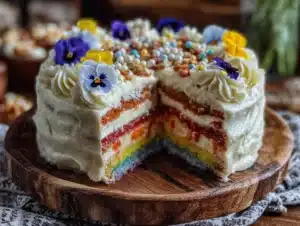
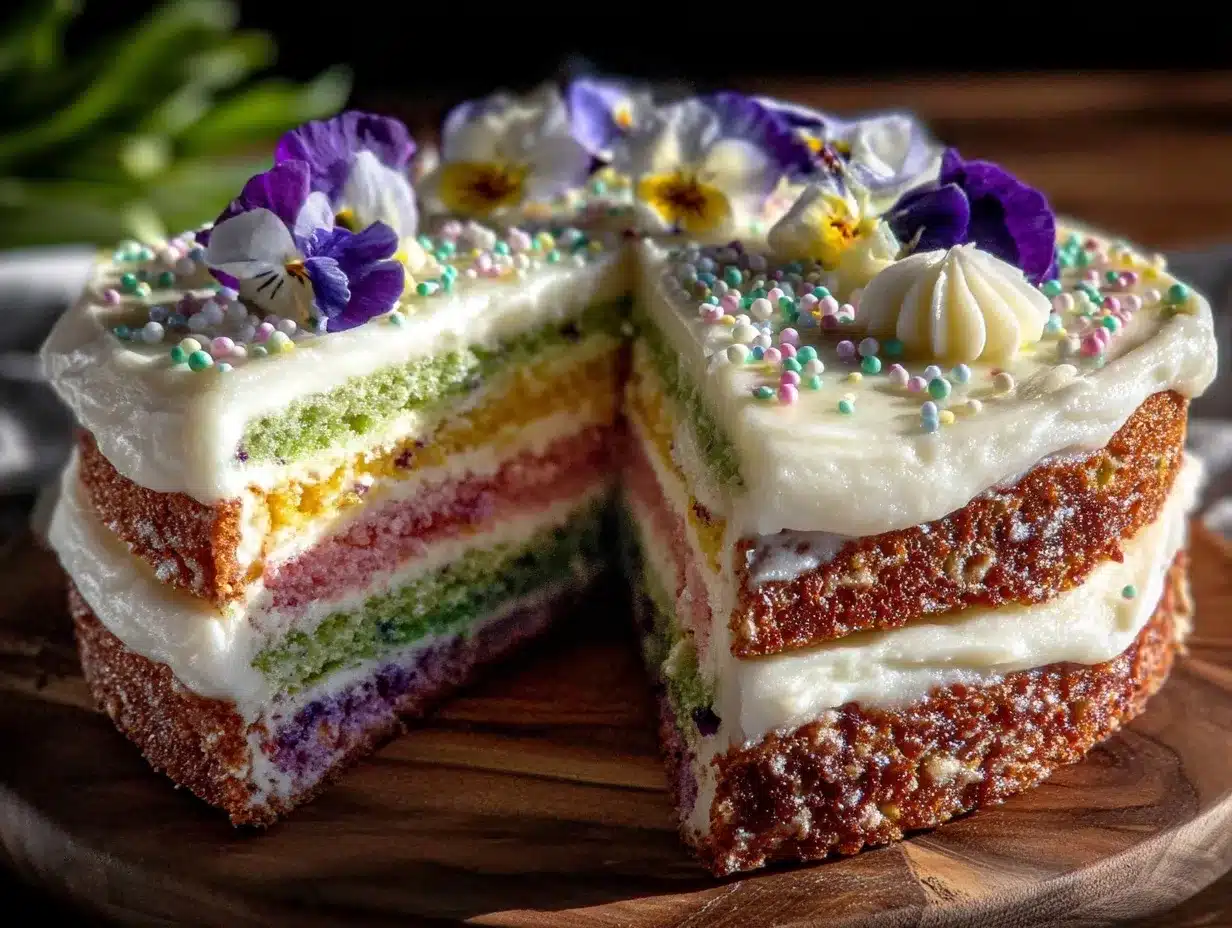
Perfect Pride Rainbow Layer Cake
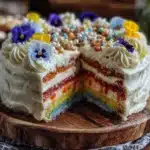
A vibrant, multi-layered rainbow cake with moist vanilla layers and fluffy buttercream frosting, perfect for celebrations and expressing joy and inclusion.
- Prep Time: 30 minutes
- Cook Time: 30 minutes
- Total Time: 1 hour 30 minutes
- Yield: 12 servings 1x
- Category: Dessert
- Cuisine: American
Ingredients
- 2 ¾ cups (345g) all-purpose flour, sifted
- 2 ½ teaspoons baking powder
- ½ teaspoon baking soda
- ½ teaspoon salt
- 1 cup (230g) unsalted butter, softened
- 1 ¾ cups (350g) granulated sugar
- 4 large eggs, room temperature
- 1 tablespoon pure vanilla extract or vanilla bean paste
- 1 cup (240ml) buttermilk, room temperature (or dairy-free milk with 1 tablespoon lemon juice)
- Food coloring gels or natural colors in red, orange, yellow, green, blue, and purple
- For the Buttercream Frosting:
- 1 ½ cups (340g) unsalted butter, softened
- 5 cups (600g) powdered sugar, sifted
- 1 tablespoon vanilla extract or vanilla bean paste
- 2–3 tablespoons heavy cream or milk (or coconut milk for dairy-free)
- Zest of 1 lemon (optional)
- Pinch of salt
Instructions
- Preheat your oven to 350°F (175°C). Grease and line six 8-inch pans with parchment paper. If you have fewer pans, plan to bake in batches.
- In a medium bowl, whisk together 2 ¾ cups flour, baking powder, baking soda, and salt. Set aside.
- Using an electric mixer, beat 1 cup softened butter and 1 ¾ cups sugar on medium speed until light and fluffy, about 3-4 minutes.
- Beat in four eggs, one at a time, making sure each is fully incorporated before adding the next. Add the vanilla extract or paste.
- With the mixer on low, add the dry ingredients in three additions, alternating with the buttermilk (1 cup), beginning and ending with the dry mix. Mix until just combined; do not overmix.
- Divide batter evenly into six small bowls (or as many as you have colors). Add a few drops of each food coloring to the bowls and stir gently until colors are vibrant and even.
- Carefully spoon each colored batter into its prepared cake pan, smoothing the tops with a spatula. Tap the pans gently on the counter to release air bubbles.
- Bake for 15-18 minutes, or until a toothpick inserted comes out clean. Rotate pans halfway through baking for even color and rise.
- Let cakes cool in pans for 10 minutes, then transfer to wire racks. Make sure layers are completely cool before frosting.
- Beat 1 ½ cups softened butter until creamy. Gradually add 5 cups powdered sugar, mixing on low. Add vanilla, lemon zest, salt, and cream 1 tablespoon at a time until fluffy and spreadable.
- Place the purple layer on your serving plate or turntable. Spread an even layer of frosting on top. Repeat with blue, green, yellow, orange, then red layers, frosting between each.
- Use remaining frosting to coat the sides and top smoothly.
- Chill the cake for at least 30 minutes to set the frosting before slicing.
Notes
Use room temperature eggs and butter for best results. If frosting gets too soft while assembling, chill it in the fridge for 10 minutes. Use a crumb coat and chill between coats for a smooth finish. You can bake layers in batches if you don’t have six pans. Natural food colorings yield softer hues than gels. Store leftovers covered in the fridge for up to 4 days and bring to room temperature before serving.
Nutrition
- Serving Size: 1 slice (1/12 of cak
- Calories: 450
- Sugar: 40
- Sodium: 250
- Fat: 25
- Saturated Fat: 15
- Carbohydrates: 55
- Fiber: 1
- Protein: 5
Keywords: rainbow cake, layer cake, celebration cake, pride cake, vanilla cake, buttercream frosting, colorful cake, easy cake recipe