Love this? Save it for later!
Share the inspiration with your friends
The power went out at 6:30 PM on Halloween night. One minute, the house was humming with the sound of the oven preheating and the TV playing spooky movies, and the next, it was pitch black. My daughter stood in the hallway holding a half-filled bucket of candy, looking at me with wide eyes. “Are we just going to eat candy for dinner?” she asked, her voice trembling slightly in the dark. Honestly, I didn’t have a plan. I had no idea what to make without electricity for the stove or the oven lights to see by. The only thing that was still warm was the residual heat in the microwave and the box of brownie mix sitting on the counter.
We had to improvise. The kids wanted something “Halloween-y,” and I needed to keep them calm while the storm raged outside. I looked around the kitchen, grabbing items by touch and memory. Flour, cocoa powder, eggs, oil, and a can of pumpkin puree that had been sitting in the pantry for weeks. We made a batter in a large bowl, using the microwave to cook it in stages. It was chaotic. There were splatters on the ceiling and flour dusting the dog’s fur. But when that first batch came out, dark and dense, the fear vanished. The kids cheered, thinking they were eating actual magic spells. That accidental, half-light creation became the foundation for these Spooky Black Velvet Halloween Brownies. They aren’t just a dessert; they are a memory of a night when everything went wrong, but turned right.
I’ve made them dozens of times since then, perfecting the ratio and adding the orange cream frosting to mimic a witch’s potion or a ghostly mist. You know how it is—sometimes the best recipes are born from the messiest moments. This one stuck because it’s forgiving, fun, and tastes like victory after a stressful day. It’s the kind of treat that makes you feel like you pulled it off, even if you’re cooking in the dark.
Why You’ll Love This Recipe
Let’s face it, Halloween baking can be a lot of work. You want something that looks impressive, tastes incredible, and doesn’t require a degree in pastry arts to pull off. This black velvet brownie recipe is the answer to all those stress points. I’ve tested this version multiple times, tweaking the cocoa content and the fat ratio, to get that specific “velvet” texture that is dense yet moist. It’s not a cakey brownie, and it’s not a fudgy bar that sticks to your teeth. It’s right in that perfect middle ground that adults crave and kids can handle.
- Quick & Easy: You can have the batter ready in 10 minutes. The cooking process is straightforward, whether you use an oven or, yes, even a microwave if you’re in a pinch like we were that night.
- Simple Ingredients: No fancy grocery trips needed. You likely already have the cocoa, flour, sugar, and butter in your pantry. The orange cream frosting uses cream cheese and orange zest, which are easy to find.
- Perfect for Parties: These are great for potlucks, school parties, or just a cozy night in. The black color is naturally spooky without needing artificial dyes, which is a bonus for parents watching sugar intake.
- Crowd-Pleaser: The contrast of the dark, rich chocolate and the bright, tangy orange frosting is a flavor combination that always gets rave reviews. It’s sophisticated enough for a dinner party but fun enough for a costume contest.
- Unbelievably Delicious: The texture is next-level comfort food. The orange zest cuts through the richness of the chocolate, making each bite feel lighter than it is. It’s the kind of dessert that makes you close your eyes after the first bite.
What makes this different from other black brownie recipes is the emphasis on the frosting. Most recipes just dust cocoa powder on top, but here, we create a stable, creamy orange buttercream that holds its shape. It’s not just chocolate; it’s an experience. It’s comfort food reimagined—spooky, faster, but with the same soul-soothing satisfaction. Perfect for impressing guests without stress, or turning a simple meal into something memorable.
What Ingredients You Will Need
This recipe uses simple, wholesome ingredients to deliver bold flavor and satisfying texture without the fuss. The “black velvet” effect comes from a high ratio of unsweetened cocoa powder to flour, creating a deep, dark color that looks dramatic but tastes like pure chocolate heaven. You don’t need food coloring, which can sometimes alter the taste or dry out the batter. The orange cream frosting relies on quality dairy for that smooth, spreadable consistency.
For the Black Velvet Brownies:
- Unsalted butter: 1 cup (2 sticks or 226 grams), melted. This provides the rich base and moisture. I prefer using European-style butter if you can find it, as it has a higher fat content for a richer flavor.
- Granulated sugar: 1 ½ cups (300 grams). This adds sweetness and helps create that slight crisp top.
- Eggs: 3 large eggs, room temperature. Room temp eggs emulsify better with the butter and sugar.
- Vanilla extract: 2 teaspoons. Pure vanilla is key here; avoid the imitation stuff.
- Unsweetened cocoa powder: ¾ cup (75 grams). This is the star. Use a high-quality Dutch-process cocoa for a darker, mellower color. Dutch-process cocoa is treated with an alkali, which darkens its color and gives it a smoother taste.
- All-purpose flour: 1 cup (125 grams). Don’t overmeasure this, or the brownies will be dry.
- Salt: ½ teaspoon. Enhances the chocolate flavor.
- Baking powder: ½ teaspoon. Just a little to give it a tiny bit of lift without making it cake-like.
- Chocolate chips: ½ cup (90 grams), optional. For extra gooeyness.
For the Orange Cream Frosting:
- Cream cheese: 4 ounces (113 grams), softened. Full-fat is a must for stability.
- Butter: ½ cup (1 stick or 113 grams), softened.
- Powdered sugar: 2-3 cups (240-360 grams), sifted. Sifting prevents lumps.
- Orange zest: 1 large orange, zested. This provides the fresh, bright flavor.
- Orange juice: 1-2 teaspoons. Add slowly to adjust consistency.
- Vanilla extract: 1 teaspoon.
Substitution Notes: If you need a gluten-free option, you can swap the all-purpose flour for a 1:1 gluten-free baking blend. For a dairy-free version, use vegan butter and a dairy-free cream cheese alternative, though the texture may be slightly less creamy. In summer, you can use fresh orange zest, but in winter, a bit of orange extract can work if you can’t find good oranges.
Equipment Needed
You don’t need a fancy kitchen to make these brownies. A few basic tools will get you through the process smoothly. The most important piece of equipment is an 8×8 inch baking pan. You can also use a 9×9 pan, but the brownies will be thinner and bake faster, so keep an eye on them. Line the pan with parchment paper, leaving an overhang on the sides. This is a lifesaver for lifting the brownies out later for clean cuts.
You’ll need a large mixing bowl for the batter and a medium bowl for the frosting. A whisk is essential for combining the dry ingredients and for beating the frosting until it’s light and fluffy. A rubber spatula will help you scrape down the sides of the bowl and fold in the chocolate chips without overmixing. For the frosting, an electric hand mixer or a stand mixer with a paddle attachment makes the job much faster and ensures a smooth texture, though a strong arm and a wooden spoon can work in a pinch.
I also recommend having a microplane zester or a fine grater for the orange zest. It releases the oils better than a knife and prevents bitter white pith from getting into your frosting. If you don’t have one, a sharp paring knife works, but you’ll need to be careful. Finally, a cooling rack is necessary to let the brownies cool completely before frosting. Frosting warm brownies is a common mistake that leads to a melted, messy result. Keep these tools clean and ready, and you’ll be baking in no time.
How do I get the brownies out of the pan easily?
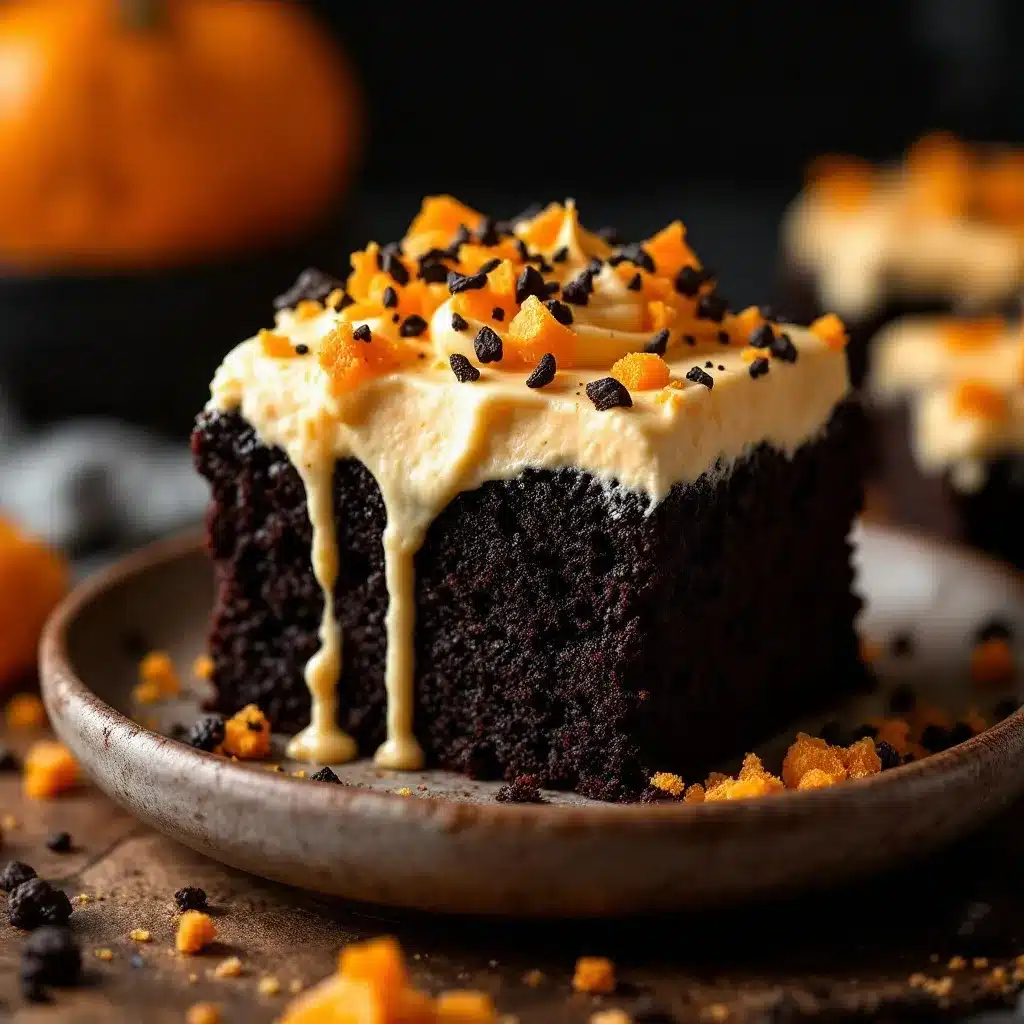
The key is lining your pan with parchment paper. Leave a few inches of paper hanging over the edges of the pan on both sides. Once the brownies are baked and cooled, you can grip the parchment paper and lift the entire block out of the pan. This prevents sticking and makes cutting much cleaner.
Can I use Dutch-process cocoa for this recipe?
Yes, and it’s actually recommended for this recipe. Dutch-process cocoa is darker and has a smoother, less acidic flavor. This helps achieve the deep black color we want for the “velvet” look. Natural cocoa powder is lighter in color and more acidic, which might result in a brownie that looks more like a dark chocolate brownie than a black velvet one.
Why is my frosting runny?
This usually happens if the butter or cream cheese was too warm when you started mixing, or if you added too much orange juice. Make sure your dairy is softened but still cool to the touch. If the frosting is too thin, add more powdered sugar, a quarter cup at a time, until it reaches the desired consistency. You can also chill the frosting in the fridge for 15 minutes before spreading.
Can I make these brownies ahead of time?
Absolutely. The brownies can be baked up to 2 days in advance and stored in an airtight container at room temperature. The frosting should be added just before serving to maintain its texture, or you can frost them and store them in the refrigerator for up to 3 days. Let them come to room temperature before serving for the best flavor.
Do I need to sift the powdered sugar?
Yes, sifting is highly recommended for the frosting. Powdered sugar tends to clump, and if you don’t sift it, you’ll get lumps in your smooth orange cream. If you’re in a hurry, you can process the powdered sugar in a food processor for a few seconds to break up the clumps, but sifting by hand is the most reliable method.
Preparation Method
Making these Spooky Black Velvet Halloween Brownies is a straightforward process, but attention to detail ensures the best texture. First, preheat your oven to 350°F (175°C). Grease your 8×8 inch baking pan and line it with parchment paper. This step is crucial for easy removal.
Step 1: Prepare the Wet Ingredients (5 minutes)
In a medium microwave-safe bowl, combine the melted butter and granulated sugar. Whisk them together until the mixture looks like wet sand. This helps dissolve the sugar slightly before adding the eggs. Next, add the eggs one at a time, whisking well after each addition. The mixture should become pale and slightly thickened. Stir in the vanilla extract. This base needs to be smooth to ensure the brownies don’t turn out grainy.
Step 2: Combine the Dry Ingredients (3 minutes)
In a separate medium bowl, whisk together the unsweetened cocoa powder, all-purpose flour, baking powder, and salt. Sifting the cocoa powder here is a good idea if it’s lumpy. Whisking the dry ingredients separately ensures that the leavening agent is evenly distributed, preventing any bitter spots of baking powder in the final product.
Step 3: Mix the Batter (3 minutes)
Pour the dry ingredients into the wet ingredients. Use a rubber spatula to fold them together. Stop mixing as soon as the flour streaks disappear. Overmixing develops gluten, which can make the brownies tough instead of tender. If you’re adding chocolate chips, fold them in now. The batter should be thick, glossy, and very dark—almost black.
Step 4: Bake the Brownies (25-30 minutes)
Pour the batter into the prepared pan and spread it evenly. Bake in the preheated oven for 25-30 minutes. The brownies are done when a toothpick inserted into the center comes out with a few moist crumbs attached, but not wet batter. If you pull out a clean toothpick, they are overbaked and will be dry. The top should look set and slightly crackly.
Step 5: Cool Completely (1 hour)
Let the brownies cool in the pan on a wire rack for at least 30 minutes, then lift them out using the parchment paper and let them cool completely on the rack. This step is non-negotiable. If you frost them while warm, the frosting will melt and slide off.
Step 6: Make the Orange Cream Frosting (10 minutes)
While the brownies cool, make the frosting. In a large bowl, beat the softened cream cheese and butter together until smooth and creamy. Add the vanilla and orange zest. Gradually add the sifted powdered sugar, starting with 2 cups. Beat on low speed until combined, then increase to medium-high speed and beat for 2-3 minutes until fluffy. If the frosting is too thick, add orange juice, one teaspoon at a time, until it reaches a spreadable consistency.
Step 7: Frost and Serve
Spread the orange cream frosting evenly over the cooled brownies. Use a knife or offset spatula to create swirls or peaks for a spooky look. You can sprinkle crushed cookies or candy eyes on top for extra decoration. Cut into squares and serve.
Cooking Tips & Techniques
One of the biggest mistakes people make with brownies is overbaking them. I learned this the hard way years ago when I pulled a batch out because it “looked done,” only to find it dry and crumbly the next day. The key is the toothpick test. You want moist crumbs, not a clean stick. Also, let your eggs come to room temperature before using them. Cold eggs can cause the melted butter to seize up, creating a curdled batter that’s hard to smooth out.
For the frosting, temperature control is everything. If your butter or cream cheese is too warm, the frosting will be runny and won’t hold its shape. If it’s too cold, you’ll get lumps. The ideal texture is soft but not melted. Another tip is to zest the orange before you juice it. It’s much easier to get the bright orange peel without getting the bitter white pith when the orange is whole. Save the zest for the frosting and use the juice for other things, or save it for a glaze if you want a thinner consistency.
When folding in the chocolate chips, be gentle. You want to distribute them evenly without breaking them down into the batter. If you want a more “velvet” texture, you can sift the cocoa powder twice. This aerates it and ensures there are no lumps in your dark batter. Finally, don’t skip the cooling rack. Placing hot brownies on a plate traps steam and makes the bottom soggy. Air circulation is your friend here.
Variations & Adaptations
While the classic black velvet and orange cream combo is perfect for Halloween, there are plenty of ways to adapt this recipe. For a spicy twist, add a pinch of cayenne pepper or cinnamon to the brownie batter. The heat pairs beautifully with the orange frosting, creating a flavor profile similar to Mexican hot chocolate. For a nutty version, fold in chopped pecans or walnuts. The crunch adds a nice contrast to the soft brownie.
If you want to make these vegetarian-friendly (they already are), you can swap the butter for a high-quality vegan butter in both the brownies and the frosting. For a gluten-free option, use a 1:1 gluten-free flour blend. The texture might be slightly more delicate, so be careful not to overmix. You can also change the frosting flavor. Instead of orange, try cream cheese frosting with a swirl of raspberry jam for a “blood” effect, or mint chocolate chip frosting for a “zombie” vibe.
For a less sweet version, reduce the sugar in the brownies by ¼ cup and use unsweetened cocoa powder. The orange zest in the frosting will still provide plenty of flavor. I’ve also tried adding a layer of salted caramel in the middle of the batter before baking. It creates a gooey center that’s absolutely indulgent. Just spoon dollops of caramel onto the batter and swirl it with a knife before baking. These variations allow you to keep the recipe fresh and exciting, even if you make it more than once.
Serving & Storage Suggestions
These brownies are best served at room temperature, allowing the flavors of the chocolate and orange to fully develop. For presentation, cut them into neat squares or triangles. You can dust the top with powdered sugar through a stencil for a “moon” effect, or use orange food coloring mixed with a little shortening to pipe “webs” on top. They pair wonderfully with a cold glass of milk or a cup of hot coffee, which cuts through the richness.
For storage, keep the brownies in an airtight container at room temperature for up to 3 days. If your kitchen is very warm, store them in the refrigerator. If refrigerated, let them sit out for 20 minutes before serving to soften the frosting. They can also be frozen. Wrap individual squares in plastic wrap and place them in a freezer-safe bag for up to 3 months. Thaw them in the refrigerator overnight. The flavors actually improve after a day, as the moisture from the frosting has time to meld with the brownie.
When reheating, avoid the microwave if possible, as it can melt the frosting. If you must, use a very short burst of power. For a fresh-baked feel, you can warm the unfrosted brownies in the oven at 300°F for 5 minutes, then frost them after they cool. This method is great for parties where you want to serve warm brownies.
Nutritional Information & Benefits
While these are definitely a treat, understanding their nutritional profile can help you plan your serving size. Each brownie (assuming 16 squares) contains approximately 350-400 calories, depending on the exact size and frosting thickness. The primary sources of calories are the butter, sugar, and cream cheese.
The recipe does offer some benefits. Cocoa powder is rich in antioxidants, specifically flavonoids, which are good for heart health. Eggs provide high-quality protein and choline, which supports brain function. The orange zest in the frosting adds a small amount of Vitamin C and fiber. However, this is a high-sugar, high-fat dessert, so moderation is key. It’s not a health food, but it’s a made-from-scratch treat that avoids artificial preservatives and colors found in store-bought options. For those with dietary restrictions, the recipe can be adapted to be gluten-free or dairy-free, making it accessible to more people.
Conclusion
These Spooky Black Velvet Halloween Brownies with Orange Cream Frosting are more than just a dessert; they are a fun, creative project that brings joy to the kitchen. Whether you’re baking them for a Halloween party or just because you crave something dark and tangy, they are sure to impress. The combination of the rich, dark brownie and the bright, creamy frosting is a classic pairing that never fails. I love this recipe because it’s forgiving and fun, perfect for involving kids in the baking process. They get to see the batter turn black and watch the frosting transform, which is half the fun.
I encourage you to try this recipe and make it your own. Add your favorite mix-ins, change the frosting flavor, or decorate it in your own spooky style. Don’t be afraid to experiment. And if you make them, I’d love to hear how they turned out. Leave a comment below with your thoughts, or share a photo of your creation. Tag me on social media if you do, because I love seeing your Halloween treats. Happy baking, and enjoy every bite of this spooky delight.
FAQs
Can I use natural cocoa powder instead of Dutch-process?
Yes, you can, but the brownies will be a darker brown rather than a deep black. Dutch-process cocoa is alkalized, which makes it darker and less acidic. If you use natural cocoa, the color will be lighter, but the flavor will still be delicious.
How do I store the leftover brownies?
Store them in an airtight container at room temperature for up to 3 days. If your kitchen is hot, refrigerate them. They can also be frozen for up to 3 months. Thaw in the refrigerator before serving.
Can I make the frosting ahead of time?
Yes, you can make the frosting up to 2 days in advance. Store it in an airtight container in the refrigerator. Let it come to room temperature and beat it again with a mixer before spreading it on the brownies to restore its fluffy texture.
What if I don’t have an 8×8 pan?
You can use a 9×9 pan, but the brownies will be thinner. Reduce the baking time by 5-7 minutes and check them early. Alternatively, you can use a 9×13 pan and double the recipe.
Can I substitute the orange zest with orange extract?
You can, but the flavor will be less fresh and vibrant. If you use extract, start with 1 teaspoon and add more to taste. Be careful, as extract is very concentrated. Fresh zest provides a better aroma and flavor profile.
Pin This Recipe!
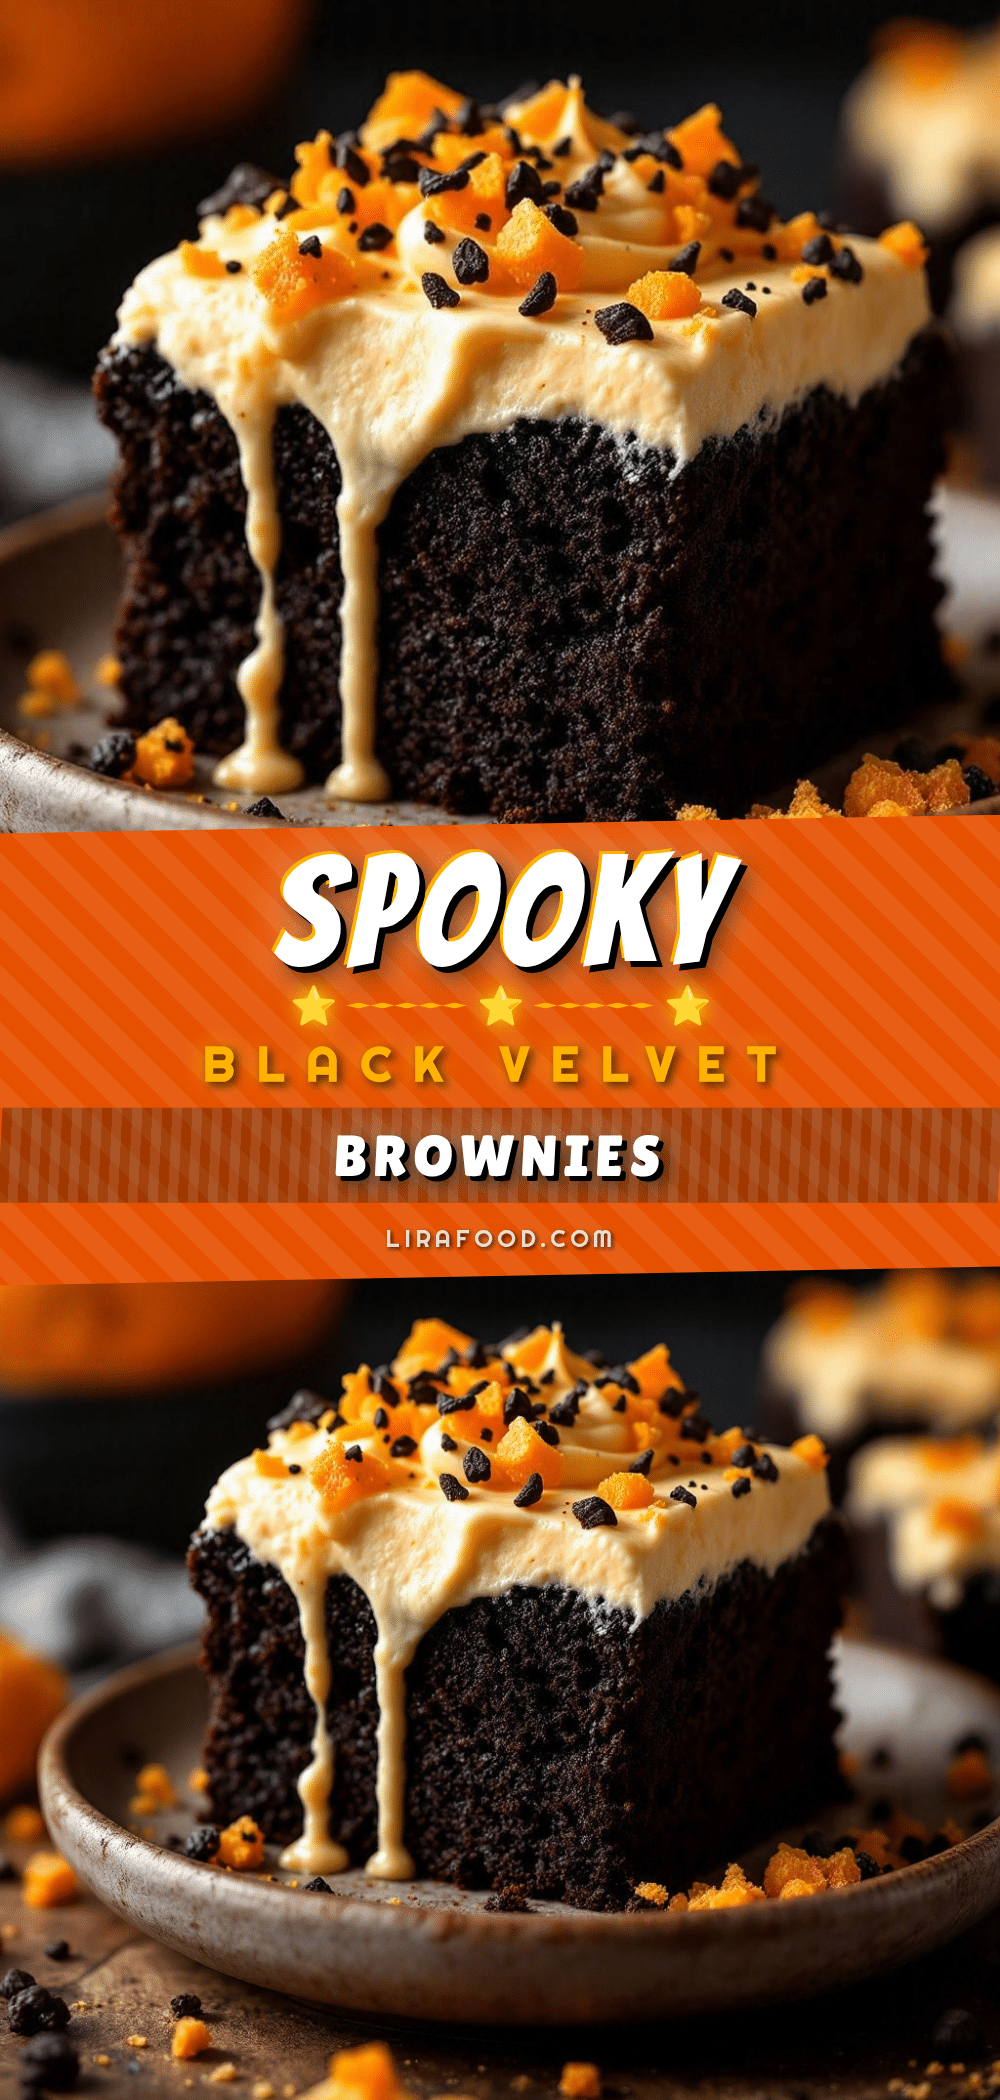
Spooky Black Velvet Halloween Brownies
A dense, moist black velvet brownie with a tangy orange cream frosting, perfect for Halloween parties or spooky treats.
- Prep Time: 15 minutes
- Cook Time: 30 minutes
- Total Time: 45 minutes
- Yield: 16 servings 1x
- Category: Dessert
- Cuisine: American
Ingredients
- 1 cup (2 sticks) unsalted butter, melted
- 1 ½ cups granulated sugar
- 3 large eggs, room temperature
- 2 teaspoons vanilla extract
- ¾ cup unsweetened cocoa powder (Dutch-process recommended)
- 1 cup all-purpose flour
- ½ teaspoon salt
- ½ teaspoon baking powder
- ½ cup chocolate chips (optional)
- 4 ounces cream cheese, softened
- ½ cup (1 stick) butter, softened
- 2–3 cups powdered sugar, sifted
- 1 large orange, zested
- 1–2 teaspoons orange juice
- 1 teaspoon vanilla extract
Instructions
- Preheat oven to 350°F (175°C). Grease an 8×8 inch baking pan and line with parchment paper.
- In a medium bowl, whisk melted butter and granulated sugar until resembling wet sand.
- Add eggs one at a time, whisking well after each addition until pale and thickened. Stir in vanilla extract.
- In a separate bowl, whisk together cocoa powder, flour, baking powder, and salt.
- Fold dry ingredients into wet ingredients with a rubber spatula until just combined. Fold in chocolate chips if using.
- Pour batter into prepared pan and spread evenly.
- Bake for 25-30 minutes until a toothpick inserted comes out with moist crumbs.
- Cool brownies in pan on a wire rack for 30 minutes, then lift out using parchment and cool completely.
- While brownies cool, beat softened cream cheese and butter until smooth.
- Add vanilla and orange zest. Gradually add sifted powdered sugar, beating on low then medium-high until fluffy.
- Adjust consistency with orange juice if needed.
- Spread frosting over cooled brownies and cut into squares.
Notes
Ensure eggs are at room temperature to prevent curdling. Do not overbake; the toothpick should have moist crumbs. Cool brownies completely before frosting to prevent melting. For gluten-free, use a 1:1 gluten-free flour blend. For dairy-free, use vegan butter and cream cheese alternatives.
Nutrition
- Serving Size: 1 square
- Calories: 375
- Sugar: 38
- Sodium: 150
- Fat: 22
- Saturated Fat: 13
- Carbohydrates: 45
- Fiber: 2
- Protein: 4
Keywords: Halloween, brownies, black velvet, orange frosting, easy dessert, spooky treats, baking


