Love this? Save it for later!
Share the inspiration with your friends
I burned the first batch of pulled pork for a Labor Day party so badly that my neighbor actually came over to ask if I was trying to smoke the whole neighborhood out. Not my finest moment. The meat was dry, the sauce tasted like burnt sugar, and I stood there flipping through phone numbers for a pizza place while thirty people waited to eat. That was about seven years ago, and honestly, I still cringe thinking about it.
But here’s the thing about failure in the kitchen — it teaches you exactly what not to do. After that disaster, I spent the next few summers obsessively testing every pulled pork method I could find. I tried oven braising, slow cookers, different rubs, different woods for smoking. I made a lot of mediocre pork before I figured out what actually works. And now, these Best BBQ Pulled Pork Sliders for Your Labor Day Cookout are the result of all that trial and error.
What I finally landed on is a method that gives you that real barbecue texture without needing a smoker or a full day of babysitting the grill. The pork stays juicy, the edges get those crispy caramelized bits everyone fights over, and the sliders come together fast enough that you’re not stuck in the kitchen while everyone else is eating potato salad. I make these every single Labor Day now, and nobody ever asks for the pizza place number anymore.
Why You’ll Love This Recipe
These aren’t just another pulled pork slider recipe you find online. I tested this version against five other methods last summer alone, and this one won every single time with my taste testers (aka my very honest friends and family).
- Perfect for a Crowd : This recipe scales up beautifully. You can feed 8 people or 30 without changing the method at all.
- Minimal Active Time : The oven or slow cooker does the heavy lifting. You get about 20 minutes of hands-on work and then hours of free time.
- No Special Equipment Needed : No smoker, no fancy grill setup. Just a Dutch oven or slow cooker and a baking sheet for the broiler finish.
- That Real BBQ Texture : The secret step of broiling the shredded meat gives you crispy edges without drying anything out.
- Make-Ahead Friendly : You can cook the pork two days ahead and reheat it right before serving. The flavor actually gets better overnight.
- Budget-Friendly : Pork shoulder is one of the cheapest cuts of meat, and it feeds a ton of people.
I remember the first time I got this version right. I was testing it for a small cookout, just six of us, and my buddy Mark took one bite of his slider and just closed his eyes for a second. That’s the reaction you want. That’s the reaction that tells you the recipe is done.
This is the kind of food that makes a cookout feel special without making the cook feel stressed. You set out a platter of these sliders with some pickles and coleslaw, and suddenly everyone is happy. The conversation gets louder, the drinks get poured faster, and you get to actually sit down and enjoy your own party.
What Ingredients You Will Need
This recipe uses straightforward ingredients, but each one plays an important role in building that deep, smoky, slightly sweet flavor you want from great barbecue. Most of these are probably already in your pantry.
For the Pork Rub
- 3 tablespoons brown sugar (light or dark both work; dark gives deeper molasses flavor)
- 2 tablespoons smoked paprika (regular paprika works in a pinch, but smoked adds that barbecue character)
- 1 tablespoon garlic powder
- 1 tablespoon onion powder
- 1 teaspoon black pepper
- 1 teaspoon salt
- 1 teaspoon cayenne pepper (optional, leave out if you want mild heat)
- 1 teaspoon dry mustard powder
For the Pork

- 4-5 pounds boneless pork shoulder (also labeled as pork butt — yes, it’s confusing, but that’s what you want)
- 2 tablespoons vegetable oil (for searing)
- 1 cup chicken broth (low sodium preferred so you control the salt)
- 2 tablespoons apple cider vinegar
- 2 tablespoons Worcestershire sauce
- 1 tablespoon liquid smoke (optional but highly recommended for that backyard smoker flavor)
For the BBQ Sauce
- 1 ½ cups ketchup (I use Heinz, but any brand works)
- ⅓ cup apple cider vinegar
- ¼ cup brown sugar
- 2 tablespoons molasses
- 1 tablespoon Worcestershire sauce
- 1 teaspoon smoked paprika
- ½ teaspoon garlic powder
- ½ teaspoon onion powder
- ½ teaspoon black pepper
- ¼ teaspoon cayenne (optional)
For the Sliders
- 12-15 slider buns (brioche buns work great, or classic potato rolls)
- Butter for toasting the buns
- Coleslaw (optional but highly recommended for crunch)
- Pickle slices (for serving)
A note on pork shoulder — look for one with good marbling. The fat renders down during cooking and keeps the meat moist. I’ve used both bone-in and boneless, and honestly, boneless is easier for shredding and serves more people per pound. If you use bone-in, add about 30 minutes to the cooking time and watch for the bone pulling away cleanly as your doneness test.
For the liquid smoke, I know some people get nervous about it, but a good brand like Wright’s or Colgin adds that campfire note without tasting artificial. You can skip it if you’re smoking the pork on an actual grill, but for oven or slow cooker versions, it makes a real difference.
Equipment Needed
You don’t need a professional kitchen setup for this recipe. Here’s what you’ll actually use:
- Dutch oven or heavy-bottomed pot with a lid — This is my preferred method for oven cooking. A 6-quart size works perfectly. Le Creuset is lovely, but a Lodge cast iron Dutch oven costs a fraction and does the same job.
- Slow cooker — If you want the set-it-and-forget-it approach, a 6-quart slow cooker works great. Just know you’ll miss the searing step if you skip it, which means less flavor.
- Baking sheet with a rim — For that crucial broiling step at the end. A half-sheet pan is perfect.
- Two forks or meat claws — For shredding the pork. I used forks for years before someone gifted me meat claws, and honestly, forks work just fine.
- Small saucepan — For making the barbecue sauce while the pork cooks.
- Cutting board — Preferably one with a groove to catch juices.
- Mixing bowl — Large enough to hold all the shredded meat.
My favorite budget tip for this recipe — don’t buy expensive equipment. A $30 cast iron Dutch oven from a discount store works exactly the same as a $300 one. The pork doesn’t care what brand your pot is.
Preparation Method
Let me walk you through this step by step. I’ve written out every detail so you don’t end up like me that first time, standing in a cloud of smoke with a phone in your hand.
Step 1: Make the Rub
Combine all the rub ingredients in a small bowl. Mix them together with a fork until everything is evenly distributed. The brown sugar might clump up a little — just break those clumps with your fingers. Set aside about 2 tablespoons of the rub for later.
Step 2: Prep and Season the Pork
Pat the pork shoulder dry with paper towels. This is important — moisture is the enemy of a good sear. Rub the remaining seasoning mixture all over the pork, pressing it into the meat so it sticks. Don’t be shy here. Cover every surface. Let the seasoned pork sit at room temperature for about 20 minutes while you preheat your oven to 300°F.
Step 3: Sear the Pork
Heat the vegetable oil in your Dutch oven over medium-high heat until it shimmers. Carefully place the pork shoulder in the hot pot. Sear for about 3-4 minutes per side, rotating until all sides are deeply browned. You’re looking for a dark crust, not just a light tan. This step builds the foundation of flavor, so don’t rush it.
Step 4: Build the Braising Liquid
Remove the seared pork to a plate. Pour the chicken broth into the hot pot and scrape up all those browned bits from the bottom — that’s pure flavor. Stir in the apple cider vinegar, Worcestershire sauce, and liquid smoke if using. Bring this to a simmer.
Step 5: Braise the Pork
Return the pork to the pot, cover with the lid, and transfer to the preheated oven. Cook for 3 to 3 ½ hours, or until the meat is fall-apart tender. You’ll know it’s done when you can poke it with a fork and the meat shreds with almost no resistance. The internal temperature should read about 200°F to 205°F.
If you’re using a slow cooker instead, cook on low for 8-10 hours or high for 5-6 hours. The texture will be slightly different — less caramelized, but still very good.
Step 6: Make the BBQ Sauce
While the pork cooks, combine all the sauce ingredients in a small saucepan. Bring to a simmer over medium heat, then reduce to low and cook for 15-20 minutes, stirring occasionally. The sauce will thicken slightly and the flavors will meld together. Taste it and adjust — more brown sugar if you like it sweeter, more vinegar if you want tang, more cayenne if you want heat.
Step 7: Shred the Pork
When the pork is done, transfer it to a large cutting board or bowl. Reserve about ½ cup of the cooking liquid from the pot. Using two forks, shred the pork into bite-sized pieces. Discard any large chunks of fat, but leave some of the smaller bits — they add flavor and moisture.
Step 8: The Secret Broiler Step
This is the game-changer. Spread the shredded pork in an even layer on your rimmed baking sheet. Pour about ½ cup of the reserved cooking liquid over the meat, then drizzle with about ½ cup of your barbecue sauce. Toss everything together gently. Place the baking sheet under your broiler for 3-5 minutes, watching carefully, until the edges of the meat start to crisp up and caramelize. Stir once halfway through. This gives you those little crispy bits that make pulled pork unforgettable.
Step 9: Toast the Buns
Split your slider buns and butter the cut sides. Place them on a separate baking sheet and toast under the broiler for about 1 minute, or until golden brown. Watch them like a hawk — buns go from perfect to burnt in about 15 seconds.
Step 10: Assemble the Sliders
Pile the hot pulled pork onto the bottom half of each bun. Top with coleslaw if using, add a pickle slice, and cap with the top bun. Serve immediately while the meat is still warm and the buns are crispy.
Cooking Tips & Techniques
I learned most of these the hard way, so you don’t have to.
Don’t skip the sear. I know it’s tempting to just dump everything in the pot and walk away, but that browned crust is where the deep flavor comes from. It’s the difference between good pulled pork and incredible pulled pork.
Let the pork rest before shredding. Give it about 10-15 minutes on the cutting board after it comes out of the oven. The juices redistribute through the meat instead of ending up in a puddle on your cutting board.
Reserve that cooking liquid. Don’t dump it down the drain. It’s concentrated pork flavor. If your shredded meat seems dry after broiling, splash some of this liquid over it to bring it back to life.
Watch the broiler like your dinner depends on it. Because it does. Every oven broils differently, and the line between caramelized and charred is razor thin. I’ve ruined more than one batch by walking away for “just a second.”
Season in layers. The rub goes on before cooking, the sauce adds another layer, and a final sprinkle of flaky salt right before serving brightens everything up. Each layer builds on the last one.
Use the weekend for meal prep. This is one of those recipes that actually tastes better the next day. Cook the pork on Saturday, shred and store it, then broil and assemble on Monday. Your future self will thank you.
Variations & Adaptations
I’ve made this recipe so many different ways over the years, and here are the versions I keep coming back to.
Spicy Chipotle Version : Add 2-3 chipotle peppers in adobo sauce to the braising liquid and puree them in. The smoky heat pairs beautifully with the pork. I made this version for a football party once and it disappeared in about 12 minutes.
Honey Mustard Twist : Swap half the ketchup in the sauce for yellow mustard and add 3 tablespoons of honey. This gives you a Carolina-style sauce that’s tangy and sweet. It’s my second favorite way to eat these sliders.
Low-Carb Option : Skip the buns entirely and serve the pulled pork over coleslaw or in lettuce cups. The meat itself has no sugar except what’s in the rub and sauce, so you can control the carbs by adjusting those elements.
Smoker Method : If you have a smoker, rub the pork and smoke it at 225°F for about 8-10 hours using hickory or apple wood. Wrap it in foil when it hits 165°F internal temperature and keep going until it reaches 200°F. The texture is even better than the oven version.
Instant Pot Adaptation : Sear the pork using the sauté function, then pressure cook on high for 90 minutes with a natural release. You lose some of the depth from slow cooking, but it’s ready in under two hours total.
I also love making a big batch of this and using the leftovers for pulled pork nachos the next day. Just layer tortilla chips with the reheated meat, cheese, jalapeños, and a drizzle of extra sauce. It’s like getting a whole second meal out of one cook.
Serving & Storage Suggestions
These sliders are best served warm, right after the buns come out of the broiler. The contrast between the crispy bun, the tender meat, and the crunchy coleslaw is what makes them so good.
What to Serve Alongside : Classic cookout sides work perfectly here. A crunchy Waldorf salad adds freshness and cuts through the richness of the pork. Baked beans, potato salad, or a simple green salad all work great. For drinks, iced tea or a cold beer is the obvious choice.
Storing Leftovers : Store the pulled pork in an airtight container in the refrigerator for up to 4 days. Keep the sauce separate if you can, and definitely don’t store assembled sliders — the buns get soggy.
Freezing Instructions : This freezes beautifully. Portion the shredded pork into freezer bags, squeeze out the air, and freeze flat for up to 3 months. Thaw overnight in the refrigerator before reheating.
Reheating Methods : The best way to reheat is in a covered baking dish at 300°F for about 15-20 minutes with a splash of broth or water to keep it moist. You can also use the microwave in a pinch, but the texture won’t be as good. If you want those crispy edges again, spread the reheated meat on a baking sheet and hit it under the broiler for 2-3 minutes.
One thing I love about this recipe — the flavors actually deepen overnight. If you’re making this for a party, cook the pork a day ahead, refrigerate it, and reheat it right before serving. The spices have time to settle in, and the meat tastes even more complex.
Nutritional Information & Benefits
Here’s the honest truth about pulled pork sliders — they’re comfort food, not health food. But they’re not as bad as you might think, especially if you control the portions and the sauce.
| Per Slider (with bun and sauce) | Amount |
|---|---|
| Calories | 320-380 |
| Protein | 22g |
| Fat | 14g |
| Carbohydrates | 28g |
| Fiber | 2g |
| Sugar | 12g |
| Sodium | 680mg |
Pork shoulder is actually a good source of protein, B vitamins, and zinc. The collagen in the connective tissue breaks down during cooking and may support joint health. If you’re watching your sodium, use low-sodium broth and go easy on the added salt in the rub.
For a lighter version, skip the bun and serve the meat over a bed of coleslaw or mixed greens. You’ll cut the calories by about half and still get all that flavor. I do this sometimes when I want the taste without the heaviness.
This recipe contains gluten from the buns, dairy from the butter (if you toast the buns), and sugar from the sauce. For gluten-free sliders, use gluten-free buns or lettuce wraps. For dairy-free, use a dairy-free butter alternative or skip the butter on the buns entirely.
FAQs
Can I make this pulled pork in a slow cooker?
Absolutely. Sear the pork first in a skillet, then transfer it to the slow cooker with the broth, vinegar, and Worcestershire. Cook on low for 8-10 hours or high for 5-6 hours. You’ll miss a tiny bit of depth from the oven braise, but it’s still delicious and way more convenient.
How do I keep the sliders from getting soggy?
Toast your buns and don’t overdress the meat. I like to let guests add their own sauce and coleslaw so the buns stay crispy until the last minute. If you’re serving a crowd, set up a slider bar and let everyone assemble their own.
What’s the best cut of pork for pulled pork?
Pork shoulder, also called pork butt. It has enough fat and connective tissue to stay moist during long cooking. Don’t use pork loin or tenderloin — they’ll dry out and turn into sawdust. Trust me on this one.
Can I freeze the pulled pork?
Yes, and it freezes beautifully. Let the meat cool completely, then portion it into freezer bags. Squeeze out as much air as possible and freeze flat. It keeps for up to 3 months. Thaw in the fridge overnight and reheat with a splash of broth.
How do I get those crispy edges on the meat?
That’s the broiler trick from Step 8. Spread the shredded pork on a baking sheet, add a little sauce and cooking liquid, and broil for 3-5 minutes. Watch it carefully and stir once. The edges get caramelized and slightly crispy while the inside stays tender.
Conclusion
These Best BBQ Pulled Pork Sliders for Your Labor Day Cookout have become my go-to party recipe for a reason. They deliver that real barbecue flavor without requiring a smoker or a full day of tending a fire. The meat is tender, the sauce is balanced, and that broiler trick gives you the texture everyone craves.
What I love most about this recipe is how forgiving it is. You can make it ahead, scale it up, adapt it to whatever equipment you have, and it still turns out great. It’s the kind of recipe that makes you look like a hero in the kitchen without actually working that hard.
If you’re planning a Labor Day cookout, this is the dish to build your menu around. Pair it with some grilled corn salad and a batch of sun-brewed sweet tea, and you’ve got a meal that people will talk about all year.
I’d love to hear how these turn out for you. Drop a comment below and let me know if you tried any variations, or tag me in your photos if you share them online. And if you’re looking for a dessert to round out your cookout menu, this bourbon pecan chocolate layer cake is the perfect finish.
Happy cooking, and have a wonderful Labor Day with the people you love.
Pin This Recipe!
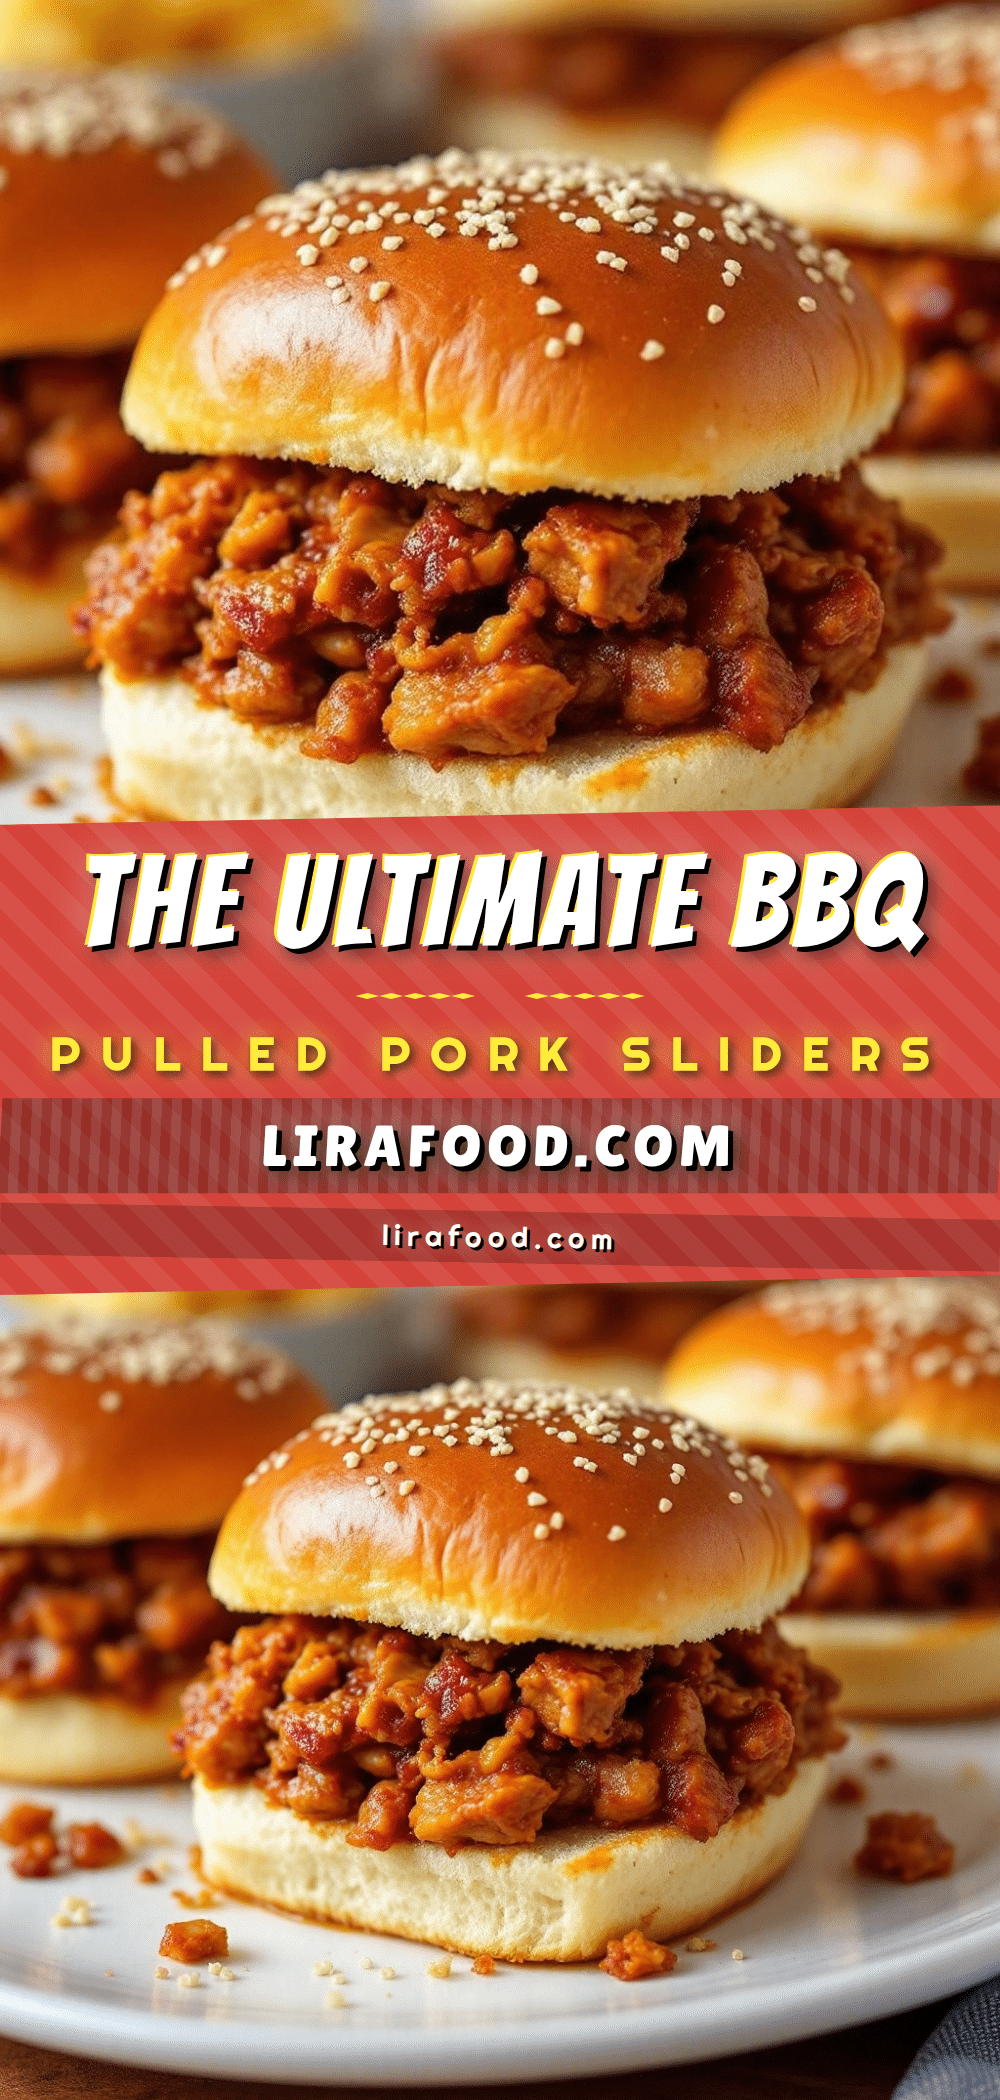
Best BBQ Pulled Pork Sliders for Your Labor Day Cookout

These BBQ pulled pork sliders deliver real barbecue texture without needing a smoker. The pork stays juicy, the edges get crispy caramelized bits, and the sliders come together fast enough that you’re not stuck in the kitchen while everyone else is eating.
- Prep Time: 20 minutes
- Cook Time: 3 hours 30 minutes
- Total Time: 3 hours 50 minutes
- Yield: 12-15 sliders 1x
- Category: Main Course
- Cuisine: American
Ingredients
- 3 tablespoons brown sugar
- 2 tablespoons smoked paprika
- 1 tablespoon garlic powder
- 1 tablespoon onion powder
- 1 teaspoon black pepper
- 1 teaspoon salt
- 1 teaspoon cayenne pepper (optional)
- 1 teaspoon dry mustard powder
- 4–5 pounds boneless pork shoulder
- 2 tablespoons vegetable oil
- 1 cup chicken broth (low sodium)
- 2 tablespoons apple cider vinegar
- 2 tablespoons Worcestershire sauce
- 1 tablespoon liquid smoke (optional)
- 1 ½ cups ketchup
- ⅓ cup apple cider vinegar
- ¼ cup brown sugar
- 2 tablespoons molasses
- 1 tablespoon Worcestershire sauce
- 1 teaspoon smoked paprika
- ½ teaspoon garlic powder
- ½ teaspoon onion powder
- ½ teaspoon black pepper
- ¼ teaspoon cayenne (optional)
- 12–15 slider buns
- Butter for toasting the buns
- Coleslaw (optional)
- Pickle slices
Instructions
- Combine all the rub ingredients in a small bowl. Mix together with a fork until evenly distributed. Set aside about 2 tablespoons of the rub for later.
- Pat the pork shoulder dry with paper towels. Rub the remaining seasoning mixture all over the pork, pressing it into the meat. Let the seasoned pork sit at room temperature for about 20 minutes while you preheat your oven to 300°F.
- Heat the vegetable oil in your Dutch oven over medium-high heat until it shimmers. Carefully place the pork shoulder in the hot pot. Sear for about 3-4 minutes per side, rotating until all sides are deeply browned.
- Remove the seared pork to a plate. Pour the chicken broth into the hot pot and scrape up all the browned bits from the bottom. Stir in the apple cider vinegar, Worcestershire sauce, and liquid smoke if using. Bring this to a simmer.
- Return the pork to the pot, cover with the lid, and transfer to the preheated oven. Cook for 3 to 3 ½ hours, or until the meat is fall-apart tender. The internal temperature should read about 200°F to 205°F.
- While the pork cooks, combine all the sauce ingredients in a small saucepan. Bring to a simmer over medium heat, then reduce to low and cook for 15-20 minutes, stirring occasionally.
- When the pork is done, transfer it to a large cutting board or bowl. Reserve about ½ cup of the cooking liquid from the pot. Using two forks, shred the pork into bite-sized pieces. Discard any large chunks of fat.
- Spread the shredded pork in an even layer on your rimmed baking sheet. Pour about ½ cup of the reserved cooking liquid over the meat, then drizzle with about ½ cup of your barbecue sauce. Toss everything together gently. Place the baking sheet under your broiler for 3-5 minutes, watching carefully, until the edges of the meat start to crisp up and caramelize. Stir once halfway through.
- Split your slider buns and butter the cut sides. Place them on a separate baking sheet and toast under the broiler for about 1 minute, or until golden brown.
- Pile the hot pulled pork onto the bottom half of each bun. Top with coleslaw if using, add a pickle slice, and cap with the top bun. Serve immediately.
Notes
Don’t skip the sear. Let the pork rest before shredding. Reserve the cooking liquid. Watch the broiler carefully. Season in layers. Use the weekend for meal prep.
Nutrition
- Serving Size: 1 slider
- Calories: 350
- Sugar: 12
- Sodium: 680
- Fat: 14
- Saturated Fat: 5
- Carbohydrates: 28
- Fiber: 2
- Protein: 22
Keywords: BBQ pulled pork, sliders, Labor Day, cookout, pulled pork sliders, barbecue, pork shoulder


