Love this? Save it for later!
Share the inspiration with your friends
Introduction
“I wasn’t supposed to be baking that afternoon,” I admit. It was one of those rare, lazy Sundays when the sun peeked through the kitchen window just right, casting warm light on my cluttered counter. I had planned to just sip coffee and scroll through some old cookbooks, but then I found it—a scribbled recipe card tucked inside a well-loved book, stained with years of use and a hint of vanilla. It was for classic homemade banana pudding, a dish I thought I knew inside and out.
What caught me off guard was how this particular recipe insisted on layering the pudding, bananas, and vanilla wafers with a precision that felt almost meditative. Honestly, I had always just thrown things together, but reading this made me want to slow down and savor each step. Maybe you’ve been there—thinking you know a classic, only to realize there’s a secret to making it truly sing.
So, I set out to create this perfectly layered banana pudding that day, with the usual chaos of a cracked mixing bowl and a curious cat weaving between my legs. The result? A creamy, dreamy dessert that wasn’t just nostalgic but somehow richer and more balanced than any banana pudding I’d had before. Let me tell you, it’s been my go-to ever since. And I have a feeling it might just become yours too.
Why You’ll Love This Recipe
This classic homemade banana pudding recipe isn’t just another sweet treat; it’s a trusted favorite that’s been tested and tweaked over countless afternoons in my kitchen. Whether you’re a seasoned baker or just starting out, this recipe offers a delicious blend of ease and elegance that’s hard to beat.
- Quick & Easy: Comes together in under 40 minutes, perfect for busy weeknights or spontaneous dessert cravings.
- Simple Ingredients: Uses pantry staples like ripe bananas, creamy pudding, and crunchy vanilla wafers—no fancy shopping needed.
- Perfect for Gatherings: Ideal for potlucks, family dinners, or a sweet finish to your Sunday meal.
- Crowd-Pleaser: Kids and adults alike find it irresistible, thanks to its creamy texture and balanced sweetness.
- Unbelievably Delicious: The layering technique creates a harmony of flavors and textures that’s pure comfort food magic.
What sets this banana pudding apart is the attention to that layering step—each bite brings together the silky pudding, the tender bananas, and the crisp bite of vanilla wafers, softened just enough. This isn’t your average dump-and-go dessert; it’s a little ritual that brings joy. I promise, once you nail the layering, you’ll close your eyes after the first bite and think, “Wow, this is exactly what banana pudding should taste like.”
What Ingredients You Will Need
This recipe uses simple, wholesome ingredients to deliver bold flavor and satisfying texture without the fuss. Most of these are pantry staples, and if you’re like me, you probably already have most of them on hand.
- For the Pudding:
- 2 cups whole milk (480 ml) – I prefer whole milk for creaminess, but 2% works fine too
- 1 cup heavy cream (240 ml) – adds richness and silkiness
- 3/4 cup granulated sugar (150 g) – adjust to taste
- 1/3 cup cornstarch (40 g) – thickens the pudding perfectly
- 1/4 teaspoon salt – balances sweetness
- 4 large egg yolks, room temperature – for that luscious custard base
- 2 teaspoons pure vanilla extract – I recommend Nielsen-Massey for best flavor
- 2 tablespoons unsalted butter, softened – adds a glossy finish
- For the Assembly:
- 4 ripe bananas, sliced – choose firm but sweet bananas for the best texture
- Vanilla wafer cookies (about 55-60 wafers) – I usually go with Nabisco Famous for that classic crunch
- Whipped cream topping:
- 1 cup heavy cream (240 ml)
- 2 tablespoons powdered sugar
- 1 teaspoon vanilla extract
Substitutions: For a lighter version, swap heavy cream with coconut milk, or use Greek yogurt in place of some cream. If you need gluten-free, almond flour cookies or gluten-free vanilla wafers work well too.
Equipment Needed
- Medium saucepan – for cooking the pudding custard. A heavy-bottomed pan helps prevent scorching.
- Whisk – essential for smooth pudding without lumps.
- Mixing bowls – at least two; one for whipping cream and another for assembling.
- Electric mixer or whisk – for whipping the cream easily. Hand-whisking is possible but takes longer.
- 9×13 inch (23×33 cm) glass or ceramic baking dish – perfect size for layering and presentation.
- Rubber spatula – to scrape down the sides of the saucepan and fold ingredients.
If you don’t have a whisk, a fork can work in a pinch, though it’s trickier to avoid lumps. For whipping, a hand mixer speeds things up, but a balloon whisk works fine if you’re patient. I once made this pudding with my grandma’s old metal bowl and a wooden spoon—took a bit longer but still turned out great!
Preparation Method
- Prepare the pudding custard: In a medium saucepan, whisk together sugar, cornstarch, and salt. Gradually whisk in the milk and heavy cream until smooth. Heat the mixture over medium heat, stirring constantly, until it thickens and just starts to bubble (about 7-10 minutes). This is your cue that the starch has activated.
- Temper the egg yolks: In a separate bowl, lightly beat the egg yolks. Slowly pour about 1 cup (240 ml) of the hot milk mixture into the yolks, whisking constantly to avoid scrambling. Then pour the yolk mixture back into the saucepan.
- Cook until thickened: Continue cooking the custard over medium heat, whisking constantly, for another 2-3 minutes until it becomes thick and coats the back of a spoon. Remove from heat immediately to prevent curdling.
- Add butter and vanilla: Stir in the softened butter and vanilla extract until smooth and glossy. Set aside to cool for about 15 minutes, stirring occasionally to prevent a skin from forming.
- Whip the cream topping: In a chilled bowl, beat the heavy cream, powdered sugar, and vanilla extract until soft peaks form. Be careful not to overwhip, or you’ll get butter!
- Assemble the pudding: In your baking dish, start with a layer of vanilla wafers, followed by a layer of banana slices, then spread a generous layer of pudding over the top. Repeat the layers—wafers, bananas, pudding—finishing with a final pudding layer.
- Add the whipped cream: Spread the whipped cream evenly over the top layer, making sure to cover every corner. For a rustic look, swirl lightly with the back of a spoon.
- Chill: Cover the dish with plastic wrap and refrigerate for at least 4 hours, preferably overnight. This resting time lets the wafers soften slightly while still holding some texture, and the flavors meld beautifully.
If your pudding feels too thick, a splash of milk can smooth it out before assembling. Also, don’t rush the chilling step—patience really pays off. I once tried to eat mine right after assembly, and honestly, it just wasn’t the same. Waiting is worth it!
Cooking Tips & Techniques
Getting that perfectly layered banana pudding isn’t just about following steps—it’s about knowing the little tricks that make a difference. Here are some tips I picked up through trial and error:
- Watch the custard closely: Once it starts bubbling, whisk continuously to avoid lumps and prevent it from sticking to the pan.
- Temper the eggs: Always add hot liquid gradually to the yolks to avoid curdling—this step can’t be skipped.
- Slice bananas just before layering: This prevents them from browning and keeps the pudding looking fresh and bright.
- Layer with care: Distribute bananas evenly to avoid overly mushy patches or dry bites.
- Chill adequately: Refrigeration time is key to let the wafers soften just right—too long and they get soggy; too short and they stay crunchy.
- Use chilled bowls for whipping cream: This helps the cream whip faster and hold its shape better.
- Don’t skip the butter: It adds a subtle richness and glossy finish that lifts the pudding from good to great.
I remember the first time I tried not to stir the custard enough and ended up with a grainy texture—lesson learned! Also, multitasking by prepping the bananas while the custard cools helps save time. Honestly, this recipe taught me patience and precision, but it’s worth every minute.
Variations & Adaptations
This classic banana pudding is super versatile, and I love switching things up depending on the season or mood.
- Chocolate Banana Pudding: Add a layer of chocolate pudding or drizzle melted chocolate between layers for a decadent twist.
- Vegan Version: Use coconut milk or almond milk, cornstarch or arrowroot for thickening, and coconut cream whipped topping. Swap vanilla wafers for vegan-friendly cookies.
- Seasonal Fruit Mix: Replace half the bananas with sliced strawberries or peaches in summer for a fresh, fruity flavor.
- Low-Sugar Option: Use a sugar substitute like erythritol in the pudding and whipped cream, and choose sugar-free vanilla wafers.
- Nutty Crunch: Sprinkle chopped toasted pecans or walnuts between layers for added texture.
A personal favorite is adding a pinch of cinnamon to the pudding base for warm spice notes. It’s subtle but adds a lovely depth. Feel free to experiment—banana pudding is forgiving and welcomes creativity!
Serving & Storage Suggestions
Serve this banana pudding chilled straight from the fridge, ideally after resting overnight. The layers should be distinct but melded nicely, with the vanilla wafers softened to a tender crunch.
Pair it with a cup of strong coffee or a light dessert wine to balance the sweetness. It’s also delightful alongside a scoop of vanilla ice cream if you’re feeling extra indulgent.
To store, cover tightly with plastic wrap or a lid and keep refrigerated for up to 3 days. The flavors actually deepen after a day, but after 3 days, the bananas might start to brown and the wafers become overly mushy.
If you want to prepare in advance, assemble everything except the whipped cream topping, cover, and refrigerate. Add the whipped cream just before serving for the freshest look and texture. Leftovers can be reheated gently in the microwave if you prefer it warm, but honestly, I like it cold best.
Nutritional Information & Benefits
This classic homemade banana pudding offers a comforting treat with some nutritional perks. Each serving (about 1 cup/240 g) provides approximately:
| Calories | Fat | Carbohydrates | Protein |
|---|---|---|---|
| 320 kcal | 15g | 40g | 5g |
Bananas are a great source of potassium and vitamin C, while the dairy provides calcium and protein. Using whole milk and cream gives a richer texture but can be swapped for lower-fat options if preferred.
This dessert is naturally gluten-free if you choose gluten-free wafers, and can be adapted for dairy-free diets as mentioned. I personally appreciate how it balances indulgence with wholesome ingredients—comfort food with a little nutritional heart.
Conclusion
If you’re looking for a classic homemade banana pudding that truly feels like a hug in a bowl, this recipe delivers. The perfectly layered creaminess makes every bite a delightful mix of textures and flavors that’s simply unforgettable. I love how it’s both approachable and special, making it a staple in my kitchen and a hit whenever guests arrive.
Feel free to tweak it to your taste, whether that means adding a sprinkle of cinnamon or swapping in seasonal fruits. I’d love to hear how you make it your own—drop a comment with your favorite tweaks or memories connected to banana pudding. Happy layering and happy eating!
FAQs
What’s the best way to keep bananas from browning in banana pudding?
Slice bananas just before assembling and layer them quickly to minimize exposure. You can also brush them lightly with lemon juice to slow browning.
Can I make banana pudding ahead of time?
Yes! Assemble it a few hours in advance or the night before. For best texture, add whipped cream topping just before serving.
What can I use if I don’t have cornstarch?
Arrowroot powder is a good substitute for cornstarch in thickening the pudding. Use the same amount.
How do I store leftover banana pudding?
Cover tightly and refrigerate for up to 3 days. Avoid freezing as it can affect texture negatively.
Is it okay to use instant pudding mix instead of making pudding from scratch?
While instant pudding is quicker, making pudding from scratch gives a richer, creamier texture and fresher flavor that’s worth the extra effort.
Pin This Recipe!

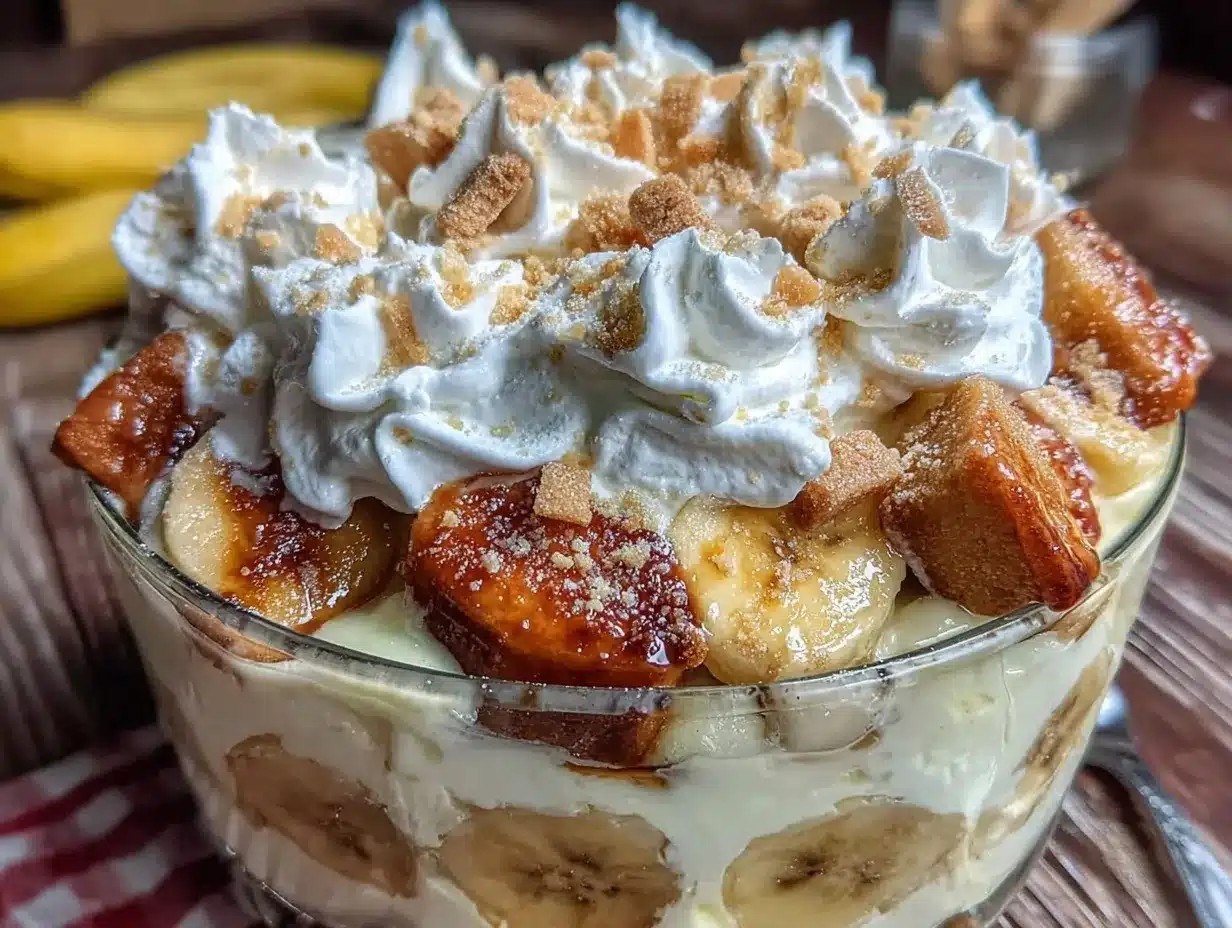
Classic Homemade Banana Pudding Recipe Easy Perfectly Layered Creamy Dessert
A creamy, perfectly layered banana pudding made from scratch with simple ingredients, offering a nostalgic yet richer dessert experience.
- Prep Time: 20 minutes
- Cook Time: 15 minutes
- Total Time: 4 hours 35 minutes
- Yield: 8 servings 1x
- Category: Dessert
- Cuisine: American
Ingredients
- 2 cups whole milk (480 ml)
- 1 cup heavy cream (240 ml)
- 3/4 cup granulated sugar (150 g)
- 1/3 cup cornstarch (40 g)
- 1/4 teaspoon salt
- 4 large egg yolks, room temperature
- 2 teaspoons pure vanilla extract
- 2 tablespoons unsalted butter, softened
- 4 ripe bananas, sliced
- Vanilla wafer cookies (about 55-60 wafers)
- 1 cup heavy cream (240 ml) for whipped cream topping
- 2 tablespoons powdered sugar
- 1 teaspoon vanilla extract
Instructions
- Prepare the pudding custard: In a medium saucepan, whisk together sugar, cornstarch, and salt. Gradually whisk in the milk and heavy cream until smooth. Heat the mixture over medium heat, stirring constantly, until it thickens and just starts to bubble (about 7-10 minutes).
- Temper the egg yolks: In a separate bowl, lightly beat the egg yolks. Slowly pour about 1 cup (240 ml) of the hot milk mixture into the yolks, whisking constantly to avoid scrambling. Then pour the yolk mixture back into the saucepan.
- Cook until thickened: Continue cooking the custard over medium heat, whisking constantly, for another 2-3 minutes until it becomes thick and coats the back of a spoon. Remove from heat immediately.
- Add butter and vanilla: Stir in the softened butter and vanilla extract until smooth and glossy. Set aside to cool for about 15 minutes, stirring occasionally to prevent a skin from forming.
- Whip the cream topping: In a chilled bowl, beat the heavy cream, powdered sugar, and vanilla extract until soft peaks form. Be careful not to overwhip.
- Assemble the pudding: In your baking dish, start with a layer of vanilla wafers, followed by a layer of banana slices, then spread a generous layer of pudding over the top. Repeat the layers—wafers, bananas, pudding—finishing with a final pudding layer.
- Add the whipped cream: Spread the whipped cream evenly over the top layer, swirling lightly with the back of a spoon for a rustic look.
- Chill: Cover the dish with plastic wrap and refrigerate for at least 4 hours, preferably overnight.
Notes
Slice bananas just before layering to prevent browning. Temper the eggs carefully to avoid curdling. Chill pudding for at least 4 hours or overnight for best texture. Use chilled bowls for whipping cream to help it hold shape. Butter adds richness and a glossy finish. For gluten-free, use gluten-free vanilla wafers. For dairy-free, substitute heavy cream with coconut milk and use vegan cookies.
Nutrition
- Serving Size: 1 cup (240 g)
- Calories: 320
- Fat: 15
- Carbohydrates: 40
- Protein: 5
Keywords: banana pudding, homemade banana pudding, classic dessert, layered pudding, creamy dessert, vanilla wafers, easy banana pudding