Love this? Save it for later!
Share the inspiration with your friends
It’s 5:15 PM on a Tuesday, and the rain is hammering against the kitchen window with enough force to shake the frames. I’m standing there in my pajamas, holding a can of white beans that looks suspiciously like it’s been in the pantry since last Christmas. The recipe called for fresh chicken breast, but you know how it is—life gets in the way, and suddenly you’re improvising with whatever is vaguely edible. I threw the frozen thighs straight into the pot, didn’t even bother thawing them, because who has time for that? Honestly, I was half-expecting the whole thing to turn into a rubbery disaster.
But then something weird happened. As the chicken cooked down in the broth with the beans, the garlic, and the cumin, the kitchen started to smell like a warm hug. The frozen meat actually broke down better than fresh would have, shredding into tiny, tender pieces that melted into the broth. The white beans? They didn’t just sit there; they started to disintegrate, thickening the liquid into this incredibly creamy, velvety base without needing a single drop of cream or heavy milk. It was pure accident. I was trying to make a standard chili, but what I got was this rich, comforting leftovers soup vibe but way better because it actually tastes like it took all day.
The first spoonful was hot enough to burn my tongue, but I didn’t care. I just sat at the counter, watching the rain, and realized I had accidentally created the perfect meal for days when you have zero energy but still want to eat something that feels like it was made with love. It’s not fancy. It doesn’t look pretty in a bowl if you’re being honest. But it hits the spot in a way that store-bought canned chili never could. I’ve made it dozens of times since that rainy Tuesday, and it’s become my go-to for when the world feels a little too loud and I just need something quiet and warm in my belly.
Why You’ll Love This Recipe
Let’s be real for a second. Most chili recipes feel like homework. You have to chop onions until your eyes water, brown the meat in batches, and then wait two hours for flavors to “meld.” This creamy freezer white bean chicken chili is different because it’s built for real life. It’s the kind of recipe that respects your time while still delivering that deep, soul-satisfying flavor you crave on a long day. I’ve tested this version over and over, tweaking the bean-to-chicken ratio until it felt just right, and the result is a dish that feels gourmet but cooks like a one-pot miracle.
Here is why this recipe is going to become a staple in your weekly rotation:
- Quick & Easy: You can have this on the table in under 45 minutes. Seriously. The beans do the heavy lifting, thickening the sauce naturally so you don’t need to simmer it for hours.
- Simple Ingredients: No fancy grocery trips needed. You likely already have chicken, beans, and spices in your kitchen. It’s pantry-friendly comfort food at its finest.
- Perfect for Meal Prep: This recipe freezes beautifully. Make a big batch on Sunday, and you have dinner sorted for three nights. It’s a lifesaver for busy parents.
- Crowd-Pleaser: Kids who usually pick out the onions? They won’t even notice them here. The creamy texture masks the veggies, making it a stealth health win.
- Unbelievably Delicious: The combination of smoky cumin, earthy beans, and tender chicken creates a flavor profile that is next-level comfort food without the guilt of heavy cream.
What makes this recipe stand out from the rest is the texture. By using white beans instead of red kidney beans, you get a milder, creamier base that blends seamlessly with the chicken broth. It’s not chunky in a rough way; it’s luxuriously smooth. I remember the first time I made this, I was skeptical about the lack of red sauce. But once that first spoonful hit my tongue, I closed my eyes. It’s comfort food reimagined—healthier, faster, but with the same soul-soothing satisfaction. It’s perfect for impressing guests without the stress, or just turning a simple Monday night into something memorable. Plus, it pairs wonderfully with other easy comfort meals, like cozy cold cucumber soup if you need a lighter contrast on a hot day.
What Ingredients You Will Need
This recipe uses simple, wholesome ingredients to deliver bold flavor and satisfying texture without the fuss. The beauty of a white bean chicken chili is that it relies on the quality of just a few key components rather than a long list of exotic spices. You don’t need to run to the store for anything special.
- Chicken Thighs (or Breasts): I prefer boneless, skinless chicken thighs because they stay juicier and shred easier when cooked from frozen. Use about 1.5 lbs. If you use breasts, keep an eye on them so they don’t dry out.
- White Beans: Cannellini or Great Northern beans are the best choice here. They have a buttery texture that breaks down to thicken the chili. Drain and rinse two 15-ounce cans thoroughly. I recommend Bush’s Best or Eden Organic for the cleanest taste.
- Chicken Broth: Low-sodium is key here so you can control the saltiness. Use 4 cups. A good quality broth makes a huge difference in the final depth of flavor.
- Onion: One medium yellow onion, diced. It’s the aromatic base that builds the foundation of the dish.
- Garlic: 4 cloves, minced. Don’t skimp on the garlic; it’s the backbone of the savory profile.
- Cumin: 1 tablespoon of ground cumin. This provides that classic earthy, warm chili flavor. Toasting it in the pan for a minute before adding liquid wakes it up.
- Chili Powder: 1 tablespoon. This adds depth and a mild heat. Make sure it’s a blend, not just pure chili powder, for better complexity.
- Dried Oregano: 1 teaspoon. A subtle herbal note that balances the richness.
- Salt and Black Pepper: To taste. Start with 1 teaspoon of salt and adjust at the end.
- Lime Juice: The juice of one lime. This is non-negotiable. The acid cuts through the creaminess and brightens the whole dish.
- Green Chiles: One 4-ounce can of diced green chiles (like Ro*Tel). Adds a nice kick and tang without overwhelming heat.
- Optional Toppings: Shredded cheese, sour cream, fresh cilantro, or crushed tortilla chips for crunch.
If you’re looking to swap things up, you can use leftover rotisserie chicken to save even more time. Just toss it in during the last 10 minutes of cooking. For a gluten-free option, this recipe is naturally safe, but always check your broth label. In the winter, you might add a diced carrot or celery stalk for extra veggies, but in the summer, keep it simple with just the beans and corn if you have it on hand.
Equipment Needed
You don’t need a fancy kitchen to make this chili. A large Dutch oven or a heavy-bottomed pot is ideal because it distributes heat evenly and prevents the beans from sticking to the bottom. I use my 6-quart enameled cast iron Dutch oven, but a standard stainless steel pot works just as well. If you’re short on space, a large stockpot or even a slow cooker will work, though the stovetop method gives you better control over the texture.
You’ll also need a wooden spoon or a silicone spatula for stirring. A good knife and cutting board are necessary for the onion and garlic. If you’re using fresh garlic, a garlic press can save time, but mincing it by hand gives you better control over the size of the pieces. For serving, ladles are essential, and having a few small bowls ready for toppings like cheese and cilantro makes the dining experience feel more organized. Keep your equipment clean as you go; this recipe moves fast, and you don’t want to be washing pots while the onions are burning.
Preparation Method
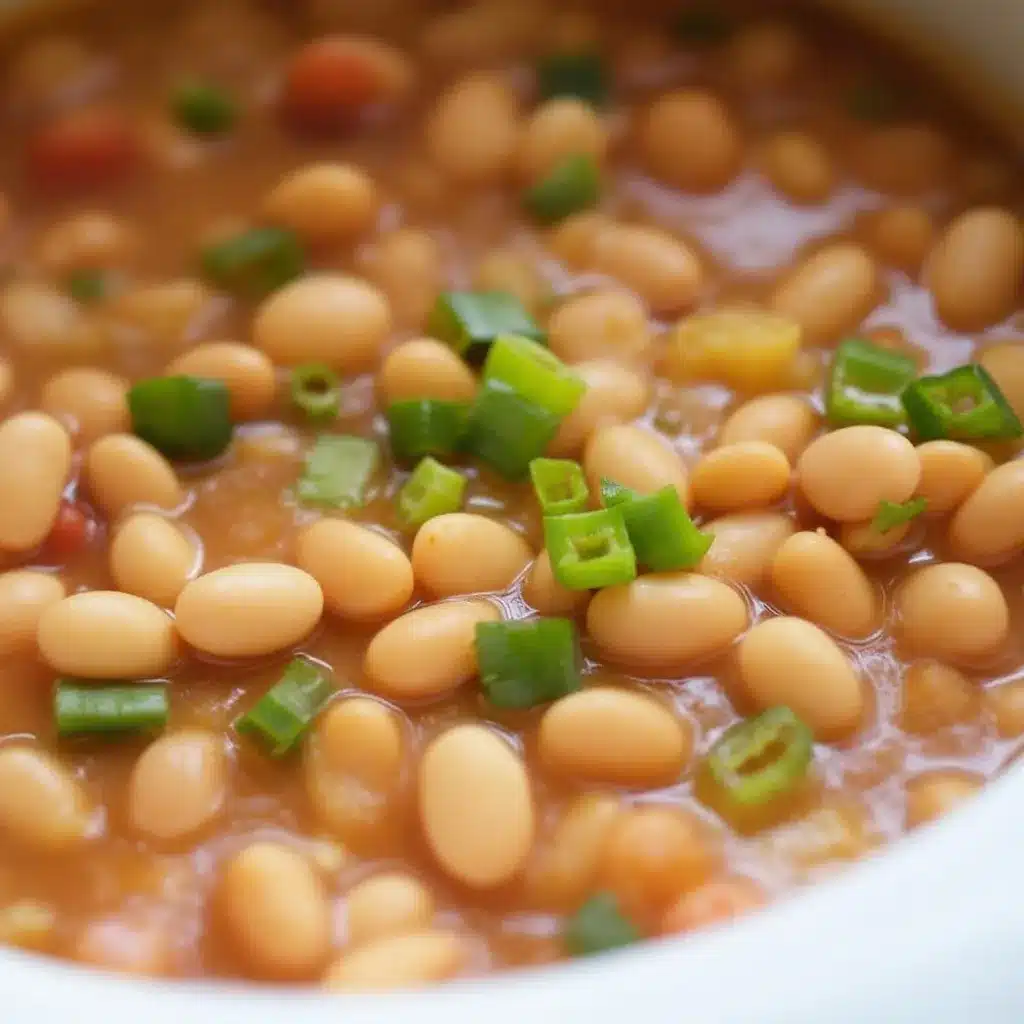
Follow these steps carefully to get that perfect creamy texture. The timing matters more than you might think.
- Sauté the Aromatics (5 minutes): Heat 2 tablespoons of olive oil in your large pot over medium heat. Add the diced onion and a pinch of salt. Cook until the onion is translucent and soft, about 4-5 minutes. Add the minced garlic and cook for just 30 seconds until fragrant. Be careful not to burn the garlic; it turns bitter instantly.
- Bloom the Spices (1 minute): Add the cumin, chili powder, and dried oregano to the pot. Stir constantly for about 60 seconds. This step “blooms” the spices, releasing their essential oils and intensifying the flavor. It’s a pro tip that makes a huge difference.
- Add the Chicken and Liquid (5 minutes): Pour in the chicken broth and scrape up any browned bits from the bottom of the pot with your wooden spoon. These bits are flavor gold. Add the chicken thighs (frozen or thawed) and the diced green chiles. Bring the mixture to a boil.
- Simmer the Chicken (20-25 minutes): Once boiling, reduce the heat to low. Cover the pot and let it simmer. If using frozen thighs, this takes about 25 minutes. If using fresh breasts or thighs, check for doneness around 15-20 minutes. The chicken is done when it reaches an internal temperature of 165°F (74°C) and shreds easily with a fork.
- Shred and Return Chicken (5 minutes): Remove the chicken from the pot and place it in a bowl. Use two forks to shred the meat into bite-sized pieces. Discard any skin or excess fat. Set the shredded chicken aside.
- Incorporate the Beans (10 minutes): This is the secret step for creaminess. Take about one-third of the drained white beans and mash them directly in the pot using a potato masher or the back of a spoon. You don’t need to make a paste, just break them up. Stir in the remaining whole beans and the shredded chicken. Let it simmer uncovered for 10 minutes. The mashed beans will release their starch, thickening the broth into a creamy sauce.
- Final Seasoning (2 minutes): Stir in the lime juice. Taste the chili. Add more salt or pepper if needed. If it’s too thick, add a splash more broth. If it’s too thin, let it simmer for another 5 minutes.
Why do I mash some of the beans?
Mashing a portion of the beans is the trick to getting that creamy texture without adding dairy. The starches from the beans dissolve into the broth, creating a velvety base that coats the chicken and other beans. It’s a simple technique that elevates the entire dish.
Cooking Tips & Techniques
Cooking is as much about intuition as it is about following instructions. Here are some tips I’ve learned along the way to ensure your chili turns out perfectly every time.
- Don’t Skip the Lime: I know it sounds like a weird addition, but the acid is crucial. It cuts through the richness of the beans and chicken, balancing the flavors. Without it, the chili can taste flat or heavy.
- Control the Heat: When simmering, keep the heat low. A rolling boil can make the beans tough and the chicken dry. You want a gentle bubble that slowly melds the flavors together.
- Watch the Salt: Broths vary in sodium content. Always taste before adding extra salt. It’s easier to add more later than to fix an overly salty pot.
- Shred, Don’t Dice: Shredded chicken absorbs flavor better than diced chunks. It also integrates more smoothly into the creamy sauce, making every spoonful consistent.
- Use a Heavy Pot: Thin pots can scorch the bottom, especially when the beans start to thicken the sauce. A heavy-bottomed pot ensures even cooking and prevents sticking.
I once tried making this in a thin stainless steel pan and ended up with a burnt bottom layer that ruined the whole batch. Lesson learned. Invest in a good pot, and your cooking will improve instantly. Also, if you’re short on time, you can use a hand blender to partially blend the soup directly in the pot, but mashing by hand gives you a nicer texture with some chunkiness.
Variations & Adaptations
One of the best things about this recipe is how adaptable it is. You can tweak it to fit your dietary needs or taste preferences without losing the core flavor.
- Spicy Version: If you like heat, add a diced jalapeño with the onions or use a hotter chili powder. You can also stir in a dash of cayenne pepper or hot sauce at the end.
- Vegetarian Swap: Simply omit the chicken and add an extra can of beans or some diced sweet potatoes. Use vegetable broth instead of chicken broth. The flavor profile remains satisfying and hearty.
- Gluten-Free: This recipe is naturally gluten-free, but always double-check your broth and spice blends to ensure they haven’t been processed in facilities with wheat.
- Dairy-Free: Skip the cheese and sour cream toppings. The chili is creamy on its own thanks to the beans, so it doesn’t need dairy to feel rich.
- Slow Cooker Method: Sauté the onions and spices in a pan first, then transfer everything to a slow cooker. Cook on low for 6-8 hours or high for 3-4 hours. Mash the beans in the last 30 minutes.
I’ve also tried adding a can of corn to this recipe, which adds a nice sweet crunch. It’s not traditional, but it works surprisingly well. If you have leftover roasted vegetables, like bell peppers or zucchini, you can stir those in at the end for extra color and nutrients. The possibilities are endless, making this a versatile base for whatever ingredients you have on hand.
Serving & Storage Suggestions
This chili is best served hot, straight from the pot. Ladle it into deep bowls and top with your favorite fixings. Shredded cheddar or Monterey Jack cheese adds a nice melt. A dollop of sour cream or Greek yogurt adds tang and richness. Fresh cilantro provides a pop of color and freshness. Crushed tortilla chips or tortilla strips add a necessary crunch that contrasts with the creamy texture.
For storage, let the chili cool completely before transferring it to airtight containers. It will keep in the refrigerator for up to 4 days. In the freezer, it lasts for up to 3 months. Label the containers with the date so you know how old it is. When reheating, add a splash of water or broth if the chili has thickened too much in the fridge. Microwave it in 1-minute intervals, stirring in between, until hot.
The flavors actually improve after sitting for a day or two, as the spices have more time to meld. It’s the perfect make-ahead meal for busy weeks. Pair it with a simple green salad or some crusty bread to soak up the sauce. It’s also a great companion to other easy meals, like Italian dressing chicken if you want a lighter main dish on a different night.
Nutritional Information & Benefits
This creamy white bean chicken chili is not just comforting; it’s also packed with nutrients. Chicken thighs provide high-quality protein, which is essential for muscle repair and satiety. White beans are an excellent source of fiber, aiding in digestion and keeping you full longer. They also provide complex carbohydrates for sustained energy.
The dish is naturally gluten-free and can be made dairy-free. It’s lower in fat than many traditional chili recipes because it relies on beans for creaminess instead of heavy cream or cheese. However, the calorie count can vary depending on the toppings you choose. A typical serving contains approximately 350-400 calories, depending on the size of the portion and added toppings.
From a wellness perspective, this recipe is a great way to incorporate more plant-based proteins into your diet. The combination of chicken and beans offers a complete amino acid profile. Plus, the spices like cumin and oregano have anti-inflammatory properties. It’s a meal that feels indulgent but supports your overall health goals.
Conclusion
This creamy freezer white bean chicken chili is more than just a recipe; it’s a solution for those days when you need comfort without the effort. It’s simple, nutritious, and incredibly satisfying. I hope you try it and find it becomes a favorite in your kitchen too. Feel free to customize it with your favorite toppings or spices. If you make this, please leave a comment and let me know how it turned out. I’d love to hear your variations and tips. Share it with friends who need a easy meal idea. Thanks for reading, and happy cooking!
FAQs
Can I use canned chicken instead of fresh?
Yes, you can use canned chicken. Add it during the last 10 minutes of cooking just to heat it through. This saves even more time and is great for emergency meals.
Why is my chili too thin?
If your chili is too thin, simmer it uncovered for 10-15 minutes to let the liquid reduce. Alternatively, mash more of the beans to release more starch and thicken the sauce.
Can I freeze this chili?
Absolutely. This recipe freezes beautifully for up to 3 months. Make sure to cool it completely before freezing to maintain quality.
What cheese goes best with this chili?
Cheddar, Monterey Jack, or a Mexican blend cheese work well. For a lighter option, try feta or goat cheese for a tangy twist.
Is this recipe spicy?
It’s mildly spiced. The chili powder and green chiles add a gentle warmth. If you want more heat, add jalapeños or hot sauce to taste.
Pin This Recipe!

Creamy Freezer White Bean Chicken Chili

A quick, one-pot comfort food made with frozen chicken thighs and white beans that naturally thicken into a creamy sauce without dairy. Perfect for busy weeknights and meal prep.
- Prep Time: 10 minutes
- Cook Time: 35 minutes
- Total Time: 45 minutes
- Yield: 6 servings 1x
- Category: Main Course
- Cuisine: American
Ingredients
- 1.5 lbs boneless, skinless chicken thighs (frozen or thawed)
- 2 (15-ounce) cans white beans (Cannellini or Great Northern), drained and rinsed
- 4 cups low-sodium chicken broth
- 1 medium yellow onion, diced
- 4 cloves garlic, minced
- 1 tablespoon ground cumin
- 1 tablespoon chili powder blend
- 1 teaspoon dried oregano
- 1 teaspoon salt (plus more to taste)
- Black pepper to taste
- Juice of 1 lime
- 1 (4-ounce) can diced green chiles
- 2 tablespoons olive oil
Instructions
- Heat olive oil in a large Dutch oven or heavy-bottomed pot over medium heat. Add diced onion and a pinch of salt; cook until translucent (4-5 minutes).
- Add minced garlic and cook for 30 seconds until fragrant, being careful not to burn.
- Add cumin, chili powder, and oregano; stir constantly for 1 minute to bloom the spices.
- Pour in chicken broth, scraping up browned bits from the bottom. Add chicken thighs and green chiles. Bring to a boil.
- Reduce heat to low, cover, and simmer until chicken is cooked through (20-25 minutes for frozen thighs, 15-20 for fresh). Internal temperature should reach 165°F.
- Remove chicken from pot and shred using two forks. Discard skin/fat and set aside.
- Mash about one-third of the white beans directly in the pot with a potato masher or spoon.
- Stir in remaining whole beans and shredded chicken. Simmer uncovered for 10 minutes to thicken.
- Stir in lime juice. Taste and adjust seasoning with salt and pepper. Add more broth if too thick, or simmer longer if too thin.
Notes
Mashing a portion of the beans creates a creamy texture without dairy. If using fresh chicken breasts, check for doneness earlier to prevent drying out. This recipe freezes well for up to 3 months. For a spicy version, add jalapeños or cayenne pepper.
Nutrition
- Serving Size: 1 bowl
- Calories: 375
- Sugar: 4
- Sodium: 600
- Fat: 12
- Saturated Fat: 3
- Carbohydrates: 35
- Fiber: 10
- Protein: 30
Keywords: chicken chili, white bean chili, creamy chili, one pot meal, freezer friendly, gluten free, healthy comfort food, easy dinner