Love this? Save it for later!
Share the inspiration with your friends
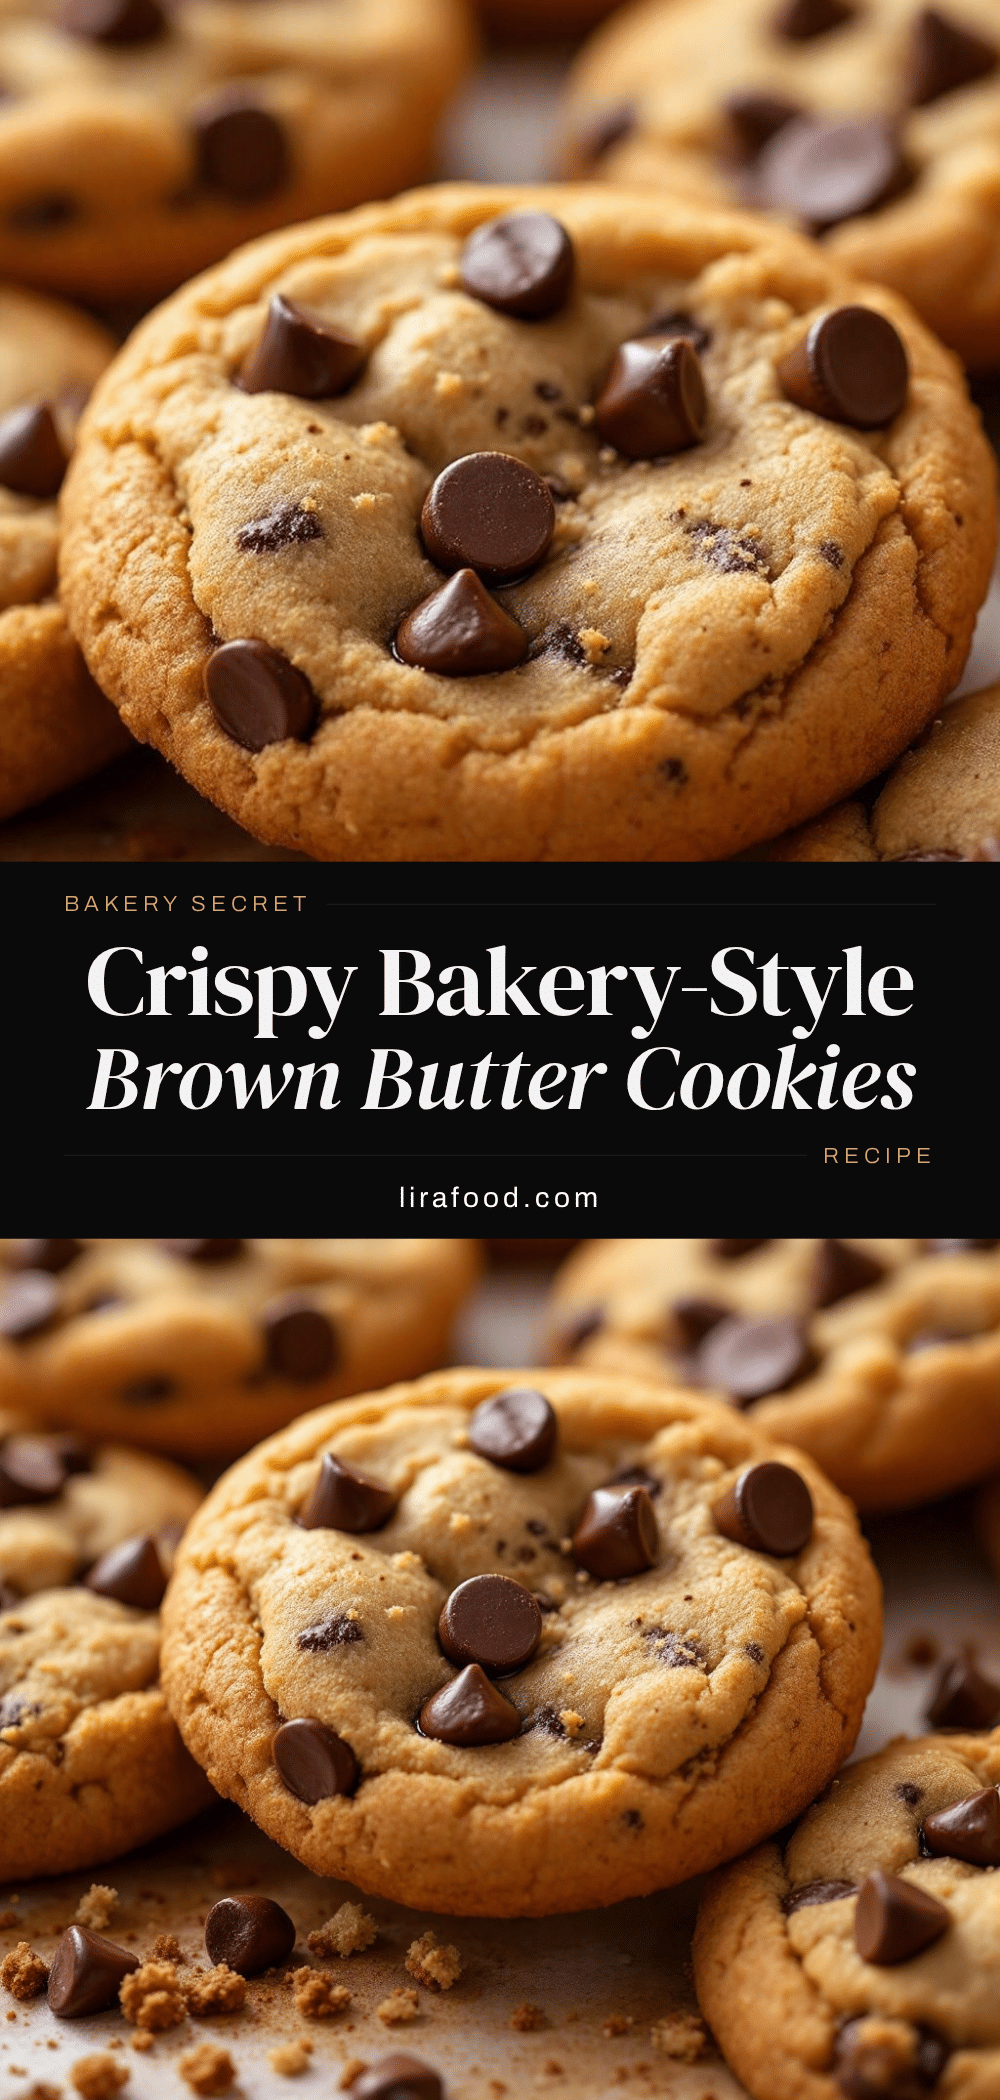
The edge is dark amber, almost mahogany, crumbling into fine, sandy dust when you pull it apart. That specific shade of toasted gold is what I made this for — everything else is secondary. You know how some cookies look perfect in photos but taste like cardboard when you actually bite them? I’m talking about those sad, pale discs that spread too thin and leave you with nothing but a greasy finger. Not these. These are different. They hold their shape but surrender the second your teeth meet the center. Honestly, it’s a weird kind of magic how browning the butter changes the entire soul of a chocolate chip cookie. It stops being just sweet and crunchy and becomes something deeper, nuttier, more complex.
I remember the first time I tried this method. I was standing over the stove, watching the milk solids in the pan turn from yellow to brown, smelling that distinct scent of hazelnuts and toasted cream filling the kitchen. My husband walked in, sniffed the air, and asked if we were making popcorn. No, no popcorn. We were making the best cookies he’d ever had. The contrast between that crisp, caramelized rim and the soft, chewy, molasses-hued center is addictive. It’s not just a cookie; it’s a texture lesson. And let’s face it, we all love a good texture lesson.
People always ask me why I bother with brown butter when regular butter works fine. It’s simple: regular butter is just butter. Brown butter is butter that has been pushed, tested, and transformed. It adds a layer of sophistication that feels like you spent hours in the bakery, but really, it just takes a few extra minutes of watching a pot. These Crispy Bakery-Style Brown Butter Chocolate Chip Cookies are the result of that effort. They are wide, thin, and incredibly fragrant. The chocolate chips melt into pools of sweetness that contrast with the salty, nutty dough. It’s a balance that hits every single note on your palate.
I’ve made these dozens of times, tweaking the flour ratio, adjusting the bake time, trying to freeze the dough balls just right. But the core remains the same: that beautiful, crisp edge. It’s the detail that matters. When you pull the tray out of the oven, that visual cue tells you everything you need to know. They aren’t done until they look slightly too dark, slightly too fragile. And then, when you let them cool on the hot pan, they firm up into perfection. It’s a quiet realization that sometimes the best things require a little bit of burn. A little bit of risk. Just like life, but with more chocolate.
Why You’ll Love This Recipe
There is a reason this recipe has become the gold standard in my kitchen. It isn’t just about following instructions; it’s about understanding the chemistry of flavor. When you brown the butter, you are essentially cooking the milk solids, which creates those nutty, toffee-like flavors that you just can’t get from raw butter. I’ve tested this method with everything from European-style butters to standard supermarket brands, and the result is always superior. It’s not just a variation; it’s an upgrade. This isn’t your average chocolate chip cookie. It’s the version that makes you close your eyes after the first bite and actually stop talking. It’s comfort food reimagined—crispier, nuttier, but with the same soul-soothing satisfaction you crave on a rainy Tuesday.
- Quick & Easy: Despite the fancy technique, these come together in under 30 minutes of active time. You brown the butter while it cools, mix the dough, and bake. It’s perfect for busy weeknights or last-minute cravings when you need something sweet but don’t want to order takeout.
- Simple Ingredients: No fancy grocery trips needed. You likely already have brown butter, flour, sugar, and chocolate chips in your kitchen. The magic is in the technique, not in sourcing rare items.
- Perfect for Gifting: These cookies travel well. Their sturdy, crisp edges hold up in tins, making them great for holiday gifts or office treats. They look professional and taste homemade.
- Crowd-Pleaser: Always gets rave reviews from kids and adults alike. The nutty flavor is subtle enough for picky eaters but complex enough for serious foodies. Even people who claim they “don’t like cookies” usually ask for seconds.
- Unbelievably Delicious: The texture and flavor combo is next-level. The contrast between the crunchy, caramelized edges and the soft, chewy center creates a mouthfeel that is truly next-level comfort food.
What makes this recipe different from the rest is the emphasis on the brown butter step. Most people skip it because it sounds intimidating, but it’s just melting butter until it smells good. Once you try these, you’ll never go back to pale, bland cookies. It’s the kind of recipe that makes you feel like a pro baker, even if you’re just standing in your pajamas. It’s perfect for impressing guests without stress, or turning a simple meal into something memorable.
What Ingredients You Will Need
This recipe uses simple, wholesome ingredients to deliver bold flavor and satisfying texture without the fuss. The key here is quality. Since there are so few ingredients, each one plays a huge role. I recommend using unsalted butter so you can control the saltiness, and high-quality chocolate chips for those melty pockets of goodness. The brown butter process concentrates the flavor, so you don’t need to add excessive spices or extracts. Just pure, rich, nutty dough.
For the Dough
- Unsalted butter (1 cup / 226g): This is the star. You will brown this until it smells like toasted hazelnuts. Use a light-colored pan so you can see the color change clearly.
- Granulated sugar (1 cup / 200g): Provides the crisp, caramelized edge. Don’t substitute with brown sugar here if you want that specific crispy texture.
- Light brown sugar (1 cup / 220g): Adds moisture and chewiness to the center. Molasses content is key for that bakery-style softness.
- Large eggs (2): Room temperature eggs mix better. They provide structure and richness.
- Vanilla extract (2 tsp): Use pure vanilla, not imitation. It complements the nutty butter perfectly.
- All-purpose flour (2 ¼ cups / 280g): Spoon and level this carefully. Too much flour makes them cakey; too little makes them spread into puddles.
- Baking soda (1 tsp): Essential for browning and spread. It reacts with the acids in the brown sugar and butter.
- Salt (1 tsp): Balances the sweetness. I use kosher salt, but table salt works too (reduce amount slightly).
For the Mix-ins

- Chocolate chips (2 cups / 340g): I prefer a mix of semi-sweet and milk chocolate chips. Semi-sweet for bitterness, milk chocolate for sweetness. Brands like Ghirardelli or Guittard work well.
- Flaky sea salt (optional): Sprinkle on top after baking for that gourmet bakery finish.
If you need a gluten-free option, you can swap the all-purpose flour for a 1:1 gluten-free baking blend, though the texture might be slightly more crumbly. For a dairy-free version, use a high-quality vegan butter stick, but note that the browning process might look different since vegan butters have different water contents.
Equipment Needed
You don’t need a lot of fancy gadgets for this, but having the right tools makes a huge difference. A heavy-bottomed saucepan is crucial for browning the butter evenly. If you use a thin pan, the butter will burn before you can smell the nuts. I use a stainless steel saucepan because it’s easy to clean and I can see the milk solids clearly.
For mixing, a large bowl is fine, but an electric mixer helps incorporate the air into the butter and sugar, which aids in that crisp edge. However, overmixing can develop gluten and make them tough, so be gentle. A silicone spatula is your best friend here for scraping down the sides.
Baking sheets are important. Use light-colored aluminum sheets. Dark sheets absorb more heat and can cause the bottoms to burn. If you only have dark pans, lower the oven temperature by 25 degrees. Parchment paper is a must for easy cleanup and even baking. I never bake these directly on the metal. A cooling rack is also helpful if you want to cool them completely, though they are best eaten warm from the pan.
For portioning, a cookie scoop ensures uniform size. This is key for even baking. If you don’t have one, a tablespoon works, but try to keep them consistent. A kitchen scale is great for precision, especially if you want to make sure each cookie weighs the same, but eyeballing it works for most home bakers.
Preparation Method
- Brown the Butter (10 minutes): Start by melting the butter in a light-colored saucepan over medium heat. Stir constantly. The butter will foam up, then settle. Watch closely. The milk solids will sink to the bottom and turn brown. It will smell nutty and fragrant. This takes about 5-7 minutes. Immediately pour the brown butter into a heat-proof bowl to stop the cooking process. Let it cool for 10-15 minutes until it’s warm but not hot.
- Mix Dry Ingredients (2 minutes): In a medium bowl, whisk together the flour, baking soda, and salt. Set aside. This ensures the leavening agent is evenly distributed.
- Cream Sugars and Butter (3 minutes): In a large bowl, combine the cooled brown butter, granulated sugar, and brown sugar. Whisk vigorously for about 2 minutes until the mixture looks glossy and slightly lighter in color. This step is crucial for creating that crispy edge.
- Add Wet Ingredients (1 minute): Add the eggs one at a time, whisking well after each addition. Add the vanilla extract and mix until combined. The mixture might look slightly curdled; that’s okay.
- Combine Dough (2 minutes): Gradually add the dry ingredients to the wet ingredients. Mix on low speed or by hand until just combined. Do not overmix. Fold in the chocolate chips with a spatula.
- Chill the Dough (Optional but Recommended, 30 mins – 24 hours): For best flavor and texture, chill the dough. This prevents over-spread and allows the flavors to meld. If you’re in a hurry, you can skip this, but the cookies will spread more.
- Preheat Oven and Prepare Sheets (2 minutes): Preheat your oven to 375°F (190°C). Line baking sheets with parchment paper.
- Scoop and Bake (12-14 minutes): Scoop dough balls onto the prepared sheets, spacing them about 2 inches apart. Bake for 12-14 minutes. The edges should be golden brown and crisp, while the centers look slightly underdone. They will firm up as they cool.
- Cool and Serve: Let the cookies cool on the baking sheet for 5 minutes before transferring to a wire rack. This allows them to set. Enjoy warm with a glass of cold milk.
Cooking Tips & Techniques
Browning butter can be scary if you’re not used to it, but it’s actually very forgiving if you pay attention. The biggest mistake people make is walking away. Once the butter starts foaming, it changes color quickly. If you smell popcorn, you’re close. If you smell burnt popcorn, you’ve gone too far. In that case, start over. Trust your nose more than your eyes.
Another common issue is overmixing the dough. Once you add the flour, mix only until no dry streaks remain. Overmixing develops gluten, which leads to tough, cakey cookies instead of crisp and chewy ones. Be gentle. Also, make sure your eggs are at room temperature. Cold eggs can seize the butter, making the dough grainy. If your butter is too cold when you mix, the dough will be hard to stir. If it’s too hot, it will melt the sugar and change the texture. Aim for warm, not hot.
Timing is everything. Ovens vary, so keep an eye on your cookies around the 10-minute mark. You want them golden brown at the edges. If they are pale, they won’t have that crispy texture. If they are dark brown all over, they will be crunchy throughout, like a biscotti. The goal is a crisp edge and a soft center. Also, don’t skip the resting time on the baking sheet. The cookies continue to cook from residual heat, and this step helps them set without breaking.
If you want extra crispiness, bake one sheet at a time in the center of the oven. This ensures even heat distribution. If you must bake two sheets, rotate them halfway through. And finally, don’t be afraid to slightly underbake them. They will firm up as they cool. It’s better to take them out a minute early than a minute late.
Variations & Adaptations
While the classic chocolate chip version is my favorite, there are many ways to twist this recipe. You can add ½ cup of chopped walnuts or pecans for extra crunch. The nutty flavor of the brown butter pairs beautifully with toasted nuts. If you like a bit of heat, add a pinch of cayenne pepper or use spicy dark chocolate chips.
For a different flavor profile, try swapping half the chocolate chips for white chocolate chips and adding dried cranberries. This creates a cranberry-white chocolate cookie that is tart and sweet. You can also add a tablespoon of orange zest to the dough for a citrusy twist. The orange pairs well with the nutty butter.
If you want to make these vegan, use a vegan butter stick that browns well (some brands don’t brown the same way) and a flax egg instead of regular eggs. The texture might be slightly different, but it will still be delicious. For gluten-free, use a 1:1 gluten-free flour blend. Add a teaspoon of xanthan gum if your blend doesn’t include it, to help with structure.
I also like to add a sprinkle of flaky sea salt on top right after they come out of the oven. The salt melts slightly and creates beautiful crystals. It enhances the chocolate flavor and adds a nice contrast to the sweet dough. You can also drizzle melted caramel over the top for a decadent treat. These variations keep the recipe fresh and exciting.
Serving & Storage Suggestions
These cookies are best served warm, straight from the oven or microwaved for 10 seconds. They pair wonderfully with a cold glass of milk, a hot cup of coffee, or even a scoop of vanilla ice cream. The contrast of temperatures is amazing. For presentation, stack them in a tin with parchment paper between layers. They make beautiful gifts when tied with a ribbon.
Store leftover cookies in an airtight container at room temperature for up to 5 days. If you live in a humid climate, add a slice of bread to the container to keep them soft. For longer storage, freeze the unbaked dough balls. Place them on a baking sheet, freeze until solid, then transfer to a freezer bag. Bake directly from frozen, adding 1-2 minutes to the bake time.
You can also freeze the baked cookies. Let them cool completely, then store in an airtight container in the freezer for up to 3 months. Reheat in the oven at 350°F for 5 minutes to restore crispiness. The flavors actually develop over the first day, so they often taste better on day two. Don’t rush to eat them all immediately!
Nutritional Information & Benefits
These cookies are rich and indulgent, so they are best enjoyed in moderation. Each cookie contains approximately 250-300 calories, depending on size. They are a good source of energy from the carbohydrates and fats. The brown butter adds a depth of flavor that makes you feel satisfied with less.
Chocolate chips contain antioxidants, especially if you use dark chocolate. Butter provides fat-soluble vitamins like A, D, E, and K. While not a health food, this recipe uses real ingredients without artificial preservatives. For those with dietary restrictions, note that this recipe contains gluten, dairy, and eggs. Always check labels for allergens.
I believe in enjoying food fully. These cookies are a treat, a moment of pleasure. They aren’t meant to be guilt-inducing. When you make them with care and quality ingredients, you’re treating yourself to something special. That’s a benefit in itself. Mental wellness is part of nutrition too.
Conclusion
Making Crispy Bakery-Style Brown Butter Chocolate Chip Cookies is more than just baking; it’s a ritual. It’s about slowing down, watching the butter change color, and smelling that incredible nutty aroma fill your home. It’s about the patience to let the dough chill and the reward of that first crisp bite. These cookies are worth the extra effort because they deliver a flavor and texture that store-bought cookies simply cannot match.
I encourage you to try this recipe and make it your own. Add your favorite mix-ins, adjust the sweetness, or experiment with different chocolates. Baking is a creative process, and these cookies are a blank canvas for your creativity. I’d love to hear how they turn out for you. Share your results in the comments below, or tag me in your photos. I love seeing your creations!
Happy baking! Remember, the best cookies are the ones shared with friends and family. Enjoy every crunchy, chewy bite.
FAQs
Can I use salted butter instead of unsalted?
Yes, but you should reduce the added salt in the recipe by half. Salted butters vary in salt content, so taste the dough before adding more salt if needed. Unsalted butter gives you more control over the final flavor.
Why did my cookies spread too much?
This usually happens if the butter was too warm when mixed with the sugar, or if the dough wasn’t chilled. Make sure your brown butter cools down before mixing. Chilling the dough for at least 30 minutes helps firm up the butter and prevents over-spread.
Can I freeze the brown butter?
Yes, you can freeze brown butter. Pour it into an ice cube tray or a freezer-safe container. It will keep for up to 3 months. Just thaw it in the refrigerator before using. Note that the flavor might be slightly less intense after freezing.
How do I get crispy edges?
The key is using more granulated sugar than brown sugar, baking at a slightly higher temperature (375°F), and baking until the edges are golden brown. Also, using a light-colored baking sheet helps prevent the bottoms from burning while the edges crisp up.
Can I make these cookies gluten-free?
Yes, substitute the all-purpose flour with a 1:1 gluten-free baking blend. Make sure the blend contains xanthan gum, or add ½ teaspoon to help with structure. The texture may be slightly more crumbly but still delicious.
Pin This Recipe!
Crispy Bakery-Style Brown Butter Chocolate Chip Cookies

These cookies feature dark amber, crispy edges and a soft, chewy center, achieved by browning the butter to create a deep, nutty flavor profile that rivals professional bakery cookies.
- Prep Time: 20 minutes
- Cook Time: 14 minutes
- Total Time: 34 minutes
- Yield: Approximately 24 cookies 1x
- Category: Dessert
- Cuisine: American
Ingredients
- 1 cup (226g) unsalted butter
- 1 cup (200g) granulated sugar
- 1 cup (220g) light brown sugar
- 2 large eggs, room temperature
- 2 tsp pure vanilla extract
- 2 ¼ cups (280g) all-purpose flour
- 1 tsp baking soda
- 1 tsp salt
- 2 cups (340g) chocolate chips (mix of semi-sweet and milk)
- Flaky sea salt (optional, for topping)
Instructions
- Brown the butter: Melt butter in a light-colored saucepan over medium heat, stirring constantly until milk solids turn brown and it smells nutty (5-7 minutes). Pour into a heat-proof bowl and cool for 10-15 minutes.
- Mix dry ingredients: Whisk together flour, baking soda, and salt in a medium bowl.
- Cream sugars and butter: In a large bowl, whisk cooled brown butter, granulated sugar, and brown sugar vigorously for 2 minutes until glossy.
- Add wet ingredients: Add eggs one at a time, whisking well after each. Add vanilla and mix until combined.
- Combine dough: Gradually add dry ingredients to wet ingredients, mixing until just combined. Fold in chocolate chips.
- Chill dough (Optional): Refrigerate dough for 30 minutes to 24 hours to prevent over-spreading and meld flavors.
- Preheat oven: Preheat oven to 375°F (190°C). Line baking sheets with parchment paper.
- Scoop and bake: Scoop dough balls onto sheets, spacing 2 inches apart. Bake for 12-14 minutes until edges are golden brown and centers look slightly underdone.
- Cool: Let cookies cool on the baking sheet for 5 minutes before transferring to a wire rack.
Notes
Brown butter can burn quickly, so watch it closely. Do not overmix the dough once flour is added to avoid tough cookies. For extra crispiness, bake one sheet at a time. Cookies continue to cook on the hot pan, so remove them when they look slightly underdone in the center.
Nutrition
- Serving Size: 1 cookie
- Calories: 275
- Sugar: 26
- Sodium: 180
- Fat: 14
- Saturated Fat: 8
- Carbohydrates: 38
- Fiber: 1
- Protein: 3
Keywords: brown butter cookies, chocolate chip cookies, bakery style cookies, crispy cookies, chewy cookies, homemade cookies, baking from scratch