Love this? Save it for later!
Share the inspiration with your friends
The plate was scraped clean before the last bite of coffee had cooled. That’s usually when the real test begins. You finish baking, you let them cool on the wire rack, and you think, “Okay, these are mine now.” But then someone walks by. They smell the brown butter. They see the golden edges. And suddenly, you’re negotiating with family members for a single cookie.
I made these crispy brown butter pumpkin spice chocolate chip cookies last Tuesday. I told everyone to wait until they were completely cool. I even set the timer. It didn’t matter. By the time the first batch hit the counter, my husband had already taken two. My daughter asked if I could make another batch for her lunchbox the next day. Honestly, it’s kind of insulting how quickly they disappear.
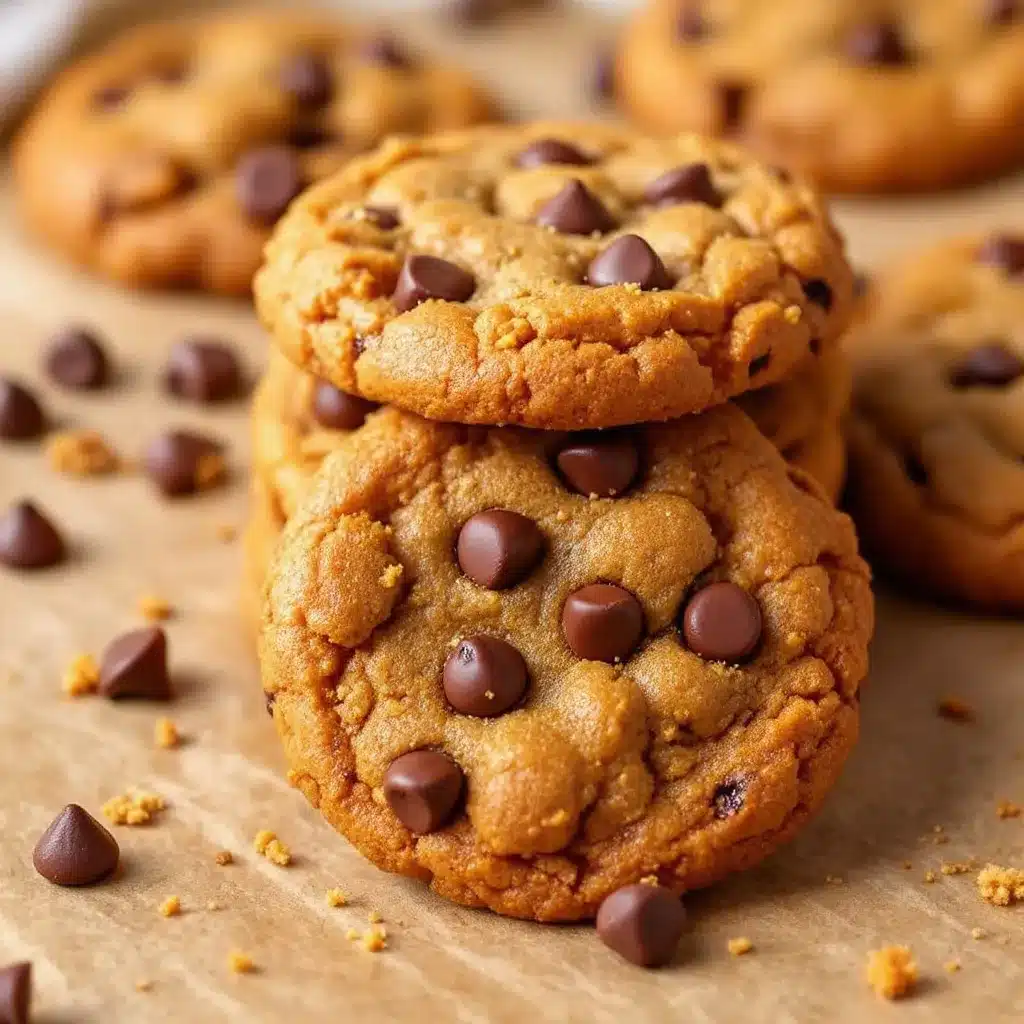
It’s funny how a simple change in technique can turn a good cookie into a legendary one. Most pumpkin cookies are soft, cakey, and sometimes a little dense. But this recipe? It’s different. The edges are shatteringly crisp, while the center stays chewy but not gummy. The brown butter adds this nutty, caramel-like depth that makes the pumpkin spice taste less like a holiday garnish and more like the star of the show.
I’ve tried making pumpkin cookies for years. Some were too wet. Some tasted like canned squash. This version finally clicked. It’s the ratio of browned butter to pumpkin puree that makes it work. It’s the extra egg yolk that gives it that rich mouthfeel. And it’s the chocolate chips that provide the necessary sweet contrast to the warm spices.
Now, every time I make these, there’s a sense of quiet confidence. I know what’s coming. I know the smell that will fill the house. I know the requests that will follow. It’s not just about feeding people. It’s about that moment of recognition. The moment they take a bite and their eyes close. The moment they ask, “What is that in there?” And you smile, because you know exactly what it is.
Why You’ll Love This Recipe
There is a specific kind of magic that happens when you brown your butter before mixing it into cookie dough. It’s not just a trend; it’s a fundamental shift in flavor architecture. If you’ve ever wondered why some cookies taste “more” than others, this is usually the secret. The Maillard reaction in the butter creates complex, nutty notes that plain melted butter just can’t achieve. It adds a layer of sophistication that feels intentional, even though the process is surprisingly simple.
- Quick & Easy Prep: While browning butter takes a few minutes of attention, the overall prep time is minimal. You likely have most of these ingredients in your pantry right now. It comes together in under 30 minutes before baking, making it perfect for those sudden cravings or when you need a last-minute dessert.
- Simple Ingredients: No fancy grocery trips needed. You just need butter, sugar, an egg, pumpkin puree, flour, spices, and chocolate chips. It’s wholesome, honest cooking. You don’t need specialty flours or hard-to-find extracts to get great results here.
- Perfect for Autumn Entertaining: Whether you are hosting a small dinner party, bringing a dish to a neighbor, or just wanting a cozy weekend treat, these cookies fit the bill. They pair beautifully with a hot drink, much like the cozy warmth found in a warm vanilla milk sleep drink, creating a complete sensory experience.
- Crowd-Pleaser Status: These get rave reviews from everyone. Kids love the chocolate chips. Adults love the nuanced spice profile. Even people who claim they “don’t like pumpkin” usually change their minds after one bite. They are approachable yet elevated.
- Unbelievably Delicious Texture: The texture is the real winner here. Crispy edges that snap, followed by a chewy, soft center. It’s not dry. It’s not cakey. It’s the perfect balance of crunch and chew that keeps you coming back for more.
What makes this recipe stand out from the rest is the technique. Many pumpkin cookie recipes fail because they add too much liquid, resulting in a flat, greasy mess. By browning the butter and using a specific ratio of pumpkin puree, we control the moisture. We also use a touch more brown sugar to encourage spreading and caramelization. It’s a tested, reliable method that yields consistent results every single time. It’s not just another pumpkin recipe; it’s the best version of one.
What Ingredients You Will Need
This recipe relies on high-quality, simple ingredients to deliver bold flavor and satisfying texture without the fuss. The key to success lies in the balance between the rich, nutty brown butter and the earthy sweetness of the pumpkin. You don’t need anything exotic, but you do need to pay attention to the quality of your spices and chocolate. Here is what you’ll need to get started.
For the Dough Base
- Unsalted Butter: 1 cup (2 sticks / 226g), cold. You will brown this in a saucepan. Use a high-quality butter if you can; the flavor will be prominent. Salted butter can be used, but you must reduce the added salt in the recipe.
- Granulated Sugar: 1 cup (200g). This helps create the crispy edges. Do not substitute with brown sugar alone, as you need that crystalline structure for crunch.
- Brown Sugar: 1 cup (220g), packed. This adds moisture and a deep molasses flavor that complements the pumpkin perfectly.
- Egg: 1 large egg, room temperature. This provides structure.
- Egg Yolk: 1 large egg yolk, room temperature. This adds richness and helps keep the center chewy rather than cakey.
- Pumpkin Puree: ½ cup (120g). Crucial Note: Make sure you use 100% pure pumpkin puree, not pumpkin pie filling. Pie filling has added sugar and spices that will throw off the balance. Look for brands like Libby’s or make your own roasted pumpkin puree for the best texture.
- Vanilla Extract: 1 tablespoon. Use pure vanilla, not imitation, for the best flavor depth.
For the Dry Ingredients
- All-Purpose Flour: 2 ¼ cups (280g). Spoon and level this measure for accuracy. Too much flour will make the cookies dry and tough.
- Baking Soda: 1 teaspoon. This helps the cookies spread and brown.
- Baking Powder: ½ teaspoon. A little bit of lift to ensure they aren’t too dense.
- Sea Salt: 1 teaspoon. Essential for balancing the sweetness.
- Pumpkin Pie Spice: 2 teaspoons. This is a blend of cinnamon, ginger, nutmeg, and cloves. If you don’t have it, you can make your own by mixing 1 tsp cinnamon, ½ tsp ginger, ¼ tsp nutmeg, and ¼ tsp cloves.
- Ground Cinnamon: 1 teaspoon. For an extra boost of warm spice flavor.
For the Mix-Ins
- Chocolate Chips: 1 ½ cups (250g). Semi-sweet or dark chocolate chips work best to cut through the sweetness of the pumpkin. You can also use chopped chocolate bars for a more rustic look.
- Optional: ½ cup chopped pecans or walnuts for added crunch and nuttiness.
When selecting your ingredients, consistency is key. If you live in a humid climate, you might need to add an extra tablespoon of flour, as humidity can affect how flour absorbs moisture. Conversely, if you are in a dry climate, keep a close eye on the dough consistency. It should be firm but pliable, not sticky.
Equipment Needed
You don’t need a fancy kitchen to make these cookies. Just a few basic tools will get you to the finish line. The most important piece of equipment is a heavy-bottomed saucepan for browning the butter. A stainless steel or enameled cast iron pan works best because you can see the color change clearly. Avoid non-stick pans if possible, as they can sometimes hide the browning process until it’s too late.
You’ll also need a large mixing bowl. A glass or ceramic bowl is nice because it doesn’t retain heat, which is helpful when you’re adding hot brown butter. An electric mixer or a sturdy whisk is useful for creaming the butter and sugars, though a strong arm and a wooden spoon works fine too.
For baking, use heavy-gauge rimmed baking sheets. Thin, flimsy pans can cause the bottoms of the cookies to burn before the tops are done. If you don’t have heavy sheets, double them up. Parchment paper is non-negotiable for easy cleanup and even baking. Silicone baking mats are a great alternative if you use them often.
A cooling rack is essential. Letting the cookies cool on the hot pan will continue the cooking process, making them dry. Transfer them to a wire rack after about 5 minutes to stop the cooking and let the structure set. A cookie scoop ensures uniform size, which leads to even baking, but a spoon works in a pinch.
Preparation Method
Getting these cookies right is all about timing and temperature. Follow these steps closely for the best results. The process is straightforward, but each step has a purpose.
Step 1: Brown the Butter (10 minutes)
Melt the butter in a light-colored saucepan over medium heat. Stir constantly with a heat-resistant spatula. You will hear the butter sizzle and pop. This is the water evaporating. Keep stirring. The butter will foam up, then settle down. Look for small brown bits at the bottom of the pan and smell that nutty, toasted aroma. As soon as you smell it, remove the pan from the heat. Pour the butter into a heat-proof bowl to stop the cooking. Let it cool for about 15-20 minutes until it is lukewarm but still liquid. If it’s too hot, it will melt the sugar and make the dough greasy. If it’s too cold, it might solidify in clumps.
Step 2: Mix the Wet Ingredients (5 minutes)
In a large bowl, combine the cooled brown butter, granulated sugar, and brown sugar. Whisk vigorously for about 2 minutes. You want the mixture to look smooth and slightly glossy. This helps dissolve the sugar, which contributes to the crispy edges. Add the egg, egg yolk, pumpkin puree, and vanilla extract. Whisk again until fully combined. The mixture might look slightly curdled at first; that’s okay. It will come together in the next step.
Step 3: Combine Dry Ingredients (2 minutes)
In a separate medium bowl, whisk together the flour, baking soda, baking powder, sea salt, pumpkin pie spice, and ground cinnamon. Make sure there are no lumps of spice. This ensures even distribution of flavor throughout the dough.
Step 4: Form the Dough (3 minutes)
Gradually add the dry ingredients to the wet ingredients. Mix on low speed or use a wooden spoon until just combined. Do not overmix. Overmixing develops gluten, which leads to tough cookies. Once the flour streaks disappear, fold in the chocolate chips (and nuts, if using). The dough should be thick and stiff. If it feels too sticky, chill it in the refrigerator for 30 minutes. This step is crucial for preventing the cookies from spreading too thin.
Step 5: Scoop and Chill (30+ minutes)
Preheat your oven to 350°F (175°C). Line two baking sheets with parchment paper. Scoop the dough into balls, about 2 tablespoons each. Place them on the baking sheets, leaving about 2 inches of space between them. For extra crisp edges, you can flatten the balls slightly with the palm of your hand. Chill the scooped dough balls in the fridge for at least 30 minutes. This helps them hold their shape and develops deeper flavor.
Step 6: Bake (12-14 minutes)
Bake one sheet at a time in the center of the oven. Bake for 12-14 minutes. The edges should be golden brown and crisp. The centers might still look slightly soft and puffy. This is intentional. They will firm up as they cool. Do not overbake, or they will lose their chewiness.
Step 7: Cool (10 minutes)
Let the cookies sit on the hot baking sheet for 5 minutes. This allows them to set. Then, transfer them to a wire rack to cool completely. This is the hardest part, but patience pays off. The texture improves significantly once they are fully cool.
Cooking Tips & Techniques
Browning butter is an art form, but it’s a learnable one. The biggest mistake people make is walking away. Butter can go from perfect to burnt in seconds. If you smell something acrid, you’ve gone too far. You can salvage it slightly by straining out the burnt bits, but it’s better to start over. The goal is a rich, amber color with a nutty scent, not a black, bitter mess.
Another common error is using warm pumpkin puree. If your puree is cold, it can seize the brown butter, creating lumps. That’s why letting the butter cool to lukewarm is so important. It should feel like a warm baby’s bottle, not hot tea. This temperature match ensures a smooth, emulsified dough.
Chilling the dough is not optional. It’s the secret to thick, chewy cookies with crisp edges. When you put cold dough into a hot oven, the fat takes longer to melt, giving the structure time to set before the cookie spreads too much. If you skip this step, you’ll get thin, crispy crackers instead of soft-centered cookies. I usually scoop the dough the night before and bake them in the morning. It makes weeknight baking so much easier.
Watch your oven temperature. Ovens vary wildly. If your cookies are spreading too fast, your oven might be too hot. Use an oven thermometer to check. If the bottoms are burning, try using a double layer of parchment paper or switching to a lighter-colored baking sheet. Dark sheets absorb more heat and can cause uneven baking.
Finally, don’t be afraid to taste the dough. If you’re worried about raw egg, use pasteurized eggs. Taste it before baking. It should taste like a sweet, spiced caramel. If it needs more spice, add a pinch more pumpkin pie spice. If it needs more salt, add a pinch more sea salt. Adjusting to your taste buds now will save you from bland cookies later.
Variations & Adaptations
One of the best things about this recipe is how flexible it is. Once you master the base, you can tweak it to suit your preferences or dietary needs. Here are a few variations that work well.
Gluten-Free Option: You can substitute the all-purpose flour with a 1:1 gluten-free flour blend. Look for a blend that includes xanthan gum, or add ½ teaspoon of xanthan gum to the dry ingredients. The texture will be slightly more delicate, but the flavor remains excellent.
Double Chocolate: For chocolate lovers, add 2 tablespoons of unsweetened cocoa powder to the dry ingredients. This deepens the chocolate flavor and pairs beautifully with the pumpkin spices. You can also use chocolate chunks instead of chips for a more intense experience.
White Chocolate and Pecan: Swap the semi-sweet chocolate chips for white chocolate chips and add ½ cup of toasted pecans. This version is sweeter and nuttier, reminiscent of a pumpkin pie in cookie form. The crunch of the pecans adds a nice texture contrast.
Maple Glazed: After the cookies have cooled completely, drizzle them with a simple glaze made from powdered sugar, maple syrup, and a splash of milk. This adds a sweet, sticky finish that enhances the autumn theme. It’s great for gift-giving or special occasions.
Vegan Adaptation: Use vegan butter (stick form, not tub) and a flax egg (1 tablespoon ground flaxseed mixed with 3 tablespoons water, rested for 5 minutes) instead of the egg and yolk. Use dairy-free chocolate chips. The results are surprisingly close to the original, though slightly less rich due to the lack of dairy fat.
I personally love adding a pinch of cayenne pepper to the dough. It adds a tiny heat that complements the chocolate and spices in a subtle way. It’s not spicy enough to overpower, but it adds a layer of complexity that keeps you guessing. It’s a fun twist for those who like a little kick.
Serving & Storage Suggestions
These cookies are best served at room temperature. Warm cookies can be soft and messy, losing that desirable crisp edge. If you want to serve them warm, microwave a single cookie for 10-15 seconds. Just be aware that the center will be very soft.
They pair wonderfully with a hot cup of coffee or tea. The bitterness of the coffee cuts through the sweetness, while the warmth of the drink complements the spices. A glass of cold milk is also a classic choice. If you’re serving them at a gathering, arrange them on a platter with a few fresh mint leaves or a dusting of powdered sugar for a pretty presentation.
For storage, keep the cookies in an airtight container at room temperature for up to 5 days. Place a slice of bread in the container with the cookies. The bread will dry out, but it will keep the cookies soft and chewy. If you prefer them crisp, leave the bread out.
You can freeze the dough balls for up to 3 months. Scoop them onto a baking sheet, freeze until solid, then transfer to a freezer bag. When you’re ready to bake, just add 1-2 minutes to the baking time. You don’t need to thaw them first. This is perfect for having homemade cookies ready to go on demand.
The flavors actually deepen after a day or two. The spices meld together, and the brown butter flavor becomes more pronounced. If you have leftovers, let them sit overnight. You’ll notice a difference in taste the next day. It’s worth the wait.
Nutritional Information & Benefits
While these are definitely a treat, they do offer some nutritional benefits. Pumpkin puree is rich in vitamin A, potassium, and fiber. It adds moisture without adding fat, which is a nice bonus compared to recipes that use oil or extra butter. The chocolate chips provide antioxidants, especially if you use dark chocolate.
Each cookie contains approximately 180-200 calories, depending on size and chocolate amount. They are a good source of carbohydrates for energy. However, they are high in sugar and saturated fat, so enjoy them in moderation. They are not a health food, but they are a mindful indulgence.
For those with dietary restrictions, remember to check labels on chocolate chips and spices for potential allergens. Some pumpkin pie spice blends may contain anti-caking agents. Always read the fine print if you have severe allergies. Overall, these cookies are a balanced way to enjoy seasonal flavors without feeling overly guilty, provided you stick to a reasonable portion size.
Conclusion
These crispy brown butter pumpkin spice chocolate chip cookies are more than just a dessert. They are a celebration of autumn flavors, brought together by a simple technique that makes a huge difference. The nutty brown butter, the warm spices, and the melty chocolate create a cookie that is both comforting and exciting. They are easy to make, impressive to serve, and nearly impossible to resist.
I encourage you to try this recipe and make it your own. Add nuts, swap chocolates, or adjust the spices to suit your taste. Baking is personal, and this recipe is a framework for your creativity. Once you try it, you’ll understand why I keep making them. They have a way of bringing people together, around the kitchen table or the dinner party.
Please let me know how they turn out for you. Leave a comment below with your thoughts, or share a photo if you post them on social media. I love seeing your adaptations and successes. And if you have friends who love pumpkin desserts, share this recipe with them. They will thank you later.
Happy baking! May your kitchen smell amazing and your plates always be empty.
Frequently Asked Questions
Can I use pumpkin pie filling instead of pure pumpkin puree?
No, you should not use pumpkin pie filling. Pie filling contains added sugars, thickeners, and spices that will throw off the balance of the recipe. It will make the dough too wet and overly sweet. Always use 100% pure pumpkin puree for the best texture and flavor.
Why are my cookies spreading too much?
This usually happens if the dough is too warm or if the butter was not cooled properly. Make sure your brown butter is lukewarm, not hot, when you mix it. Also, ensure you chill the dough balls for at least 30 minutes before baking. If your oven is too hot, the cookies may spread before they set. Use an oven thermometer to verify your temperature.
Can I freeze the baked cookies?
Yes, you can freeze baked cookies for up to 2 months. Let them cool completely, then store them in an airtight container or freezer bag. Thaw them at room temperature when you’re ready to eat. They may lose a little crispness, but they will still taste great.
What is the best way to brown butter?
Melt butter in a light-colored saucepan over medium heat. Stir constantly with a spatula. Watch for the foam to subside and look for brown bits at the bottom. Smell for a nutty aroma. As soon as you see the color change and smell the nuts, remove from heat. It happens quickly, so don’t walk away.
Can I make these cookies gluten-free?
Yes, substitute the all-purpose flour with a 1:1 gluten-free flour blend. Ensure the blend contains xanthan gum, or add ½ teaspoon yourself. The cookies will be slightly more delicate but will still be delicious. Check your chocolate chips and spices to ensure they are certified gluten-free if needed.
Pin This Recipe!
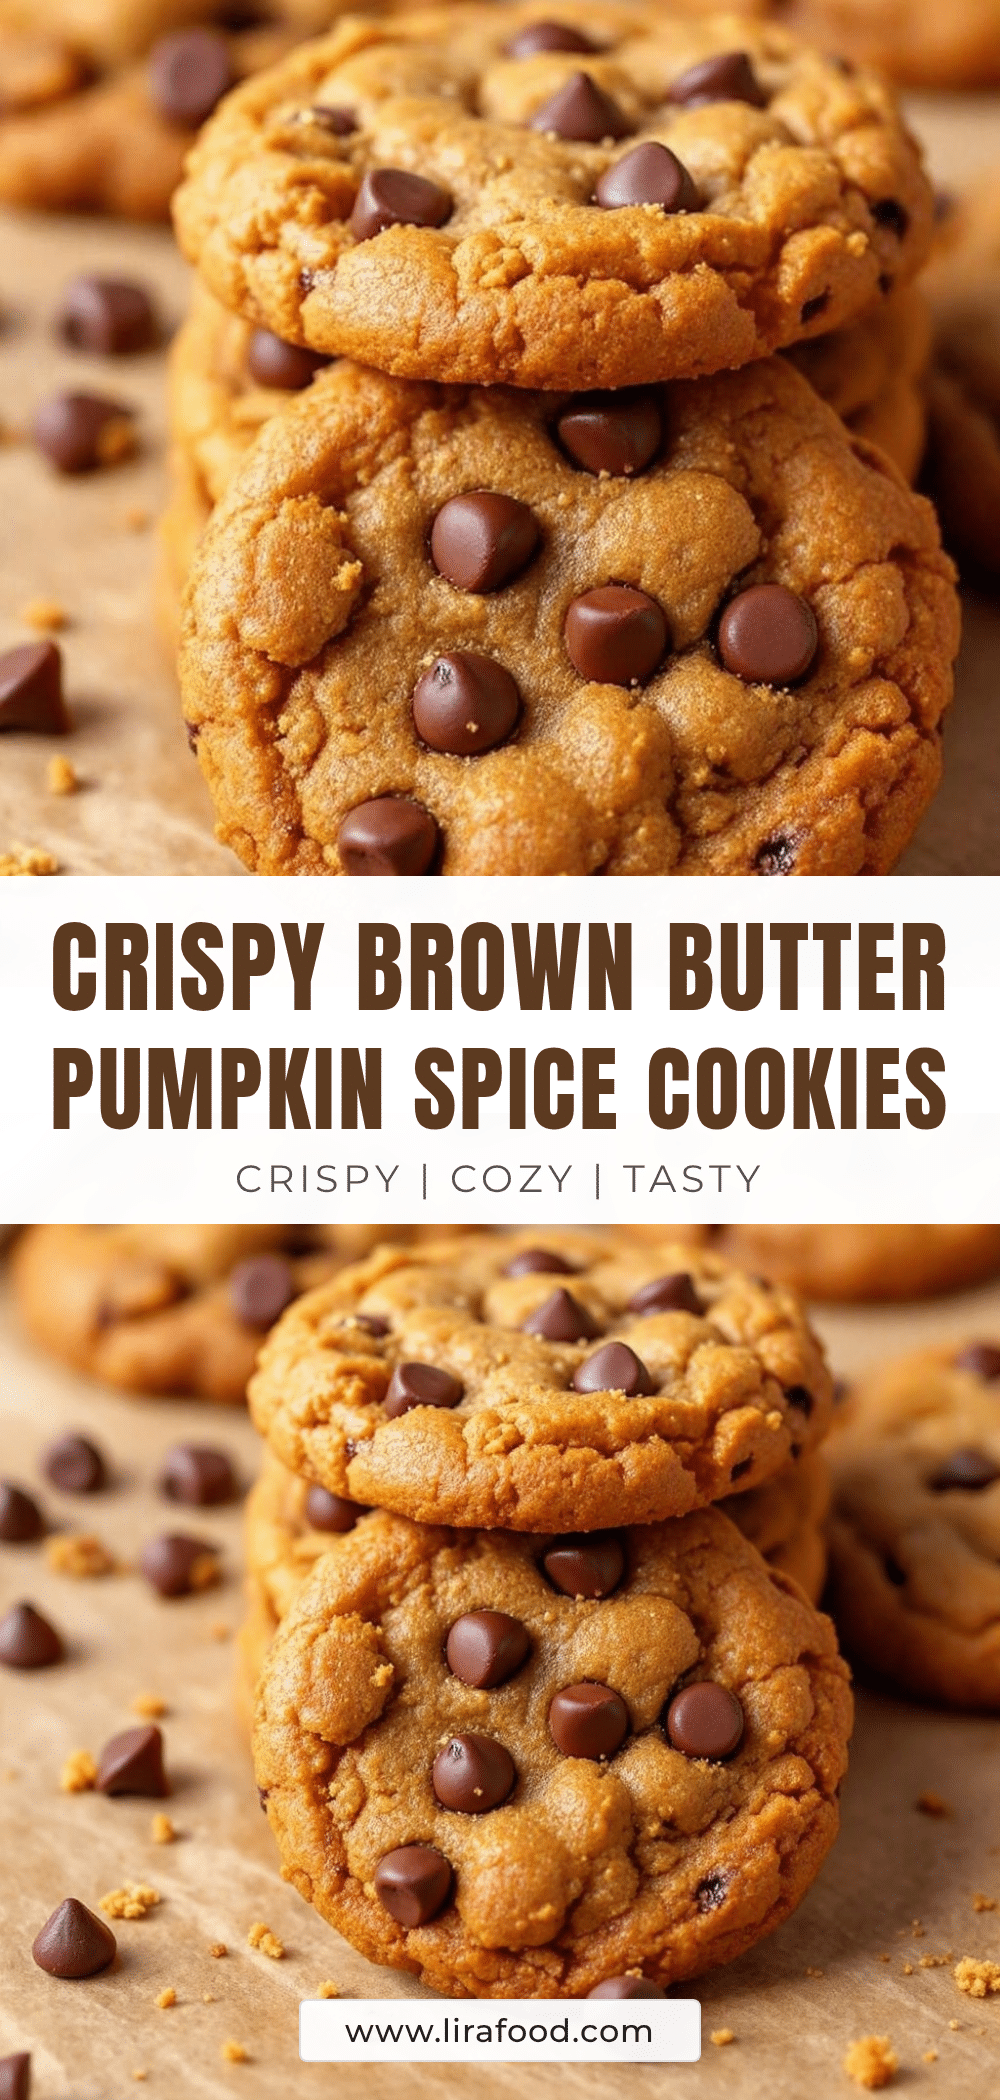
Crispy Brown Butter Pumpkin Spice Chocolate Chip Cookies
These cookies feature shatteringly crisp edges and a chewy center, elevated by the nutty depth of browned butter and warm pumpkin spices. A reliable, crowd-pleasing autumn treat that is easy to make and impossible to resist.
- Prep Time: 30 minutes
- Cook Time: 14 minutes
- Total Time: 45 minutes
- Yield: Approximately 24 cookies 1x
- Category: Dessert
- Cuisine: American
Ingredients
- 1 cup (2 sticks / 226g) unsalted butter, cold
- 1 cup (200g) granulated sugar
- 1 cup (220g) packed brown sugar
- 1 large egg, room temperature
- 1 large egg yolk, room temperature
- ½ cup (120g) 100% pure pumpkin puree
- 1 tablespoon vanilla extract
- 2 ¼ cups (280g) all-purpose flour
- 1 teaspoon baking soda
- ½ teaspoon baking powder
- 1 teaspoon sea salt
- 2 teaspoons pumpkin pie spice
- 1 teaspoon ground cinnamon
- 1 ½ cups (250g) semi-sweet or dark chocolate chips
- Optional: ½ cup chopped pecans or walnuts
Instructions
- Brown the butter: Melt butter in a light-colored saucepan over medium heat, stirring constantly until it foams, settles, and develops a nutty aroma with brown bits at the bottom. Pour into a heat-proof bowl and cool to lukewarm (15-20 minutes).
- Mix wet ingredients: In a large bowl, whisk the cooled brown butter, granulated sugar, and brown sugar vigorously for 2 minutes until smooth. Add the egg, egg yolk, pumpkin puree, and vanilla extract; whisk until combined.
- Combine dry ingredients: In a separate medium bowl, whisk together the flour, baking soda, baking powder, sea salt, pumpkin pie spice, and ground cinnamon.
- Form the dough: Gradually add dry ingredients to wet ingredients, mixing on low speed or with a wooden spoon until just combined. Fold in chocolate chips (and nuts if using). Do not overmix. If dough is sticky, chill for 30 minutes.
- Scoop and chill: Preheat oven to 350°F (175°C). Line baking sheets with parchment paper. Scoop dough into 2-tablespoon balls, leaving 2 inches of space. Flatten slightly if desired. Chill dough balls in the fridge for at least 30 minutes.
- Bake: Bake one sheet at a time in the center of the oven for 12-14 minutes, until edges are golden brown and crisp but centers look soft.
- Cool: Let cookies sit on the hot baking sheet for 5 minutes to set, then transfer to a wire rack to cool completely.
Notes
Ensure you use 100% pure pumpkin puree, not pumpkin pie filling. Chilling the dough is crucial for preventing excessive spreading and ensuring a chewy center. Brown butter must be cooled to lukewarm before mixing to avoid melting the sugar or seizing the dough. For gluten-free options, use a 1:1 gluten-free flour blend with xanthan gum.
Nutrition
- Serving Size: 1 cookie
- Calories: 190
- Sugar: 18
- Sodium: 180
- Fat: 9
- Saturated Fat: 5
- Carbohydrates: 26
- Fiber: 1
- Protein: 2
Keywords: pumpkin cookies, brown butter cookies, chocolate chip cookies, autumn baking, fall desserts, crispy cookies, pumpkin spice


