Love this? Save it for later!
Share the inspiration with your friends
The dent in the side of the pumpkin can, honestly, should have been my first clue. It was a Tuesday, the kind of damp, gray Tuesday where the whole world feels like it’s wearing a wet sweater. I was supposed to be making something impressive for a small get-together the next day. Something layered. Something that required, you know, effort. But my can opener, a cheap thing I’d had since college, chose that exact moment to give up. It just spun, making a sad, grinding noise against the metal, refusing to bite.
I stood there, holding the dented can, defeated by a piece of hardware that cost less than a sandwich. The yellow cake mix was already on the counter, a box of pure, unadulterated convenience. I’d bought it for a different recipe, a more complicated one, but that plan had gone out the window. The butter was softening. The whole scene felt like a culinary dead end. Then I remembered a friend’s mom, a woman who could make a feast out of nothing. She used to make something she called “dump cake.” Not elegant, not fussy. Just… dumped. And perfect.
That’s how this easy pumpkin dump cake was born in my kitchen. It wasn’t a eureka moment of genius. It was a surrender. I surrendered to the dented can, the broken opener, and the sheer laziness of the moment. And you know what? That surrender produced the most comforting, soul-warming fall dessert I’d had in years. It’s the kind of recipe that reminds you that sometimes, the best things come from letting go of the plan. This is that recipe. The one you make when you need a win.
Why You’ll Love This Recipe
Let’s be real—there are a million pumpkin desserts out there. But this one is different. This is the one you make when you want the deep, cozy flavor of fall without spending your whole afternoon in the kitchen. It’s a back-pocket recipe for the win.
- 3 Ingredients, No Joke: You probably have two of them in your pantry right now. A can of pumpkin, a box of yellow cake mix, and some butter. That’s it for the base. It doesn’t get simpler than that.
- No Mixing Bowls (Almost): You mix the pumpkin and the spices right in the baking dish. Less cleanup means more time to enjoy that first bite.
- Magical Texture: The cake mix on top bakes into this incredible, buttery, crunchy crust while the pumpkin underneath stays soft, creamy, and almost pudding-like. It’s a study in contrasts.
- Perfect for Any Crowd: I brought this to a potluck once, and a guy who swore he “didn’t like pumpkin things” went back for thirds. It’s a crowd-pleaser that converts the skeptics.
- Foolproof: You can’t overmix it. You can’t really mess it up. It’s the dessert equivalent of a deep breath. If you’ve ever had a kitchen fail, this is the recipe to restore your baking confidence.
This isn’t just another version of a fall classic. It’s the version you’ll remember. The one you’ll make for Thanksgiving when you’re already juggling six other dishes. The one that makes you look like a hero with almost zero effort. It’s comfort food in its purest, most honest form.
What Ingredients You Will Need
This recipe is the definition of pantry-friendly. It uses simple, wholesome ingredients to deliver that deep, spiced fall flavor without any fuss. The magic is in how they layer together.
- 1 (15-ounce) can of pure pumpkin puree: Not pumpkin pie filling. We’re talking 100% pure pumpkin. The pie filling has sugar and spices already added, which will throw off the whole balance. I usually grab Libby’s, but any store brand works fine. Just make sure it’s pure.
- 1 (13.25-ounce) box of yellow cake mix: This is the secret weapon. The dry mix creates that incredible, crumbly topping. Don’t make the batter according to the box directions. You use it dry. I’ve used Duncan Hines and Betty Crocker, and both are great. The classic yellow cake mix has a mild vanilla flavor that pairs perfectly with the pumpkin.
- 1/2 cup (1 stick) of unsalted butter, melted: This is what turns the dry cake mix into a golden, buttery crust. It seeps down through the mix and creates pockets of crispy, caramelized goodness. Use real butter, not margarine. The flavor is non-negotiable here.
- 1 teaspoon of pumpkin pie spice: This is my “cheater” move for guaranteed flavor. It’s a blend of cinnamon, nutmeg, ginger, and cloves. If you don’t have it, you can use 1/2 teaspoon cinnamon, 1/4 teaspoon nutmeg, and a pinch of ground ginger and cloves.
- 1/2 teaspoon of ground cinnamon: I always add a little extra cinnamon because I love it. It gives the pumpkin a deeper, warmer note that feels like a hug in a bowl.
- 1/4 teaspoon of salt: Don’t skip this. A pinch of salt in the pumpkin puree balances the sweetness and makes all the flavors pop. It’s the same principle as salted caramel.
- Optional toppings: Chopped pecans or walnuts for crunch, a sprinkle of coarse sugar for a shatteringly crisp top, or a drizzle of caramel sauce after it bakes. I’m partial to a handful of pecans.
That’s it. Seven ingredients, and three of them are the stars. The rest are just there to make the stars shine brighter.
Equipment Needed
One of the best things about this easy pumpkin dump cake is the minimal cleanup. You don’t need a stand mixer or a food processor. Just a few basic tools.
- A 9×13-inch baking dish: A glass or ceramic dish works best. Metal works too, but glass helps you see the bottom crust forming.
- A small saucepan or microwave-safe bowl: For melting the butter. I always use the microwave because I’m impatient.
- A fork or a whisk: Just to stir the pumpkin and spices together. A fork works perfectly.
- A rubber spatula: To spread the pumpkin puree evenly in the dish.
- A sharp knife or kitchen shears: To open the cake mix box. Not a glamorous tool, but essential.
That’s the whole list. No fancy gadgets. No expensive stand mixers. Just the basics. If you have a 9×13 pan and a fork, you’re in business.
Preparation Method
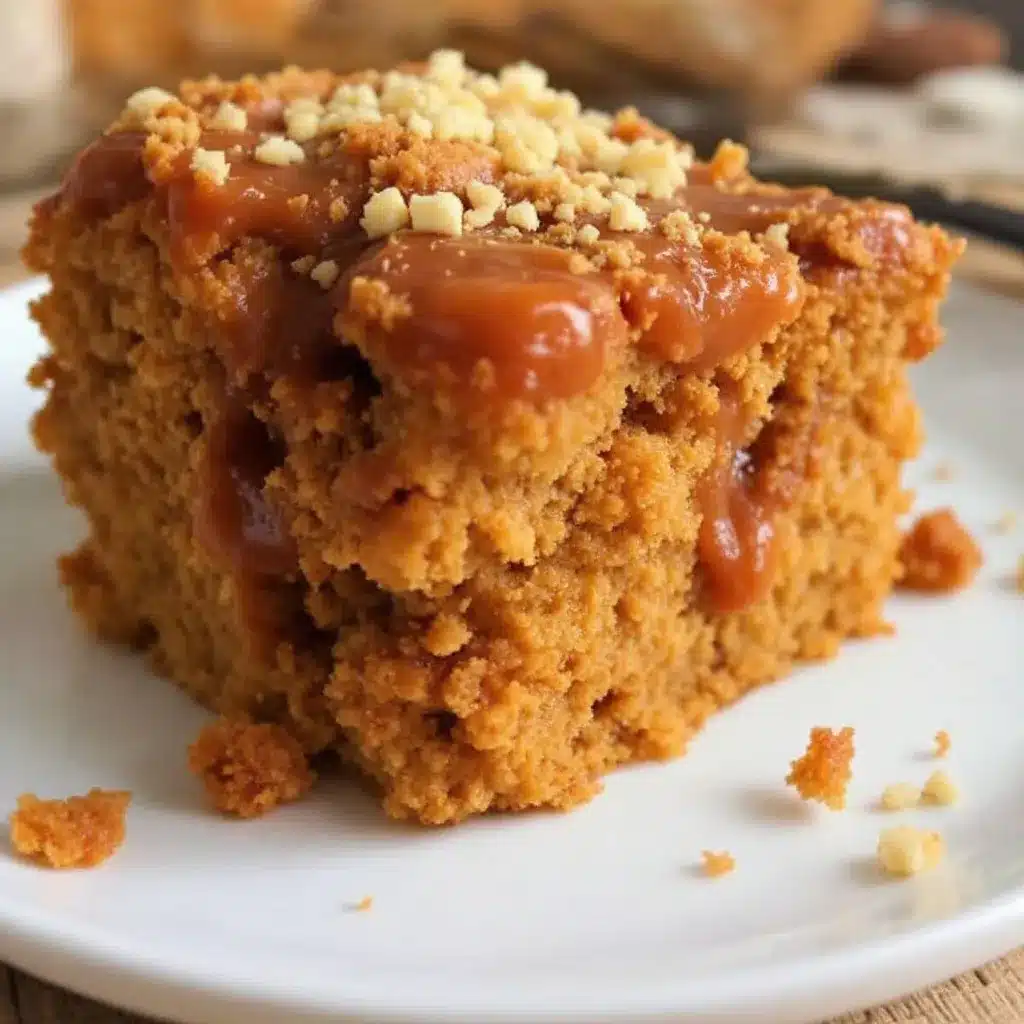
This is the easiest part. I mean it. If you can open a can and sprinkle a powder, you can make this. Here’s the step-by-step, broken down so there’s no confusion.
- Preheat that oven. Set your oven to 350°F (175°C). Let it get nice and hot while you do the next steps. This is important for getting that crispy top.
- Grease the pan. Spray your 9×13-inch baking dish with non-stick cooking spray, or rub a little butter all over the bottom and sides. This ensures the pumpkin layer doesn’t stick. Trust me, you want an easy release.
- Mix the pumpkin base. Dump the entire can of pumpkin puree into the greased baking dish. Add the pumpkin pie spice, the extra cinnamon, and the salt. Use your fork to stir it all together right in the dish until it’s smooth and well-combined. It will look a little thick, like a very smooth paste. Spread it into an even layer with your spatula.
- Sprinkle the dry cake mix. Open the box of yellow cake mix. Sprinkle the entire dry mix evenly over the pumpkin layer. Don’t stir it. Don’t mix it in. Just let it fall like a blanket of snow. It should cover every bit of the orange pumpkin underneath.
- Add the butter. Melt your stick of butter. The easiest way is in a microwave-safe bowl in 30-second bursts until it’s fully liquid. Now, drizzle the melted butter as evenly as you can over the top of the dry cake mix. Try to cover the whole surface. Some spots will get more butter than others, and that’s okay. Those spots will be extra crispy.
- Add the nuts (optional). If you’re using pecans or walnuts, sprinkle them over the top now. The butter will help them stick and get toasty in the oven.
- Bake until golden and bubbly. Place the dish in the preheated oven. Bake for 40 to 45 minutes. You’ll know it’s done when the top is a deep, beautiful golden brown and the edges are bubbly. The pumpkin layer underneath will be thick and set. If you jiggle the pan, the center should be mostly firm, with just a slight wobble.
- Cool before serving. This is the hardest part. Let the cake cool in the pan on a wire rack for at least 15 to 20 minutes. It needs this time to set up properly. If you scoop it out while it’s piping hot, it will be a soupy mess. Patience, friend. It’s worth it.
One note: The top will look a little uneven, with some dry patches and some buttery, crispy spots. That’s the beauty of a dump cake. It’s supposed to look rustic. It’s supposed to look like you just threw it together (because you did).
Cooking Tips & Techniques
I’ve made this recipe about a dozen times now, and I’ve learned a few things the hard way. Here’s my hard-earned wisdom, so you don’t have to repeat my mistakes.
The butter distribution is key. My first attempt had a huge puddle of butter in the middle and dry cake mix on the edges. The middle was a gooey, buttery mess, and the edges were crunchy. Not terrible, but not balanced. Now, I drizzle the butter in a zigzag pattern, then gently tilt the pan to let it run into the dry spots. It’s not perfect, but it’s better.
Don’t overbake it. The top can go from golden to burnt in about two minutes. Start checking it at the 35-minute mark. If the top is browning too fast, tent the dish loosely with a piece of aluminum foil. This will protect the top while the inside finishes cooking.
Let it cool completely. I know I said this before, but it bears repeating. The pumpkin layer needs time to set. If you eat it warm, it will be more like a pumpkin pudding with a crunchy top. That’s delicious, but it’s not the intended texture. For the best, cleanest slices, let it cool for at least an hour.
Use a serrated knife to cut. The top is crispy and crumbly. A regular chef’s knife will just crush it. A serrated knife saws through gently and leaves cleaner edges. It’s a small tip that makes a big difference for presentation.
Don’t be afraid of the “dry” spots. Some people panic when they see a patch of cake mix that didn’t get buttered. Don’t worry. Those spots will still cook. They just won’t be as crunchy. They’ll be softer, almost like a streusel. It adds to the texture variety.
Variations & Adaptations
This easy pumpkin dump cake is a perfect canvas for customization. I’ve played around with it a lot, and here are my favorite variations.
- The Spice Explosion: Instead of just pumpkin pie spice, add 1/4 teaspoon of cardamom and a pinch of white pepper to the pumpkin base. It gives it a warm, almost chai-like flavor that’s incredible in the fall.
- The Chocolate Lover’s Version: Use a devil’s food or chocolate fudge cake mix instead of yellow. The chocolate and pumpkin are a surprisingly good pair. It tastes like a pumpkin brownie. My kids went absolutely wild for this one.
- The Gluten-Free Swap: You can use a gluten-free yellow cake mix. I’ve done it with the King Arthur brand and it works perfectly. No one will know the difference. Just make sure your pumpkin puree is also certified gluten-free if that’s a concern.
- The Vegan Adaptation: Use a vegan butter stick (like Earth Balance) and a vegan yellow cake mix. The texture will be slightly different—a little less crispy on top—but it’s still delicious and satisfying.
- The “Apple Pie” Twist: Swap the pumpkin for a 20-ounce can of apple pie filling (chop the apples into smaller pieces first). Use a spice cake mix instead of yellow. It’s like an apple crisp, but easier. I made this for a Sunday pork roast dinner once, and it was the perfect fall finale.
The beauty of this recipe is that it forgives. You can swap, add, and experiment without fear. It’s a low-stakes adventure in the kitchen.
Serving & Storage Suggestions
This dump cake is fantastic on its own, but a little something extra can make it feel like a special occasion dessert.
Serve it warm or at room temperature. Both are excellent. If you’re serving it warm, a scoop of vanilla ice cream is non-negotiable. The cold, creamy ice cream melting into the warm, spiced pumpkin is a textural symphony. A dollop of freshly whipped cream is also a classic choice.
For a little extra flair, drizzle the top with a simple caramel sauce or a dusting of powdered sugar. I’ve even drizzled it with maple syrup once, and it was divine. It pairs beautifully with a cup of hot coffee or a mug of spiced chai.
Storage: Cover the baking dish tightly with plastic wrap or aluminum foil. It will keep in the refrigerator for up to 4 days. The top will soften a little over time, but the flavor only gets better as the spices meld.
Reheating: The best way to reheat it is in the oven or a toaster oven. Warm it at 300°F (150°C) for about 10 minutes. This helps re-crisp the top. The microwave works in a pinch, but the top will be soft. It’s still good, just different.
Freezing: You can freeze the baked and cooled dump cake for up to 3 months. Wrap the entire dish in a layer of plastic wrap, then a layer of aluminum foil. Thaw it in the refrigerator overnight and reheat as directed. It’s a great make-ahead dessert for the holidays.
Flavor development: Honestly, this cake is even better the next day. The pumpkin flavor deepens and the spices settle into something more complex. It’s a great dessert to make a day ahead of a party.
Nutritional Information & Benefits
Let’s be upfront: this is a dessert. It’s not health food. But it does have some redeeming qualities, and knowing what’s in it helps you enjoy it mindfully.
Estimated nutrition per serving (1/12 of the cake):
- Calories: 310
- Fat: 16g
- Carbohydrates: 42g
- Fiber: 2g
- Sugar: 24g
- Protein: 3g
The good stuff: Pumpkin is packed with Vitamin A, which is great for your eyes and immune system. It’s also a good source of fiber, which helps you feel full. The cinnamon and nutmeg have anti-inflammatory properties. So, while you’re eating a slice of cake, you’re also getting a little bit of a health boost. It’s all about balance, right?
Dietary considerations: This recipe is not gluten-free or vegan in its standard form, but the variations above offer easy swaps. It contains dairy (butter) and gluten (cake mix). If you have a nut allergy, simply omit the pecans.
My perspective: I believe in enjoying food without guilt. This is a treat. It’s a celebration of fall. It’s the kind of dessert you make when you want to feel cozy and cared for. Have a slice, savor it, and don’t overthink it.
Conclusion
So there you have it. The easy pumpkin dump cake that started with a broken can opener and ended with a new family tradition. It’s proof that you don’t need a dozen ingredients or a culinary degree to make something truly memorable. Sometimes, the simplest path leads to the most delicious destination.
I love this recipe because it’s honest. It’s not trying to be fancy. It’s just trying to be good. And it succeeds. Every single time. The buttery, crunchy top. The soft, spiced pumpkin underneath. It’s fall in a dish, and it’s ready in under an hour.
I’d love to hear how yours turns out. Did you add pecans? Did you try the chocolate version? Did you serve it with ice cream or whipped cream? Drop a comment below and tell me all about it. And if you share a photo on social media, tag me so I can see your beautiful creation. Happy baking, friend. You’ve got this.
Frequently Asked Questions
Can I use pumpkin pie filling instead of pure pumpkin?
Technically, yes, but the result will be much sweeter and more spiced. The pie filling already has sugar and spices added, so you would want to reduce or skip the extra sugar and spices in the recipe. The texture might also be a little denser. I always recommend using 100% pure pumpkin for the best control over the final flavor.
Why is my dump cake soupy in the middle?
This usually happens for two reasons: it wasn’t baked long enough, or it was cut while it was still too hot. The pumpkin layer needs time to set. Make sure you bake it for the full 40-45 minutes, and let it cool for at least 20 minutes before you even think about cutting into it. The center should be mostly firm when you jiggle the pan.
Can I make this in a slow cooker?
You can, but the texture will be different. The top won’t get crispy and crunchy like it does in the oven. It will be softer, more like a cakey pudding. If you want to try it, cook it on low for 2-3 hours or on high for 1-2 hours, and prop the lid open with a wooden spoon to let steam escape. It’s a good option if your oven is full on Thanksgiving.
Do I have to use a yellow cake mix?
Not at all! That’s the beauty of this recipe. You can use spice cake mix for a more intense fall flavor, or white cake mix for a milder taste. A butter pecan cake mix is also fantastic. Just stay away from mixes with pudding in the mix, as they can change the texture. For a fun twist, try making this alongside a flag cake for a dessert table that has something for everyone.
Can I add eggs and milk to the cake mix layer?
No, please don’t! The whole point of a dump cake is that you use the cake mix dry. If you add eggs and milk, you’ll be making a traditional cake, and the texture will be completely different. You’ll lose that incredible, crumbly, buttery top. Trust the process. Keep the cake mix dry.
Pin This Recipe!
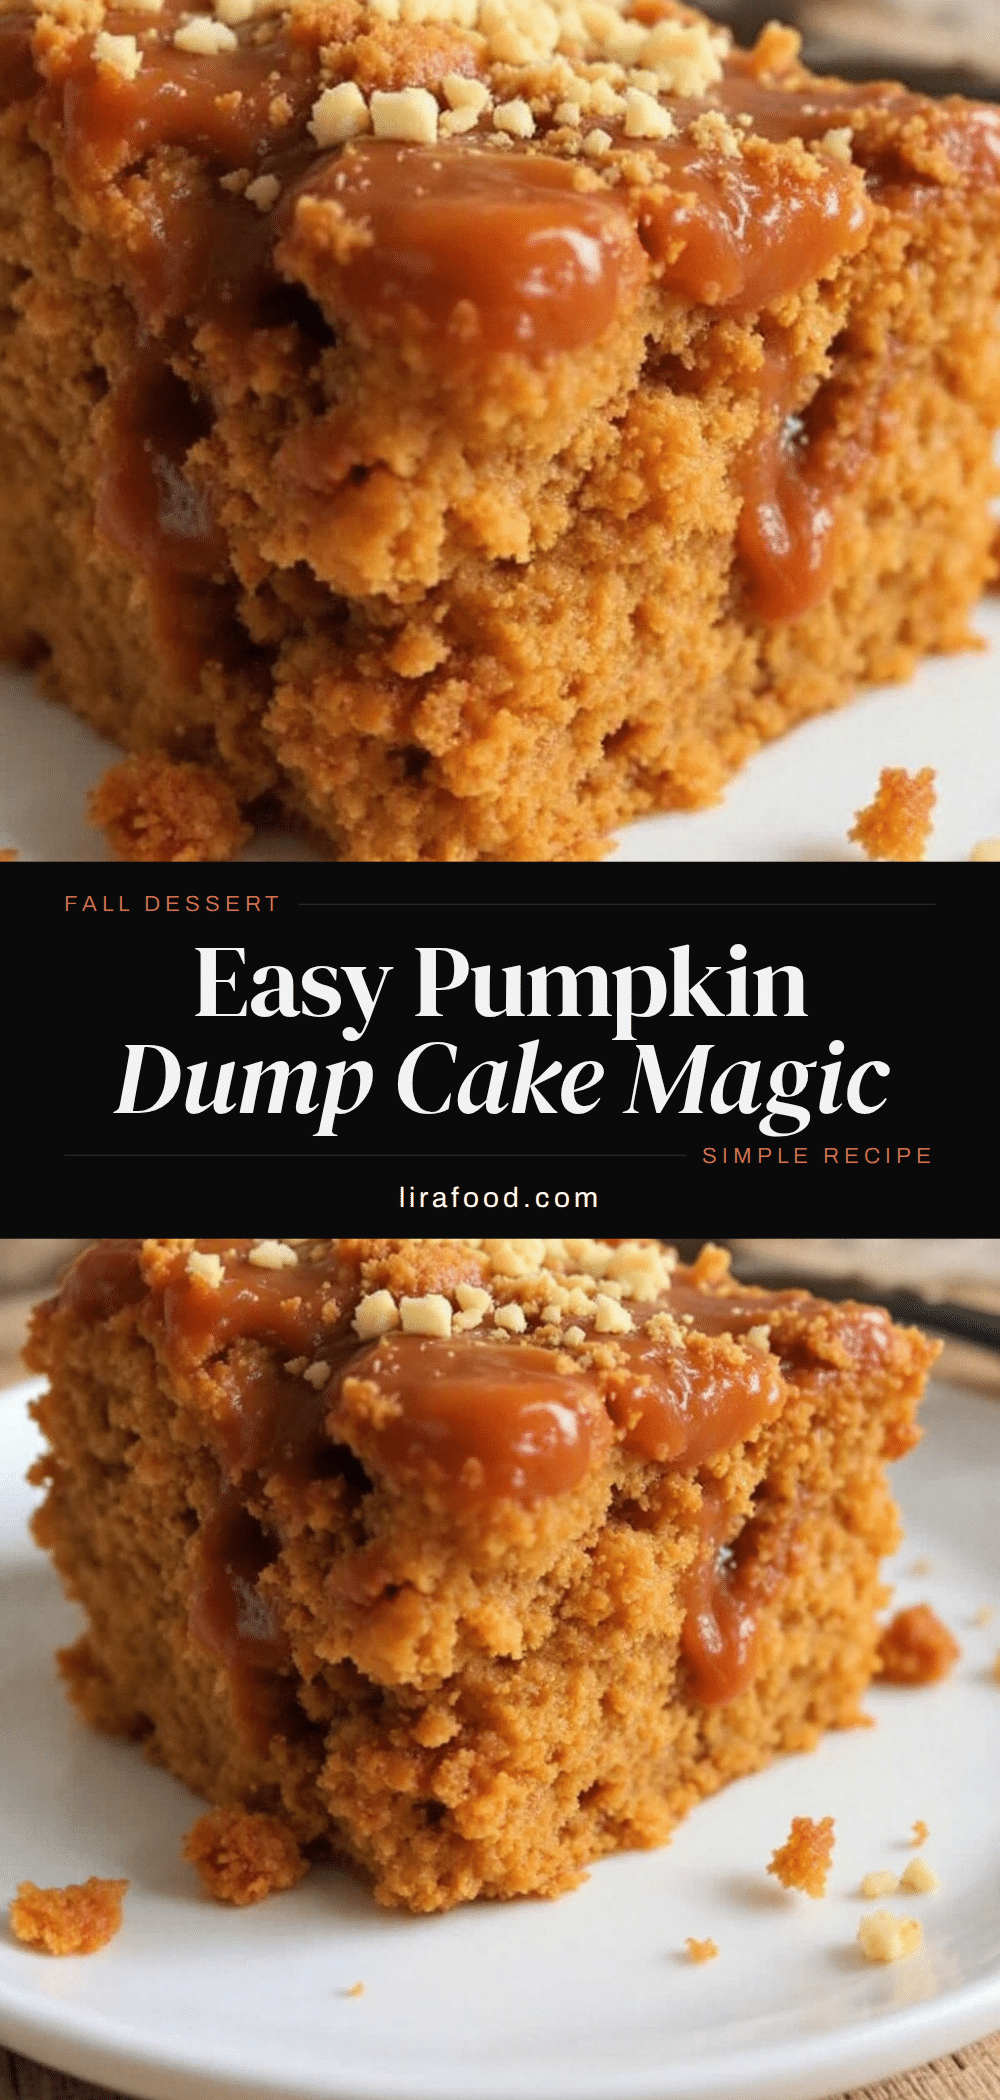
Easy Pumpkin Dump Cake: Best 3-Ingredient Fall Dessert
A simple, 3-ingredient pumpkin dump cake with a buttery, crunchy top and soft, spiced pumpkin layer. Perfect for fall gatherings and easy enough for any baker.
- Prep Time: 10 minutes
- Cook Time: 45 minutes
- Total Time: 55 minutes
- Yield: 12 servings 1x
- Category: Dessert
- Cuisine: American
Ingredients
- 1 (15-ounce) can of pure pumpkin puree
- 1 (13.25-ounce) box of yellow cake mix
- 1/2 cup (1 stick) unsalted butter, melted
- 1 teaspoon pumpkin pie spice
- 1/2 teaspoon ground cinnamon
- 1/4 teaspoon salt
- Optional: chopped pecans or walnuts, coarse sugar, caramel sauce
Instructions
- Preheat oven to 350°F (175°C).
- Grease a 9×13-inch baking dish with non-stick spray or butter.
- In the baking dish, mix pumpkin puree, pumpkin pie spice, cinnamon, and salt until smooth. Spread into an even layer.
- Sprinkle the entire dry cake mix evenly over the pumpkin layer. Do not stir.
- Drizzle melted butter evenly over the dry cake mix.
- If using, sprinkle nuts over the top.
- Bake for 40-45 minutes until top is golden brown and edges are bubbly.
- Cool in the pan on a wire rack for at least 15-20 minutes before serving.
Notes
Let the cake cool completely for cleaner slices. The top may have dry spots, which is normal. For best results, use a serrated knife to cut.
Nutrition
- Serving Size: 1 slice (1/12 of cak
- Calories: 310
- Sugar: 24
- Sodium: 320
- Fat: 16
- Saturated Fat: 10
- Carbohydrates: 42
- Fiber: 2
- Protein: 3
Keywords: pumpkin dump cake, easy pumpkin dessert, 3-ingredient dessert, fall dessert, pumpkin cake


