Love this? Save it for later!
Share the inspiration with your friends
The lunchbox came home empty. Not just the sandwich part — the whole thing, wiped clean like it had been through a dishwasher. My son didn’t even wait to get in the car before telling me, “Mom, can you make those wraps again? Jake asked if he could trade.” That was the fourth time in two weeks someone had asked about them.
Honestly, I stumbled into this combination by accident. I had a half-eaten apple on the counter, some leftover turkey from Sunday dinner, and a block of cheddar that was staring at me every time I opened the fridge. The kids were tired of the same old lunch rotation — peanut butter, ham and cheese, the occasional thermos of soup. I needed something that wouldn’t get soggy by noon and didn’t require a microwave.
What came together that morning was one of those happy kitchen accidents that you don’t fully appreciate until you see the results. The crunch of the apple, the sharp bite of cheddar, the savory turkey — it worked in a way I wasn’t expecting. I wrapped it tight, tossed it in the bag, and forgot about it.
Until the empty lunchbox came home.
These Easy Turkey Apple Cheddar Lunchbox Wraps have become a staple in our house, and I keep finding myself making extra for my own lunch too. There’s something about that sweet-savory combination that hits different when you’re eating it at a desk or a picnic table. It’s not fancy. It’s not complicated. It’s just really, really good.
Why You’ll Love This Recipe
Let me tell you why this wrap is different from every other lunch idea you’ve pinned and forgotten about.
- Ready in Under 10 Minutes : No cooking required. No heating up the kitchen. Just assemble, wrap, and go. This is the kind of recipe that saves you on those mornings when you hit snooze one too many times.
- Simple, Real Ingredients : You don’t need anything weird or expensive. Deli turkey, a crisp apple, good cheddar cheese, and a wrap. That’s it. No special trips to a fancy grocery store.
- Perfect for Lunchboxes and Picnics : These wraps hold up beautifully. No sogginess, no sad bread. They actually taste better after sitting for an hour or two as the flavors meld together.
- Crowd-Pleaser for All Ages : Kids love the mild sweetness of the apple. Adults appreciate the sharp cheddar and savory turkey. It’s one of those rare recipes that makes everyone happy.
- Unbelievably Satisfying : The combination of textures — crisp apple, creamy cheese, tender turkey, soft wrap — is honestly next-level. It’s lunch you actually look forward to eating.
What makes this version different from other turkey wraps you’ve tried? It’s the apple-cheddar pairing. That classic combo works because the tartness of the apple cuts through the richness of the cheese, and the turkey ties it all together into something savory and satisfying. I’ve tried other versions with spreads and sauces, but honestly, this simple combination is the one that keeps getting requested.
This is the kind of meal that makes you feel like you’ve got your act together, even on chaotic mornings. And let’s face it — we could all use a little of that energy.
What Ingredients You Will Need
This recipe uses simple, wholesome ingredients to deliver bold flavor and satisfying texture without any fuss. You probably already have most of these in your kitchen right now.
- Large flour tortillas or wraps (10-inch size works best; use spinach or sun-dried tomato wraps for extra color)
- 8 ounces deli-sliced turkey breast (I prefer oven-roasted or honey-roasted for a touch of sweetness; Boar’s Head or your local deli counter brand both work great)
- 1 large apple (Honeycrisp or Fuji are my favorites — they hold their crunch and don’t brown too quickly; Granny Smith works if you prefer a tarter bite)
- 4 ounces sharp cheddar cheese (block cheese shredded or thinly sliced; pre-shredded works but fresh tastes noticeably better)
- 2 tablespoons cream cheese, softened (acts as a spread to hold everything together and adds creaminess; use dairy-free if needed)
- 1 tablespoon honey or maple syrup (optional, for drizzling; adds a touch of sweetness that kids especially love)
- ¼ cup baby spinach or arugula (optional, for a pop of green and extra nutrients)
- Salt and black pepper (a tiny pinch brings out the flavors)
Ingredient Selection Tips: When choosing your apple, look for one that’s firm with no soft spots. A crisp apple is essential for that satisfying crunch. For the cheese, I recommend buying a block and shredding or slicing it yourself — it melts better in the wrap and has a sharper flavor. If you’re using pre-sliced deli turkey, ask them to slice it slightly thicker than usual; it holds up better in the wrap and doesn’t get lost next to the other ingredients.
Substitution Guidance: Need a gluten-free option? Use large gluten-free tortillas or collard green leaves as the wrap. For a dairy-free version, swap the cheddar with a plant-based alternative and use dairy-free cream cheese. If you don’t eat turkey, thinly sliced roast beef or even smoked tofu works beautifully here. The apple-cheddar combination is surprisingly versatile.
Equipment Needed
You don’t need much for this recipe, which is part of the beauty of it.
- Cutting board (any size works, but a larger one gives you room to work)
- Sharp knife (a chef’s knife or a serrated knife for the apple; a dull knife will bruise the fruit)
- Box grater or mandoline (for shredding the cheese or thinly slicing the apple; a regular knife works fine too)
- Butter knife or small spatula (for spreading the cream cheese)
- Plastic wrap or parchment paper (for wrapping the finished wraps tightly; keeps them fresh and prevents drying out)
- Lunchbox or container (a wide, shallow container works best to keep the wrap from getting squished)
I’ve made these wraps with nothing more than a butter knife and a paper plate when I was camping, and they still turned out great. The key tool is really just a sharp knife for the apple — everything else is negotiable. If you don’t have a box grater, just slice the cheese thinly with a knife. If you don’t have plastic wrap, you can use a beeswax wrap or even a clean kitchen towel to keep them fresh until lunchtime.
Preparation Method
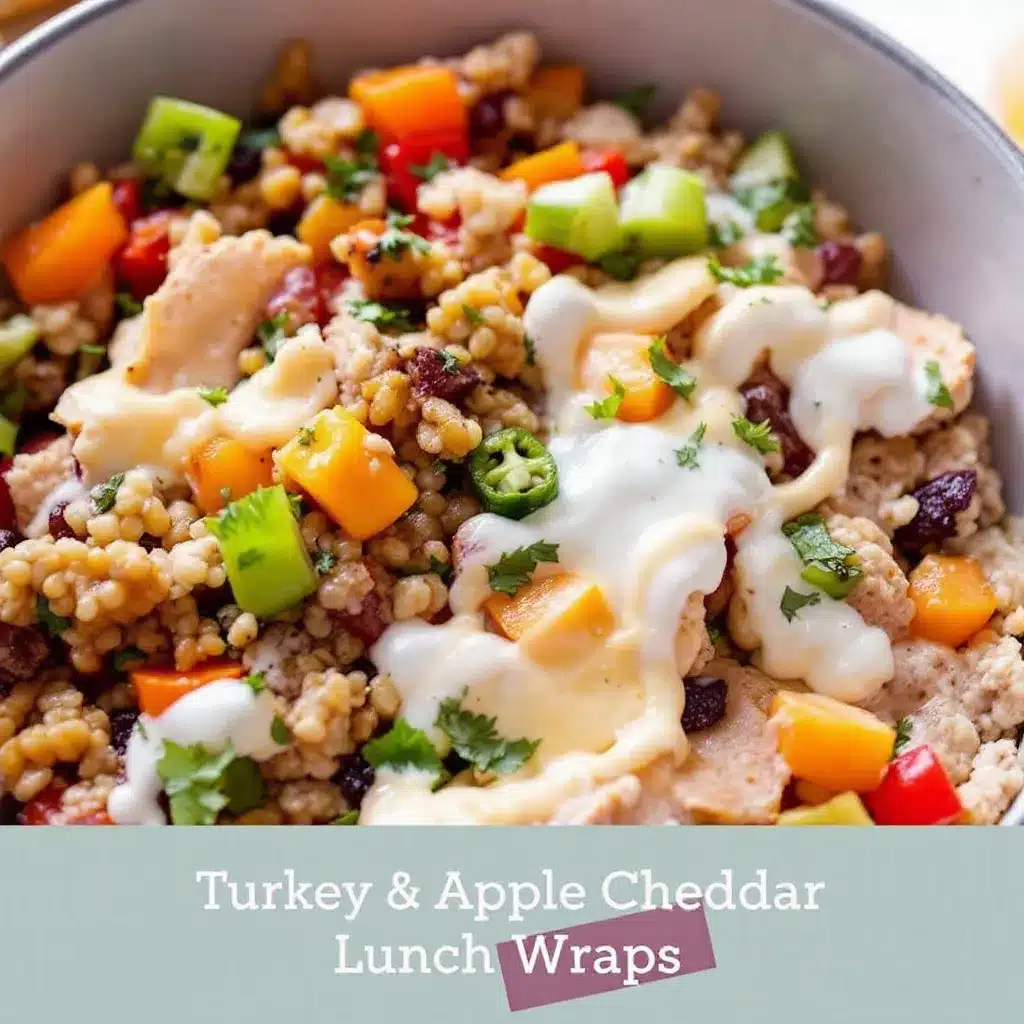
Follow these steps, and you’ll have perfect wraps in under 10 minutes. I’ve included all my little tricks so yours turn out as good as mine.
-
Prep your ingredients. Wash and dry your apple. If you’re using a block of cheddar, shred it or slice it into thin pieces. Take the cream cheese out of the fridge and let it soften for a few minutes — this makes spreading much easier. Lay your tortillas flat on a clean work surface.
-
Spread the cream cheese. Using a butter knife or small spatula, spread a thin, even layer of softened cream cheese over the entire surface of each tortilla. Leave about an inch border around the edges. This layer acts as a barrier that prevents the wrap from getting soggy from the apple’s moisture. If you’re using honey or maple syrup, drizzle a thin line down the center of the cream cheese.
-
Layer the turkey. Place the turkey slices evenly over the cream cheese, covering about two-thirds of the tortilla. Don’t pile it all in the center — spreading it out ensures every bite has turkey. I usually use about 4-5 slices per wrap, depending on the size.
-
Add the apple and cheese. Core the apple (no need to peel it — the skin adds color and fiber) and slice it into thin, matchstick-sized pieces or thin half-moons. Arrange the apple slices over the turkey, then sprinkle or layer the cheddar cheese on top. If you’re using spinach or arugula, add a small handful now. Season with a tiny pinch of salt and pepper.
-
Roll it tight. Fold the sides of the tortilla inward about an inch, then starting from the bottom edge, roll the wrap tightly away from you. Keep it snug but not so tight that the filling squishes out the ends. Think of it like rolling a burrito — firm but gentle. The cream cheese helps seal the edge when you finish rolling.
-
Wrap and chill. Place the finished wrap seam-side down on a piece of plastic wrap or parchment paper. Wrap it tightly, twisting the ends like a candy wrapper. This step is important — it keeps the wrap from unraveling and helps the flavors meld together. Refrigerate for at least 30 minutes if you have time, or pack it straight into a lunchbox for same-day eating.
-
Slice and serve. When ready to eat, unwrap the tortilla and slice it diagonally in half or into pinwheels (about 1-inch thick rounds). Diagonally cut halves are easier for lunchboxes, while pinwheels are great for parties or snack platters.
Sensory Cues: When you spread the cream cheese, it should glide easily without tearing the tortilla. When you bite into the finished wrap, you should hear a crisp crunch from the apple, followed by the creamy cheese and tender turkey. The wrap should feel firm in your hand, not droopy or wet.
My Personal Tip: If you’re making these the night before, wait to slice the apple until you’re ready to assemble. Pre-sliced apples will brown and release moisture, making the wrap soggy. I prep everything else the night before — shred the cheese, spread the cream cheese on the tortillas, portion the turkey — and then just slice the apple and assemble in the morning. Takes about 3 minutes.
Cooking Tips & Techniques
I’ve made probably fifty of these wraps by now, and I’ve learned a few things the hard way. Here’s what I wish someone had told me.
The Biggest Mistake: Overfilling the wrap. I know it’s tempting to pile on the ingredients, but less is genuinely more here. Too much filling and the wrap won’t roll properly, the filling will fall out the ends, and you’ll end up eating it with a fork. Aim for a modest, even layer of each ingredient.
Don’t Skip the Cream Cheese Layer: I tried making these without the cream cheese once because I was out, and the wrap was a soggy mess by lunchtime. The cream cheese creates a moisture barrier that keeps the tortilla from absorbing the apple juice. It also acts as glue for the other ingredients. If you’re dairy-free, use a thick hummus or avocado mash instead — same effect, different flavor profile.
Timing and Multitasking: These wraps come together so quickly that you don’t need to worry about timing. But if you’re making a batch for the week, here’s my strategy: Lay out all your tortillas, spread cream cheese on all of them, then layer turkey on all of them, then add apples and cheese. Assembly-line style saves time and keeps things consistent.
My Personal Failure: The first time I made these, I used a mealy Red Delicious apple. Big mistake. The apple basically disintegrated when I bit into the wrap, and the texture was off-putting. Firm, crisp apples are non-negotiable here. Honeycrisp, Fuji, or Granny Smith — those are your friends.
For Consistency: If you’re making these for multiple lunches, slice all your apples at once and toss them with a squeeze of lemon juice. The lemon prevents browning and adds a tiny tang that works well with the cheddar. Just a teaspoon is enough for a whole batch.
Variations & Adaptations
One of the best things about this recipe is how easy it is to change up. Here are some variations I’ve tried and loved.
1. The Sweet Heat Version: Swap the honey for a drizzle of hot honey, and add a few thin slices of pickled jalapeño. The sweet-spicy-savory combination is incredible. My husband requests this version constantly.
2. The Low-Carb Option: Use large lettuce leaves (butter lettuce or romaine hearts work best) instead of tortillas. Layer the ingredients in the center and roll like a lettuce wrap. Skip the cream cheese or use a thin layer of mashed avocado. This version is lighter but still satisfying.
3. The Fall Harvest Wrap: Add a thin layer of whole-berry cranberry sauce or fig jam under the cream cheese. Sprinkle with a few toasted pecans or walnuts. This tastes like Thanksgiving in a wrap and is perfect for autumn lunchboxes. It pairs beautifully with the flavors in our Perfect Sunday Pork Roast with Easy Apple and Sage Stuffing.
4. The Kid-Friendly Twist: Use mild cheddar instead of sharp, and cut the wrap into small pinwheels. Kids love the fun shape, and the mild flavors are more approachable for picky eaters. You can also swap the turkey for thinly sliced ham if that’s what your kids prefer.
5. The Protein-Packed Version: Add a thin layer of hummus under the turkey, or sprinkle some cooked, crumbled bacon over the cheese. The extra protein makes this wrap substantial enough for a post-workout lunch or a hiking snack.
I personally love the fall harvest version with cranberry sauce. It reminds me of the Fresh Waldorf Salad my grandmother used to make — that same sweet-savory-crunchy magic, just in a portable form.
Serving & Storage Suggestions
Serving Temperature: These wraps are best served cold or at room temperature. If you’re packing them for lunch, they’ll be perfect by the time lunch rolls around. If you’re serving them at a picnic or potluck, slice them into pinwheels and arrange on a platter — they look beautiful and are easy for guests to grab.
Presentation Ideas: For lunchboxes, slice the wrap diagonally and pack it with a small container of apple slices (tossed with lemon juice), some baby carrots, and a handful of grapes. For parties, cut the wraps into 1-inch pinwheels and secure each with a toothpick. Arrange them on a platter with a small bowl of honey mustard or ranch dip in the center.
Complementary Dishes: These wraps pair wonderfully with a light soup or salad. Try serving them alongside a bowl of our Cozy Cold Cucumber Soup for a refreshing summer lunch. Or pack them with some crunchy Classic Bread and Butter Pickles for a satisfying contrast of textures.
Storage Instructions: Wrapped tightly in plastic wrap or parchment paper, these wraps will keep in the refrigerator for up to 2 days. The apple will soften slightly over time, but the cream cheese barrier helps maintain the texture. I don’t recommend freezing these — the apple and lettuce will become watery and unappetizing when thawed.
Reheating: These wraps are meant to be eaten cold, so no reheating is needed. If you prefer a warm wrap, you can assemble them without the lettuce and then warm them in a dry skillet for 1-2 minutes per side before adding the greens. But honestly, I think they’re best cold — the flavors are more pronounced.
How Flavors Develop: If you can, make these wraps the night before you plan to eat them. The flavors meld together beautifully overnight. The apple infuses the cream cheese with a subtle sweetness, and the cheddar sharpens as it sits. It’s like the wrap version of marinating.
Nutritional Information & Benefits
Here’s an approximate nutritional breakdown for one wrap (using standard ingredients, no added honey or greens):
| Nutrient | Amount per Wrap |
|---|---|
| Calories | 380-420 |
| Protein | 28-32g |
| Carbohydrates | 30-35g |
| Fiber | 4-5g |
| Fat | 16-20g |
| Saturated Fat | 8-10g |
| Sodium | 800-1000mg |
Health Benefits: This wrap is packed with lean protein from the turkey, which keeps you full and satisfied. The apple provides fiber and vitamin C, along with natural sweetness that helps curb sugar cravings. Cheddar cheese offers calcium and protein, and if you add spinach, you’re getting iron and vitamin K. It’s a balanced meal that covers protein, produce, and healthy fats in one portable package.
Dietary Considerations: This recipe can easily be made gluten-free (use gluten-free tortillas or lettuce wraps) and dairy-free (use plant-based cheese and cream cheese). It’s naturally nut-free, making it a safe option for school lunchboxes. If you’re watching your sodium, look for low-sodium deli turkey and skip the added salt.
My Wellness Perspective: I love that this wrap feels indulgent but is actually quite balanced. It’s the kind of lunch that doesn’t leave you reaching for a snack an hour later. The combination of protein, fiber, and healthy fat keeps your energy steady through the afternoon.
Conclusion
These Easy Turkey Apple Cheddar Lunchbox Wraps have genuinely changed our lunch game in this house. They’re the recipe I turn to when I’m tired of the same old sandwiches, when I need something that travels well, and when I want to feel like I’ve got my act together even on the busiest mornings.
What I love most about this recipe is how forgiving it is. You can swap ingredients, adjust portions, add or subtract based on what’s in your fridge — and it still works. It’s not a fussy recipe. It’s a practical, delicious, real-life solution that makes lunch something to look forward to.
I’d love to hear how these turn out for you. Did you try a variation I haven’t thought of? Did your kids clean their lunchboxes? Drop a comment below and let me know — your ideas might end up in someone else’s lunchbox tomorrow.
Here’s to lunches that actually get eaten. Happy wrapping!
Frequently Asked Questions
Can I make these wraps ahead of time for the whole week?
Yes, you can assemble them up to 2 days in advance. Wrap each one tightly in plastic wrap and store them in the refrigerator. The apple will soften slightly over time, but the cream cheese barrier helps maintain the texture. I wouldn’t recommend making them more than 2 days ahead, as the tortilla can start to get soggy.
What’s the best apple to use for these wraps?
Firm, crisp apples work best. Honeycrisp and Fuji are my top picks because they hold their crunch and don’t brown too quickly. Granny Smith apples add a nice tartness that pairs well with sharp cheddar. Avoid soft or mealy varieties like Red Delicious — they’ll turn mushy in the wrap.
How do I keep the wrap from getting soggy by lunchtime?
The cream cheese layer is your secret weapon. Spread a thin, even layer over the entire tortilla before adding any other ingredients. This creates a moisture barrier that prevents the apple juice from soaking into the wrap. Also, make sure your apple slices are thin and not dripping with moisture.
Can I use a different type of cheese?
Absolutely. Sharp cheddar is classic, but you can use provolone, gouda, Swiss, or even pepper jack for a spicy kick. Soft cheeses like brie or goat cheese also work beautifully, though they’ll change the texture slightly. Just make sure whatever cheese you choose pairs well with apples and turkey.
Are these wraps suitable for school lunchboxes?
Yes, they’re perfect for school lunches. They’re nut-free (as long as you don’t add nuts), don’t need to be heated, and hold up well in a lunchbox. Cut them into pinwheels for younger kids — they’re easier to eat and more fun. Just pack them with an ice pack to keep them fresh until lunchtime.
Pin This Recipe!
Easy Turkey Apple Cheddar Lunchbox Wraps

These Easy Turkey Apple Cheddar Lunchbox Wraps are a quick, no-cook lunch solution that combines savory turkey, crisp apple, and sharp cheddar in a soft tortilla. Perfect for lunchboxes and picnics, they hold up beautifully and are ready in under 10 minutes.
- Prep Time: 10 minutes
- Cook Time: 0 minutes
- Total Time: 10 minutes
- Yield: 4 servings 1x
- Category: Lunch
- Cuisine: American
Ingredients
- 4 large flour tortillas or wraps (10-inch size; use spinach or sun-dried tomato wraps for extra color)
- 8 ounces deli-sliced turkey breast (oven-roasted or honey-roasted preferred)
- 1 large apple (Honeycrisp, Fuji, or Granny Smith)
- 4 ounces sharp cheddar cheese (block cheese, shredded or thinly sliced)
- 2 tablespoons cream cheese, softened
- 1 tablespoon honey or maple syrup (optional)
- ¼ cup baby spinach or arugula (optional)
- Salt and black pepper to taste
Instructions
- Prep your ingredients. Wash and dry your apple. If using a block of cheddar, shred or slice it into thin pieces. Let the cream cheese soften for a few minutes. Lay tortillas flat on a clean work surface.
- Spread the cream cheese. Using a butter knife or small spatula, spread a thin, even layer of softened cream cheese over the entire surface of each tortilla, leaving about an inch border around the edges. If using honey or maple syrup, drizzle a thin line down the center of the cream cheese.
- Layer the turkey. Place the turkey slices evenly over the cream cheese, covering about two-thirds of the tortilla. Use about 4-5 slices per wrap.
- Add the apple and cheese. Core the apple and slice it into thin, matchstick-sized pieces or thin half-moons. Arrange the apple slices over the turkey, then sprinkle or layer the cheddar cheese on top. If using spinach or arugula, add a small handful. Season with a tiny pinch of salt and pepper.
- Roll it tight. Fold the sides of the tortilla inward about an inch, then starting from the bottom edge, roll the wrap tightly away from you. Keep it snug but not so tight that the filling squishes out the ends.
- Wrap and chill. Place the finished wrap seam-side down on a piece of plastic wrap or parchment paper. Wrap it tightly, twisting the ends like a candy wrapper. Refrigerate for at least 30 minutes if time allows, or pack straight into a lunchbox for same-day eating.
- Slice and serve. When ready to eat, unwrap the tortilla and slice it diagonally in half or into pinwheels (about 1-inch thick rounds).
Notes
For best texture, use a firm, crisp apple like Honeycrisp or Fuji. The cream cheese layer acts as a moisture barrier to prevent sogginess. If making ahead, slice the apple just before assembling to avoid browning. Wraps can be stored in the refrigerator for up to 2 days.
Nutrition
- Serving Size: 1 wrap
- Calories: 400
- Sugar: 12
- Sodium: 900
- Fat: 18
- Saturated Fat: 9
- Carbohydrates: 33
- Fiber: 5
- Protein: 30
Keywords: turkey apple cheddar wraps, lunchbox wraps, easy lunch recipe, no-cook lunch, kid-friendly lunch, picnic wraps


