Love this? Save it for later!
Share the inspiration with your friends
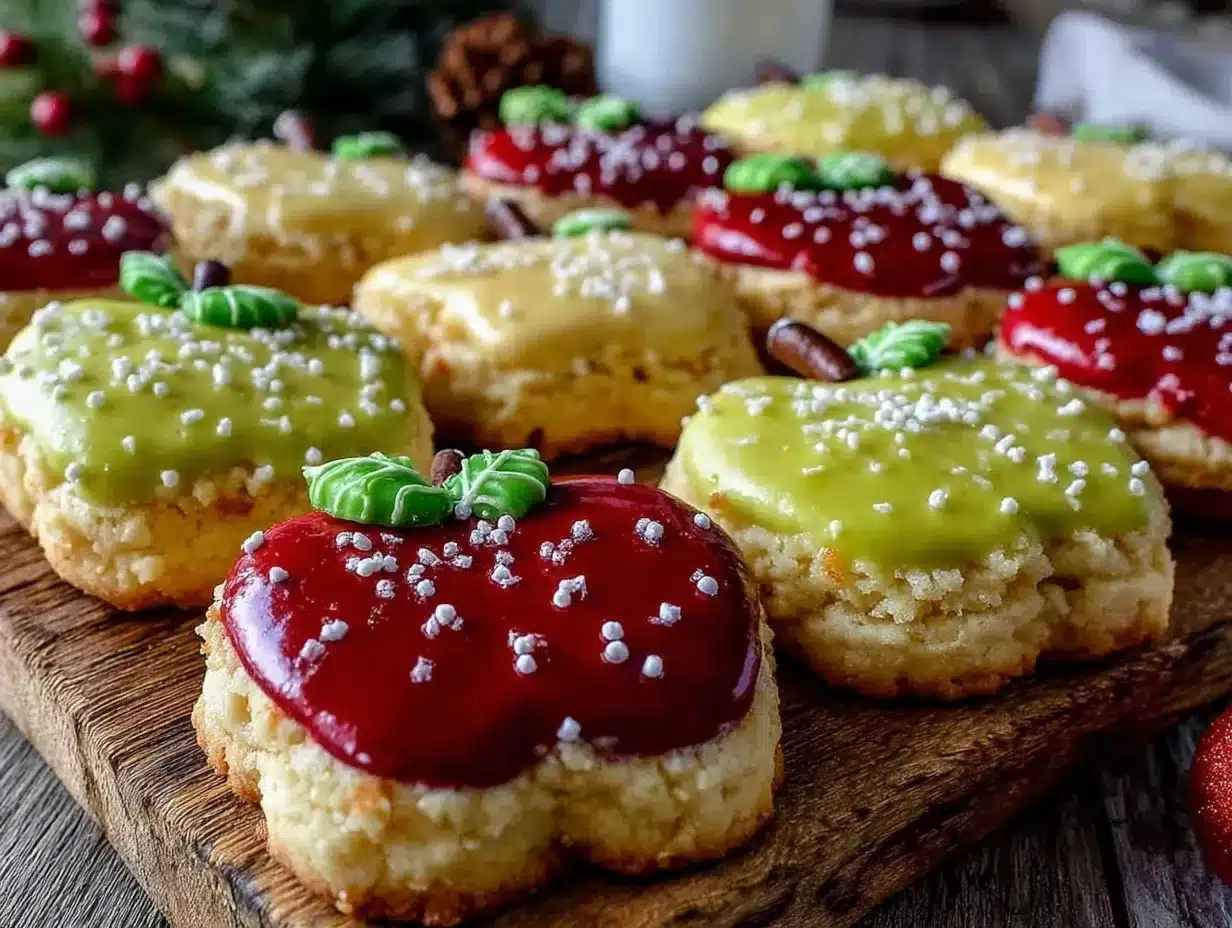
“You think shortbread cookies can’t get any cuter?” my neighbor Lisa asked one bright Saturday morning as we sat on her porch, sipping coffee and watching her kids run around. Honestly, I wasn’t expecting much when she pulled out a tin of her homemade apple shaped shortbread cookies decorated with royal icing. But the moment I took a bite, I was hooked. The buttery, crumbly texture paired with the smooth, sweet icing was like a little gift in every bite.
Lisa shared that she’s been making these cookies every fall as teacher gifts for years. She said it started one hectic September when she forgot to buy a gift for her son’s teacher and whipped these up with whatever she had in the pantry. That happy accident turned into a beloved tradition, and I could see why. The apple shape feels perfectly symbolic and the icing makes each cookie feel like a tiny masterpiece.
Maybe you’ve been there too—rushing to find a thoughtful but easy gift that shows you care. These apple shaped shortbread cookies with royal icing are exactly that kind of recipe. Simple to make but impressive enough to make a teacher smile and remember. Let me tell you, I’ve tried a few versions since that day on Lisa’s porch, and I’m excited to share my perfected recipe with you. It’s a little crunchy, a little soft, and just sweet enough to keep you coming back for more—plus, decorating them is surprisingly fun once you get the hang of the royal icing.
So, whether you need a last-minute teacher gift or just want a charming fall treat to brighten your kitchen, these cookies will fit the bill. And hey, if you’re like me and sometimes get distracted halfway through decorating (hello, icing-covered fingers), this recipe still delivers every time.
Why You’ll Love This Recipe
- Quick & Easy: Comes together in under 45 minutes, perfect for busy parents or last-minute gift ideas.
- Simple Ingredients: Uses pantry staples you probably already have on hand—no exotic shopping required.
- Perfect for Teacher Gifts: The apple shape and royal icing make these cookies feel thoughtful and festive without a ton of fuss.
- Crowd-Pleaser: Butter-rich shortbread with a crisp edge and tender bite—everyone loves them, kids and adults alike.
- Unbelievably Delicious: The buttery dough is complemented by the subtly sweet royal icing, which you can customize with colors or messages.
This isn’t just any shortbread recipe—it’s the one I keep coming back to every fall because it balances flavor with that homemade charm. The trick is in the dough’s texture and the royal icing’s smooth finish, which lets you get creative or keep it simple. Honestly, it’s the kind of recipe that makes you pause and savor the moment, whether you’re wrapping them up to give away or sneaking one when no one’s looking.
What Ingredients You Will Need
This recipe uses simple, wholesome ingredients to deliver buttery, crisp shortbread cookies with a delicate royal icing finish. Most of these are kitchen staples, and you can swap a few to fit your pantry or dietary needs.
- For the Shortbread Cookies:
- 1 cup (227g) unsalted butter, softened (I recommend plugging in Kerrygold for that rich flavor)
- 1/2 cup (100g) granulated sugar
- 2 cups (240g) all-purpose flour (or substitute with almond flour for a gluten-free twist)
- 1/4 teaspoon salt
- 1 teaspoon vanilla extract (adds warmth and depth)
- For the Royal Icing:
- 2 cups (240g) powdered sugar, sifted
- 2 large egg whites (or 4 tablespoons pasteurized meringue powder mixed with 5 tablespoons water for safety)
- 1/2 teaspoon cream of tartar (helps stabilize the icing)
- Food coloring gels (red and green are classic for apple shapes, but feel free to get creative)
- Optional: a few drops of lemon juice (for a little tang and brightness)
Pro Tip: If fresh egg whites make you nervous, meringue powder is a great alternative that still produces that perfect royal icing texture. And if you want to skip the food coloring, a simple white royal icing still looks elegant on these cookies.
Equipment Needed
- Mixing bowls (one for dough, one for icing)
- Electric hand mixer or stand mixer (makes creaming butter and sugar easier)
- Rolling pin (a small one works well for precision)
- Apple-shaped cookie cutter (about 3 to 4 inches wide; I found mine at a craft store, but online options are great too)
- Baking sheet(s) lined with parchment paper or silicone mats
- Wire cooling rack
- Small piping bags or resealable plastic bags for icing (tip cut off)
- Toothpicks or fine brushes (for icing details)
By the way, you don’t need fancy piping tips to get gorgeous results—just steady hands and a little patience. I use a simple plastic bag with a tiny snip on the corner and sometimes get a little messy, but that’s part of the fun!
Preparation Method
- Make the Dough: In a large bowl, beat 1 cup (227g) softened unsalted butter with 1/2 cup (100g) granulated sugar until light and fluffy (about 3-4 minutes). This creaming step is key for that melt-in-your-mouth texture.
- Add Flavor: Mix in 1 teaspoon vanilla extract until combined.
- Combine Dry Ingredients: In a separate bowl, whisk together 2 cups (240g) all-purpose flour and 1/4 teaspoon salt.
- Mix Dry into Wet: Gradually add the flour mixture to the butter mixture, mixing on low speed until just combined. The dough will be soft but manageable. If it feels too sticky, pop it in the fridge for 15 minutes.
- Roll the Dough: Lightly flour your work surface and roll out the dough to about 1/4 inch (6mm) thickness. I usually roll out half the dough at a time to keep it from getting too soft.
- Cut the Cookies: Use your apple-shaped cookie cutter to cut shapes and transfer them carefully to a parchment-lined baking sheet.
- Chill: Place the baking sheet in the fridge for 15-20 minutes—this helps the cookies keep their shape while baking.
- Bake: Preheat the oven to 325°F (163°C). Bake cookies for 15-18 minutes, or until edges just start to turn golden. Keep an eye on them; overbaking will dry them out.
- Cool: Let the cookies cool on the baking sheet for 5 minutes, then transfer to a wire rack to cool completely before icing.
- Prepare Royal Icing: While cookies bake, whisk 2 large egg whites (or meringue powder mix) with 1/2 teaspoon cream of tartar until frothy. Gradually add 2 cups (240g) sifted powdered sugar, beating until stiff peaks form.
- Color Your Icing: Divide icing into small bowls and add food coloring gels as desired. Mix gently to get vibrant shades.
- Decorate: Fill piping bags with icing. Outline each apple cookie first, then flood the center with thinner icing if you like (thin with a few drops of water). Use toothpicks to gently spread and smooth. Let details dry before adding leaves or stems.
- Dry Completely: Allow decorated cookies to dry at room temperature for several hours or overnight to set the icing fully.
Little heads-up: I once forgot to chill the dough and ended up with cookies that spread too much—lesson learned! Chilling really helps keep those crisp apple edges. Also, when flooding with icing, patience is key. If your icing is too runny, the colors might bleed; too thick, and it’s hard to spread.
Cooking Tips & Techniques
- Butter Temperature Matters: The butter should be softened but not melted. This helps trap air for a tender, crumbly shortbread.
- Don’t Overmix the Dough: Once you add the flour, mix just until combined. Overworking develops gluten and makes the cookies tough.
- Chill Twice: Chill the dough before cutting and the cut cookies before baking. This keeps shapes sharp and prevents spreading.
- Use Parchment or Silicone Mats: Prevent sticking and promote even baking.
- Practice Your Icing Consistency: For outlining, use thicker royal icing; for flooding, thin it with water a drop at a time. If you mess up, gently scrape off the wet icing and start again after it sets.
- Multitask Smartly: While cookies bake, mix your royal icing. This saves time and keeps you from getting overwhelmed.
- Personal Tip: I like to decorate cookies on a baking sheet lined with parchment so I can slide them into the fridge to firm up the icing faster.
Variations & Adaptations
- Gluten-Free Version: Swap all-purpose flour with a 1:1 gluten-free baking blend. I tried Bob’s Red Mill blend with great results—cookies still held their shape beautifully.
- Vegan Adaptation: Use vegan butter and substitute egg whites in royal icing with aquafaba (chickpea brine). It whips up surprisingly well for icing.
- Flavor Twists: Add a pinch of cinnamon or nutmeg to the dough for a warm fall vibe, or swap vanilla for almond extract for a subtle nutty note.
- Alternative Shapes: If you don’t have an apple cutter, try leaf or heart shapes for a similar festive feel.
- Decorating Variations: Instead of royal icing, dust cookies with cinnamon sugar or dip edges in melted white chocolate for a different look and texture.
I once made these with a lavender-infused royal icing for a friend’s garden party—unexpected but totally charming!
Serving & Storage Suggestions
These apple shaped shortbread cookies are best served at room temperature, allowing the buttery flavor and crisp texture to shine. Present them in a decorative tin or tied with a ribbon to make any teacher feel special. They pair beautifully with a hot cup of tea or apple cider, especially on a crisp autumn afternoon.
To store, keep the cookies in an airtight container at room temperature for up to one week. If you want to keep them longer, freeze undecorated cookies in a sealed bag for up to 3 months. Royal icing cookies freeze well too—just let them thaw fully before serving to avoid moisture softening the icing.
Reheating isn’t necessary, but if you prefer a warm cookie, pop one in the microwave for 5-7 seconds (don’t overdo it or the icing might melt). Over time, the flavors meld nicely, and the cookies soften a bit, which some folks prefer.
Nutritional Information & Benefits
These shortbread cookies are rich in butter and sugar, making them a treat best enjoyed in moderation. Each cookie (about 2.5 inches wide) contains roughly 120 calories, 6 grams of fat, and 12 grams of carbohydrates.
Butter provides vitamin A and a satisfying richness, while the egg whites in the royal icing add a touch of protein. This recipe is naturally gluten-free if you use an almond flour substitution, which adds a bit of extra protein and healthy fats.
For those with allergies, be mindful of eggs in the royal icing and wheat in the standard flour. Vegan and gluten-free options can be made with simple ingredient swaps.
From my perspective, these cookies strike a nice balance between indulgence and homemade goodness—perfect for sharing with loved ones and celebrating small moments.
Conclusion
Why settle for ordinary when you can make apple shaped shortbread cookies that feel like a personal gift? This recipe combines buttery, tender cookies with the fun of royal icing decoration—making it perfect for thoughtful teacher gifts or cozy fall treats. I love how customizable it is, letting you add your own flair with colors or flavors.
Give this recipe a try, make it your own, and don’t be surprised if you find yourself baking these year after year. And hey, if you tweak the recipe or decorating style, I’d love to hear how it turns out for you! Drop a comment below or share your photos—there’s nothing better than swapping cookie stories with fellow baking fans.
Remember, the best gifts are the ones made with a little love (and maybe a little butter). Happy baking!
FAQs
Can I make the dough ahead of time?
Yes! You can prepare the dough up to 2 days in advance, wrapped tightly in plastic wrap and stored in the fridge. Just let it sit at room temperature for 10 minutes before rolling.
Is it safe to use raw egg whites in royal icing?
Traditional royal icing uses raw egg whites, which carry some risk. To be safe, use pasteurized egg whites or meringue powder as a substitute—they work just as well and are kid-friendly.
How do I fix royal icing that’s too runny or too thick?
If your icing is too runny, add more powdered sugar a tablespoon at a time. If it’s too thick, add water drop by drop until you reach the desired consistency.
Can I store decorated cookies for gift-giving later?
Absolutely! Store them in an airtight container at room temperature for up to a week. For longer storage, freeze undecorated cookies or fully dried decorated cookies.
What if I don’t have an apple-shaped cookie cutter?
No worries! Use any fall-themed cutter like leaves or hearts, or even cut freehand with a knife for a rustic look. The royal icing decoration adds the perfect finishing touch regardless.
Pin This Recipe!
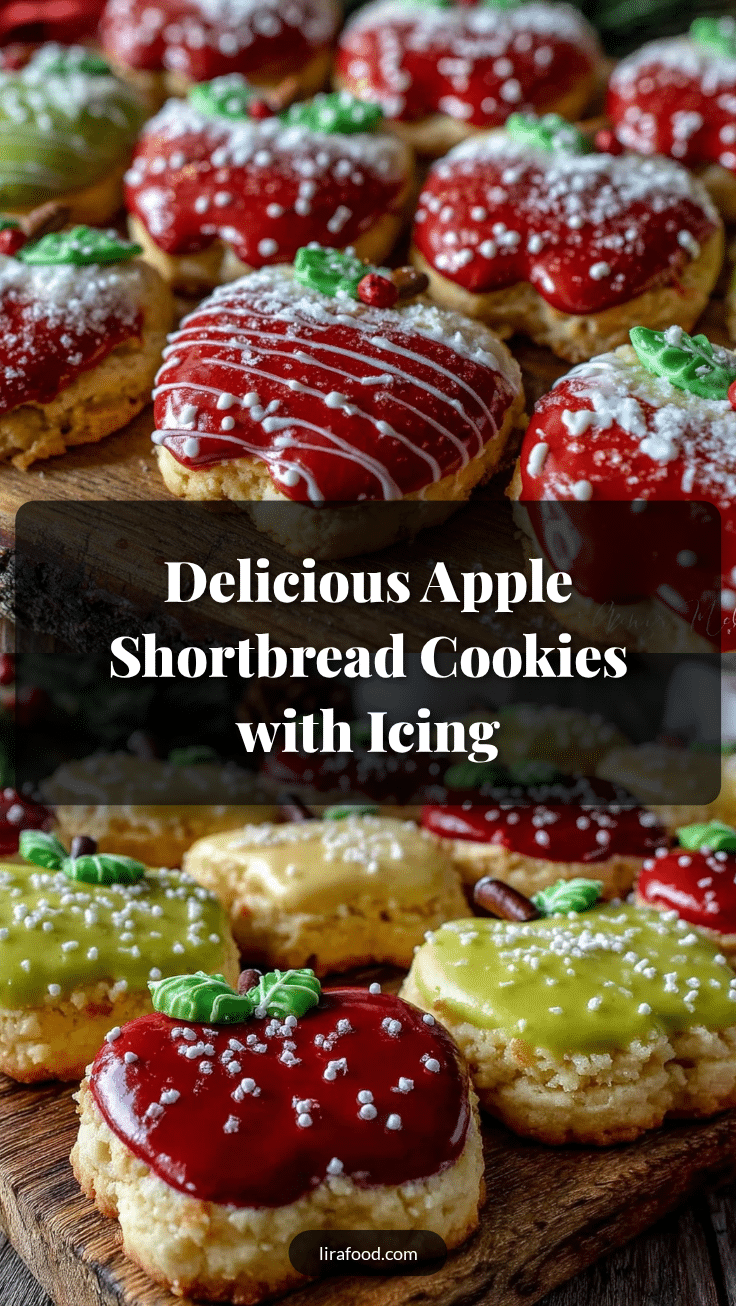
Perfect Apple Shaped Shortbread Cookies

Buttery, crumbly apple shaped shortbread cookies decorated with royal icing, perfect for teacher gifts or festive fall treats. Easy to make with simple pantry ingredients and customizable icing.
- Prep Time: 20 minutes
- Cook Time: 18 minutes
- Total Time: 45 minutes
- Yield: 24 cookies 1x
- Category: Dessert
- Cuisine: American
Ingredients
- 1 cup (227g) unsalted butter, softened
- 1/2 cup (100g) granulated sugar
- 2 cups (240g) all-purpose flour (or almond flour for gluten-free)
- 1/4 teaspoon salt
- 1 teaspoon vanilla extract
- 2 cups (240g) powdered sugar, sifted
- 2 large egg whites (or 4 tablespoons pasteurized meringue powder mixed with 5 tablespoons water)
- 1/2 teaspoon cream of tartar
- Food coloring gels (red and green recommended)
- Optional: a few drops of lemon juice
Instructions
- In a large bowl, beat 1 cup softened unsalted butter with 1/2 cup granulated sugar until light and fluffy (about 3-4 minutes).
- Mix in 1 teaspoon vanilla extract until combined.
- In a separate bowl, whisk together 2 cups all-purpose flour and 1/4 teaspoon salt.
- Gradually add the flour mixture to the butter mixture, mixing on low speed until just combined. Chill dough in fridge for 15 minutes if too sticky.
- Lightly flour work surface and roll out dough to about 1/4 inch thickness.
- Use apple-shaped cookie cutter to cut shapes and transfer to parchment-lined baking sheet.
- Chill cut cookies in fridge for 15-20 minutes to keep shape.
- Preheat oven to 325°F (163°C). Bake cookies for 15-18 minutes until edges start to turn golden.
- Cool cookies on baking sheet for 5 minutes, then transfer to wire rack to cool completely.
- While cookies bake, whisk 2 egg whites with 1/2 teaspoon cream of tartar until frothy. Gradually add 2 cups sifted powdered sugar, beating until stiff peaks form.
- Divide icing into bowls and add food coloring gels as desired.
- Fill piping bags with icing. Outline each cookie, then flood center with thinner icing. Use toothpicks to spread and smooth. Let details dry before adding leaves or stems.
- Allow decorated cookies to dry at room temperature for several hours or overnight to set icing fully.
Notes
Use softened but not melted butter for best texture. Chill dough before cutting and chill cut cookies before baking to prevent spreading. For royal icing, use pasteurized egg whites or meringue powder for safety. Adjust icing consistency by adding powdered sugar or water as needed. Decorate on parchment-lined baking sheet to easily chill icing. Cookies store well in airtight container at room temperature for up to 1 week or freeze undecorated for up to 3 months.
Nutrition
- Serving Size: 1 cookie (about 2.5
- Calories: 120
- Fat: 6
- Carbohydrates: 12
Keywords: shortbread cookies, apple shaped cookies, royal icing, teacher gifts, fall treats, homemade cookies, easy cookies, gluten-free option, vegan option