Love this? Save it for later!
Share the inspiration with your friends
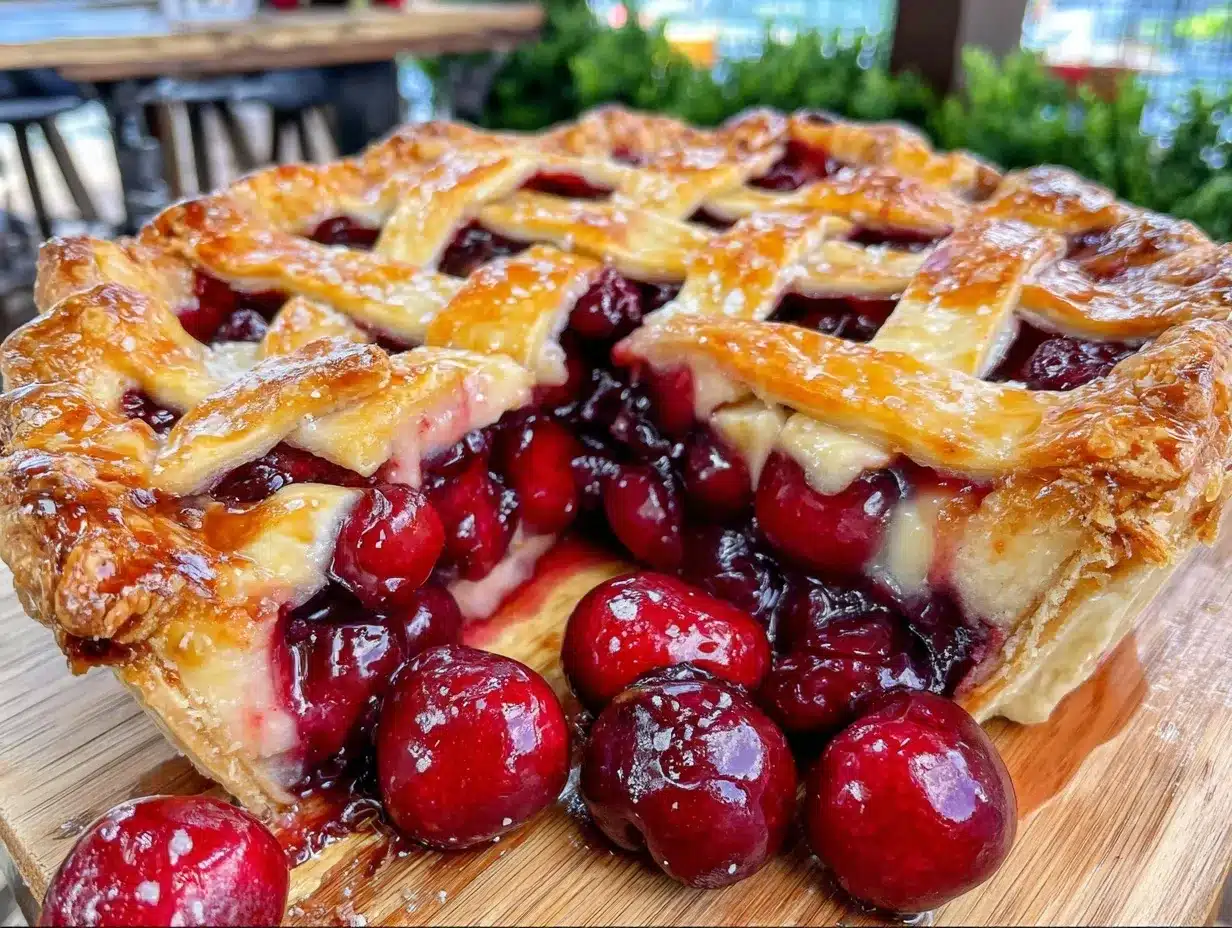
“The summer I turned twenty-five, I stumbled into something unforgettable,” I often tell friends when they ask about my favorite dessert. It was early June, and I was visiting a small, tucked-away orchard that smelled like sunshine and earth after rain. The owner, an elderly gentleman named Mr. Calloway, was casually slicing into a pie as golden light spilled over his creaky wooden porch. That fresh cherry pie—the crust flaky and buttery, the filling bursting with tart-sweet cherries—was nothing short of magic.
I wasn’t expecting much when I took that first bite; honestly, I was distracted by the clatter of nearby bees and the hum of summer cicadas. But that pie had a way of pulling me into the moment. I remember the crust crumbling just right, the juice dripping down my fingers, and the way the cherries seemed to sing with every forkful. Maybe you’ve been there—caught off guard by a simple recipe that feels like a warm hug from the past.
Since then, I’ve chased that perfect fresh cherry pie every June, trying to capture the rustic charm and orchard-fresh taste that Mr. Calloway served without fuss. It’s become my seasonal obsession, a ritual that marks the start of summer with every flaky crust and vibrant cherry bite. Let me tell you, this recipe isn’t just another pie—it’s a little slice of orchard sunshine, easy enough for a weeknight treat but special enough to bring out when you want to impress without stress.
Why You’ll Love This Recipe
After countless tests and tweaks (and a few kitchen mishaps involving runaway cherry pits), I’ve landed on a recipe that balances tradition with simplicity. It’s a homemade fresh cherry pie that feels just right—rustic, full of character, and utterly delicious.
- Quick & Easy: Ready in about 90 minutes, perfect for those June evenings when cherries are begging to be eaten fresh.
- Simple Ingredients: You don’t need anything exotic. Just fresh cherries, pantry staples, and a bit of love.
- Perfect for Summer Gatherings: Whether it’s a casual backyard barbecue or a quiet dessert with friends, this pie fits the bill.
- Crowd-Pleaser: I’ve brought this to potlucks and seen it disappear faster than you can say “second slice.”
- Unbelievably Delicious: The flaky crust and juicy cherry filling hit that sweet-tart balance that makes you close your eyes mid-bite.
What makes this fresh cherry pie stand out? It’s all about the crust—lightly sweetened, buttery, and flaky—and the filling that’s just the right mix of tart and sweet, with a little cornstarch to thicken but never gum things up. I like to toss in a hint of almond extract for depth, which really brings out the cherry’s natural flavor. Honestly, it’s the kind of pie that feels like a secret handshake between you and summer itself.
What Ingredients You Will Need
This fresh cherry pie recipe uses straightforward ingredients that come together to create bold flavor and satisfying texture without any fuss. Most of these are pantry staples, and fresh cherries are the true star, of course.
- For the crust:
- 2 1/2 cups all-purpose flour (I trust King Arthur for consistent results)
- 1 teaspoon salt
- 1 tablespoon granulated sugar (adds just a hint of sweetness)
- 1 cup unsalted butter, cold and cubed (the colder, the flakier!)
- 6-8 tablespoons ice water, as needed
- For the cherry filling:
- 5 cups fresh sweet cherries, pitted (Bing or Rainier work beautifully; pick firm, ripe cherries)
- 3/4 cup granulated sugar (adjust to taste depending on cherry sweetness)
- 2 tablespoons cornstarch (for that perfect thickened filling)
- 1 tablespoon freshly squeezed lemon juice (brightens the flavor)
- 1 teaspoon almond extract (optional but highly recommended for depth)
- 1/4 teaspoon ground cinnamon (just a whisper for warmth)
- 1 tablespoon unsalted butter, cut into small pieces (to dot on top of filling before baking)
- For finishing touches:
- 1 large egg, beaten (for egg wash)
- 1 tablespoon coarse sugar (sprinkled on crust for crunch and sparkle)
If you want a gluten-free crust, almond flour or a store-bought gluten-free blend works well here. For a dairy-free option, coconut oil can replace butter, though the texture changes slightly. In summer, you can swap in fresh blueberries or a mix of berries if cherries are scarce, but honestly, there’s nothing quite like the fresh cherry flavor this time of year.
Equipment Needed
- 9-inch (23 cm) pie dish (glass or ceramic — I prefer glass for even baking)
- Mixing bowls (one large for dough, one medium for filling)
- Pastry cutter or two forks (to cut butter into flour)
- Rolling pin (a small wooden one works fine; if you don’t have one, a clean wine bottle can do the trick!)
- Sharp knife or pizza cutter (for trimming and venting the crust)
- Measuring cups and spoons (for precise ingredients)
- Baking sheet (to catch any drips during baking)
For those without a pastry cutter, cold hands and quick finger work will do just fine, though the cutter helps keep the butter pieces intact for flakiness. If you don’t own a pie dish, any oven-safe round dish about the same size works, just watch the baking time. I keep a silicone baking mat handy for rolling out dough — it makes transfer easier and cleanup a breeze.
Preparation Method
- Make the pie dough: In a large bowl, whisk together 2 1/2 cups flour, salt, and sugar. Add the cold, cubed butter. Using a pastry cutter or two forks, cut the butter into the flour until the mixture resembles coarse crumbs with pea-sized pieces. (Tip: Work quickly to keep butter cold.)
- Add ice water: Sprinkle 6 tablespoons of ice water over the mixture. Use a fork to mix gently until the dough starts to come together. Add more water, one tablespoon at a time, if needed—dough should hold when pressed but not be sticky.
- Chill the dough: Divide dough into two equal discs, wrap each tightly in plastic wrap, and refrigerate for at least 1 hour. (If you’re pressed for time, 30 minutes works, but cold dough is easier to handle.)
- Prepare the filling: In a medium bowl, combine pitted cherries, sugar, cornstarch, lemon juice, almond extract, and cinnamon. Toss gently to coat all cherries. Let it sit while dough chills to allow juices to mingle.
- Roll out the bottom crust: On a lightly floured surface, roll one dough disc into a 12-inch circle, about 1/8 inch thick. Carefully transfer it to your pie dish, letting the dough hang over edges slightly.
- Add filling: Pour cherry filling into crust, spreading evenly. Dot the 1 tablespoon butter pieces over the cherries.
- Roll out top crust: Roll the second dough disc into a 12-inch circle. You can do a full top crust with slits for steam to escape, or cut into strips to create a lattice pattern.
- Assemble the pie: Place the top crust or lattice over the filling. Trim excess dough, leaving about 1/2 inch overhang. Fold edges under and crimp decoratively with your fingers or a fork.
- Apply egg wash: Brush the top crust with beaten egg. Sprinkle coarse sugar generously for a sparkling finish.
- Bake: Place pie on a baking sheet to catch drips. Bake in a preheated 375°F (190°C) oven for 50-60 minutes. The crust should be golden brown, and the filling bubbly. If edges brown too quickly, cover them with foil halfway through baking.
- Cool: Let the pie cool at least 2 hours before slicing to allow the filling to set properly.
Pro tip: If your crust shrinks or tears, patch it with extra dough scraps and a dab of water—it’s rustic, so no need to stress! Also, I like to keep a bowl handy for cherry pits; this recipe can get messy but that’s all part of the fun.
Cooking Tips & Techniques
Making fresh cherry pie might seem straightforward, but a few tricks help get it just right every time. First, keep everything as cold as possible—cold butter and chilled dough make for flakier crust. When rolling out, try not to overwork the dough; that’s how toughness sneaks in.
Don’t skip cornstarch in the filling—cherries release a lot of juice, and cornstarch helps thicken without turning gummy. If your cherries are very juicy, add an extra teaspoon.
For even baking, I always place the pie on a lower oven rack to help the bottom crust cook through. A baking sheet underneath is a must unless you want a sticky oven mess (trust me, I’ve been there).
Lattice tops look fancy but are surprisingly simple once you get the hang of weaving strips. If you’re short on time or patience, a simple fully covered crust with steam vents works just as well.
Finally, patience is key. Let the pie cool completely before slicing. I know it’s tempting to dig in hot, but the filling needs time to thicken for neat slices.
Variations & Adaptations
- Dietary tweaks: For gluten-free crust, almond or oat flour blends work well. Use coconut oil instead of butter for a dairy-free option, though expect a slightly different texture.
- Flavor twists: Add a splash of bourbon or vanilla extract to the filling for an adult-friendly version. Mixing in fresh blueberries or blackberries makes a lovely berry medley.
- Cooking method: If you don’t want to bake a full pie, try making cherry hand pies or turnovers using the same filling and dough.
- Personal favorite: I once tried sprinkling chopped toasted almonds over the filling before topping the crust—it added a delightful crunch and nutty note that surprised everyone.
Serving & Storage Suggestions
Serve your fresh cherry pie slightly warm or at room temperature, ideally with a scoop of vanilla ice cream or a dollop of lightly whipped cream. The contrast of cool cream and warm pie is just heavenly.
Leftovers keep well covered in the fridge for up to 3 days. Reheat slices in a 300°F (150°C) oven for 10-15 minutes to bring back that fresh-baked warmth without sogginess. Cherry pie also freezes beautifully—wrap tightly and freeze for up to 2 months. Thaw overnight in the fridge before reheating.
Flavors deepen after a day, so if you can wait, the pie tastes even better the next day. Just don’t wait too long, or you’ll miss that fresh cherry zing that makes it special.
Nutritional Information & Benefits
This fresh cherry pie offers a sweet treat with some nutritional perks. Cherries are packed with antioxidants and vitamin C, which support overall health. Using fresh fruit rather than canned or processed keeps the pie lighter and more wholesome.
While it’s a dessert, controlling sugar levels and using a homemade crust means you know exactly what’s going in. You can reduce sugar slightly if your cherries are very sweet. This recipe is naturally vegetarian and can be adapted for gluten-free or dairy-free diets as needed.
Conclusion
This perfect fresh cherry pie recipe is my go-to every June, a little celebration of the season’s best fruit wrapped in flaky, buttery crust. Honestly, it’s the kind of dessert that makes you pause and savor the simple joys of summer.
Feel free to tweak the sweetness, add your own flavor notes, or try different crust types. That’s the beauty of homemade pie—it’s personal, imperfect, and always delicious.
I’d love to hear how your cherry pie turns out, any variations you try, or even those funny kitchen moments you have along the way. Drop a comment and share your story—the pie community is waiting!
Happy baking and may your summer be filled with sweet moments and even sweeter pie!
FAQs
How do I pit cherries quickly for this pie?
A handy trick is to use a metal straw or a chopstick to push the pit out through the stem end. It’s quick and keeps the cherries mostly intact.
Can I use frozen cherries instead of fresh?
Yes, frozen cherries work fine but thaw and drain them well to avoid excess liquid. You may need to add a bit more cornstarch to thicken the filling.
Why did my pie crust turn out tough?
Tough crust usually means the dough was overworked or the butter got too warm. Keep ingredients cold and handle dough gently for the flakiest results.
How do I prevent the crust edges from burning?
Cover the edges with foil or a pie shield about halfway through baking to protect them from over-browning.
Can I make this pie ahead of time?
Absolutely! You can assemble and refrigerate the pie a few hours before baking. Just bring it back to the fridge for at least 30 minutes before baking to keep the crust firm.
Pin This Recipe!
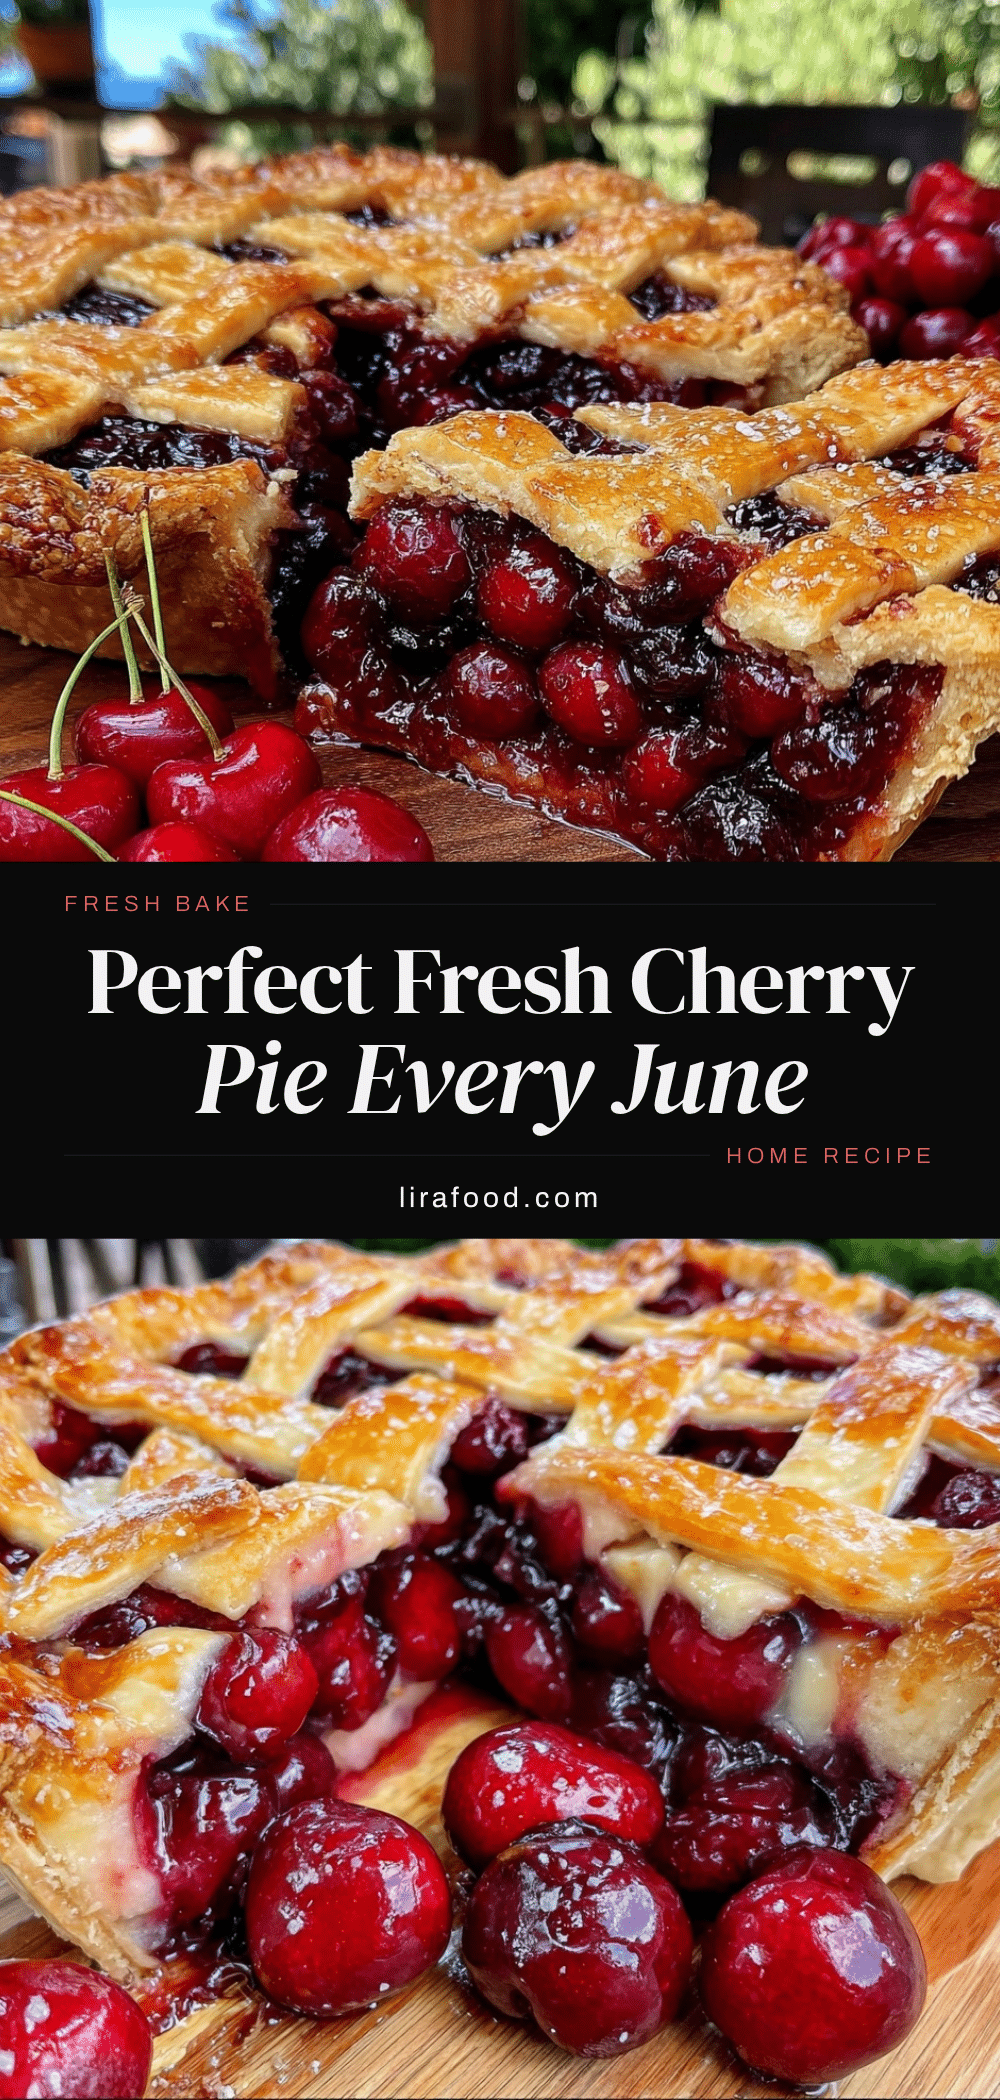
Perfect Fresh Cherry Pie Recipe Easy Homemade Rustic Favorite
A rustic and easy homemade fresh cherry pie with a flaky buttery crust and a tart-sweet cherry filling, perfect for summer gatherings and simple enough for weeknight treats.
- Prep Time: 20 minutes
- Cook Time: 55 minutes
- Total Time: 1 hour 15 minutes plus 1 hour chilling
- Yield: 8 servings 1x
- Category: Dessert
- Cuisine: American
Ingredients
- 2 1/2 cups all-purpose flour
- 1 teaspoon salt
- 1 tablespoon granulated sugar
- 1 cup unsalted butter, cold and cubed
- 6–8 tablespoons ice water, as needed
- 5 cups fresh sweet cherries, pitted
- 3/4 cup granulated sugar
- 2 tablespoons cornstarch
- 1 tablespoon freshly squeezed lemon juice
- 1 teaspoon almond extract (optional)
- 1/4 teaspoon ground cinnamon
- 1 tablespoon unsalted butter, cut into small pieces
- 1 large egg, beaten
- 1 tablespoon coarse sugar
Instructions
- In a large bowl, whisk together 2 1/2 cups flour, salt, and sugar. Add the cold, cubed butter. Using a pastry cutter or two forks, cut the butter into the flour until the mixture resembles coarse crumbs with pea-sized pieces.
- Sprinkle 6 tablespoons of ice water over the mixture. Use a fork to mix gently until the dough starts to come together. Add more water, one tablespoon at a time, if needed—dough should hold when pressed but not be sticky.
- Divide dough into two equal discs, wrap each tightly in plastic wrap, and refrigerate for at least 1 hour.
- In a medium bowl, combine pitted cherries, sugar, cornstarch, lemon juice, almond extract, and cinnamon. Toss gently to coat all cherries. Let it sit while dough chills.
- On a lightly floured surface, roll one dough disc into a 12-inch circle, about 1/8 inch thick. Carefully transfer it to your pie dish, letting the dough hang over edges slightly.
- Pour cherry filling into crust, spreading evenly. Dot the 1 tablespoon butter pieces over the cherries.
- Roll the second dough disc into a 12-inch circle. Place the top crust or lattice over the filling. Trim excess dough, leaving about 1/2 inch overhang. Fold edges under and crimp decoratively.
- Brush the top crust with beaten egg. Sprinkle coarse sugar generously for a sparkling finish.
- Place pie on a baking sheet to catch drips. Bake in a preheated 375°F (190°C) oven for 50-60 minutes until crust is golden brown and filling bubbly. Cover edges with foil halfway through if browning too fast.
- Let the pie cool at least 2 hours before slicing to allow the filling to set properly.
Notes
Keep ingredients cold for a flaky crust. Use cornstarch to thicken filling without gumminess. Cover crust edges with foil if browning too quickly. Let pie cool completely before slicing for neat slices. Gluten-free and dairy-free substitutions suggested in notes.
Nutrition
- Serving Size: 1 slice (1/8 of pie)
- Calories: 350
- Sugar: 25
- Sodium: 180
- Fat: 18
- Saturated Fat: 11
- Carbohydrates: 44
- Fiber: 2
- Protein: 3
Keywords: cherry pie, fresh cherry pie, homemade pie, summer dessert, rustic pie, flaky crust, easy pie recipe