Love this? Save it for later!
Share the inspiration with your friends
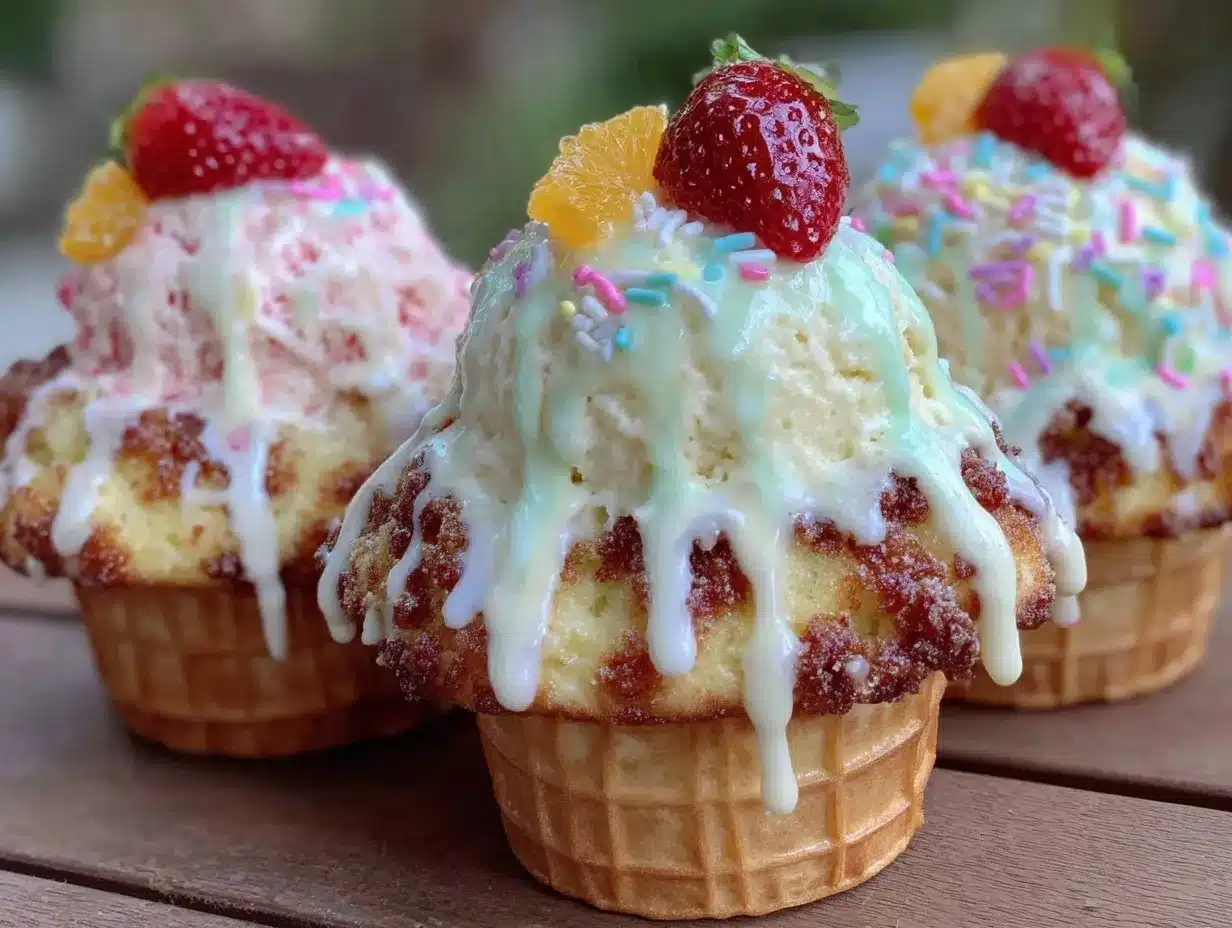
“I wasn’t planning on baking that day,” I admitted to myself as the sun streamed lazily through my kitchen window. It was one of those unexpected summer afternoons when the kids begged for something cold and sweet, but honestly, the freezer was looking pretty bare. I rifled through the pantry and spotted a few waffle ice cream cones tucked away behind the cereal boxes. That’s when it hit me—why not turn those cones into cupcakes? I grabbed a mixing bowl, and amidst a small flour spill and an enthusiastic but messy frosting attempt, the Perfect Ice Cream Cone Cupcakes with Dripping Summer Scoops were born.
You know that feeling when a simple idea turns into a full-blown celebration? That’s exactly what happened. These cupcakes look like mini ice cream cones, dripping with luscious frosting that mimics melting scoops on a hot day. Honestly, I wasn’t sure if the batter would hold in the cones, or if the frosting would slide off—but it all worked out, and the kids’ faces said it all. Maybe you’ve been there—scrambling to make something fun and delicious with whatever’s on hand. This recipe stays with me because it’s not just playful; it’s a way to bring summer joy into any kitchen, no matter the chaos. Let me tell you, the cracked cone and the frosting blob that slid off didn’t matter one bit once the first bite happened.
Why You’ll Love This Recipe
After a few kitchen trials, I can confidently say this recipe is a keeper. The Perfect Ice Cream Cone Cupcakes with Dripping Summer Scoops offer a delightful twist on traditional cupcakes, making them a hit for parties, family get-togethers, or just a sunny afternoon treat.
- Quick & Easy: Ready in under 45 minutes, perfect for last-minute dessert cravings.
- Simple Ingredients: Uses pantry staples like flour, sugar, and eggs—no fancy trips to specialty stores.
- Fun Presentation: The ice cream cone shape with dripping frosting instantly wows guests, especially kids.
- Versatile Flavor Base: Vanilla cupcakes with customizable frosting flavors to suit any taste.
- Messy-But-Rewarding: The dripping frosting look is a little imperfect, but that’s part of the charm and homemade feel.
This recipe isn’t just another cupcake—it’s a playful take that brings the nostalgia of summer ice cream into a portable, bite-sized form. What makes these cupcakes stand out is the clever use of waffle cones as the base, which adds a satisfying crunch and a visual pop that’s hard to resist. Plus, the frosting is whipped just right to mimic melting ice cream, which is honestly a bit of kitchen magic I love sharing with friends. It’s the kind of dessert that makes you pause, smile, and maybe even close your eyes after the first bite (you know what I mean).
What Ingredients You Will Need
This recipe uses simple, wholesome ingredients to deliver bold flavor and satisfying texture without the fuss. Most are pantry staples, and you probably have them already. Here’s what you’ll need:
- Ice cream cones: Standard waffle cones, about 4-inch size (makes a sturdy cupcake base).
- All-purpose flour: 1 cup (125g), sifted for lightness.
- Baking powder: 1 teaspoon (leavening to keep cupcakes fluffy).
- Salt: 1/4 teaspoon (balances sweetness).
- Granulated sugar: 3/4 cup (150g), I prefer Domino sugar for consistency.
- Unsalted butter: 1/2 cup (115g), softened (adds richness).
- Large eggs: 2, room temperature (helps with structure).
- Vanilla extract: 1 teaspoon (real vanilla makes all the difference).
- Whole milk: 1/2 cup (120ml), room temperature (keeps batter moist).
- Powdered sugar: 1 1/2 cups (180g), for frosting.
- Heavy cream: 2 tablespoons (30ml), for frosting smoothness.
- Food coloring: Optional, to tint frosting like your favorite ice cream flavors.
- Sprinkles or crushed nuts: Optional, for decorating dripping frosting.
If you want a dairy-free version, swap whole milk with almond milk and use dairy-free butter. For a gluten-free twist, almond flour or a gluten-free blend works, but expect a slightly different texture. In summer, adding a teaspoon of lemon zest to the batter brightens the flavor nicely. I often grab my cones from the local bakery section—they tend to be sturdier and less sweet than some grocery brands.
Equipment Needed
- Mixing bowls: One medium and one large for batter and frosting.
- Electric mixer: Stand or handheld, helps whip up the butter and sugar effortlessly.
- Measuring cups and spoons: For accurate ingredient amounts.
- Ice cream cones: As the cupcake vessel.
- Baking sheet or cupcake pan: A rimmed baking sheet works best to keep cones upright.
- Piping bag with round tip: For that perfect dripping frosting look (a zip-top bag with a corner cut off works too).
- Cooling rack: To let cupcakes cool completely before frosting.
If you don’t have a piping bag, a small spoon works fine for dolloping frosting, though you won’t get the same drip effect. I once tried using a muffin tin to hold the cones—worked okay but was tricky to get cones to stand perfectly upright. A simple baking sheet rimmed with foil or parchment paper makes cleanup easier too. For budget-friendly options, electric beaters can be skipped by hand whisking the frosting, but be ready for a workout!
Preparation Method
- Preheat your oven to 350°F (175°C). Line a rimmed baking sheet with parchment paper. Place the waffle cones upright, spacing them a couple of inches apart so they don’t tip over.
- In a medium bowl, whisk together 1 cup (125g) all-purpose flour, 1 teaspoon baking powder, and 1/4 teaspoon salt. Set aside. This dry mix will keep your cupcakes light and fluffy.
- In a large bowl, cream 1/2 cup (115g) softened unsalted butter and 3/4 cup (150g) granulated sugar with an electric mixer for about 3 minutes. You want it pale and fluffy—this traps air for a tender crumb.
- Add two large eggs one at a time to the butter mixture, beating well after each addition. Stir in 1 teaspoon vanilla extract. If you forget the vanilla like I did once, the cupcakes end up a little flat in flavor, so don’t skip this!
- Alternate adding the dry ingredients and 1/2 cup (120ml) whole milk to the wet mixture, starting and ending with the dry. Mix just until combined—overmixing can make cupcakes tough.
- Spoon the batter carefully into each cone, filling about 3/4 full. I use a small ice cream scoop or two spoons to avoid spills. Expect a little batter to drip over the edge—just wipe it away before baking.
- Bake for 18-20 minutes or until a toothpick inserted into the cupcake comes out clean. The cones might brown slightly, but that’s part of the charm. Keep an eye after 15 minutes to avoid burning.
- Remove cones from oven and let them cool upright on the baking sheet for 10 minutes. Then transfer to a cooling rack to cool completely. Frosting warm cupcakes will cause melting—trust me, I learned this the hard way.
- For the frosting, beat 1/2 cup (115g) softened unsalted butter until creamy. Gradually add 1 1/2 cups (180g) powdered sugar, alternating with 2 tablespoons (30ml) heavy cream, until fluffy and spreadable.
- Add food coloring if desired. Use a piping bag with a round tip to pipe frosting generously on top of each cupcake, letting it drip naturally down the sides to mimic melting ice cream.
- Decorate with sprinkles or crushed nuts for extra fun. Serve immediately or chill for 30 minutes to set the frosting drip.
Cooking Tips & Techniques
One thing I’ve learned is that batter consistency is key. If it’s too thick, the cupcakes won’t rise well inside the cones, and if it’s too thin, you risk spills and uneven baking. So, keep an eye on your batter texture—it should be smooth but not runny.
Also, positioning the cones upright is a bit tricky. I like to create little cardboard or foil holders to keep cones steady on the baking sheet. Without this, they might tip and spill batter everywhere (been there!).
When frosting, piping slowly and letting gravity do the work gives the best dripping effect. Don’t try to force drips; a natural run looks more like melting ice cream. If your frosting is too stiff, add a splash more cream; if too soft, add a bit more powdered sugar.
Timing is important—cool cupcakes completely before frosting to prevent melting. If you’re multitasking, bake the cupcakes first and prepare frosting while they cool.
Lastly, don’t be afraid to get messy. The charm of these cupcakes is in their imperfect, playful look. I always say a few drips on the counter are worth the smiles at the table.
Variations & Adaptations
There are plenty of ways to make these cupcakes your own:
- Flavor swaps: Add cocoa powder to the batter for chocolate cones, or swirl in strawberry puree for a fruity twist.
- Frosting flavors: Try cream cheese frosting for tanginess or peanut butter frosting for a rich, nutty vibe.
- Dietary adaptations: Use gluten-free flour blends for gluten intolerance, and swap butter with coconut oil for dairy-free versions.
- Seasonal toppings: Top with fresh berries in summer or candied nuts in fall for a festive touch.
- Cooking method: For a fun twist, refrigerate the cones with batter and bake just before serving to keep cones extra crunchy.
I personally love adding a pinch of cinnamon to the batter in the fall, which gives a warm note that pairs beautifully with cream cheese frosting. It’s a small change but feels like a whole new treat.
Serving & Storage Suggestions
Serve these cupcakes at room temperature to fully enjoy the texture contrast between crunchy cone and soft cake. They make a fantastic centerpiece for summer parties or casual backyard barbecues.
Pair with a cold lemonade or iced tea to keep the summer vibe going. If you want to add a grown-up touch, a scoop of vanilla ice cream alongside works surprisingly well.
Store cupcakes in an airtight container in the refrigerator for up to 3 days. Let them come to room temperature for about 15 minutes before serving to soften the frosting slightly.
For longer storage, freeze unfrosted cupcakes wrapped tightly for up to 2 months. Thaw overnight in the fridge and frost just before serving. The cone stays surprisingly crunchy even after freezing, which always impresses guests.
Over time, the frosting flavor settles and the texture softens a bit, making these cupcakes even more enjoyable the next day if you can resist eating them all at once!
Nutritional Information & Benefits
Each Perfect Ice Cream Cone Cupcake contains approximately 220 calories, 10g fat, 30g carbohydrates, and 3g protein. This makes them an indulgent but reasonable treat when enjoyed in moderation.
The use of real butter and eggs provides a good dose of essential fats and protein, while the vanilla extract adds a natural flavor punch without artificial additives.
For those watching sugar intake, you can reduce granulated and powdered sugar amounts by 20% without sacrificing too much texture or sweetness.
Gluten-free or dairy-free versions allow more people to enjoy these cupcakes, making them a flexible choice for diverse dietary needs.
From a wellness perspective, I find that homemade treats like this connect us to joyful moments and shared experiences, which is just as important as any nutrition fact!
Conclusion
Honestly, the Perfect Ice Cream Cone Cupcakes with Dripping Summer Scoops are a fun, charming way to bring summer vibes into your kitchen any time of year. They combine familiar flavors with a playful presentation that’s sure to make you smile (and maybe a little messy!).
Feel free to customize these cupcakes to your liking—different flavors, toppings, or dietary tweaks. I love that this recipe invites creativity as much as it does enjoyment.
These cupcakes have become a go-to for me when I want a dessert that feels special but doesn’t require hours in the kitchen. If you try them, I’d love to hear how they turned out or what twists you added!
Go ahead and give these a shot this weekend—you might just find your new favorite summer treat. Happy baking!
FAQs
Can I use cake mix instead of making the batter from scratch?
Yes! Using a vanilla cake mix saves time. Just be sure to reduce the liquid slightly to keep the batter thick enough to hold in the cones.
How do I keep the cones from tipping over during baking?
Place the cones in a rimmed baking sheet lined with foil or parchment, and use crumpled foil to create little holders that stabilize each cone upright.
What’s the best way to pipe the frosting to get the dripping effect?
Use a piping bag fitted with a round tip and pipe slowly from the top center, letting the frosting naturally drip down. Adjust frosting consistency if needed.
Can I make these cupcakes ahead of time?
Absolutely! Bake the cupcakes a day ahead and store unfrosted in an airtight container. Frost just before serving for best results.
Are these cupcakes kid-friendly?
Definitely! Kids love the playful ice cream cone look and the sweet, soft cake with creamy frosting. Just watch out for drips and sticky fingers!
Pin This Recipe!
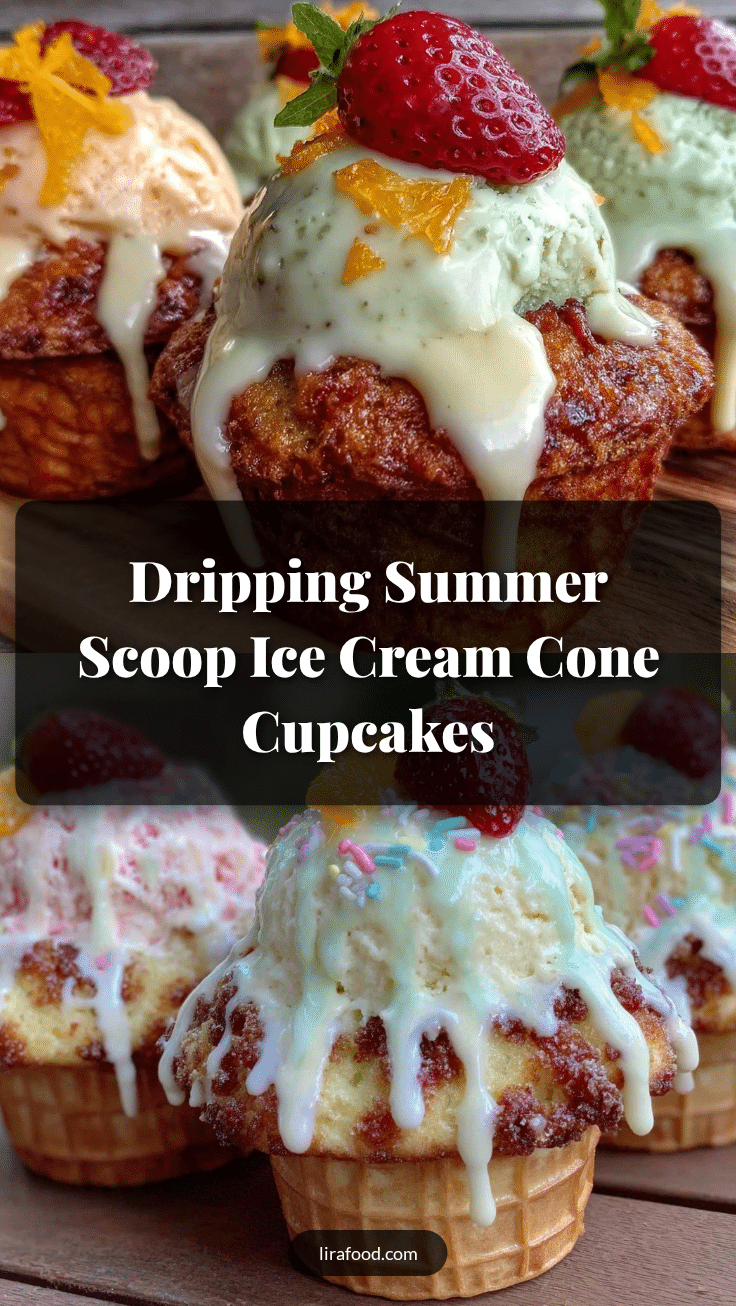
Perfect Ice Cream Cone Cupcakes with Dripping Summer Scoops
These playful cupcakes use waffle ice cream cones as the base, filled with vanilla cupcake batter and topped with dripping frosting that mimics melting ice cream. Perfect for summer parties and family treats.
- Prep Time: 15 minutes
- Cook Time: 20 minutes
- Total Time: 35 minutes
- Yield: 8 servings 1x
- Category: Dessert
- Cuisine: American
Ingredients
- 4-inch waffle ice cream cones
- 1 cup (125g) all-purpose flour, sifted
- 1 teaspoon baking powder
- 1/4 teaspoon salt
- 3/4 cup (150g) granulated sugar
- 1/2 cup (115g) unsalted butter, softened
- 2 large eggs, room temperature
- 1 teaspoon vanilla extract
- 1/2 cup (120ml) whole milk, room temperature
- 1 1/2 cups (180g) powdered sugar
- 2 tablespoons (30ml) heavy cream
- Food coloring (optional)
- Sprinkles or crushed nuts (optional)
Instructions
- Preheat your oven to 350°F (175°C). Line a rimmed baking sheet with parchment paper. Place the waffle cones upright, spacing them a couple of inches apart so they don’t tip over.
- In a medium bowl, whisk together 1 cup (125g) all-purpose flour, 1 teaspoon baking powder, and 1/4 teaspoon salt. Set aside.
- In a large bowl, cream 1/2 cup (115g) softened unsalted butter and 3/4 cup (150g) granulated sugar with an electric mixer for about 3 minutes until pale and fluffy.
- Add two large eggs one at a time to the butter mixture, beating well after each addition. Stir in 1 teaspoon vanilla extract.
- Alternate adding the dry ingredients and 1/2 cup (120ml) whole milk to the wet mixture, starting and ending with the dry. Mix just until combined.
- Spoon the batter carefully into each cone, filling about 3/4 full. Wipe away any drips before baking.
- Bake for 18-20 minutes or until a toothpick inserted into the cupcake comes out clean. Watch closely after 15 minutes to avoid burning.
- Remove cones from oven and let them cool upright on the baking sheet for 10 minutes. Then transfer to a cooling rack to cool completely.
- For the frosting, beat 1/2 cup (115g) softened unsalted butter until creamy. Gradually add 1 1/2 cups (180g) powdered sugar, alternating with 2 tablespoons (30ml) heavy cream, until fluffy and spreadable.
- Add food coloring if desired. Use a piping bag with a round tip to pipe frosting generously on top of each cupcake, letting it drip naturally down the sides.
- Decorate with sprinkles or crushed nuts if desired. Serve immediately or chill for 30 minutes to set the frosting drip.
Notes
Keep batter consistency smooth but not runny to avoid spills and ensure cupcakes rise well. Use foil or cardboard holders to keep cones upright during baking. Cool cupcakes completely before frosting to prevent melting. For a natural dripping frosting effect, pipe slowly and let gravity work. Frosting consistency can be adjusted with more cream or powdered sugar as needed.
Nutrition
- Serving Size: 1 cupcake
- Calories: 220
- Sugar: 20
- Sodium: 120
- Fat: 10
- Saturated Fat: 6
- Carbohydrates: 30
- Fiber: 0.5
- Protein: 3
Keywords: ice cream cone cupcakes, summer cupcakes, dripping frosting, easy cupcakes, kids dessert, waffle cone cupcakes