Love this? Save it for later!
Share the inspiration with your friends
“I wasn’t expecting a party centerpiece to come from a last-minute grocery run,” I confessed to my friend Lisa that Friday evening. It was my niece’s eighth birthday, and honestly, I had forgotten all about picking up a cake until I was halfway through the store. As I wandered the frozen aisle, the idea of a sparkling, colorful cake that combined ice cream and all those festive sprinkles popped into my head like a lightbulb moment. I mean, who doesn’t love a good surprise that’s both fun and delicious?
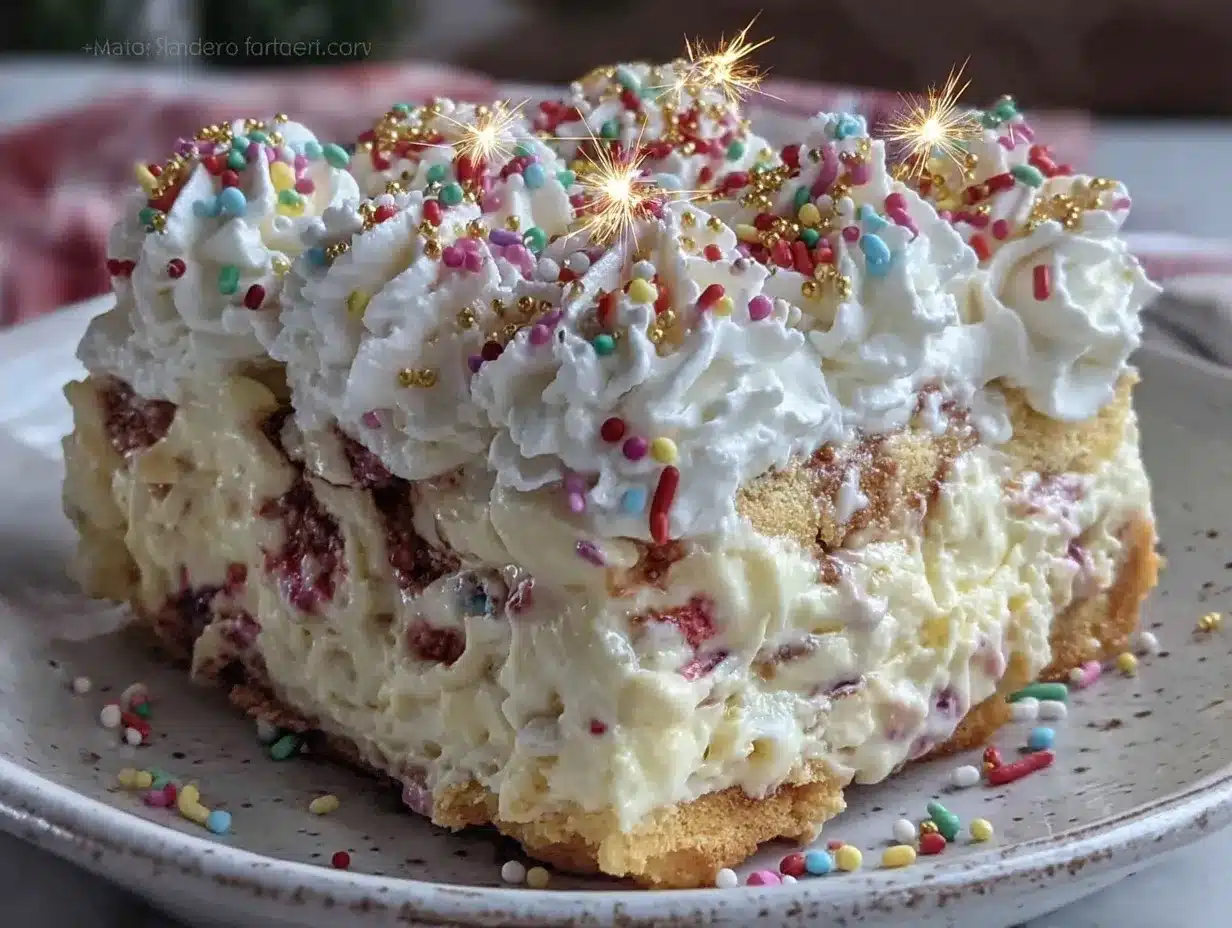
The next day, with a cracked mixing bowl and a kitchen that looked like a confetti explosion had exploded, I whipped up what I now call the Perfect Sparkler Funfetti Ice Cream Cake for Celebrations. It was a bit messy, the timer dinged just as my phone buzzed with a dozen last-minute RSVPs, but that first bite? Magical. The creamy ice cream melting into the soft cake, the bursts of rainbow sprinkles, and the crackle of sparklers on top made everyone pause and smile.
Maybe you’ve been there—scrambling to put together something festive without the fuss. This recipe stayed with me because it’s simple enough to pull off on a busy day, yet it feels like a showstopper. Honestly, it’s the kind of cake that makes you close your eyes after the first bite and say, “Yep, this is celebration food.” Let me tell you, it’s become my go-to for birthdays, holidays, and any moment worth a little sparkle.
Why You’ll Love This Recipe
From my many trials (and a few hilarious kitchen mishaps), I can confidently say this Perfect Sparkler Funfetti Ice Cream Cake is a winner for celebrations big and small. Here’s why it might just become your favorite too:
- Quick & Easy: Comes together in under 45 minutes, perfect for those last-minute party plans or sudden cravings.
- Simple Ingredients: You likely have most of these in your pantry and freezer—no hunting down fancy items required.
- Perfect for Celebrations: Whether it’s a birthday bash, a festive gathering, or just because, this cake steals the show.
- Crowd-Pleaser: Kids adore the colorful sprinkles, and adults appreciate the creamy texture and balanced sweetness.
- Unbelievably Delicious: The combo of moist funfetti cake layers with smooth ice cream makes every bite a treat.
What really sets this recipe apart is the layering technique I developed after a few less-than-perfect attempts. Instead of mixing the sprinkles into batter that sometimes bled color, I fold them gently into the cake batter just before baking, keeping their vibrant pop intact. Plus, the sparkler-topped presentation adds that wow factor without extra fuss.
Honestly, this isn’t just any funfetti cake with ice cream slapped on. It’s celebration food reimagined—light, refreshing, and joyful. You can make it your own by swapping ice cream flavors or sprinkle varieties, but the core magic stays the same. It’s all about that moment when you light the sparklers and watch faces light up alongside them.
What Ingredients You Will Need
This recipe uses straightforward, pantry-friendly ingredients to create that perfect balance of flavor and texture. The ingredients are easy to find, and I’ve included some substitution tips if you want to tweak it to your liking.
- For the Funfetti Cake Layers:
- 1 ½ cups (190g) all-purpose flour
- 1 tsp baking powder
- ¼ tsp salt
- ¾ cup (150g) granulated sugar
- ½ cup (115g) unsalted butter, softened (I recommend Kerry Gold for a rich flavor)
- 2 large eggs, room temperature
- 2 tsp vanilla extract (pure vanilla for best aroma)
- ½ cup (120ml) whole milk (swap with almond milk if you want dairy-free)
- ⅓ cup rainbow sprinkles (use sturdy jimmies rather than nonpareils to avoid bleeding)
- For the Ice Cream Filling:
- 1 quart (946ml) vanilla ice cream, slightly softened (Ben & Jerry’s or Häagen-Dazs work well)
- Optional: ½ cup mini chocolate chips or candy pieces for texture
- For Decoration:
- Additional sprinkles for the top
- Birthday sparklers (make sure they are food-safe)
Pro tip: If you want a gluten-free version, swap the all-purpose flour for a 1-to-1 gluten-free baking blend. The texture might be slightly different, but the flavor still rocks. Also, if you prefer a richer cake, try using sour cream instead of milk—it adds moistness and depth.
Equipment Needed
- Two 8-inch (20cm) round cake pans – I use non-stick for easy release, but greased and parchment-lined pans work just as well.
- Mixing bowls – at least two, one for dry ingredients, one for wet.
- Electric mixer or stand mixer – helps get that butter and sugar creamed perfectly, but you can do it by hand if needed (just brace yourself!).
- Spatula and whisk – for folding in sprinkles and combining ingredients gently.
- Plastic wrap or airtight container – for freezing the assembled cake layers.
- Offset spatula or butter knife – for spreading the ice cream smoothly between layers.
- Kitchen timer – because timing is everything in baking and freezing.
If you don’t have cake pans, you can use a springform pan or even an 8-inch square baking dish (just adjust layering accordingly). For freezing, make sure your freezer has enough space to lay the cake flat for several hours. I once forgot to clear space, and the cake got a little squished—lesson learned!
Preparation Method
- Preheat your oven to 350°F (175°C). Grease and line your two 8-inch cake pans with parchment paper. This step prevents sticking and makes cleanup easier – trust me, it’s worth the extra minute.
- Mix dry ingredients: In a medium bowl, whisk together 1 ½ cups flour, 1 tsp baking powder, and ¼ tsp salt. Set aside.
- Cream butter and sugar: In a large bowl, beat ½ cup softened unsalted butter and ¾ cup sugar with an electric mixer on medium speed until light and fluffy (about 3-4 minutes). This step gives the cake its tender crumb.
- Add eggs and vanilla: Beat in 2 large eggs one at a time, then stir in 2 tsp vanilla extract until combined.
- Combine wet and dry: Gradually add the flour mixture alternately with ½ cup milk, starting and ending with dry ingredients. Mix until just combined – don’t overmix or the cake will be tough.
- Fold in sprinkles: Gently fold in ⅓ cup rainbow sprinkles using a spatula. The key here is to be gentle so the colors don’t bleed.
- Divide batter and bake: Pour the batter evenly into the two prepared pans. Smooth the tops with a spatula. Bake for 22-25 minutes or until a toothpick inserted into the center comes out clean. Keep an eye on them; ovens vary!
- Cool cakes: Let cakes cool in pans for 10 minutes, then transfer to wire racks to cool completely. This prevents the ice cream from melting when assembling.
- Prepare ice cream layer: Slightly soften 1 quart of vanilla ice cream at room temperature for about 10 minutes so it’s spreadable but not melted. If using, fold in mini chocolate chips gently.
- Assemble the cake: Place one cake layer on a serving plate. Spread half the softened ice cream evenly over the top using an offset spatula. Top with the second cake layer, then spread the remaining ice cream over the top and sides for a smooth finish.
- Freeze: Wrap the entire cake tightly with plastic wrap and place in the freezer for at least 4 hours, preferably overnight. This helps the layers set perfectly.
- Decorate: Before serving, sprinkle extra rainbow sprinkles on top. Add birthday sparklers carefully when ready to wow your guests.
Pro tip: If you notice your cake layers domed on top, level them off with a serrated knife before assembling. It makes stacking neater and spreading easier. Also, don’t skip the chilling step – rushing it can cause a melty mess.
Cooking Tips & Techniques
Making the Perfect Sparkler Funfetti Ice Cream Cake isn’t complicated, but here are some tips I’ve picked up from a few kitchen disasters:
- Butter temperature matters: Too cold and it won’t cream properly; too warm and it’ll be greasy. Room temperature is key.
- Don’t overmix the batter: Overworking gluten can make cakes dense—fold in the dry ingredients gently.
- Use sturdy sprinkles: Some sprinkles bleed color when baked, turning your batter pastel and muddy-looking. Choose jimmies or similar for bright spots.
- Softening ice cream: Plan ahead so it’s spreadable but not melted. If it gets too soft, pop it back in the freezer for 10-15 minutes.
- Freezing properly: Wrap the cake well to avoid freezer burn and ice crystals. I double-wrap with plastic wrap and then foil.
- Lighting sparklers: Use long matches or a lighter with an extended nozzle to keep fingers safe. Light sparklers right before serving for the best effect.
I once tried to skip the cooling stage before assembling, and my kitchen looked like a mini ice cream flood. Lesson learned: patience pays off.
Variations & Adaptations
Want to switch things up? Here are some ideas I’ve tried and enjoyed:
- Flavor swaps: Use chocolate or strawberry cake mix instead of vanilla for a twist. Or swap vanilla ice cream for mint chip or cookie dough.
- Vegan version: Use a vegan cake mix, coconut or almond milk, and dairy-free ice cream. Just be sure your sprinkles are vegan-friendly.
- Seasonal fruit add-ins: Fold fresh berries into the ice cream layer during warmer months for a juicy surprise.
- Nutty crunch: Add chopped toasted pecans or almonds between layers for texture.
- Gluten-free: Use a 1-to-1 gluten-free flour blend and double-check all other ingredients.
Once, I made a version with lemon cake and blueberry ice cream that was a refreshing hit at a summer potluck—definitely worth trying if you want a fruity twist.
Serving & Storage Suggestions
This cake is best served straight from the freezer after the sparklers have dazzled your guests. Let it sit at room temperature for 5-10 minutes before slicing to make cutting easier and neater.
For presentation, I love placing the cake on a bright, festive platter and surrounding it with extra sprinkles or edible glitter for that extra sparkle. Pair it with a simple fruit salad or a glass of sparkling lemonade for a light contrast.
Store leftovers tightly wrapped in the freezer for up to one week. To reheat, just let slices thaw in the refrigerator for about 20-30 minutes before serving. Flavors actually mellow and meld beautifully after a day or two.
Nutritional Information & Benefits
Per serving (based on 12 servings): approximately 320 calories, 15g fat, 42g carbohydrates, 4g protein.
This recipe includes real butter and whole milk, providing a satisfying richness and a good source of calcium from the ice cream. Using natural vanilla extract adds flavor without artificial additives. You can lighten it up by choosing low-fat ice cream or reducing sugar slightly.
Keep in mind this recipe contains gluten, dairy, and eggs, so it’s not suitable for those with allergies unless adapted.
Conclusion
So, there you have it—the Perfect Sparkler Funfetti Ice Cream Cake for Celebrations that’s as fun to make as it is to eat. It’s a recipe that brings a little magic and sparkle to any party, no matter how last-minute.
Feel free to personalize it with your favorite ice cream flavors or sprinkle combos. I love this cake because it’s forgiving, festive, and always puts smiles on faces—plus, it’s a total crowd-pleaser.
If you try it, drop a comment below and share how you made it your own. And hey, if you have a go-to celebration dessert, I’d love to hear about that too. Let’s keep the party going!
FAQs
Can I make this cake ahead of time?
Absolutely! Assemble the cake and freeze overnight. Just add the sparklers right before serving for the best effect.
What if I don’t have sparklers?
You can decorate with candles or edible glitter—anything that adds a festive touch!
Can I use a boxed cake mix instead of making the batter from scratch?
Yes, a funfetti cake mix works fine and saves time, just follow the box instructions and fold in extra sprinkles for an added pop.
How do I prevent sprinkles from bleeding color in the cake?
Use sturdy sprinkles like jimmies and fold them in gently right before baking. Avoid nonpareils or very small sprinkles that tend to bleed.
Is this recipe suitable for kids to help make?
Definitely! Kids can help mix the batter, fold in sprinkles, and spread ice cream layers. Just handle the oven and sparklers yourself.
For a fun twist on party desserts, you might also enjoy my crispy garlic chicken recipe, which is perfect for casual gatherings, or this summer berry pavlova for a light, fruity finish to any meal.
Pin This Recipe!
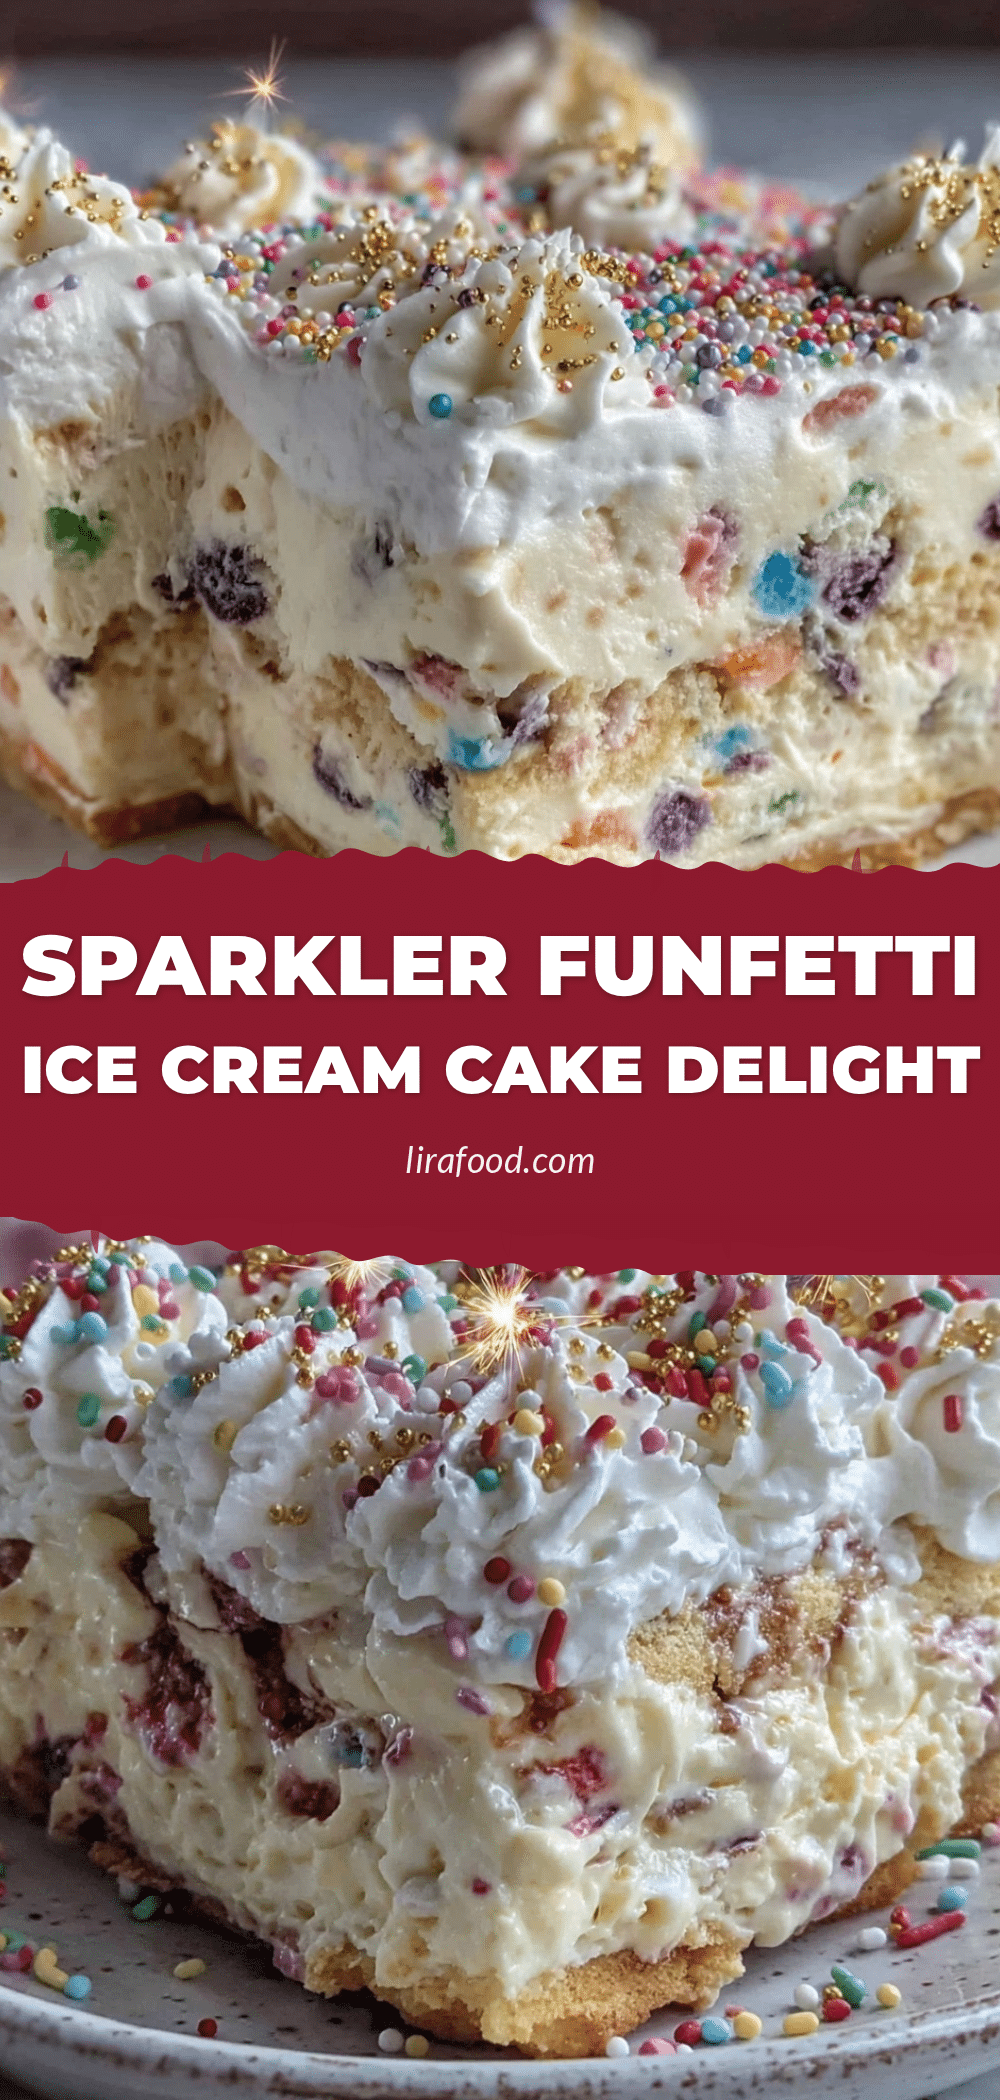
Perfect Sparkler Funfetti Ice Cream Cake
A quick and easy funfetti ice cream cake perfect for celebrations, combining moist cake layers with creamy ice cream and festive sprinkles topped with birthday sparklers.
- Prep Time: 20 minutes
- Cook Time: 25 minutes
- Total Time: 4 hours 45 minutes
- Yield: 12 servings 1x
- Category: Dessert
- Cuisine: American
Ingredients
- 1 ½ cups (190g) all-purpose flour
- 1 tsp baking powder
- ¼ tsp salt
- ¾ cup (150g) granulated sugar
- ½ cup (115g) unsalted butter, softened
- 2 large eggs, room temperature
- 2 tsp vanilla extract
- ½ cup (120ml) whole milk
- ⅓ cup rainbow sprinkles (use sturdy jimmies)
- 1 quart (946ml) vanilla ice cream, slightly softened
- Optional: ½ cup mini chocolate chips or candy pieces
- Additional sprinkles for decoration
- Birthday sparklers (food-safe)
Instructions
- Preheat oven to 350°F (175°C). Grease and line two 8-inch cake pans with parchment paper.
- In a medium bowl, whisk together flour, baking powder, and salt. Set aside.
- In a large bowl, beat softened butter and sugar with an electric mixer on medium speed until light and fluffy, about 3-4 minutes.
- Beat in eggs one at a time, then stir in vanilla extract until combined.
- Gradually add the flour mixture alternately with milk, starting and ending with dry ingredients. Mix until just combined; do not overmix.
- Gently fold in rainbow sprinkles using a spatula to avoid bleeding colors.
- Divide batter evenly into prepared pans and smooth tops. Bake for 22-25 minutes or until a toothpick inserted in the center comes out clean.
- Cool cakes in pans for 10 minutes, then transfer to wire racks to cool completely.
- Slightly soften vanilla ice cream at room temperature for about 10 minutes. If using, fold in mini chocolate chips gently.
- Place one cake layer on a serving plate. Spread half the softened ice cream evenly over the top using an offset spatula.
- Top with the second cake layer, then spread remaining ice cream over the top and sides for a smooth finish.
- Wrap the entire cake tightly with plastic wrap and freeze for at least 4 hours or overnight.
- Before serving, sprinkle extra rainbow sprinkles on top and add birthday sparklers carefully.
Notes
Use sturdy sprinkles like jimmies to prevent color bleeding. Soften ice cream just enough to spread but not melt. Double-wrap cake before freezing to avoid freezer burn. Level cake layers if domed for easier stacking. Light sparklers just before serving for safety and effect.
Nutrition
- Serving Size: 1 slice (1/12th of c
- Calories: 320
- Sugar: 28
- Sodium: 180
- Fat: 15
- Saturated Fat: 9
- Carbohydrates: 42
- Fiber: 1
- Protein: 4
Keywords: funfetti cake, ice cream cake, celebration cake, birthday cake, sprinkles cake, easy dessert, party dessert