Love this? Save it for later!
Share the inspiration with your friends
My niece showed up at my door last October 28th, completely panicked because she’d volunteered to bring treats for her class Halloween party and then completely forgot. The only things I had in my fridge that even vaguely resembled something spooky were some slivered almonds, a bag of flour, and a stick of butter that had seen better days. She looked at me with those big eyes, and I knew we weren’t running to the store.
I started pulling things out of the pantry—powdered sugar, vanilla, an egg. Honestly, I was just grabbing stuff and hoping for the best. I remembered those witch finger cookies from a magazine years ago, the ones that looked terrifyingly real but were just buttery shortbread underneath. We shaped the dough into lumpy fingers, pressed an almond on for the nail, and used a knife to make little knuckle wrinkles. When they came out of the oven, she let out this delighted scream. They looked absolutely disgusting. Perfect.
That afternoon, covered in flour and almond slivers, I realized that some of the best recipes aren’t planned. They’re born from a moment of panic and a fridge that’s almost empty. These best witch finger cookies have become our official Halloween tradition ever since. They’re creepy, they’re buttery, and they’re the easiest way to look like you planned a spooky Halloween treat all along.
Why You’ll Love This Recipe
Let me tell you why these cookies are my go-to for Halloween. I’ve tested this recipe about six times over the years, tweaking the butter-to-flour ratio until the texture was just right—not too crumbly, not too soft, but with that perfect shortbread snap.
- Quick & Easy : Comes together in under 30 minutes, perfect for last-minute Halloween parties or when a niece shows up in a panic.
- Simple Ingredients : No fancy grocery trips needed. You likely already have butter, sugar, flour, and an egg in your kitchen.
- Perfect for Halloween Parties : Great for classroom treats, spooky movie nights, or potlucks where you want to impress with minimal effort.
- Crowd-Pleaser : Kids and adults alike get a kick out of these. They’re creepy enough to be fun but delicious enough to disappear fast.
- Unbelievably Delicious : The texture is melt-in-your-mouth buttery shortbread with a hint of almond from the “fingernail.” It’s comfort food with a spooky twist.
What makes these different from every other version? It’s the technique. I use a slightly higher butter ratio than most shortbread recipes, which gives these cookies a tender crumb that doesn’t crack when you shape the fingers. Plus, I add a touch of almond extract to the dough itself, not just on the nail—it gives the whole cookie a subtle marzipan flavor that ties everything together.
This isn’t just a Halloween cookie. It’s the kind that makes you close your eyes after the first bite, even while you’re pretending to be grossed out by the fingernail. It’s spooky season reimagined—faster, easier, but with the same soul-soothing satisfaction of a perfect shortbread.
What Ingredients You Will Need
This recipe uses simple, wholesome ingredients to deliver that perfect buttery texture and spooky appearance. Most of these are pantry staples, which is exactly what you want when Halloween sneaks up on you.
- Unsalted butter, softened (1 cup / 226g) — I prefer using unsalted so I can control the salt level. Let it sit out for about 30 minutes until it’s soft but not melting. Land O’Lakes works great here.
- Powdered sugar (1/2 cup / 60g) — This gives the cookies that delicate, melt-in-your-mouth texture. Don’t swap for granulated sugar; the cornstarch in powdered sugar is what makes shortbread special.
- Large egg (1, room temperature) — Binds everything together. Take it out of the fridge with the butter so they come to temp together.
- Vanilla extract (1 teaspoon) — Adds warmth and depth. I use Nielsen-Massey because it’s pure and has that rich flavor.
- Almond extract (1/2 teaspoon) — This is the secret. It gives the cookies a subtle marzipan undertone that pairs perfectly with the almond fingernail. Don’t skip it.
- All-purpose flour (2 cups / 250g) — Spoon and level it. Scooping directly from the bag packs too much flour and makes the cookies dry.
- Salt (1/4 teaspoon) — Balances the sweetness and enhances the buttery flavor.
- Slivered almonds (about 30-36 pieces) — These become the fingernails. Look for whole slivered almonds, not the tiny chopped pieces. You want them long enough to look like a nail.
- Red food coloring (optional, a few drops) — Mix this with a tiny bit of water to paint “blood” around the nail bed. Totally optional but adds to the creep factor.
- Seedless raspberry jam (optional, 2 tablespoons) — For a more realistic “blood” effect. Mix with a drop of water and dab around the nail. It looks disturbingly real.
For the almond “nails,” I recommend buying whole slivered almonds rather than sliced. The slivered ones have that natural curved shape that looks exactly like a fingernail. If you only have sliced almonds, they work too—just press them on gently so they don’t break.
Equipment Needed
You don’t need anything fancy for these cookies. Here’s what I use every time:
- Electric mixer (stand or hand) — Creaming the butter and sugar by hand is possible but takes forever. A hand mixer works perfectly.
- Large mixing bowl — Any bowl big enough to hold all the dough.
- Baking sheets (2) — Line them with parchment paper or silicone baking mats. Parchment is easier for cleanup.
- Parchment paper — Prevents sticking and makes cleanup a breeze. I buy the pre-cut sheets for convenience.
- Sharp knife — For making the knuckle marks. A paring knife works best.
- Small paintbrush (optional) — For applying the “blood” effect. A clean art brush or a pastry brush works. I use a cheap one from the craft store that I only use for food.
- Cooling rack — Lets the cookies cool evenly so they stay crisp.
If you don’t have an electric mixer, you can cream the butter and sugar with a wooden spoon. It takes about 5 minutes of vigorous stirring, but it works. I’ve done it when my mixer broke mid-recipe, and the cookies turned out fine—just a little arm workout involved.
Preparation Method
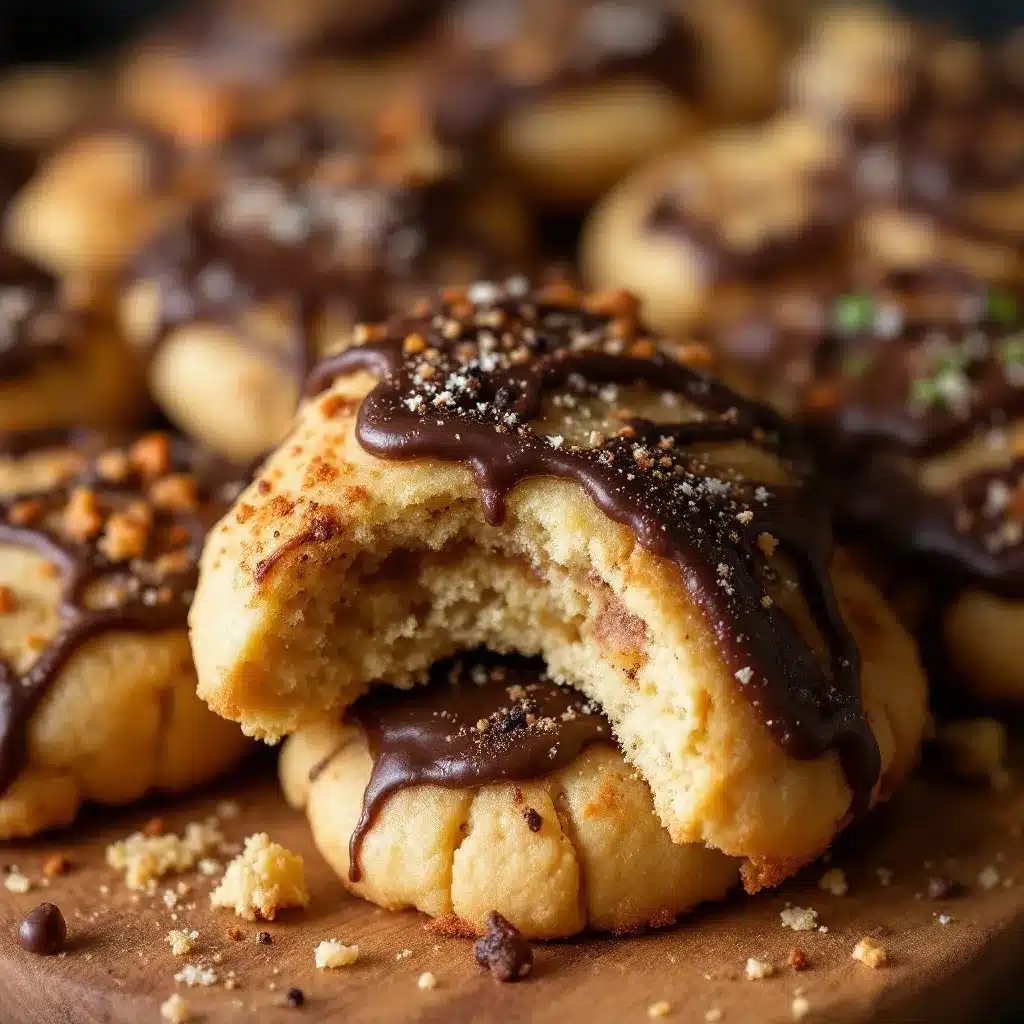
Let’s get our hands dirty. This is the fun part.
- Cream the butter and sugar (3-4 minutes). In a large bowl, beat the softened butter and powdered sugar together until light and fluffy. Scrape down the sides halfway through. The mixture should look pale and airy, almost like frosting.
- Add the wet ingredients (1 minute). Beat in the egg, vanilla extract, and almond extract until fully combined. The mixture might look slightly separated at this point—that’s normal. Don’t panic.
- Mix the dry ingredients (1-2 minutes). In a separate bowl, whisk together the flour and salt. Gradually add this to the wet mixture, mixing on low speed until just combined. Stop when you no longer see streaks of flour. Overmixing makes tough cookies.
- Chill the dough (30 minutes). Wrap the dough in plastic wrap and refrigerate for at least 30 minutes. This step is crucial—cold dough is easier to shape and holds its form better in the oven. I’ve skipped this before and ended up with flat, blob-like fingers instead of creepy witch digits.
- Preheat the oven to 325°F (163°C). Line two baking sheets with parchment paper.
- Shape the fingers (10-15 minutes). Scoop out about 1 tablespoon of dough and roll it into a log about 3 inches long. Taper one end slightly to look like a fingertip. Place on the prepared baking sheet, spacing them about 2 inches apart. Don’t make them too thick—they’ll puff up slightly in the oven.
- Create the knuckles (2 minutes). Using a sharp knife, gently press 2-3 lines across each finger to create knuckle marks. Don’t cut all the way through—just deep enough to leave an indent. You want them to look wrinkled, not severed.
- Attach the fingernails (3 minutes). Press one slivered almond onto the tapered end of each finger. Gently push it into the dough so it stays put during baking. The almond should look like it’s growing out of the finger—disturbing but accurate.
- Bake (12-15 minutes). Bake until the cookies are set and the edges are just barely golden. The bottoms should be light golden brown. They’ll look pale on top, which is what you want—they’re supposed to look like creepy witch fingers, not golden tanned ones.
- Cool completely (10 minutes on the sheet, then transfer to a cooling rack). Let them sit on the baking sheet for 5 minutes before moving them. They’re fragile when warm.
- Add the “blood” effect (optional, 5 minutes). Once cooled, mix a few drops of red food coloring with a tiny bit of water, or use seedless raspberry jam thinned with water. Using a small paintbrush, dab a little “blood” around the nail bed and knuckle areas. Don’t overdo it—a little goes a long way toward looking realistic.
A sensory cue here: when you press the knuckle marks, you should feel the dough give slightly but not crack. If it cracks, the dough is too dry. Add a teaspoon of water and mix gently. If it’s too sticky, add a tablespoon of flour.
Cooking Tips & Techniques
I’ve made these cookies about a dozen times now, and let me tell you, I’ve learned a few things the hard way.
Don’t skip the chill time. I once rushed through this step, thinking “how bad could it be?” The fingers spread into flat, unrecognizable blobs. They tasted fine, but they looked like sad potato pancakes, not witch fingers. The cold dough holds its shape and keeps those knuckle marks defined.
Watch the oven temperature. These cookies bake at 325°F, not the standard 350°F. The lower temperature prevents the edges from browning too fast while the centers finish baking. If your oven runs hot (like mine does), check them at the 10-minute mark. You want them set but not golden.
Make the fingers different sizes. Real hands don’t have perfectly uniform fingers. Make some longer, some shorter, some a little crooked. It adds to the creepy realism. My niece always makes one “thumb” that’s thicker and shorter, and it’s always the favorite.
Press the almonds gently but firmly. You want them to stay attached during baking. If you press too hard, the almond sinks into the dough and disappears. If you press too lightly, it falls off when you pick up the cookie. Aim for about halfway embedded.
Use the raspberry jam for blood. The first time I used red food coloring alone, it looked fake and bright. The raspberry jam gives a darker, more realistic “blood” color that looks like it’s been there for a while. Plus, it adds a tiny bit of fruity sweetness that complements the almond perfectly.
Variations & Adaptations
These cookies are surprisingly flexible. Here are some twists I’ve tried over the years:
Gluten-Free Version : Swap the all-purpose flour for a 1:1 gluten-free baking flour. I’ve used Bob’s Red Mill with great results. The texture is slightly more crumbly, so handle them gently when shaping. Add an extra tablespoon of butter to compensate for the drier flour blend.
Vegan Adaptation : Use vegan butter (I like Miyoko’s) and replace the egg with a flax egg (1 tablespoon ground flaxseed mixed with 3 tablespoons water, let sit for 5 minutes). The texture is a bit less tender, but the flavor is still spot-on. The almond extract becomes even more prominent, which is a good thing.
Chocolate Witch Fingers : Add 2 tablespoons of cocoa powder to the dry ingredients and reduce the flour by 2 tablespoons. The chocolate version looks even more realistic—like dirt-covered witch fingers pulled straight from the ground. My nephew prefers these over the original.
Spiced Pumpkin Version : Add 1/2 teaspoon pumpkin pie spice and 1/4 cup pumpkin puree to the wet ingredients. Reduce the flour by 2 tablespoons to compensate for the extra moisture. These taste like fall in cookie form, and the orange tint from the pumpkin makes the “blood” look even more dramatic.
Different Nail Colors : Instead of almonds, try using green pumpkin seeds for a “moldy” look, or dye the almonds green with food coloring for a more witchy vibe. I tried blue once—looked like a Smurf finger. Stick with natural or green.
Serving & Storage Suggestions
These cookies are best served at room temperature, arranged on a platter in a way that looks like a pile of severed fingers. I like to place them in a cluster with the “nails” pointing in different directions. For maximum creep factor, serve them on a black or dark purple platter.
They pair beautifully with a warm cozy warm vanilla milk sleep drink with cinnamon and honey for a spooky movie night. The contrast between the creepy cookies and the soothing drink is oddly perfect. For a Halloween party, serve them alongside a creamy homemade vanilla ice cream—the cold sweetness balances the buttery shortbread.
Storage : Store the cookies in an airtight container at room temperature for up to 5 days. Layer them between sheets of parchment paper to prevent the almonds from breaking off. Don’t refrigerate them—the fridge dries out shortbread and makes it crumbly.
Freezer : You can freeze the unbaked shaped fingers on a baking sheet until solid, then transfer to a freezer bag. Bake directly from frozen, adding 2-3 minutes to the baking time. I’ve done this for Halloween parties and it’s a lifesaver. The baked cookies also freeze well for up to 2 months. Thaw at room temperature for about 30 minutes before serving.
Reheating : These don’t really need reheating, but if you want that just-baked warmth, pop them in a 300°F oven for 3-4 minutes. Don’t microwave them—the texture gets weird and the almond falls off.
Flavor Development : Honestly, these cookies taste better the next day. The almond extract melds with the butter overnight, and the texture becomes even more tender. If you can resist eating them all on day one, you’re in for a treat on day two.
Nutritional Information & Benefits
Let’s be real—these are cookies, not health food. But here’s the breakdown per cookie (based on 36 cookies):
- Calories : Approximately 85-100 calories per cookie
- Fat : 5-6g (mostly from butter and almonds)
- Carbohydrates : 10-12g
- Protein : 1-2g
- Sugar : 4-5g
Health Benefits of Key Ingredients : Almonds provide vitamin E and healthy monounsaturated fats. Butter contains vitamin A and butyrate, which supports gut health in small amounts. The powdered sugar? Well, it’s sugar. But hey, it’s Halloween—moderation is key.
Dietary Considerations : This recipe contains gluten, dairy, eggs, and tree nuts (almonds). For a gluten-free version, use a 1:1 gluten-free flour blend. For a dairy-free version, use vegan butter. The almond extract is naturally gluten-free and vegan.
Potential Allergens : Wheat, dairy, eggs, tree nuts. If you’re serving these at a party, label them clearly. I once had a guest with a nut allergy who didn’t realize the “fingernails” were real almonds. Now I always put a small sign next to the platter.
From a wellness perspective, I believe in enjoying treats like these without guilt. They’re a once-a-year Halloween tradition, not an everyday snack. Life’s too short to skip the cookies that make your niece scream with delight.
Conclusion
These best witch finger cookies are everything you want in a Halloween treat—creepy, delicious, and surprisingly easy to make. They’ve become our family’s go-to for spooky season, and every year, my niece asks if we’re making “the finger cookies” together. That’s the kind of tradition that sticks.
I encourage you to customize them based on your preferences. Try the chocolate version, add some pumpkin spice, or get creative with the “blood” effect. The beauty of this recipe is that it’s forgiving and flexible. You can make them as simple or as elaborate as you want.
My favorite part of making these is watching people’s reactions. There’s always that moment of hesitation before someone takes a bite—like they’re not sure if it’s actually a finger or a cookie. And then that first bite, followed by a surprised “wait, these are actually good!” That’s the magic of Halloween baking.
Have you made these before? Drop a comment below and let me know how they turned out. Share your spooky creations with us—I’d love to see your version of these creepy cookies. And if you try a variation I haven’t thought of, definitely tell me about it. Happy Halloween, and happy baking!
Frequently Asked Questions
Can I make these cookies ahead of time?
Absolutely. You can shape the fingers and refrigerate them on a baking sheet for up to 24 hours before baking. Or freeze the unbaked shaped fingers for up to 2 months. Bake from frozen, adding 2-3 minutes to the baking time. Baked cookies also store well for up to 5 days in an airtight container.
Why did my cookies spread and lose their shape?
This usually happens when the dough isn’t chilled enough before baking. The butter melts too quickly in the oven, causing the fingers to flatten. Make sure you chill the shaped dough for at least 30 minutes, or even longer if your kitchen is warm. Also, check that your butter was softened but not melted when you started—overly soft butter leads to spread.
Can I use something other than almonds for the fingernails?
Yes! Green pumpkin seeds (pepitas) make great “moldy” nails. You can also use sliced almonds, though they’re more delicate. For a nut-free version, use a small piece of white chocolate shaped into a nail, or even a piece of dried apple. Just be aware that different materials may brown differently in the oven.
How do I make the “blood” look realistic?
My best trick is using seedless raspberry jam mixed with a drop of water. Heat it in the microwave for 10 seconds, then brush it around the nail bed with a small paintbrush. The dark red color looks disturbingly like dried blood. Red food coloring mixed with a tiny bit of cocoa powder also works to darken the shade.
Can I make these cookies without almond extract?
You can, but the flavor won’t be as complex. The almond extract complements the almond fingernail and gives the cookies that subtle marzipan undertone. If you don’t have it, substitute with an extra 1/2 teaspoon of vanilla extract. The cookies will still taste good—just less “witchy” in flavor.
Pin This Recipe!
Best Witch Finger Cookies Recipe – Easy Halloween Treat

These creepy but buttery witch finger cookies are a perfect Halloween treat. Made with simple ingredients and a touch of almond extract, they look disturbingly real but taste deliciously like shortbread.
- Prep Time: 20 minutes
- Cook Time: 15 minutes
- Total Time: 35 minutes
- Yield: 36 cookies 1x
- Category: Dessert
- Cuisine: American
Ingredients
- 1 cup (226g) unsalted butter, softened
- 1/2 cup (60g) powdered sugar
- 1 large egg, room temperature
- 1 teaspoon vanilla extract
- 1/2 teaspoon almond extract
- 2 cups (250g) all-purpose flour
- 1/4 teaspoon salt
- 30–36 slivered almonds
- Red food coloring (optional, a few drops)
- 2 tablespoons seedless raspberry jam (optional)
Instructions
- Cream the butter and sugar: In a large bowl, beat the softened butter and powdered sugar together until light and fluffy (3-4 minutes). Scrape down the sides halfway through.
- Add the wet ingredients: Beat in the egg, vanilla extract, and almond extract until fully combined (1 minute). The mixture might look slightly separated—that’s normal.
- Mix the dry ingredients: In a separate bowl, whisk together the flour and salt. Gradually add this to the wet mixture, mixing on low speed until just combined (1-2 minutes). Stop when no streaks of flour remain.
- Chill the dough: Wrap the dough in plastic wrap and refrigerate for at least 30 minutes.
- Preheat the oven to 325°F (163°C). Line two baking sheets with parchment paper.
- Shape the fingers: Scoop about 1 tablespoon of dough and roll into a log about 3 inches long. Taper one end slightly to look like a fingertip. Place on the prepared baking sheet, spacing them about 2 inches apart.
- Create the knuckles: Using a sharp knife, gently press 2-3 lines across each finger to create knuckle marks. Don’t cut all the way through.
- Attach the fingernails: Press one slivered almond onto the tapered end of each finger. Gently push it into the dough so it stays put during baking.
- Bake: Bake until the cookies are set and the edges are just barely golden (12-15 minutes).
- Cool completely: Let them sit on the baking sheet for 5 minutes, then transfer to a cooling rack.
- Add the ‘blood’ effect (optional): Once cooled, mix a few drops of red food coloring with a tiny bit of water, or use seedless raspberry jam thinned with water. Using a small paintbrush, dab a little ‘blood’ around the nail bed and knuckle areas.
Notes
Don’t skip the chill time—cold dough holds its shape better. Bake at 325°F to prevent over-browning. Make fingers different sizes for realism. For the ‘blood,’ raspberry jam gives a more realistic color than food coloring alone. Store in an airtight container at room temperature for up to 5 days. Freeze unbaked shaped fingers for up to 2 months.
Nutrition
- Serving Size: 1 cookie
- Calories: 90
- Sugar: 4
- Sodium: 35
- Fat: 6
- Saturated Fat: 3.5
- Carbohydrates: 10
- Fiber: 0.5
- Protein: 1.5
Keywords: witch finger cookies, Halloween cookies, shortbread cookies, spooky treats, easy Halloween recipe


