Love this? Save it for later!
Share the inspiration with your friends
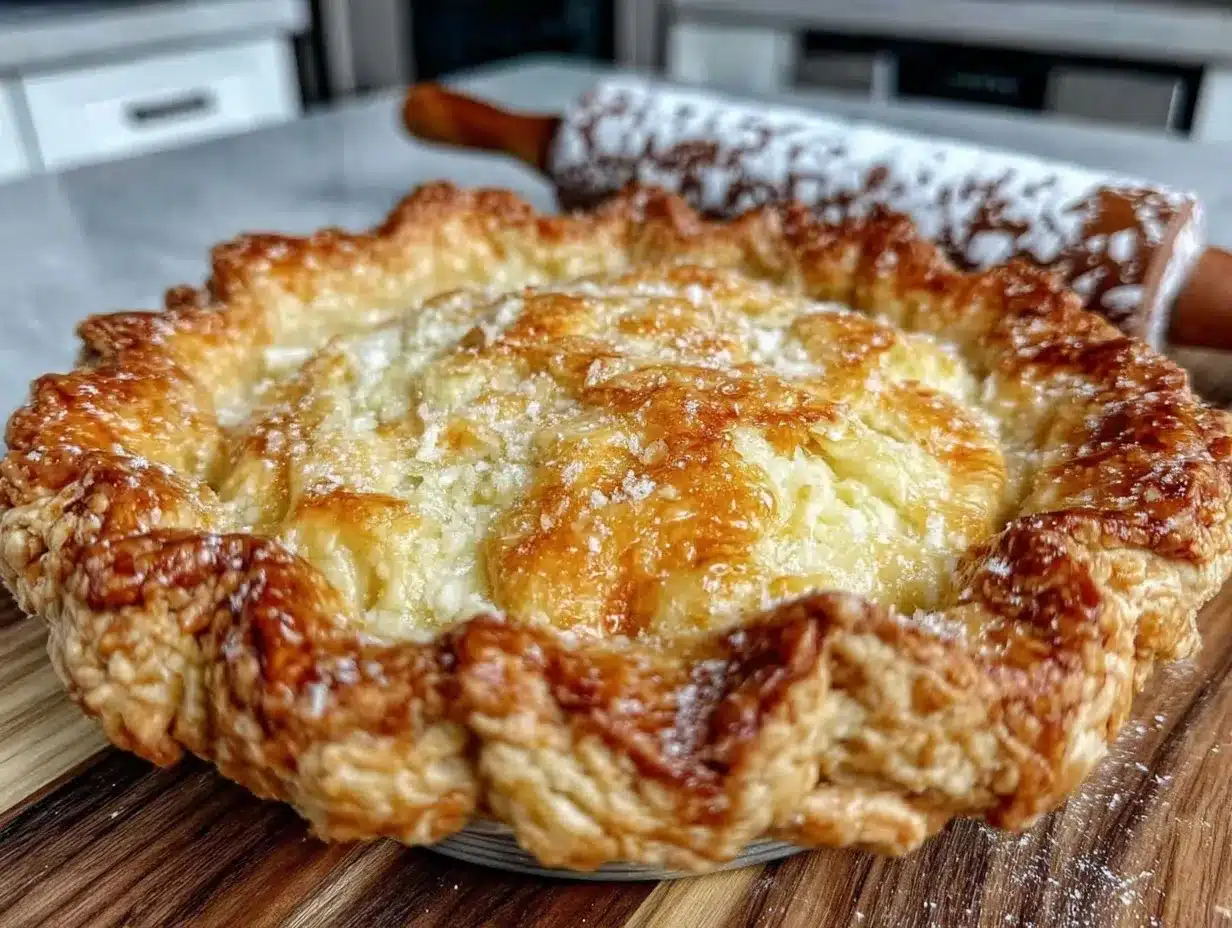
“I wasn’t expecting much when I found that crumpled, flour-dusted recipe card tucked inside an old tin in my grandmother’s attic,” I remember telling a friend just last week. The faded handwriting belonged to my great-aunt Mabel, a woman whose kitchen was legendary for the simple, no-nonsense meals she’d whip up. That classic homemade butter pie crust recipe, honestly, felt like a secret treasure lost in time—until now.
It was a rainy Saturday afternoon when I decided to try the recipe after decades of relying on store-bought crusts. Let me tell you, the moment I rolled out that dough, the buttery aroma filled the entire kitchen, and a wave of nostalgia swept over me. You know that feeling when the scent of something familiar just pulls you back to a place you’ve never actually been? That’s exactly what happened.
There was a tiny mishap, of course—the dough stuck a bit to my rolling pin, and I had to dust the counter more than once. But those little imperfections just made it feel real, like I was part of a long line of home bakers who never rushed their pies. This classic homemade butter pie crust isn’t just about pastry; it’s a slice of warmth, history, and comfort that’s stayed with me ever since. Maybe you’ve been there, hunting for that perfect pie crust that’s flaky, tender, and truly homemade. Well, this might just be the one you keep coming back to.
Why You’ll Love This Recipe
I’ve tested countless pie crust recipes over the years, but this classic homemade butter pie crust stands apart for several reasons. It’s the kind of recipe that’s been tried and trusted by generations—grandma’s timeless recipe, if you will—and it shows in every bite.
- Quick & Easy: You can whip it up in about 20 minutes, perfect for those last-minute baking urges.
- Simple Ingredients: Just flour, butter, a pinch of salt, and a little ice water—no complicated or fancy stuff needed.
- Perfect for All Pies: Whether you’re making savory quiches or sweet fruit pies, this crust holds up beautifully.
- Crowd-Pleaser: Everyone notices the flaky layers and buttery flavor, even the picky eaters who usually avoid homemade crusts.
- Unbelievably Delicious: The secret is real butter, cold and cut into the flour just right, giving that perfect flaky texture.
What sets this recipe apart is its simplicity paired with steadfast technique. There’s no fancy gadgetry or secret ingredient—just patience, cold butter, and a light hand. Honestly, I think that’s why it tastes so much better than the rushed, store-bought versions. It’s like you’re carrying on a tradition with every fold and pinch, and that makes every pie feel special.
What Ingredients You Will Need
This classic homemade butter pie crust recipe relies on a few simple ingredients that work together to create that flaky, buttery texture we all crave. You probably already have most of these in your pantry, which makes this recipe a breeze to pull together anytime.
- All-purpose flour: 2 1/2 cups (312 grams) – the base of your crust. I prefer King Arthur flour for its consistency.
- Unsalted butter: 1 cup (226 grams), very cold and cut into small cubes – key for that tender flakiness. Land O’Lakes is my go-to brand.
- Salt: 1 teaspoon – enhances flavor without overpowering.
- Ice water: 6 to 8 tablespoons (90-120 ml) – adds moisture and helps bind the dough. Use chilled water straight from the fridge or with ice cubes.
Optional but recommended to try occasionally:
- White vinegar or lemon juice: 1 teaspoon – sometimes added to tenderize the dough and prevent toughness, but I usually skip it unless I’m baking in very warm weather.
If you want a gluten-free version, almond flour or a gluten-free flour blend can work, but the texture will be a bit different. For a dairy-free crust, swap the butter with a firm coconut oil or vegan butter substitute, making sure it’s equally cold.
Equipment Needed
Making this classic homemade butter pie crust doesn’t require fancy tools, which is part of its charm. Here’s what you’ll want handy:
- Mixing bowl: A large bowl for combining your flour and butter.
- Pastry cutter or two knives: For cutting the cold butter into the flour. I don’t have a fancy pastry blender, so two knives work just fine.
- Measuring cups and spoons: For precise ingredient amounts.
- Rolling pin: Essential for rolling out the dough evenly. Wooden is classic, but silicone ones can work well too.
- Plastic wrap: To chill the dough before baking.
If you don’t have a pastry cutter, you can use your fingertips quickly, but be careful not to warm the butter too much. For rolling, a lightly floured surface and patience go a long way – I once tried rolling on a sticky counter and it was a disaster!
Preparation Method
- Combine dry ingredients: In your large bowl, whisk together 2 1/2 cups (312 g) of all-purpose flour and 1 teaspoon of salt. This sets the base for your crust. (2 minutes)
- Cut in the butter: Add 1 cup (226 g) of cold cubed unsalted butter to the flour mixture. Using a pastry cutter or two knives, cut the butter into the flour until the mixture resembles coarse crumbs with pea-sized bits of butter visible. Don’t overdo it—those chunks of butter create flakiness. (5-7 minutes)
- Add ice water gradually: Drizzle in 6 tablespoons (90 ml) of ice-cold water, stirring gently with a fork. If the dough feels dry, add another tablespoon or two, but be careful not to overhydrate. You want the dough to just come together when pressed. (3 minutes)
- Form the dough: Turn the dough out onto a floured surface and gently knead it just a few times to bring it together. Flatten the dough into two discs approximately 1 inch (2.5 cm) thick. Wrap each disc tightly in plastic wrap. (3 minutes)
- Chill: Refrigerate the dough discs for at least 1 hour, preferably 2. This resting time allows the flour to hydrate and the butter to firm up again, which is critical for a tender crust. (1-2 hours)
- Roll out the dough: Remove one disc from the fridge and let it sit for 5 minutes to soften slightly. On a lightly floured surface, roll the dough into a 12-inch (30 cm) circle, turning and flouring as needed to prevent sticking. The edges can be a bit ragged—that’s normal and fixable when you transfer it to your pie pan. (10 minutes)
- Transfer to pie pan: Carefully fold the dough in half and lift it into your 9-inch (23 cm) pie pan. Unfold and gently press it into the pan, trimming any excess dough around the edges. Use your fingers or a fork to crimp the edges as you like. (5 minutes)
- Chill again before baking: Pop the pie crust back in the fridge for 20 minutes before filling or blind baking. This step helps the crust hold its shape and prevents shrinking. (20 minutes)
Cooking Tips & Techniques
Making the perfect butter pie crust is as much about technique as it is about ingredients. Here are some tips that have saved me from many a crust catastrophe:
- Keep everything cold: Butter should be cold right out of the fridge, and even your water should be icy. Warm ingredients will make the dough tough, so don’t rush.
- Don’t overwork the dough: Handle it just enough to bring it together. Over-kneading develops gluten and makes the crust chewy instead of flaky.
- Use a light touch when rolling: Pressing too hard can warm the butter and make rolling difficult. Let the rolling pin do the work gently.
- Chill between steps: Resting the dough after mixing and again after shaping keeps the butter firm and helps prevent shrinking during baking.
- Blind baking tips: If your pie filling is wet or unbaked, blind bake the crust with pie weights or dried beans on parchment paper to avoid bubbles and sogginess.
- Test your oven’s temperature: Some ovens run hot or cold, which can affect crust browning. An inexpensive oven thermometer can be a game changer.
- Don’t forget to flour your surface and rolling pin: It’s easy to skip, but it prevents the dough from sticking and tearing.
Variations & Adaptations
This classic homemade butter pie crust is wonderfully versatile. Here are some ways I’ve adjusted it over time:
- Whole wheat crust: Substitute half the all-purpose flour with whole wheat flour for a nuttier flavor and more fiber. The texture will be a bit denser but still delicious.
- Herbed crust: Add 1 teaspoon of dried herbs like thyme or rosemary to the flour for a savory pie crust perfect for quiches or pot pies.
- Gluten-free crust: Use a gluten-free flour blend designed for baking. You might need to add a teaspoon of xanthan gum for structure.
- Vegan crust: Replace butter with cold vegan butter or firm coconut oil. Keep the water chilled and follow the same method for best results.
- Nutty crust: Add 1/4 cup finely ground almonds or pecans to the flour for added flavor and texture.
One time, I experimented with a mix of butter and cream cheese for a richer crust. It was a happy accident that gave the crust a tender crumb and slight tang—definitely worth a try if you want something a little different.
Serving & Storage Suggestions
This classic homemade butter pie crust shines best when freshly baked, but it also stores well:
- Serving: Serve your pie at room temperature or slightly warm. For fruit pies, a scoop of vanilla ice cream or whipped cream takes it to the next level.
- Storage: Unbaked dough discs can be wrapped tightly and stored in the fridge for up to 2 days or frozen for up to 3 months. Thaw overnight in the fridge before rolling.
- Baked crusts: Store leftovers covered at room temperature for 1-2 days or wrapped in foil in the fridge for up to 4 days.
- Reheating: Warm slices in a 325°F (160°C) oven for 10-15 minutes to refresh crispness.
- Flavor development: The crust’s flavor deepens slightly after resting in the fridge before baking, so don’t skip that chill time!
Nutritional Information & Benefits
While pie crusts aren’t exactly health food, this classic homemade butter pie crust has some redeeming qualities:
- Made with real butter, it contains natural fats rather than trans fats found in many store-bought crusts.
- The simple ingredient list means no preservatives or unnecessary additives.
- Using whole wheat flour in variations adds fiber and nutrients.
Approximate nutrition per 1/8 of crust (without filling): 180 calories, 15g fat, 8g carbohydrates, 1g protein. Of course, enjoy it in moderation, and think of it as part of the joy of homemade baking!
Conclusion
This classic homemade butter pie crust is more than just a recipe—it’s a connection to a simpler time and the kind of baking that fills a home with love and warmth. I love how it’s approachable for bakers of all skill levels yet delivers that flaky, buttery perfection every time.
Feel free to make it your own by trying different flours, adding herbs, or adjusting thickness. The best part? You don’t have to be a professional baker to make a crust that tastes like it came from grandma’s kitchen. Give it a try, and I’d love to hear how it turns out for you—drop a comment or share your twists!
Happy baking, and may your pies be ever flaky and delicious!
FAQs
How do I prevent my pie crust from shrinking during baking?
Make sure to chill the dough before and after shaping, avoid stretching it when placing in the pan, and consider blind baking with weights to hold its shape.
Can I make this pie crust ahead of time?
Yes! The dough can be refrigerated for up to 2 days or frozen for up to 3 months. Just thaw in the fridge overnight before rolling out.
What’s the best way to roll out sticky dough?
Lightly flour your surface and rolling pin, and chill the dough if it’s too soft. Rolling between two sheets of parchment paper also helps.
Can I use margarine instead of butter?
Butter is best for flavor and texture, but margarine or vegan butter can be substituted. Just make sure they’re very cold and firm.
Is this crust suitable for savory pies?
Absolutely! This classic butter pie crust works beautifully for both sweet and savory pies, quiches, and tarts.
By the way, if you enjoy baking, you might appreciate the flaky layers and buttery flavor in our crispy garlic chicken recipe or the comforting warmth of a homemade slow cooker beef stew to pair alongside your savory pies.
Pin This Recipe!
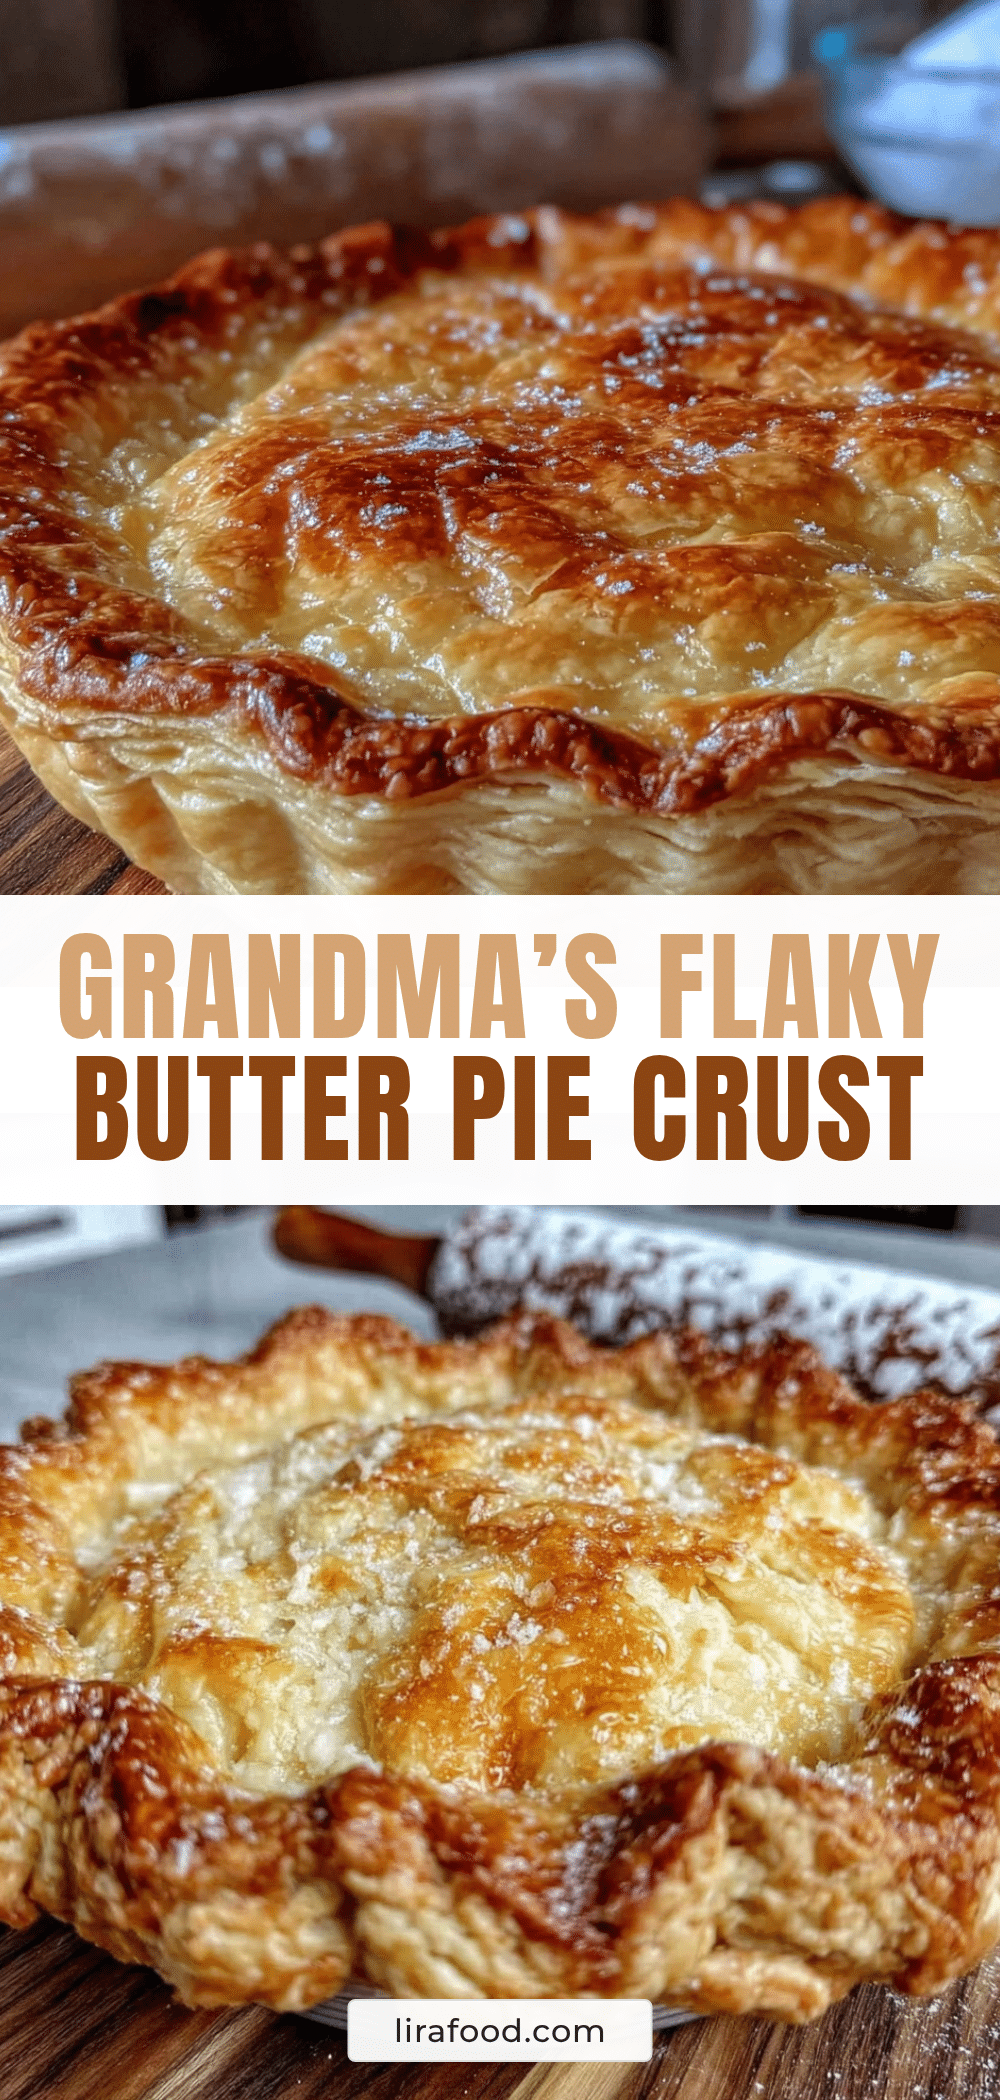
Classic Homemade Butter Pie Crust Recipe

A timeless, flaky, and buttery pie crust recipe passed down through generations, perfect for both sweet and savory pies. Made with simple ingredients and easy step-by-step instructions.
- Prep Time: 15 minutes
- Cook Time: 0 minutes
- Total Time: 1 hour 35 minutes
- Yield: 1 double crust for a 9-inch pie (8 servings) 1x
- Category: Dessert
- Cuisine: American
Ingredients
- 2 1/2 cups (312 grams) all-purpose flour
- 1 cup (226 grams) unsalted butter, very cold and cut into small cubes
- 1 teaspoon salt
- 6 to 8 tablespoons (90–120 ml) ice water
- Optional: 1 teaspoon white vinegar or lemon juice
Instructions
- Combine 2 1/2 cups (312 g) all-purpose flour and 1 teaspoon salt in a large mixing bowl.
- Add 1 cup (226 g) cold cubed unsalted butter to the flour mixture. Cut the butter into the flour using a pastry cutter or two knives until the mixture resembles coarse crumbs with pea-sized bits of butter visible.
- Gradually drizzle in 6 tablespoons (90 ml) of ice-cold water, stirring gently with a fork. Add more water, 1 tablespoon at a time, if the dough feels dry, until it just comes together when pressed.
- Turn the dough out onto a floured surface and gently knead a few times to bring it together. Flatten the dough into two discs about 1 inch (2.5 cm) thick. Wrap each disc tightly in plastic wrap.
- Refrigerate the dough discs for at least 1 hour, preferably 2 hours.
- Remove one disc from the fridge and let it sit for 5 minutes to soften slightly. On a lightly floured surface, roll the dough into a 12-inch (30 cm) circle, turning and flouring as needed to prevent sticking.
- Carefully fold the dough in half and lift it into a 9-inch (23 cm) pie pan. Unfold and gently press it into the pan, trimming any excess dough around the edges. Crimp the edges as desired.
- Chill the pie crust in the fridge for 20 minutes before filling or blind baking.
Notes
Keep all ingredients cold to ensure flakiness. Do not overwork the dough to avoid toughness. Chill dough before rolling and again after shaping to prevent shrinking. Use pie weights when blind baking to avoid bubbles. Lightly flour surface and rolling pin to prevent sticking.
Nutrition
- Serving Size: 1/8 of the pie crust
- Calories: 180
- Fat: 15
- Carbohydrates: 8
- Protein: 1
Keywords: butter pie crust, homemade pie crust, flaky pie crust, easy pie crust, classic pie crust, pie dough, baking, pie crust recipe