Love this? Save it for later!
Share the inspiration with your friends
My kid was staring at me with that specific look that says, “I knew you’d forget, but I’m still hoping you didn’t.” The school bake sale was tomorrow morning. Not next week. Tomorrow. And our pantry was looking less like a culinary arsenal and more like a graveyard of expired spices and a single, sad jar of pickles.
I was already sweating. I mean, metaphorically. But also, literally, because the thermostat was broken again. I needed something fast. Something colorful. Something that screamed “I put thought into this” without actually requiring any thought. That’s when I saw the popcorn bowl. And the bag of candy corn. And the chocolate chips.
It was a disaster waiting to happen, honestly. But then, I remembered this trick my sister taught me years ago. No bake. No oven. Just melt, mix, and chill. It felt like cheating. It felt like magic. It felt like the only way I was going to survive until morning.
So, I dumped the popcorn. I melted the chocolate. I swirled in the candy corn. And suddenly, the panic subsided. The kitchen smelled like a carnival. The kids stopped complaining. And I realized that sometimes, the best recipes aren’t the ones you plan. They’re the ones that save you when you’re running on empty. This easy candy corn popcorn bark isn’t just a treat. It’s a lifeline. And it’s about to be yours too.
Why You’ll Love This Recipe
Let’s be real for a second. Most dessert recipes online feel like they were written by robots who have never actually held a spatula. They talk about “elevating” flavors and “unlocking” potential. Please. I just want something that tastes good and doesn’t require a degree in food science. This easy candy corn popcorn bark is different because it respects your time and your sanity.
I’ve tested this thing more times than I care to admit. There was the batch where I used cheap chocolate and it seized up into a gray rock. There was the batch where I let it sit out too long and it got sticky. But the version below? The one I’m sharing with you? It’s the gold standard. It’s the one that works every single time, even if you’re making it at 11 PM with one hand tied behind your back.
- Quick & Easy: You’re looking at about 15 minutes of active time. That’s it. The rest is just waiting for the fridge to do its job. Perfect for last-minute party platters or midnight cravings.
- Simple Ingredients: You likely have half of this in your cupboard right now. Popcorn? Check. Chocolate? Check. Candy corn? Well, you might need to run to the store, but it’s worth it.
- Perfect for Fall Gatherings: Whether it’s a Halloween party, a harvest dinner, or just a cozy night in, this bark fits right in. It’s festive without being overly complicated.
- Crowd-Pleaser: Kids love it. Adults love it. Even the picky eater who only eats white bread will take a bite of this. It’s sweet, crunchy, and familiar.
- Unbelievably Delicious: The contrast between the salty-sweet popcorn and the creamy chocolate is next-level. It’s comfort food in its purest form.
What makes this recipe stand out from the rest is the simplicity of the technique. You aren’t tempering chocolate. You aren’t caramelizing sugar. You are just melting and mixing. It’s foolproof. And honestly, the texture is everything. That crunch from the popcorn paired with the snap of the cooled chocolate? It’s satisfying in a way that’s hard to explain until you try it. It’s not just good—it’s the kind of treat that makes you close your eyes after the first bite. It’s nostalgia on a stick, essentially. Perfect for impressing guests without the stress of baking a whole cake. Or, you know, just making yourself happy on a random Tuesday.
What Ingredients You Will Need
This recipe relies on simple, wholesome ingredients to deliver bold flavor and satisfying texture without the fuss. You don’t need fancy pantry items or hard-to-find specialty stores. In fact, the magic here lies in the accessibility of what you’re using. Most of these items are staples that likely already have a home in your kitchen.
- Popped Popcorn (10 cups): This is the base. I recommend using plain, air-popped popcorn for the best texture. If you use microwave popcorn, make sure it’s just the kernels—no butter or salt added, or it can get soggy. Look for fresh, fluffy kernels; stale popcorn will ruin the crunch.
- Semi-Sweet Chocolate Chips (12 oz): I personally prefer Ghirardelli or Callebaut chocolate chips because they melt smoothly and have a rich cocoa flavor that balances the sweetness. Avoid chocolate bars that are meant for eating out of hand, as they often contain additives that make them harder to melt evenly.
- White Chocolate Chips (8 oz): This adds a creamy contrast and helps with the visual appeal. If you can’t find white chips, you can melt white chocolate bars, but chips are easier to control. Dairy-free options work well here if you need to accommodate allergies.
- Candy Corn (1.5 cups): The star of the show. Use the classic kind. If you’re feeling fancy, you can mix in some mini marshmallows, but stick to candy corn for the authentic fall vibe. Ensure they are fresh; old candy corn can get hard as a rock.
- Butter (2 tablespoons): Unsalted butter is best here to control the sodium, but it adds a necessary richness to the chocolate coating. It helps the chocolate flow better when melting.
- Salt (1/2 teaspoon): A pinch of flaky sea salt on top after setting enhances the flavor profile significantly. It cuts through the sugar and makes the chocolate taste more complex.
- Vegetable Oil (1 teaspoon): Optional, but I highly recommend it. Adding a tiny bit of oil to the melting chocolate helps thin it out slightly, making it easier to coat the popcorn evenly without adding extra sweetness.
If you’re looking to substitute, you can use almond flour for a gluten-free option if your popcorn is certified gluten-free. For a nut-free environment, this recipe is naturally safe, but always check your chocolate packaging. In summer, you might swap the candy corn for pumpkin-shaped marshmallows for a Halloween twist. The beauty of this recipe is its flexibility.
Equipment Needed
You don’t need a fancy kitchen to make this. In fact, the simpler the tools, the better. Here is what you’ll need to get the job done without a headache.
- Large Microwave-Safe Bowl: This is your main stage. Make sure it’s big enough to hold all the popcorn. A 4-quart bowl is ideal. If you don’t have one, you can use two smaller bowls, but that doubles the work.
- Microwave: Obviously. But here’s a pro tip: If your microwave has variable power, use 50% power when melting the chocolate. This prevents scorching. I learned this the hard way after making a batch of burnt chocolate that tasted like regret.
- Large Mixing Bowl: Something wide and shallow is best for tossing the popcorn. A salad spinner bowl works great if you have one, as it helps keep the popcorn contained.
- Parchment Paper: Essential for lining your baking sheet. Do not use wax paper; it will stick. Parchment paper is your best friend for no-bake desserts.
- Spatula: A silicone spatula is best for scraping the chocolate bowl clean. You want every bit of that goodness.
- Baking Sheet: A standard 9×13 inch sheet is perfect. If you don’t have one, two smaller sheets work fine. Just make sure they fit in your fridge.
If you don’t have a microwave, you can use a double boiler on the stove, but it takes longer and requires more attention. For budget-friendly options, any microwave-safe bowl and a standard baking sheet will do. Just keep an eye on your equipment; a scratched non-stick pan can sometimes react weirdly with chocolate, so stick to glass or ceramic if possible.
Preparation Method
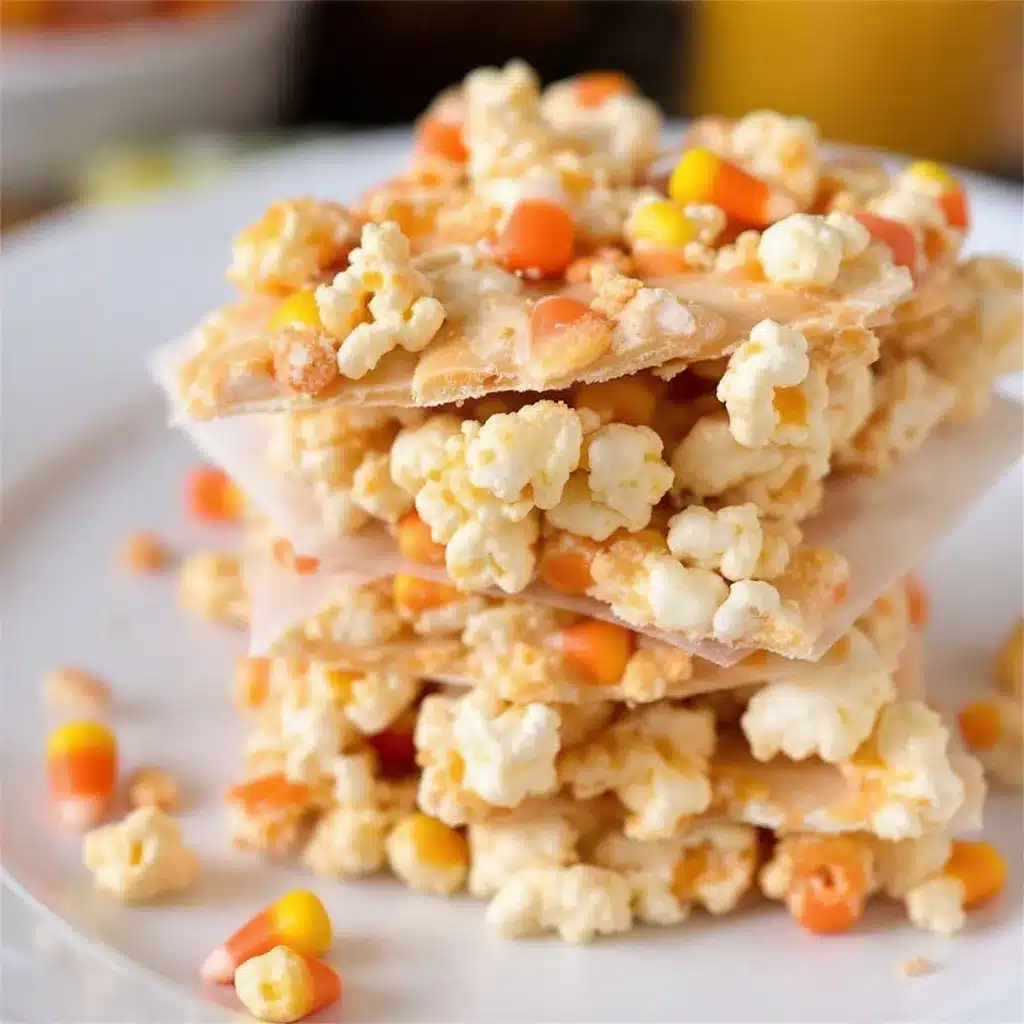
- Prep Your Workspace (5 minutes): Line your baking sheet with parchment paper. Set it aside. This is crucial because once the bark is ready, it needs to go straight to the fridge. If you skip this step, you’ll be scrambling later. Clean up your counter space so you have room to toss the popcorn.
- Pop the Corn (10 minutes): If you haven’t already, pop your popcorn. Aim for 10 cups of popped corn. This is roughly 1/2 cup of kernels. Discard any unpopped kernels—they are the popcorn equivalent of bones in chicken. You don’t want to chip a tooth on a hard kernel. Let the popcorn cool completely. Warm popcorn will melt the chocolate prematurely, leading to a soggy mess.
- Melt the Chocolate (3-4 minutes): In your large microwave-safe bowl, combine the semi-sweet chocolate chips, white chocolate chips, and butter. Microwave on high for 1 minute. Remove and stir. If it’s not fully melted, microwave in 30-second intervals, stirring between each. Be careful not to overheat. Chocolate burns easily. Add the teaspoon of vegetable oil now if using. Stir until smooth and glossy. This should take about 2-3 minutes total.
- Combine (2 minutes): Pour the melted chocolate over the cooled popcorn. Use your silicone spatula to gently fold the chocolate into the popcorn. You want to coat every piece. This might look like a lot of chocolate at first, but it will settle. Don’t rush this step. Take your time to ensure even coverage. If you see dry spots, add a tiny splash of melted chocolate.
- Add the Candy Corn (1 minute): Gently fold in the candy corn. Be gentle here. You don’t want to break the candy corn into tiny pieces. Just enough to distribute them evenly. You want those bursts of color and texture.
- Spread and Chill (20 minutes): Pour the mixture onto your prepared baking sheet. Spread it out into an even layer. Use the back of a spoon to press it down slightly. It should be about 1/2 inch thick. Sprinkle with flaky sea salt if desired. Place in the fridge. This is the hardest part—waiting. But it only takes about 20 minutes for the chocolate to set. If you’re in a hurry, you can put it in the freezer for 10 minutes, but watch it closely.
- Break and Serve: Once the chocolate is firm to the touch, remove from the fridge. Break it into irregular chunks. Don’t use a knife; your hands work best. This gives it that rustic, homemade look. Serve immediately or store in an airtight container.
Troubleshooting tip: If the chocolate seems too thick, add another teaspoon of oil. If it’s too thin, add a few more chocolate chips and let it sit for a minute. The goal is a coating that sticks but isn’t gloopy.
Cooking Tips & Techniques
There are a few tricks I’ve picked up over the years that can make or break this recipe. Let’s talk about them.
Temperature Control is Key: The biggest mistake people make is using chocolate that is too hot. If you melt it until it’s bubbling, it will seize when it hits the cool popcorn. Aim for just melted. It should be fluid, not boiling. If you’re worried, err on the side of slightly under-melted. The residual heat will finish the job.
Don’t Skip the Salt: I know, it’s a sweet recipe. But the salt is what makes it taste expensive. Without it, it’s just sugar and chocolate. With it, it’s a balanced treat. Use flaky sea salt for the best visual and textural impact. If you don’t have it, regular table salt works, but use half the amount.
Work Quickly: Once the chocolate is melted, it starts to cool down fast. Have your popcorn and candy corn ready to go before you touch the chocolate. This isn’t the time to go look for a spoon. You need to move fast to get an even coat before the chocolate starts to thicken.
Double Batch for Parties: This recipe scales up easily. I often double it for holiday parties. Just make sure you have enough bowls and enough fridge space. If you don’t have enough fridge space, make two batches and chill them sequentially. It’s worth the extra effort.
Avoid Humidity: If you live in a humid climate, be careful. Humidity can make chocolate sticky and dull. Make this on a dry day if possible. If it’s humid, add a tablespoon of cocoa powder to the chocolate to help counteract the stickiness.
Multitasking Strategy: While the chocolate is melting, you can be breaking up the popcorn if it’s in clumps. Or you can be prepping your serving platter. Use that 2-minute melt time wisely. Efficiency is key when you’re making a large batch.
Consistency Check: Before you pour the mixture onto the sheet, dip a spoon in and pull it out. The chocolate should coat the spoon evenly and drip slowly. If it drips too fast, it’s too thin. If it clumps, it’s too thick. Adjust accordingly.
Variations & Adaptations
One of the best things about this recipe is how adaptable it is. You can tweak it to fit your mood or your dietary needs.
Dairy-Free Option: Simply swap the chocolate chips for dairy-free varieties. Many brands like Enjoy Life or Pascha melt beautifully. Use coconut oil instead of butter. The result is just as creamy and delicious.
Gluten-Free Option: Ensure your popcorn is certified gluten-free. Most plain popcorn is, but some flavored varieties might have cross-contamination. The rest of the ingredients are naturally gluten-free, so this is an easy swap.
Flavor Twist: Add a teaspoon of peppermint extract to the melted chocolate for a holiday twist. Or swap the candy corn for crushed pretzels for a sweet-salty combo. I once tried adding orange zest, and it was surprisingly good. Experiment!
Seasonal Swap: In summer, use pumpkin spice candy corn. In winter, use red and green M&Ms instead. The base recipe remains the same, but the flavor profile changes completely. It’s a great way to keep things fresh.
Personal Variation: I sometimes add a layer of peanut butter cups chopped up into the mix. It adds a chewy texture that contrasts nicely with the crunch. It’s a bit indulgent, but life is short, right?
Serving & Storage Suggestions
This bark is best served at room temperature. If it’s too cold, the chocolate can be too hard and snap aggressively. Let it sit out for 5 minutes before serving. It pairs wonderfully with a glass of cold milk or a cup of hot coffee. The warmth of the coffee contrasts nicely with the cool, sweet bark.
For storage, keep it in an airtight container at room temperature for up to 5 days. If your kitchen is warm, store it in the fridge. Just let it come to room temperature before eating to avoid condensation. You can also freeze it for up to 2 months. Thaw in the fridge overnight. The texture might change slightly, but the flavor remains intact.
I’ve noticed that the flavors meld together over time. Day 1 is good. Day 3 is better. The chocolate softens slightly, and the candy corn releases a bit of its flavor into the mix. It’s like a marinated dessert. If you’re making it for a party, make it a day ahead for best results.
Nutritional Information & Benefits
While this is definitely a treat, it’s not without its merits. Popcorn is a whole grain, which provides some fiber. Chocolate, especially semi-sweet, contains antioxidants. Candy corn, well, it’s mostly sugar, so enjoy in moderation.
A typical serving (about 2 ounces) contains approximately 250 calories. It’s high in sugar and fat, so keep portions in check. If you’re watching your sugar intake, consider using dark chocolate chips with lower sugar content. This recipe is not suitable for low-carb diets, but it fits well into a balanced lifestyle when enjoyed as an occasional treat.
From a wellness perspective, I love this recipe because it brings people together. Sharing food is a form of care. Even if it’s just sugar and chocolate, the act of making it for someone else is what matters. Plus, the crunch is surprisingly satisfying for the palate.
Conclusion
This easy candy corn popcorn bark is more than just a recipe. It’s a solution. It’s a way to turn a chaotic evening into a moment of joy. It’s simple, it’s delicious, and it’s forgiving. You don’t need to be a professional baker to make it. You just need a microwave and a willingness to try.
I hope you give it a shot. Customize it to your liking. Add your own twists. Make it your own. And when you do, I’d love to hear about it. Leave a comment below and let me know how it turned out. Did you add the extra salt? Did you use the fancy chocolate? Share your stories. And if you make it, snap a photo and tag me. I love seeing your creations.
Happy cooking! And remember, life is too short for boring snacks. Make something sweet, make something crunchy, and make it yours.
Frequently Asked Questions
Can I use microwave popcorn for this recipe?
Yes, you can, but make sure it’s just the plain popcorn. Avoid buttered or salted varieties as they can make the bark soggy. You’ll need about 10 cups of popped corn.
How long does the bark last?
It lasts up to 5 days at room temperature in an airtight container. If your kitchen is warm, store it in the fridge. It can also be frozen for up to 2 months.
Can I substitute the candy corn?
Absolutely. You can use M&Ms, pretzels, mini marshmallows, or chopped nuts. Get creative! The base recipe works with almost any mix-in.
Why did my chocolate seize?
Chocolate seizes when it comes into contact with water or when it’s overheated. Make sure your bowl and utensils are completely dry. Also, melt it slowly and stir frequently.
Is this recipe gluten-free?
It can be. Just ensure your popcorn is certified gluten-free and use gluten-free chocolate chips. The rest of the ingredients are naturally gluten-free.
Pin This Recipe!
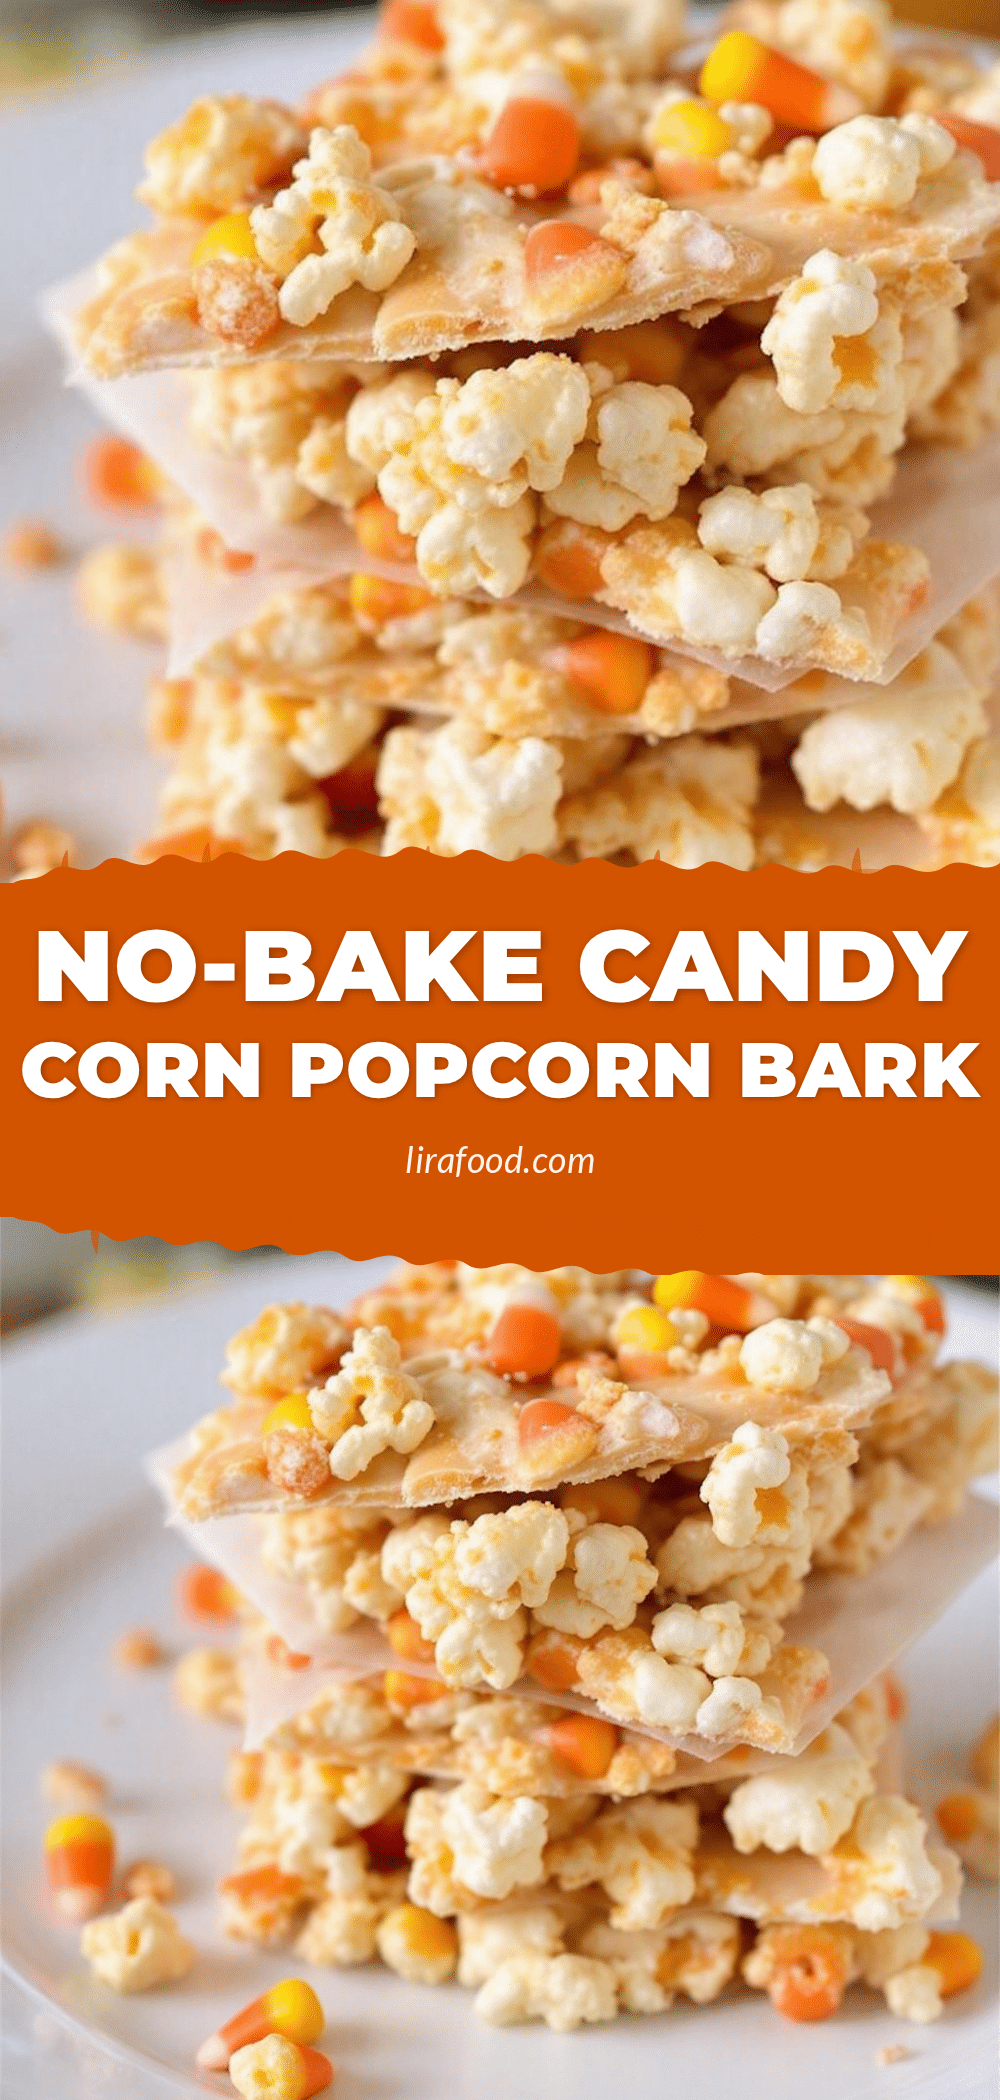
Easy Candy Corn Popcorn Bark: Best No-Bake Recipe
A quick, no-bake fall treat combining salty-sweet popcorn, creamy chocolate, and festive candy corn. Perfect for last-minute parties or cozy nights in.
- Prep Time: 15 minutes
- Cook Time: 0 minutes
- Total Time: 35 minutes
- Yield: Approximately 8-10 servings 1x
- Category: Dessert
- Cuisine: American
Ingredients
- 10 cups popped popcorn (plain, air-popped)
- 12 oz semi-sweet chocolate chips
- 8 oz white chocolate chips
- 1.5 cups candy corn
- 2 tablespoons unsalted butter
- 1 teaspoon vegetable oil (optional)
- 1/2 teaspoon flaky sea salt (for topping)
Instructions
- Line a 9×13 inch baking sheet with parchment paper and set aside.
- Pop the popcorn to yield 10 cups, discarding unpopped kernels. Let the popcorn cool completely.
- In a large microwave-safe bowl, combine semi-sweet chocolate chips, white chocolate chips, and butter.
- Microwave on high for 1 minute, then stir. Continue microwaving in 30-second intervals, stirring between each, until smooth and glossy. Add vegetable oil if using.
- Pour the melted chocolate over the cooled popcorn and gently fold to coat evenly.
- Gently fold in the candy corn, being careful not to break the pieces.
- Spread the mixture onto the prepared baking sheet into an even layer about 1/2 inch thick.
- Sprinkle with flaky sea salt if desired.
- Refrigerate for 20 minutes (or freeze for 10 minutes) until the chocolate is firm.
- Break the bark into irregular chunks by hand and serve.
Notes
Ensure popcorn is completely cool before adding chocolate to prevent sogginess. Use 50% power on the microwave if possible to prevent scorching the chocolate. If the chocolate is too thick, add more oil; if too thin, add more chocolate chips. Store in an airtight container at room temperature for up to 5 days or freeze for up to 2 months.
Nutrition
- Serving Size: 2 ounces
- Calories: 250
- Sugar: 28
- Sodium: 150
- Fat: 12
- Saturated Fat: 7
- Carbohydrates: 35
- Fiber: 2
- Protein: 3
Keywords: candy corn, popcorn bark, no-bake, fall dessert, halloween treat, easy recipe, chocolate popcorn


