Love this? Save it for later!
Share the inspiration with your friends
I figured Halloween snacks for kids meant hours of fussy decorating and Pinterest fails waiting to happen. It took about ten minutes of watching my nephew wrap crescent dough around a hot dog for that assumption to fall apart completely. He was laughing, dough stuck to his fingers, and these little mummy faces were actually coming together without a single stressed-out adult in sight.
The thing is, I never set out to make “cute food.” I was just trying to survive a Halloween party where the sugar rush had already hit and the store-bought pizza rolls weren’t cutting it. My sister handed me a package of hot dogs and a can of crescent rolls, shrugged, and said “make something that looks like a monster.” So I did. And honestly? The kids devoured them before I could even arrange them nicely on a platter.
These Easy Halloween Mummy Hot Dog Bites are the kind of snack that makes you look like a hero without actually trying that hard. They’re buttery, slightly flaky, and wrapped around a classic kid-approved hot dog. The mustard eyes are just for fun — you could skip them and the kids would still inhale these things. What started as a last-minute panic snack turned into the one thing I actually look forward to making every October.
Why You’ll Love This Recipe
Let me tell you why these little mummies have become my go-to Halloween trick. I’ve tested this recipe through three different party scenarios — a classroom celebration, a backyard costume party, and a quiet movie night where the kids just wanted something fun. Every single time, the plate was empty.
- Quick & Easy: You can have these assembled in under 15 minutes. The oven does the rest of the work while you deal with costume emergencies or last-minute candy bowl refills.
- Simple Ingredients: Hot dogs, crescent roll dough, and a squirt of mustard. That’s it. No specialty grocery runs, no obscure spices you’ll never use again.
- Perfect for Halloween Parties: Whether it’s a school potluck, a trunk-or-treat event, or just a spooky dinner at home, these bites fit right in.
- Crowd-Pleaser: I’ve yet to meet a kid who turns down a hot dog wrapped in buttery dough. Even the picky eaters at my nephew’s party grabbed seconds.
- Unbelievably Delicious: There’s something about the combo of salty hot dog and flaky, golden crescent dough that hits different. It’s comfort food in bite-sized form.
What makes this version different from every other Halloween hot dog recipe out there? It’s the way the dough wraps — not too tight, not too loose — so every bite has that perfect ratio of bread to meat. I learned through trial and error that leaving tiny gaps between the dough strips gives the mummies that authentic “bandaged” look while letting the hot dog brown just enough on the edges. It’s a small detail, but it makes the difference between a sad-looking snack and one that actually makes kids giggle.
This recipe isn’t just good — it’s the kind that makes you close your eyes after the first bite. It’s Halloween fun without the stress, and honestly, that’s exactly what we all need this time of year.
What Ingredients You Will Need
This recipe uses simple, everyday ingredients to create something that feels special without the fuss. Most of these are probably already sitting in your fridge or pantry, which is exactly how I like my last-minute recipes to work.
- Hot dogs (12 standard-size): Use your favorite brand. I personally prefer all-beef hot dogs for better flavor, but turkey or chicken hot dogs work just fine. Cocktail sausages are a fun alternative for mini mummy bites.
- Crescent roll dough (2 cans, 8-ounce each): This is the shortcut that makes the recipe work. Pillsbury is my go-to brand because the dough is consistent and rolls out evenly. Store brands work too, just check the expiration date — old dough tears more easily.
- Yellow mustard (for eyes): A squeeze bottle makes this so much easier. You can also use ketchup dots or even tiny dollops of cream cheese if you want to avoid mustard. Dijon works in a pinch, but kids tend to prefer the milder yellow variety.
- Butter (1 tablespoon, melted, optional): Brushing this on before baking gives the mummies a gorgeous golden sheen. I skip it when I’m in a hurry, but it does make them look bakery-fresh.
- Sesame seeds or poppy seeds (optional): A light sprinkle adds texture and makes the mummies look even more like little baked goods. Totally optional, but my nephew calls them “mummy freckles.”
One thing I learned the hard way — don’t use jumbo hot dogs for this recipe. The regular size fits the crescent dough strips perfectly, and you get a better balance of dough to meat. If all you have are jumbo dogs, slice them in half lengthwise first. It changes the shape a bit but the flavor is still there.
For a gluten-free version, look for gluten-free crescent dough at specialty grocery stores. The texture is slightly different — a bit more crumbly — but the taste is still delicious. I’ve also used gluten-free hot dog buns sliced into thin strips in a pinch. It’s not quite the same, but desperate times call for creative solutions.
Equipment Needed
You don’t need fancy kitchen tools for this recipe, which is honestly my favorite kind of cooking. Here’s what you’ll need:
- Baking sheet (large, rimmed): A standard half-sheet pan works perfectly. Line it with parchment paper for easy cleanup — trust me, the mustard dots can be stubborn.
- Parchment paper or silicone baking mat: Either works. Silicone mats are reusable and eco-friendly, but parchment is fine for one-time use.
- Sharp knife or pizza cutter: A pizza cutter makes slicing the crescent dough into strips so much faster. I’ve used a butter knife in a pinch, but the strips come out uneven and some mummies end up with too much dough.
- Pastry brush (optional): For brushing on melted butter. A clean silicone spatula works too if you’re not picky about even coverage.
- Small bowl (for melted butter): Microwave-safe is easiest.
- Toothpicks (for securing eyes, optional): If you want to add olive slices or cheese eyes, toothpicks help them stay put during baking.
I picked up a set of silicone baking mats a few years ago and honestly, they’ve saved me from scrubbing baked-on mustard more times than I can count. If you’re making these for a big party, I’d recommend grabbing an extra baking sheet so you can bake two trays at once.
Preparation Method
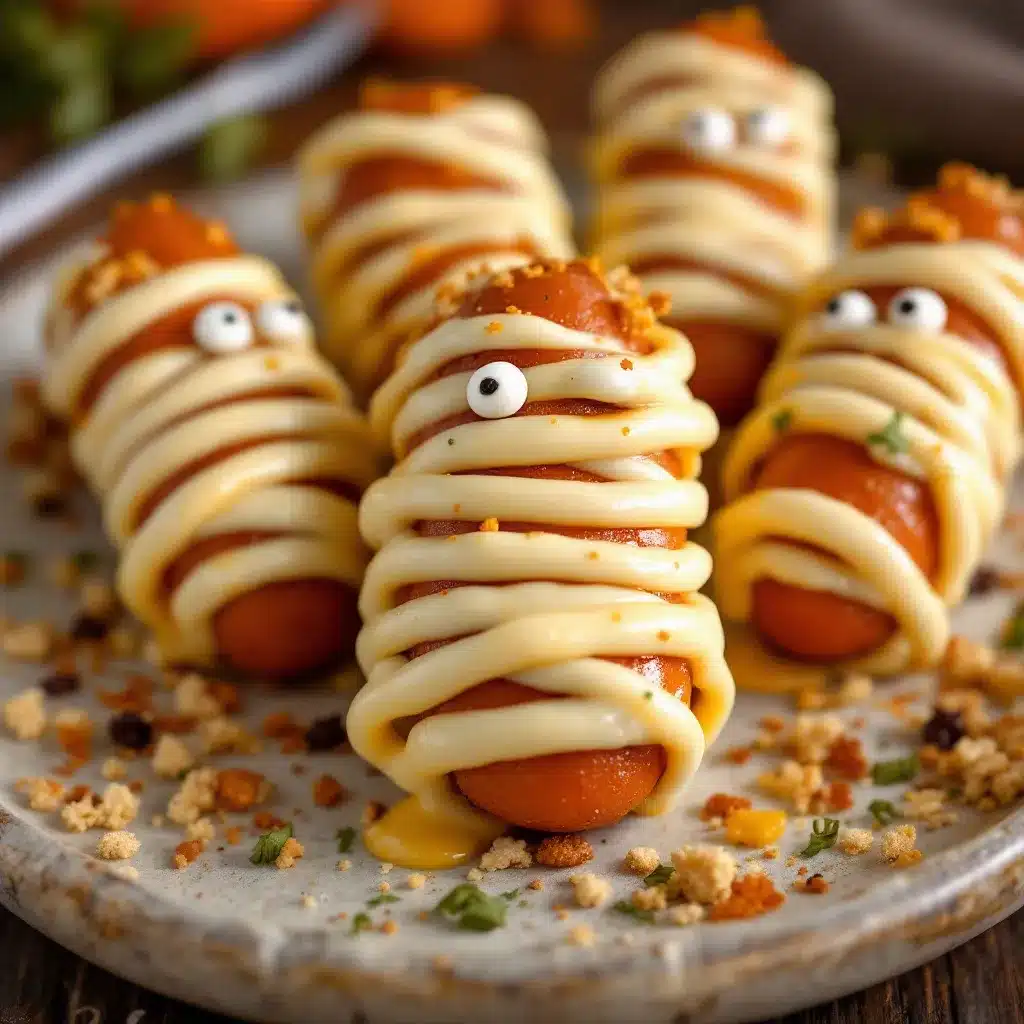
Alright, let’s get to the fun part. This is where the mummies come to life — no culinary degree required.
- Preheat your oven to 375°F (190°C). Line a large baking sheet with parchment paper or a silicone mat. This gives the dough a chance to start puffing immediately once it hits the heat.
- Unroll the crescent dough and separate it along the perforated lines. You should have 8 triangles per can. Press the perforations together gently to seal them — you want solid rectangles of dough, not triangles. I usually just pinch the seams with my fingers and it works fine.
- Use a pizza cutter or sharp knife to slice each dough rectangle lengthwise into 4-5 thin strips. The strips should be about 1/4-inch wide. Don’t worry if they’re not perfectly even — the mummies look more authentic with slightly irregular bandages.
- Take one hot dog and start wrapping a dough strip around it, stretching the dough slightly as you go. Leave small gaps between the strips so the hot dog peeks through — this is what gives it the mummy look. Start at one end and work your way to the other, overlapping the strips slightly. Each hot dog should use about 4-5 strips.
- Repeat with the remaining hot dogs and place them on the prepared baking sheet, spacing them about 2 inches apart. They’ll puff up as they bake, so give them room to breathe.
- Optional: Brush the tops with melted butter using a pastry brush. This step adds a beautiful golden color and a hint of richness. If you’re skipping it, no judgment — they’ll still taste great.
- Bake for 12-15 minutes or until the dough is golden brown and cooked through. The hot dogs should be heated through and slightly plump. Keep an eye on them after the 12-minute mark — ovens vary, and you don’t want burnt mummies.
- Remove from the oven and let them cool on the baking sheet for 2-3 minutes. This helps the dough set and makes the mummies easier to handle.
- Add the eyes using mustard dots. Squeeze two small dots of yellow mustard onto each mummy’s “face” area. I use a toothpick to dab them into perfect little circles if the squeeze bottle gets messy. For a less mustard-forward option, use ketchup or cream cheese instead.
- Serve warm and watch them disappear. Seriously — don’t blink.
A few things I’ve learned through trial and error: If the dough tears while you’re wrapping, just press it back together — it’ll fuse during baking. Don’t wrap the dough too tightly or it’ll squeeze the hot dog and make the mummies look squished. And if you’re making these ahead of time for a party, bake them completely, add the eyes just before serving, and reheat in a 300°F oven for 5 minutes. They won’t be quite as crisp as fresh, but they’ll still be delicious.
Cooking Tips & Techniques
I’ve made these mummies about a dozen times now, and I’ve picked up a few tricks that make the process smoother and the results better. Let me share what I’ve learned so you don’t have to make the same mistakes I did.
The dough temperature matters. Cold crescent dough is easier to cut into clean strips. If it gets too warm and sticky, pop it in the fridge for 10 minutes before slicing. I learned this the hard way when my first batch turned into a sticky, torn mess because I left the dough on the counter too long.
Don’t over-wrap the hot dogs. Two to three wraps around each mummy is plenty. Any more than that and you end up with a dough-heavy bite that overwhelms the hot dog. The whole point is balance — you want to taste both elements in every bite.
Use a pizza cutter for speed. I tried using a knife the first time and the strips came out uneven and frustrating. A pizza cutter glides through the dough effortlessly and gives you consistent strips every time. It’s a small investment that pays off if you make these regularly.
Leave gaps for the “bandage” look. I once wrapped a hot dog so tightly that it looked like a dough-covered sausage with no personality. The gaps between the strips are what make them look like mummies. Plus, the exposed hot dog gets slightly crispy edges during baking, which adds texture.
Watch the baking time. Every oven runs slightly different. My first batch came out burnt because I trusted the timer without checking visually. Start checking at the 12-minute mark and pull them when the dough is golden brown, not dark brown. The hot dog should be plump and heated through.
Make the eyes fun. Mustard dots are classic, but I’ve also used tiny dollops of ketchup, cream cheese, or even slices of black olive for a more “Halloween-y” vibe. My nephew once insisted on using Sriracha dots for “angry mummies” — they actually looked hilarious and added a tiny kick.
One failure I’ll never forget: I tried to make these in an air fryer without adjusting the temperature. They came out burnt on the outside and cold in the middle. If you want to use an air fryer, cook them at 350°F for 6-8 minutes, checking halfway through. The hot dogs heat up faster in the air fryer, so you don’t need as long.
Variations & Adaptations
One of the best things about this recipe is how easy it is to tweak. I’ve tried several variations over the years, and here are my favorites.
Cheesy Mummy Bites
Before wrapping the hot dog, slice it lengthwise and insert a strip of cheddar or mozzarella cheese. Wrap the dough as usual and bake. The cheese melts into the hot dog and creates a gooey, delicious center. Just be careful — the cheese gets hot and can burn little mouths if you serve them straight out of the oven.
Spicy Mummy Bites
Use spicy Italian sausages instead of hot dogs and add a thin strip of jalapeño before wrapping. These are more for adults or adventurous kids, but they’re surprisingly good. I made these for a Halloween party where the adults wanted something with a kick, and they were a hit.
Vegetarian Mummy Bites
Swap the hot dogs for vegetarian sausages or even cheese sticks. The cheese sticks work especially well — they get melty and stretchy, and kids love pulling them apart. Just watch the baking time since cheese sticks cook faster than hot dogs.
Breakfast Mummy Bites
Use breakfast sausages instead of hot dogs and add a tiny strip of bacon before wrapping. Serve with maple syrup for dipping. I tried this one Sunday morning when we had leftover crescent dough, and it was a game-changer for Halloween-themed breakfasts.
Gluten-Free Version
Use gluten-free crescent roll dough (available at most grocery stores now) and gluten-free hot dogs. The texture is slightly different — the dough is a bit more crumbly — but the flavor is still there. I’ve also used gluten-free puff pastry sheets cut into strips, which gives a flakier result.
If you’re looking for more kid-friendly party ideas, you might enjoy this classic homemade banana pudding for a sweet follow-up, or these fluffy buttermilk pancakes for a Halloween morning treat.
Serving & Storage Suggestions
These mummy bites are best served warm, straight from the oven, when the dough is still flaky and the hot dog is perfectly heated through. But I know real life doesn’t always cooperate, so here’s how to handle different serving situations.
Serving temperature: Serve them warm, but not piping hot — especially if kids are eating them. Let them cool for 3-5 minutes after baking. The mustard eyes will set better if the mummies have cooled slightly, too.
Presentation ideas: Arrange the mummies on a platter with a small bowl of ketchup or mustard for dipping. I like to add a few “spooky” decorations around the platter — plastic spiders, fake cobwebs, or even a few candy eyeballs scattered between the mummies. For a themed party, serve them alongside cozy birthday cake mix cupcakes decorated with orange frosting for a complete spread.
Complementary dishes: These mummies pair well with other finger foods. Try serving them with veggie sticks and ranch dip for a balanced snack table, or alongside a fresh Waldorf salad for a more substantial meal. For drinks, apple cider or a simple fruit punch works great.
Storage instructions: Store leftover mummies in an airtight container in the refrigerator for up to 3 days. The dough will soften slightly, but they’re still tasty. I don’t recommend leaving them out at room temperature for more than 2 hours, especially if you’re serving them at a party.
Reheating methods: The best way to reheat these is in the oven at 300°F for 5-7 minutes. The microwave works in a pinch (30-45 seconds), but the dough will be soft rather than crispy. If you’re reheating a large batch, the oven is definitely worth the extra time.
Freezer instructions: You can freeze these before or after baking. To freeze unbaked mummies, assemble them on a baking sheet and freeze until solid, then transfer to a freezer bag. Bake directly from frozen, adding 3-5 minutes to the baking time. To freeze baked mummies, let them cool completely, then wrap individually in plastic wrap and store in a freezer bag. Reheat from frozen in a 300°F oven for 8-10 minutes.
Flavor development: Honestly, these are best fresh from the oven. The dough loses its crispness over time, and the hot dog can get a bit rubbery. If you’re making them for a party, bake them as close to serving time as possible. The assembly can be done hours ahead — just keep the wrapped mummies in the fridge until you’re ready to bake.
Nutritional Information & Benefits
Let’s be real — these are a treat, not a health food. But here’s what you’re looking at per serving (2 mummy bites):
- Calories: Approximately 280-320
- Protein: 10-12g
- Fat: 18-22g
- Carbohydrates: 22-26g
- Fiber: 0-1g
- Sugar: 4-6g
- Sodium: 700-900mg
The hot dogs provide a decent amount of protein, which helps keep kids full longer — useful for a Halloween party where there’s going to be a lot of candy later. The crescent dough adds carbohydrates for quick energy, though it’s not exactly a nutritional powerhouse.
Dietary considerations: This recipe contains wheat (gluten) and dairy (if you use butter). For a dairy-free version, skip the butter wash or use a plant-based alternative. The hot dogs may contain soy or other allergens depending on the brand, so check labels if you’re cooking for someone with sensitivities.
Healthier tweaks: Use turkey or chicken hot dogs to reduce fat and calories. You can also use low-fat crescent dough, though the texture is slightly different. For a lower-sodium option, look for low-sodium hot dogs and skip the butter wash.
My personal take: These are a once-in-a-while treat, not an everyday meal. I don’t stress about the nutritional profile when I’m making them for Halloween fun. The joy on the kids’ faces when they see the mummies is worth every calorie. Balance is key — serve them with veggie sticks on the side and call it a win.
Conclusion
These Easy Halloween Mummy Hot Dog Bites have become a tradition in my house, and I think they deserve a spot in yours too. They’re simple enough for a weeknight snack, fun enough for a party, and delicious enough that even the adults sneak a few when the kids aren’t looking.
What I love most about this recipe is how forgiving it is. The dough might tear, the mustard eyes might smear, and the mummies might look a little wonky — but that’s kind of the point. Halloween is supposed to be a little imperfect, a little silly, and a lot of fun. These mummies capture that spirit perfectly.
I’d love to hear how yours turn out. Did you try a variation? Did the kids help with the wrapping? Drop a comment below and share your mummy-making adventures. And if you’re looking for more Halloween snack ideas, check out some of the other recipes on the site — there’s plenty of spooky inspiration waiting for you.
Go ahead, grab that package of hot dogs and a can of crescent dough. Your mummies are waiting to come to life. Happy Halloween, friends!
Frequently Asked Questions
Can I make these mummy hot dog bites ahead of time?
Yes, you can assemble them up to 24 hours in advance. Keep the wrapped mummies covered in the refrigerator, then bake them just before serving. The dough might be slightly colder, so add 1-2 minutes to the baking time.
Can I use puff pastry instead of crescent dough?
Absolutely. Puff pastry gives a flakier, more buttery result. Cut the puff pastry into thin strips and wrap the hot dogs the same way. The baking time is similar, but keep an eye on them since puff pastry browns faster.
How do I prevent the dough from tearing while wrapping?
Make sure the dough is cold when you cut it. Warm dough is sticky and tears easily. If the dough does tear, just press it back together — it’ll fuse during baking. You can also use slightly wider strips for a sturdier wrap.
What can I use instead of mustard for the eyes?
Ketchup, cream cheese, sour cream, or even tiny dollops of ranch dressing all work well. For a non-dairy option, use hummus or mashed avocado. You can also use small slices of black olive or capers for a more traditional mummy look.
Can I bake these in an air fryer?
Yes, but adjust the temperature and time. Air fry at 350°F for 6-8 minutes, checking halfway through. The hot dogs heat up faster in the air fryer, so you don’t need as long. Just be careful not to overcrowd the basket — work in batches if needed.
Pin This Recipe!
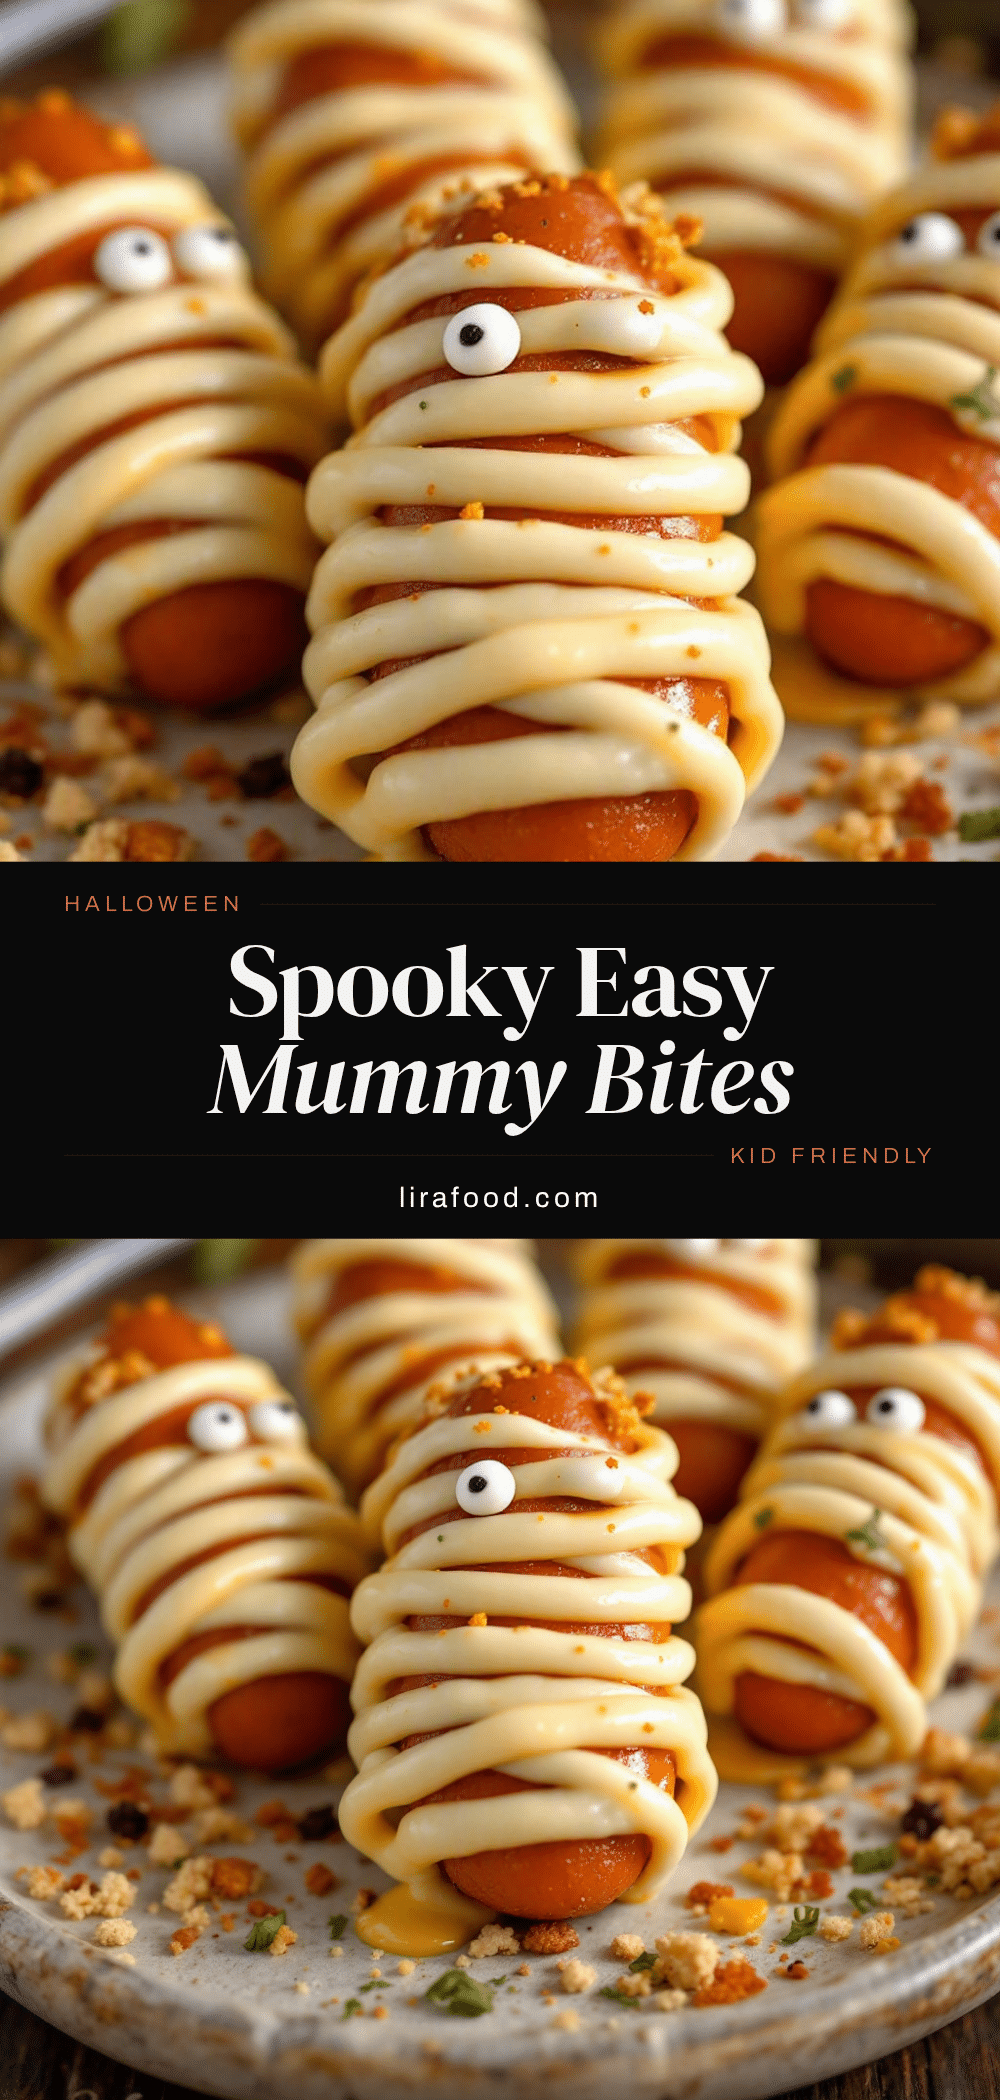
Easy Halloween Mummy Hot Dog Bites: Best Kid-Friendly Snack
These Easy Halloween Mummy Hot Dog Bites are a buttery, flaky, and fun snack that kids love. Made with just hot dogs, crescent roll dough, and mustard for eyes, they come together in under 15 minutes and are perfect for Halloween parties, school potlucks, or a spooky dinner at home.
- Prep Time: 15 minutes
- Cook Time: 15 minutes
- Total Time: 30 minutes
- Yield: 12 servings 1x
- Category: Appetizer
- Cuisine: American
Ingredients
- 12 standard-size hot dogs
- 2 cans (8 ounces each) crescent roll dough
- Yellow mustard (for eyes)
- 1 tablespoon melted butter (optional)
- Sesame seeds or poppy seeds (optional)
Instructions
- Preheat your oven to 375°F (190°C). Line a large baking sheet with parchment paper or a silicone mat.
- Unroll the crescent dough and separate it along the perforated lines. Press the perforations together gently to seal them, forming solid rectangles of dough.
- Use a pizza cutter or sharp knife to slice each dough rectangle lengthwise into 4-5 thin strips, about 1/4-inch wide.
- Take one hot dog and start wrapping a dough strip around it, stretching the dough slightly as you go. Leave small gaps between the strips so the hot dog peeks through. Start at one end and work your way to the other, overlapping the strips slightly. Each hot dog should use about 4-5 strips.
- Repeat with the remaining hot dogs and place them on the prepared baking sheet, spacing them about 2 inches apart.
- Optional: Brush the tops with melted butter using a pastry brush.
- Bake for 12-15 minutes or until the dough is golden brown and cooked through. The hot dogs should be heated through and slightly plump.
- Remove from the oven and let them cool on the baking sheet for 2-3 minutes.
- Add the eyes using mustard dots. Squeeze two small dots of yellow mustard onto each mummy’s ‘face’ area.
- Serve warm.
Notes
For best results, use cold crescent dough to prevent tearing. Don’t over-wrap the hot dogs; 2-3 wraps per mummy is plenty. Leave gaps between dough strips for the mummy look. Start checking at 12 minutes to avoid burning. For air fryer, cook at 350°F for 6-8 minutes. To make ahead, assemble up to 24 hours in advance and refrigerate, then bake just before serving. Freeze unbaked mummies on a baking sheet, then transfer to a freezer bag; bake from frozen, adding 3-5 minutes.
Nutrition
- Serving Size: 2 mummy bites
- Calories: 300
- Sugar: 5
- Sodium: 800
- Fat: 20
- Saturated Fat: 6
- Carbohydrates: 24
- Fiber: 0.5
- Protein: 11
Keywords: Halloween, mummy, hot dog, crescent roll, kid-friendly, snack, party food, easy, quick


