Love this? Save it for later!
Share the inspiration with your friends
Introduction
Last October, I was at the local hardware store of all places—yes, the one with the creaky wooden floors and dusty aisles—when the checkout clerk, a quiet guy named Jerry who I’d never pegged for a baker, suddenly started talking about Halloween treats. Honestly, I wasn’t expecting baking wisdom from someone surrounded by paint cans and power tools, but there I was, holding a bag of chocolate chips, listening as Jerry described exactly how to make these Easy Witch Hat Chocolate Peanut Butter Cup Cookies. He swore it was foolproof and perfect for last-minute Halloween parties.
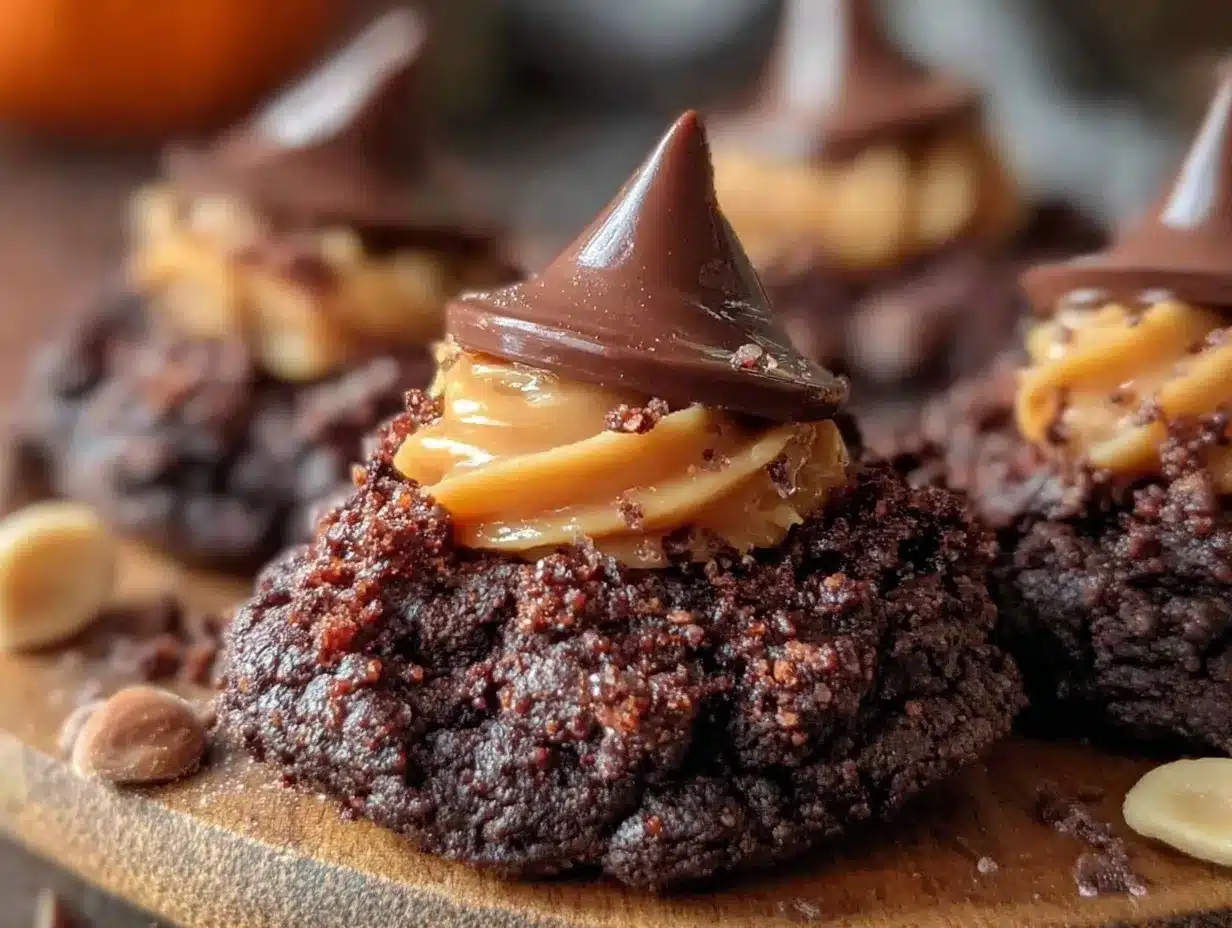
What caught me off guard was how simple yet whimsical the idea was: a chocolate cookie base topped with a peanut butter cup and a candy “hatband” to look like a witch’s hat. I forgot to grab my grocery list that day, got distracted by Jerry’s enthusiasm, and ended up scribbling the recipe on the back of my receipt. Maybe you’ve been there—caught in an unexpected moment where something ordinary turns into a little magic.
Since that day, these cookies have become my go-to for Halloween. They’re quick, they look fantastic, and honestly, they taste like a cozy Halloween hug in cookie form. Let me tell you, this recipe stayed with me because it’s so easy to pull off, even when the kitchen feels like chaos and the kids are running around in costumes. It’s the kind of treat that makes you smile every time you bite into that melty peanut butter and rich chocolate combo.
Why You’ll Love This Recipe
This Easy Witch Hat Chocolate Peanut Butter Cup Cookies recipe has been tested and enjoyed by my whole circle—from my skeptical friends to my sugar-loving neighbors. Here’s why it’s a must-try:
- Quick & Easy: Comes together in under 30 minutes, perfect for busy Halloween prep or last-minute spooktacular cravings.
- Simple Ingredients: You probably already have everything in your pantry and fridge—no fancy shopping required.
- Perfect for Halloween Parties: These cute little witch hats are a hit at potlucks, classroom parties, and family gatherings.
- Crowd-Pleaser: Kids and adults both love the peanut butter and chocolate combo, making them the ultimate treat.
- Unbelievably Delicious: The cookie’s soft texture combined with the melty peanut butter cup and a crunchy candy band is pure bliss.
What sets this recipe apart? It’s the creative twist of turning a simple cookie and peanut butter cup into a whimsical Halloween icon without complicated steps or unusual ingredients. The method calls for minimal baking, so you don’t have to stand over the oven all day. Plus, the candy “hatband” detail adds that festive flair that makes these cookies stand out from the usual Halloween fare.
If you’re someone who loves quick treats that still impress, or you want to get the kids involved without a kitchen disaster, this is your recipe. Honestly, it’s comfort food with a Halloween costume—fun, festive, and satisfying all at once.
What Ingredients You Will Need
This recipe uses simple, wholesome ingredients that come together to create bold flavor and a satisfying, playful texture. Most are pantry staples, making substitutions easy.
- For the Cookies:
- 1 cup (225 g) unsalted butter, softened (I use Land O’Lakes for consistent creaminess)
- 1 cup (200 g) granulated sugar
- 1 large egg, room temperature
- 1 teaspoon vanilla extract
- 2 cups (250 g) all-purpose flour
- ¼ cup (25 g) unsweetened cocoa powder (natural or Dutch-processed works fine)
- ½ teaspoon baking powder
- ¼ teaspoon salt
- For the Topping:
- 36 mini peanut butter cups (like Reese’s Miniatures; you can swap for dairy-free versions if needed)
- 36 small orange or yellow candy pieces (M&M’s or candy-coated chocolates work well for the hatband)
Pro tip: For a seasonal touch, I sometimes swap the candy hatband with tiny orange sprinkles or edible glitter for that extra Halloween sparkle. If you’re aiming for gluten-free, almond flour can replace the all-purpose flour, just reduce the amount slightly and watch texture.
Equipment Needed
To make these Easy Witch Hat Chocolate Peanut Butter Cup Cookies, you’ll need a few basic kitchen tools:
- Mixing bowls – A large one for the dough and a smaller one for wet ingredients.
- Electric mixer or sturdy wooden spoon – I’ve tried both; the mixer saves time, but the spoon works if you don’t mind some arm workout.
- Baking sheets lined with parchment paper – Essential for easy cleanup and even baking.
- Measuring cups and spoons – Accuracy helps with consistent cookie size.
- Cooling rack – Very helpful to cool cookies quickly, so the peanut butter cups don’t melt too much when placed on top.
If you don’t have a mixer, no worries—just mix thoroughly by hand. I once forgot to preheat my oven (don’t ask…), and the cookies took a bit longer but still turned out great. For budget-friendly baking sheets, I recommend those with a non-stick coating; they make life easier when removing delicate cookies.
Preparation Method
- Preheat your oven to 350°F (175°C). Line two baking sheets with parchment paper to prevent sticking and simplify cleanup.
- Make the cookie dough: In a large bowl, cream together 1 cup (225 g) softened unsalted butter and 1 cup (200 g) granulated sugar using an electric mixer or wooden spoon until light and fluffy, about 2–3 minutes.
- Add 1 large egg and 1 teaspoon vanilla extract. Beat until combined. The mixture might look a little curdled—that’s normal.
- In a separate bowl, sift together 2 cups (250 g) all-purpose flour, ¼ cup (25 g) cocoa powder, ½ teaspoon baking powder, and ¼ teaspoon salt. Gradually add this dry mix to the wet ingredients, stirring gently until just combined. Don’t overmix; you want a soft, slightly sticky dough.
- Shape the cookies: Scoop out about 1 tablespoon (15 ml) of dough per cookie using a spoon or cookie scoop. Roll into balls and place them on the prepared baking sheets about 2 inches (5 cm) apart.
- Bake for 8–10 minutes. Cookies should look set but still soft in the center. They’ll firm up as they cool.
- Remove from oven and immediately press a mini peanut butter cup into the center of each cookie. The warmth will gently melt the bottom of the peanut butter cup, helping it stick without squashing the cookie.
- Add the candy hatband: Place a small orange or yellow candy piece on the peanut butter cup to form the witch hatband. Press lightly to secure.
- Let cookies cool completely on the baking sheet or transfer to a cooling rack. This prevents the peanut butter cups from sliding off.
If your peanut butter cups are too cold and don’t stick, try warming them slightly in your hand or microwave for a few seconds before placing. I once had a batch slide apart mid-assembly—lesson learned to work quickly but gently!
Cooking Tips & Techniques
Making these cookies is straightforward, but a few tricks help get them just right:
- Softened Butter is Key: Don’t melt the butter. Softened means it’s just pliable enough to cream smoothly with sugar. Melted butter will make the dough too runny, and your cookies may spread too much.
- Don’t Overmix the Dough: Overworking develops gluten, resulting in tougher cookies. Mix until ingredients are just combined for tender, soft cookies.
- Press Peanut Butter Cups While Cookies Are Hot: This trick ensures the cups stick without squishing the cookies. Timing is everything!
- Use Parchment Paper: It prevents sticking and helps cookies bake evenly without burning on the bottom.
- Multitasking Tip: While cookies bake, unwrap your peanut butter cups and candy pieces to save time. It makes assembly smoother and less frantic.
I once tried swapping peanut butter cups for plain chocolate kisses, but the lack of peanut butter left the cookies feeling incomplete. Trust me, the peanut butter cup is essential for that perfect Halloween combo.
Variations & Adaptations
You can customize these witch hat cookies in several fun ways:
- Dietary Adjustments: Use gluten-free flour blends if you need a gluten-free version. Swap regular peanut butter cups for allergy-friendly or vegan alternatives—many brands offer soy-free or dairy-free options.
- Seasonal Twists: Change the candy hatband color to match different holidays—green for St. Patrick’s Day or red for Christmas.
- Flavor Variations: Add a teaspoon of cinnamon or pumpkin pie spice to the cookie dough for a warm, seasonal flavor boost. You can also try swapping cocoa powder for melted dark chocolate for a richer taste.
- Alternative Cookies: If you prefer a crunchy cookie base, bake the dough a minute or two longer, watching carefully to prevent burning.
Personally, I once made a batch with mini caramel-filled chocolates instead of peanut butter cups, which was a surprising hit among my caramel-loving friends. Feel free to experiment; just keep the candy hatband for the signature witch hat look!
Serving & Storage Suggestions
These Easy Witch Hat Chocolate Peanut Butter Cup Cookies are best served at room temperature so the peanut butter cups are soft but not melted.
- Arrange them on a festive platter with some fresh fruit or a bowl of candy corn for a full Halloween spread.
- Pair with a cold glass of milk, hot chocolate, or spiced cider for that cozy vibe.
- Store leftovers in an airtight container at room temperature for up to 3 days.
- For longer storage, freeze the cookies in a sealed container with parchment between layers for up to 2 months. Thaw at room temperature before serving.
- Reheating isn’t usually necessary, but if you want the peanut butter cups slightly melty again, pop cookies in a warm (not hot) oven for 2–3 minutes.
Flavors meld beautifully after a day, so if you can wait, the cookies taste even better the next day. Just don’t wait too long or the peanut butter cups might lose their charm!
Nutritional Information & Benefits
Each cookie offers a satisfying balance of fat, protein, and carbs, mainly from the peanut butter cups and butter in the dough. Here’s a rough estimate per cookie (based on 36 cookies):
| Calories | ~150 kcal |
|---|---|
| Fat | 9 g (mostly from peanut butter and butter) |
| Protein | 3 g |
| Carbohydrates | 16 g (includes sugar and flour) |
| Fiber | 1 g (from cocoa powder) |
Key ingredients like peanut butter provide heart-healthy fats and protein, while cocoa powder adds antioxidants. If you swap to gluten-free or dairy-free candy, the recipe can suit common dietary restrictions. Just be mindful of nut allergies; the peanut butter cup is central to the flavor, so replace accordingly if needed.
From a wellness perspective, this treat works best as an occasional indulgence that brings joy without overcomplicating your diet. Sometimes, you just need a little magic in cookie form!
Conclusion
These Easy Witch Hat Chocolate Peanut Butter Cup Cookies are more than just a Halloween snack—they’re a sweet little surprise that brings fun and flavor with minimal fuss. Whether you’re baking for kids, party guests, or just yourself, this recipe makes spooky season a bit sweeter and a lot more festive.
Don’t be shy about tweaking the candy or spices to match your vibe. I love how these cookies bring out the kid in me every October, and I bet they’ll do the same for you. So grab your mixing bowl, unwrap those peanut butter cups, and give these a try—your Halloween table will thank you.
If you try this recipe, I’d love to hear what twist you put on it or how it turned out! Leave a comment below or share your own witch hat cookie photos to spread the Halloween cheer.
Happy baking and spooky snacking!
FAQs
Can I make these cookies ahead of time?
Yes! You can bake the cookies a day or two in advance. Store them in an airtight container at room temperature. Add the peanut butter cups and candy hatbands right before serving for the freshest look.
What if I don’t have mini peanut butter cups?
You can use regular-sized peanut butter cups, but you’ll want to cut them into smaller pieces to maintain the witch hat shape. Alternatively, try peanut butter-filled chocolates or fudge pieces.
How do I prevent the peanut butter cups from melting too much?
Press the peanut butter cups onto the warm cookies immediately after baking, but be gentle. Avoid placing them on hot cookies that are still baking or too soft, and cool the cookies on a rack to set.
Can I freeze these cookies?
Absolutely! Freeze the fully assembled cookies in an airtight container with parchment between layers. Thaw at room temperature before serving.
Is there a dairy-free version of this recipe?
Yes, swap the butter for dairy-free margarine and use dairy-free peanut butter cups. Make sure to check the candy pieces for dairy ingredients as well.
Pin This Recipe!
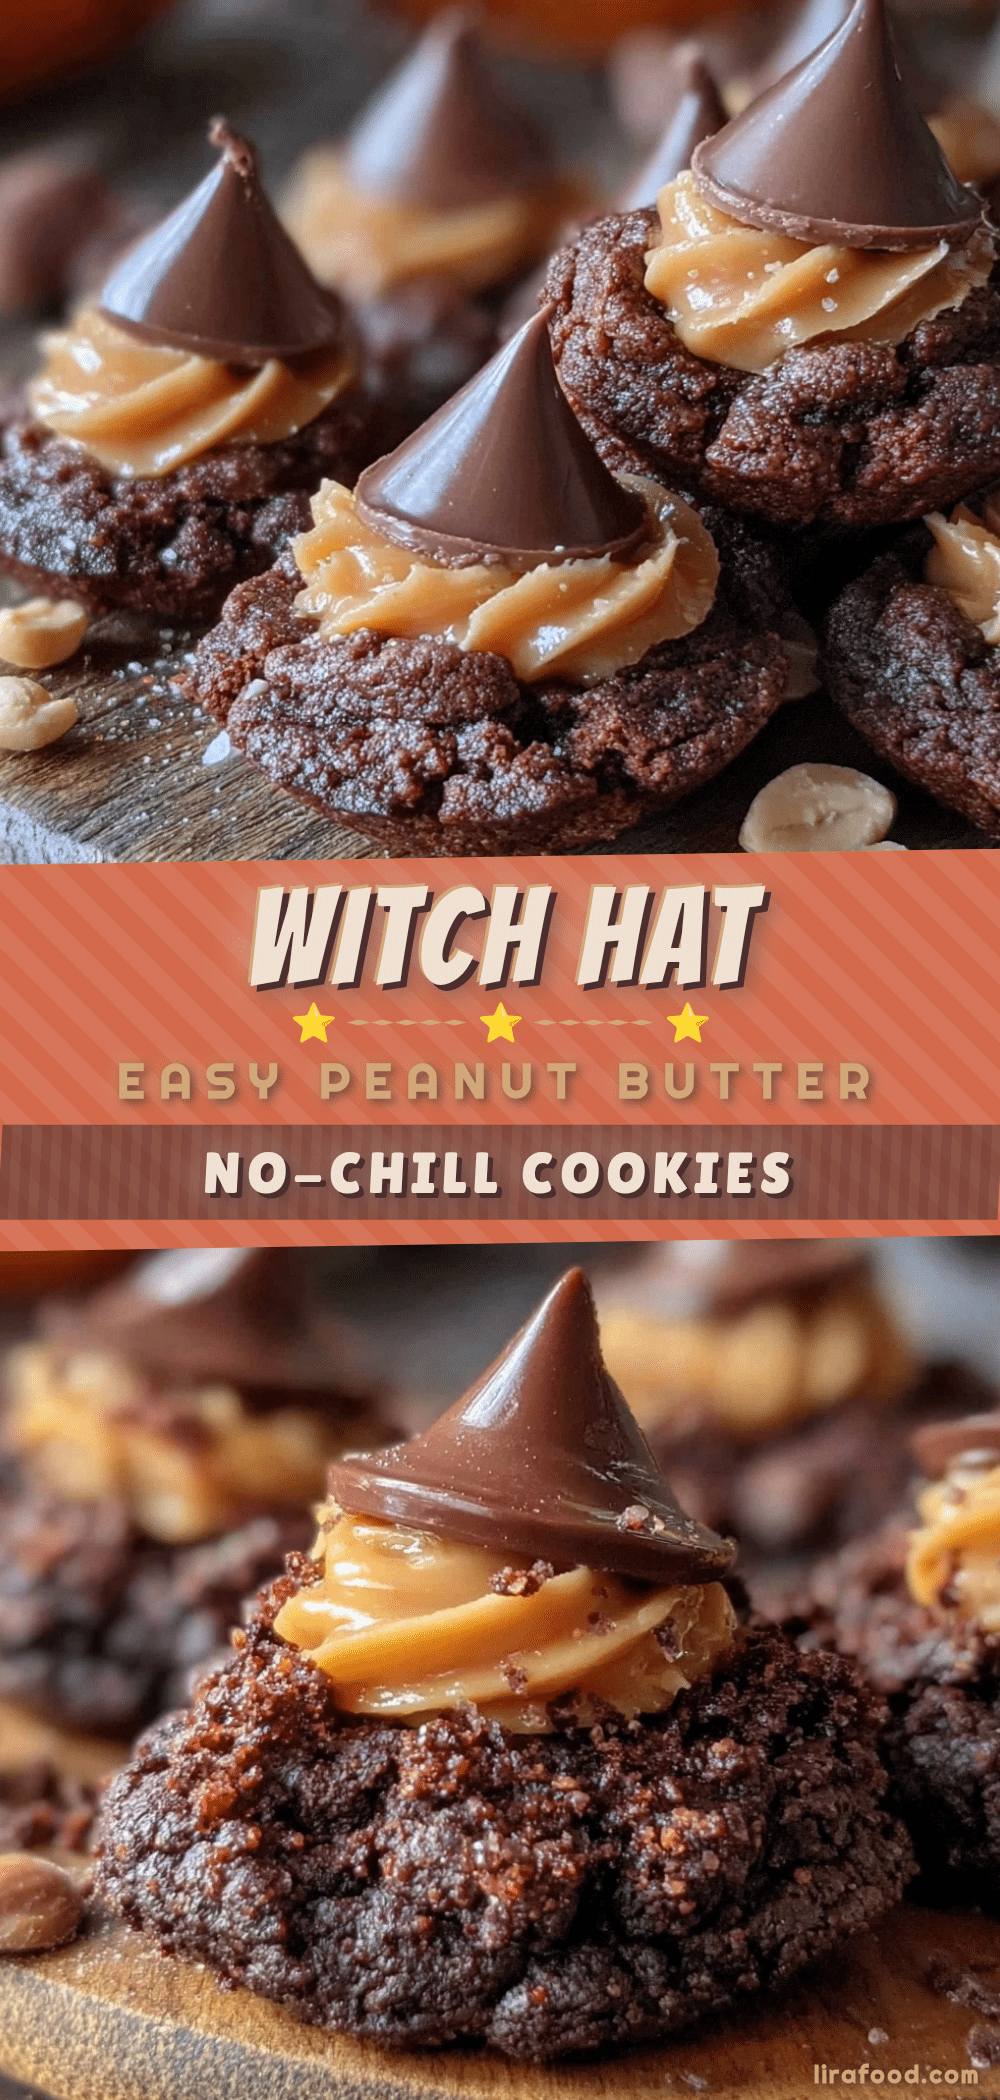
Easy Witch Hat Chocolate Peanut Butter Cup Cookies

These whimsical Halloween cookies feature a soft chocolate cookie base topped with a melty peanut butter cup and a candy hatband, perfect for festive parties and quick treats.
- Prep Time: 10 minutes
- Cook Time: 10 minutes
- Total Time: 20 minutes
- Yield: 36 cookies 1x
- Category: Dessert
- Cuisine: American
Ingredients
- 1 cup (2 sticks, 225 g) unsalted butter, softened
- 1 cup (200 g) granulated sugar
- 1 large egg, room temperature
- 1 teaspoon vanilla extract
- 2 cups (250 g) all-purpose flour
- 1/4 cup (25 g) unsweetened cocoa powder
- 1/2 teaspoon baking powder
- 1/4 teaspoon salt
- 36 mini peanut butter cups (e.g., Reese’s Miniatures)
- 36 small orange or yellow candy pieces (M&M’s or candy-coated chocolates)
Instructions
- Preheat your oven to 350°F (175°C). Line two baking sheets with parchment paper.
- In a large bowl, cream together softened butter and granulated sugar using an electric mixer or wooden spoon until light and fluffy, about 2–3 minutes.
- Add the egg and vanilla extract. Beat until combined; mixture may look slightly curdled.
- In a separate bowl, sift together flour, cocoa powder, baking powder, and salt.
- Gradually add the dry ingredients to the wet ingredients, stirring gently until just combined. Do not overmix.
- Scoop about 1 tablespoon of dough per cookie, roll into balls, and place on baking sheets about 2 inches apart.
- Bake for 8–10 minutes until cookies look set but are still soft in the center.
- Remove from oven and immediately press a mini peanut butter cup into the center of each cookie.
- Place a small orange or yellow candy piece on top of each peanut butter cup to form the witch hatband, pressing lightly to secure.
- Let cookies cool completely on the baking sheet or transfer to a cooling rack.
Notes
Use softened butter, not melted, for best texture. Press peanut butter cups onto warm cookies immediately after baking to help them stick without squashing. If peanut butter cups are too cold, warm slightly before placing. Use parchment paper for even baking and easy cleanup. For gluten-free, substitute almond flour with slight quantity adjustment. Candy hatband colors can be swapped for other holidays or seasonal themes.
Nutrition
- Serving Size: 1 cookie
- Calories: 150
- Fat: 9
- Carbohydrates: 16
- Fiber: 1
- Protein: 3
Keywords: Halloween cookies, witch hat cookies, peanut butter cup cookies, chocolate cookies, easy Halloween treats, festive cookies


