Love this? Save it for later!
Share the inspiration with your friends
Introduction
“You know, I never imagined a plumber would hand me the best dessert idea for the 4th of July,” I confessed to my friend last summer. It was just another sunny Tuesday afternoon when Mike, my neighbor, popped over to fix a leaky faucet. While tightening a stubborn valve, he casually mentioned a dessert his cousin whipped up for their Independence Day barbecue—a brownie pizza topped with red, white, and blue berries. Intrigued, I scribbled the idea on a napkin, thinking it sounded quirky but fun.
That evening, I decided to give it a shot, even though my kitchen was a bit chaotic (I swear the mixing bowl slipped and splattered batter all over the counter). Despite the mess, the aroma of molten chocolate filling the house was pure magic. The first bite? Honestly, it was like fireworks on my taste buds. The crisp edges of the brownie, the creamy white topping, and the burst of fresh berries combined into a festive flavor explosion that felt just right for celebrating the holiday.
Maybe you’ve been there—wanting a dessert that’s both crowd-pleasing and eye-catching without the fuss. This Festive 4th of July Brownie Pizza with Red, White & Blue Berries has since become my go-to for summer get-togethers. I keep making it, not just because it’s delicious, but because it sparks joy and conversation every time.
Why You’ll Love This Recipe
- Quick & Easy: Comes together in under 45 minutes, perfect when you’re juggling party prep and last-minute guests.
- Simple Ingredients: No fancy or hard-to-find items—just classic brownie essentials and fresh berries.
- Perfect for 4th of July Celebrations: The red, white, and blue colors make it festive and fun to serve at barbecues or picnics.
- Crowd-Pleaser: Kids and adults alike love the mix of fudgy brownie and sweet, tangy fruit.
- Unbelievably Delicious: The creamy white topping adds a silky texture that balances the rich chocolate base beautifully.
What makes this brownie pizza stand out is the layering technique—spreading a cream cheese glaze over the brownie base before adding the berries. It’s a trick I picked up after a few tries, and honestly, it transforms the texture from ordinary to something you’ll crave again and again. Plus, this recipe is flexible—you can swap berries based on what’s fresh or on sale.
Whether you’re looking to impress without stress or just want a dessert that feels like a celebration on a plate, this recipe ticks all the boxes.
What Ingredients You Will Need
This recipe uses simple, wholesome ingredients that come together to deliver bold flavor and a festive look without the fuss. Most are pantry staples, and fresh berries add that patriotic pop.
- For the Brownie Base:
- 1/2 cup (115g) unsalted butter, melted (I prefer Kerry Gold for richness)
- 1 cup (200g) granulated sugar
- 2 large eggs, room temperature
- 1 teaspoon vanilla extract
- 1/3 cup (30g) unsweetened cocoa powder
- 1/2 cup (65g) all-purpose flour (King Arthur works well here)
- 1/4 teaspoon salt
- 1/4 teaspoon baking powder
- For the White Topping:
- 4 oz (115g) cream cheese, softened (use Philadelphia for best texture)
- 1/4 cup (30g) powdered sugar
- 1/2 teaspoon vanilla extract
- 2 tablespoons heavy cream (or full-fat coconut cream for dairy-free)
- For the Red, White & Blue Berries:
- 1/2 cup fresh strawberries, sliced (pick firm, ripe berries)
- 1/2 cup fresh blueberries
- 1/2 cup fresh raspberries
Substitution tip: If you want a gluten-free option, substitute the all-purpose flour with a 1:1 gluten-free blend. For the white topping, Greek yogurt can work in a pinch but expect a tangier flavor and thinner texture.
Equipment Needed
- 9-inch (23 cm) round pizza pan or baking sheet – I use a non-stick one for easy release
- Mixing bowls – at least two; one for the batter, one for the topping
- Electric mixer or whisk – the topping comes together faster with a handheld mixer
- Spatula – for spreading batter and topping evenly
- Measuring cups and spoons – precise measurements help the brownie come out just right
- Oven mitts – because safety first, especially when handling hot pans
If you don’t have a pizza pan, a square baking dish works fine; just adjust the baking time slightly. Also, a silicone spatula is my favorite because it scrapes every last bit of batter from the bowl with no fuss.
Preparation Method
- Preheat your oven to 350°F (175°C). Prepare your pizza pan by lightly greasing it or lining it with parchment paper for easy cleanup. This step takes about 5 minutes.
- Make the brownie batter: In a medium bowl, whisk together the melted butter and granulated sugar until smooth. Add the eggs one at a time, mixing well after each addition. Stir in the vanilla extract. This should take roughly 5 minutes.
- Combine the dry ingredients: In a separate bowl, sift together the cocoa powder, flour, salt, and baking powder. Gradually fold the dry mix into the wet ingredients until just combined. Avoid overmixing to keep the brownies tender (about 2 minutes).
- Spread the batter evenly: Pour the batter onto your prepared pan and use a spatula to smooth it into a circle about 9 inches in diameter. The batter will be thick but spreadable. This step should take 3 minutes.
- Bake the brownie base: Place the pan in the oven and bake for 18-22 minutes. You’re looking for edges that are set and a slightly soft center—test with a toothpick inserted near the middle; it should come out with a few moist crumbs. Baking time varies by oven.
- Prepare the white topping while the brownie cools: In a bowl, beat cream cheese, powdered sugar, vanilla extract, and heavy cream until smooth and spreadable. This takes about 5 minutes. If the mixture is too thick, add a teaspoon of cream at a time until it reaches a creamy consistency.
- Once the brownie is cool to the touch (about 20 minutes), spread the cream cheese topping evenly over the surface. Use a spatula to smooth it out gently. Don’t rush this—patience here keeps the topping from mixing into the warm brownie.
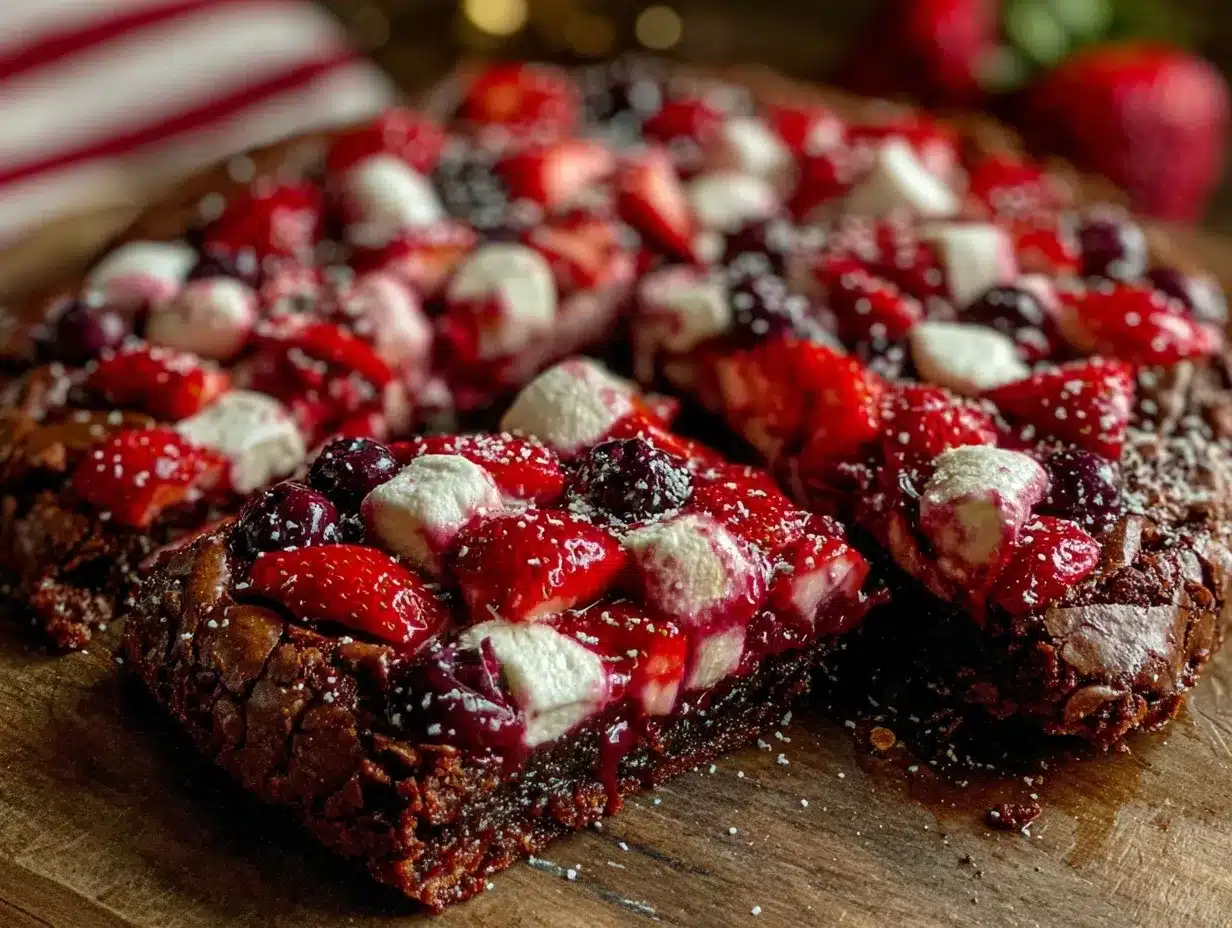
- Arrange the berries on top: Place sliced strawberries, blueberries, and raspberries in clusters or a pattern for that festive red, white, and blue look. Be generous! This step takes about 5 minutes.
- Chill the brownie pizza: Place it in the refrigerator for at least 30 minutes to set the topping and let flavors meld. It’s tempting to dig in right away, but trust me, the chill makes a big difference.
- Slice and serve: Use a sharp knife to cut into wedges. Serve chilled or at room temperature. The contrast of the cool topping with the fudgy brownie is irresistible.
Cooking Tips & Techniques
Making a brownie pizza might sound unusual, but these tips will guarantee success.
- Don’t overbake the brownies. You want a fudgy center, not a dry one. Keep a close eye during the last few minutes and test with a toothpick carefully.
- Softened cream cheese is key. If it’s too cold, the topping won’t smooth out properly. Take it out of the fridge early or microwave in short bursts.
- Fresh berries, not frozen. Frozen berries release moisture that can make the topping soggy. If you only have frozen, thaw and pat dry thoroughly.
- Use a sharp knife to slice. Clean the knife between cuts to keep the edges neat and prevent berry juice from smearing.
- Multi-task like a pro. While the brownie bakes, prepare the topping and wash berries. Saves time and keeps your workflow smooth.
One time, I forgot to grease the pan (classic me), and the brownie stuck badly. Lesson learned: always prep your pan! Also, chilling the pizza before serving is not negotiable—trust me on this one.
Variations & Adaptations
- Dairy-Free Version: Swap butter with coconut oil, use dairy-free cream cheese, and replace heavy cream with coconut cream. The flavor will be tropical with the same festive look.
- Seasonal Fruit Swap: In winter months, use pomegranate seeds and kiwi slices to mimic the red, white, and blue theme.
- Nutty Twist: Sprinkle chopped toasted pecans or walnuts on the brownie batter before baking for extra crunch and depth.
- Gluten-Free Option: Use almond flour or a gluten-free all-purpose blend. The texture will be slightly different but still delicious.
- Personal Favorite: I once drizzled a little melted white chocolate over the berries for an extra sweet touch. It’s a bit indulgent but perfect for celebrations.
Serving & Storage Suggestions
This brownie pizza shines when served chilled or at room temperature. For a festive presentation, serve it on a wooden board or a bright red platter to complement the berry colors. It pairs wonderfully with a cold glass of lemonade, iced tea, or even a sparkling rosé for adults.
Store leftovers tightly wrapped in the refrigerator for up to 3 days. The flavors actually meld and improve after sitting a bit. To reheat, let it come to room temperature or warm gently in the oven at 300°F (150°C) for 5 minutes—skip the microwave to avoid soggy topping.
If you want to keep it longer, slice into wedges and freeze individually wrapped for up to a month. Thaw in the fridge overnight before serving.
Nutritional Information & Benefits
Each serving of this brownie pizza offers a satisfying mix of indulgence and fresh fruit goodness. The berries provide antioxidants, vitamins C and K, and fiber, balancing the rich chocolate and creamy topping. While it’s a treat, using fresh ingredients and moderate serving size makes it a festive option that doesn’t feel too heavy.
This recipe is gluten-friendly when made with all-purpose flour, and easily adaptable for gluten-free or dairy-free diets. Just be mindful of allergens like nuts if you add the nutty variation.
From a wellness perspective, I appreciate that this dessert combines fresh fruit with a homemade base, steering clear of artificial preservatives and processed toppings.
Conclusion
This Festive 4th of July Brownie Pizza with Red, White & Blue Berries is a recipe you’ll want to keep in your back pocket for every summer celebration. It’s easy to make, visually impressive, and so delicious that it truly brings people together around the table. Honestly, I love how it turns a classic brownie into a centerpiece-worthy dessert that’s both fun and festive.
Feel free to tweak the berries or toppings based on what you like or what’s fresh. And if you try the variations, I’d love to hear how they worked for you! Don’t hesitate to share your twists or questions in the comments below—let’s keep the conversation going.
Go ahead, make this recipe your own and watch it become a holiday tradition in your kitchen.
FAQs
Can I make the brownie pizza ahead of time?
Absolutely! You can prepare the brownie base and topping a day ahead. Just assemble the berries and chill right before serving for the freshest look.
What if I don’t have cream cheese?
You can substitute with mascarpone or a thick yogurt, but the texture and flavor will be slightly different—less tangy and creamy.
How do I keep the berries from making the topping soggy?
Wash and dry berries thoroughly. Add them just before serving or chilling. The cream cheese layer acts as a barrier to keep moisture from soaking in too quickly.
Can I use frozen berries?
It’s best to use fresh berries. If frozen, thaw and drain well, then pat dry to avoid excess moisture.
What’s the best way to cut the brownie pizza?
Use a sharp knife, wiping it clean between cuts to keep slices neat and prevent berry juices from smearing.
Pin This Recipe!
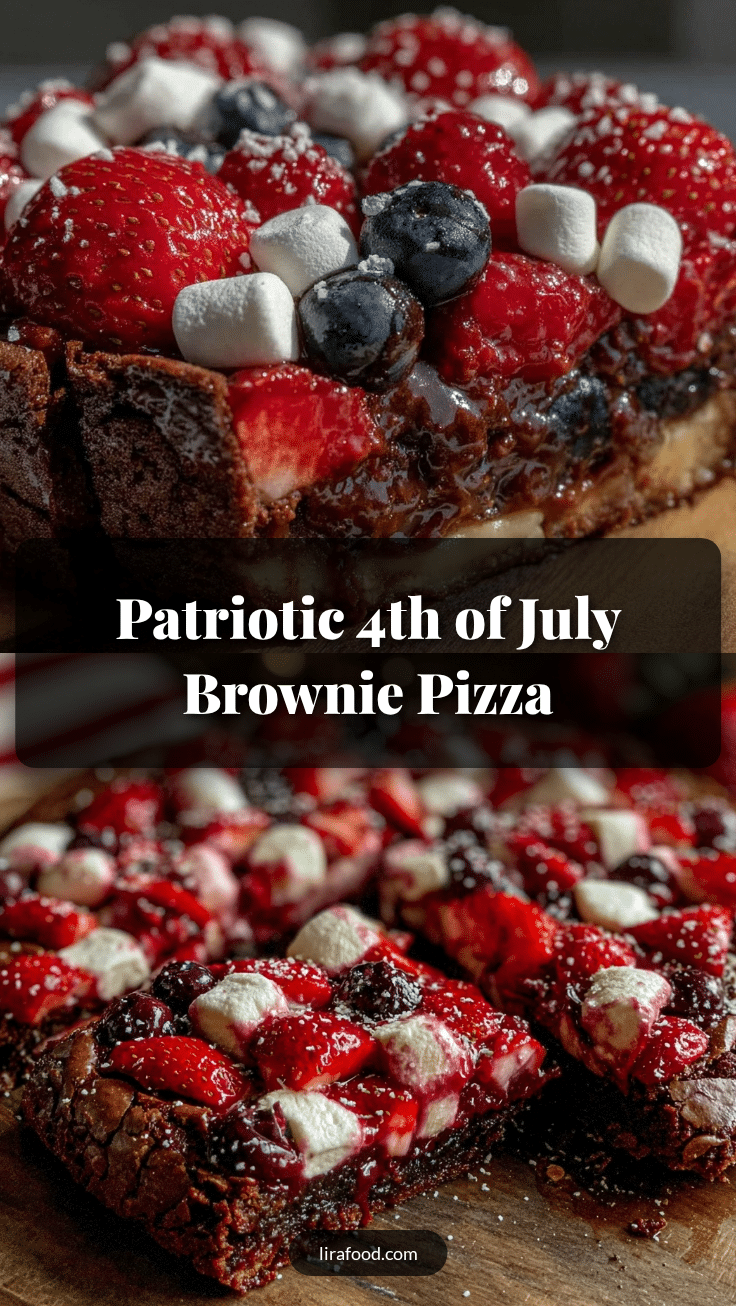
Festive 4th of July Brownie Pizza Recipe with Red White Blue Berries
A quick and easy brownie pizza topped with a creamy white topping and fresh red, white, and blue berries, perfect for 4th of July celebrations and summer get-togethers.
- Prep Time: 15 minutes
- Cook Time: 22 minutes
- Total Time: 1 hour 7 minutes
- Yield: 8 servings 1x
- Category: Dessert
- Cuisine: American
Ingredients
- 1/2 cup (115g) unsalted butter, melted
- 1 cup (200g) granulated sugar
- 2 large eggs, room temperature
- 1 teaspoon vanilla extract
- 1/3 cup (30g) unsweetened cocoa powder
- 1/2 cup (65g) all-purpose flour
- 1/4 teaspoon salt
- 1/4 teaspoon baking powder
- 4 oz (115g) cream cheese, softened
- 1/4 cup (30g) powdered sugar
- 1/2 teaspoon vanilla extract
- 2 tablespoons heavy cream (or full-fat coconut cream for dairy-free)
- 1/2 cup fresh strawberries, sliced
- 1/2 cup fresh blueberries
- 1/2 cup fresh raspberries
Instructions
- Preheat your oven to 350°F (175°C). Prepare your pizza pan by lightly greasing it or lining it with parchment paper for easy cleanup.
- In a medium bowl, whisk together the melted butter and granulated sugar until smooth. Add the eggs one at a time, mixing well after each addition. Stir in the vanilla extract.
- In a separate bowl, sift together the cocoa powder, flour, salt, and baking powder. Gradually fold the dry mix into the wet ingredients until just combined. Avoid overmixing.
- Pour the batter onto your prepared pan and use a spatula to smooth it into a circle about 9 inches in diameter.
- Place the pan in the oven and bake for 18-22 minutes until edges are set and center is slightly soft. Test with a toothpick; it should come out with a few moist crumbs.
- While the brownie cools, beat cream cheese, powdered sugar, vanilla extract, and heavy cream until smooth and spreadable. Add more cream if needed to reach desired consistency.
- Once the brownie is cool to the touch (about 20 minutes), spread the cream cheese topping evenly over the surface.
- Arrange the sliced strawberries, blueberries, and raspberries on top in clusters or a pattern for a festive look.
- Chill the brownie pizza in the refrigerator for at least 30 minutes to set the topping and let flavors meld.
- Slice into wedges with a sharp knife and serve chilled or at room temperature.
Notes
Do not overbake the brownies to keep a fudgy center. Use softened cream cheese for a smooth topping. Use fresh berries to avoid soggy topping. Chill the brownie pizza before serving for best texture and flavor. Use a sharp knife and clean between cuts to keep slices neat.
Nutrition
- Serving Size: 1 wedge (1/8 of pizz
- Calories: 280
- Sugar: 22
- Sodium: 150
- Fat: 15
- Saturated Fat: 8
- Carbohydrates: 33
- Fiber: 3
- Protein: 4
Keywords: brownie pizza, 4th of July dessert, patriotic dessert, red white blue berries, easy brownie recipe, summer dessert, crowd-pleaser