Love this? Save it for later!
Share the inspiration with your friends
I burned brown butter three times before I made a decent batch of cookies. That’s not an exaggeration for dramatic effect—it’s the embarrassing truth of my early baking days. The first time, I walked away to answer a text and came back to a pan of blackened, acrid-smelling liquid that looked nothing like the golden elixir recipes promised. The second time, I was so scared of burning it that I pulled it off the heat too early, ending up with what was essentially just melted butter with a slightly confused personality. The third time, I got distracted by my dog barking at a squirrel and, well, you can guess how that ended.
But that fourth time? That was the one that changed everything. I stood at the stove, watching the butter foam and hiss, waiting for those little brown milk solids to appear at the bottom of the pan. When the smell shifted from ordinary melted butter to something nutty and almost caramel-like, I knew I had it. I poured it into a bowl, let it cool, and made what I can only describe as the best chocolate chip cookies I’d ever tasted. They had this depth of flavor—almost like a toffee note running through the whole thing—that regular cookies just can’t touch. I’ve been chasing that same high ever since, and honestly, I’ve gotten pretty good at it.
These chewy brown butter chocolate chip cookies are the result of all those failures and the one success I kept trying to recreate. They’ve got crispy edges, soft centers, and that unmistakable nutty richness that only brown butter can deliver. I’m not saying they’re perfect—I’ve still got a lot of baking ahead of me—but they’re the cookies I make when I want something that feels special without requiring a pastry degree.
Why You’ll Love This Recipe
I’ve tested this recipe more times than I care to count, and I can tell you with confidence that it delivers exactly what it promises: chewy, flavorful cookies that are anything but ordinary. Here’s why I think you’ll come back to this one again and again:
- Deep, Nutty Flavor: The brown butter adds a layer of complexity that regular butter just can’t achieve. It’s like the difference between a plain chocolate bar and one with caramel swirled through it—same basic idea, but way more interesting.
- Perfectly Chewy Texture: These cookies stay soft and chewy for days (if they last that long). The combination of melted brown butter and the right amount of brown sugar creates that ideal texture that doesn’t turn cakey or crispy.
- Simple Ingredients: You probably have most of these in your pantry right now. No weird specialty flours or hard-to-find extracts—just good, basic baking staples transformed by one simple technique.
- No Chill Time Required: I know some cookie recipes insist on chilling the dough for hours, but these come together fast. You can have cookies in your hand in under 30 minutes from start to finish.
- Foolproof Once You Get the Brown Butter Right: The hardest part is browning the butter, and I’ll walk you through exactly how to do it without burning it. After that, it’s smooth sailing.
What makes these different from every other chocolate chip cookie recipe out there? It’s the brown butter, sure, but it’s also how the flavors come together. The nuttiness from the browned butter plays off the sweetness of the brown sugar, and the salt—don’t skip the flaky salt on top—cuts through everything and makes each bite pop. I’ve served these at potlucks, holiday parties, and random Tuesday nights, and they always disappear first.
What Ingredients You Will Need
This recipe relies on simple, everyday ingredients, but the way they come together is where the magic happens. The brown butter does most of the heavy lifting, so quality matters more than quantity here.
- Unsalted Butter (1 cup, or 2 sticks): Use unsalted so you can control the salt level yourself. I prefer a good-quality European-style butter like Kerrygold for brown butter because it has a higher fat content and more flavor, but any unsalted butter works.
- Brown Sugar (1 cup, packed): Light or dark brown sugar both work, but dark brown sugar gives a deeper molasses flavor that pairs beautifully with the nutty brown butter. Pack it firmly into the measuring cup.
- Granulated Sugar (½ cup): This adds a bit of crispness to the edges while keeping the center soft.
- All-Purpose Flour (2 cups): Spoon and level your flour—don’t scoop directly from the bag or you’ll end up with dry cookies. If you’re feeling ambitious, you can substitute up to half with whole wheat pastry flour for a slightly nuttier flavor.
- Large Eggs (2, room temperature): Room temperature eggs incorporate more easily into the batter. If you forgot to take them out ahead of time, place them in a bowl of warm water for 5 minutes.
- Vanilla Extract (2 teaspoons): Real vanilla extract makes a difference here. The brown butter is already complex, and artificial vanilla can taste harsh against it.
- Baking Soda (1 teaspoon): This helps the cookies spread just right and gives them that chewy texture.
- Salt (1 teaspoon): I use fine sea salt in the dough and flaky sea salt (like Maldon) for sprinkling on top after baking. The flaky salt is optional but highly recommended—it adds little bursts of saltiness that make the sweetness pop.
- Chocolate Chips (2 cups): Use a mix of semisweet and dark chocolate chips for the best flavor. I like Ghirardelli 60% cacao chips for their intense chocolate taste that stands up to the brown butter. You can also chop up a good-quality chocolate bar for those irregular, melty puddles.
Equipment Needed
You don’t need a professional bakery setup for these cookies, but a few key tools make the process smoother. Here’s what I use:
- Light-Colored Saucepan: A light-colored pan lets you see the butter change color as it browns. Dark pans make it nearly impossible to tell when the milk solids are toasting.
- Mixing Bowls: One large bowl for the wet ingredients and one for the dry. I prefer glass or stainless steel—plastic can absorb odors and flavors.
- Whisk and Wooden Spoon: A whisk for the wet ingredients and a sturdy wooden spoon or rubber spatula for folding in the flour and chocolate.
- Cookie Scoop: A 1.5-tablespoon scoop gives you uniform cookies that bake evenly. If you don’t have one, use two spoons to portion the dough.
- Baking Sheets: Two rimmed baking sheets, lined with parchment paper. Avoid dark nonstick sheets—they can cause the bottoms of the cookies to burn before the centers are done.
- Cooling Rack: Essential for letting the cookies cool properly so the centers set without getting soggy.
Preparation Method
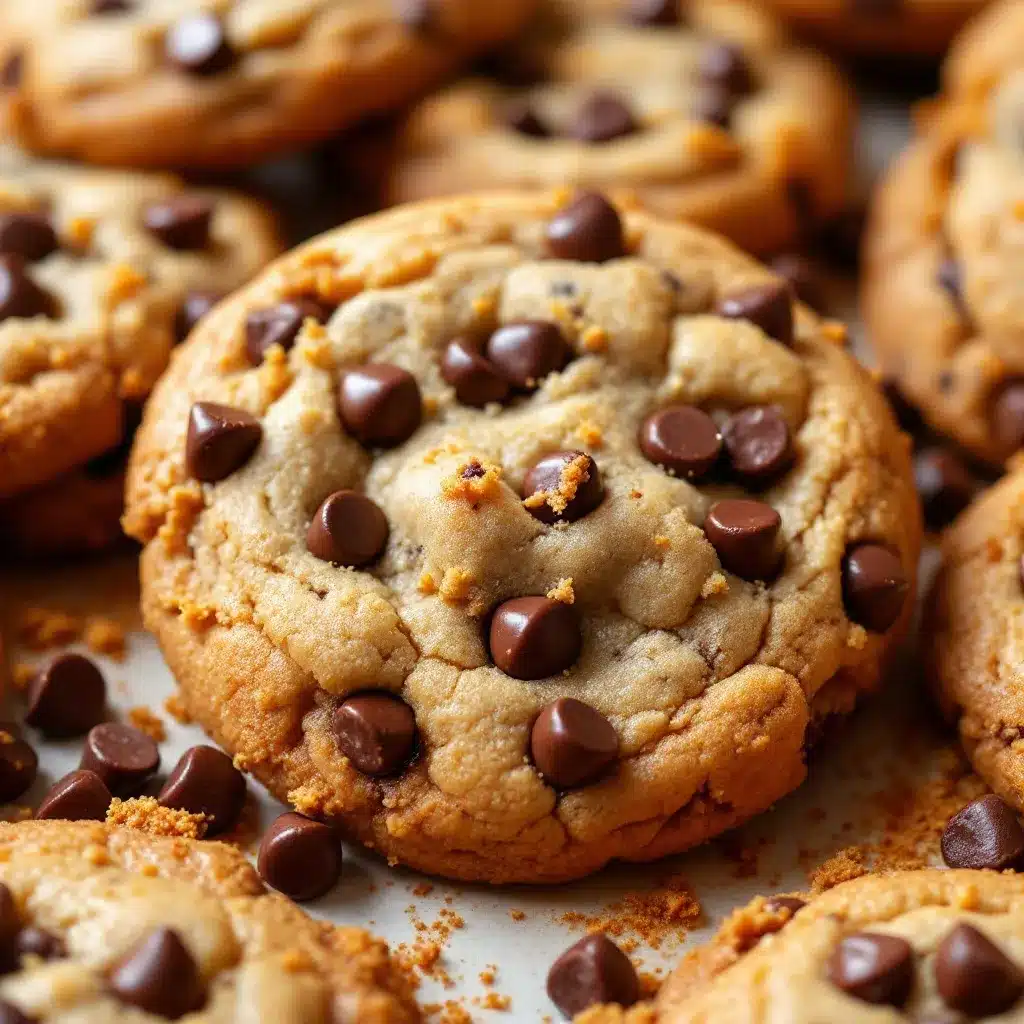
Follow these steps carefully, and you’ll have chewy, brown butter-infused cookies in no time. I’ve included timestamps and visual cues so you know exactly what to look for at each stage.
- Brown the Butter (5-7 minutes): Place the butter in your light-colored saucepan over medium heat. Stir occasionally with a whisk or rubber spatula as it melts. The butter will foam up, then the foam will subside, and you’ll see little brown specks forming at the bottom of the pan. Keep stirring gently—don’t walk away. When the butter smells nutty and the specks are a deep amber color (not black), remove it from the heat immediately. Pour it into a heatproof bowl to stop the cooking process.
- Cool the Brown Butter (10-15 minutes): Let the brown butter cool until it’s warm but not hot—about 110°F. If you add it to the sugars while it’s too hot, it’ll melt the sugar and change the texture of the cookies. You can speed this up by placing the bowl in the fridge for 5 minutes, stirring every minute or so.
- Mix the Wet Ingredients (3-4 minutes): In a large mixing bowl, combine the cooled brown butter, brown sugar, and granulated sugar. Whisk vigorously for about 2 minutes until the mixture looks like wet sand and is slightly thickened. Add the eggs one at a time, whisking well after each addition. Stir in the vanilla extract. The mixture should be smooth and glossy.
- Combine the Dry Ingredients (2 minutes): In a separate bowl, whisk together the flour, baking soda, and salt. Make sure there are no lumps—baking soda clumps can create bitter spots in your cookies.
- Fold in the Flour Mixture (1-2 minutes): Add the dry ingredients to the wet ingredients in two additions. Use a rubber spatula or wooden spoon to fold gently until just combined. Overmixing will develop gluten and make the cookies tough. Stop when you can still see a few streaks of flour.
- Add the Chocolate Chips (1 minute): Fold in the chocolate chips until evenly distributed. The dough will be thick and slightly sticky. If it feels too soft to scoop, let it rest for 5 minutes—the flour will absorb some of the moisture and firm it up.
- Preheat the Oven (10 minutes): Set your oven to 350°F (175°C). While it preheats, line your baking sheets with parchment paper.
- Scoop and Shape (5 minutes): Using your cookie scoop or two spoons, portion the dough into balls about 1.5 tablespoons each. Place them 2 inches apart on the prepared baking sheets—these cookies spread, so give them room. I usually fit 8 cookies per standard baking sheet.
- Bake (10-12 minutes): Bake one sheet at a time in the center of the oven. The cookies are done when the edges are golden brown and the centers look slightly puffed and underdone. They’ll continue to set on the baking sheet as they cool. For softer, chewier cookies, pull them out at the 10-minute mark. For slightly crispier edges, go to 12 minutes.
- Cool and Sprinkle with Salt (5 minutes): Let the cookies cool on the baking sheet for 5 minutes. While they’re still warm, sprinkle a tiny pinch of flaky sea salt on top of each cookie. Transfer to a cooling rack to cool completely—or eat them warm, which is my preferred method.
Cooking Tips & Techniques
I’ve made enough mistakes with this recipe to fill a small notebook, so let me save you some trouble. Here are the things I wish someone had told me:
Don’t Rush the Brown Butter: This is the most important step, and it’s also the easiest to mess up. The butter goes from perfectly browned to burnt in about 30 seconds. Watch for the foam to subside and the milk solids to turn amber. The smell is your best clue—it should smell nutty and toasty, like toasted hazelnuts. If it smells sharp or acrid, you’ve gone too far.
Measure Your Flour Correctly: I cannot stress this enough. Scooping flour directly from the bag can add up to 25% more flour than the recipe calls for, which makes cookies dry and cakey. Spoon the flour into your measuring cup, then level it off with a knife. If you’re using a kitchen scale, 240 grams is the sweet spot for 2 cups of all-purpose flour.
Use Room Temperature Eggs: Cold eggs can seize the brown butter and create a lumpy batter. If you’re in a hurry, place the eggs in a bowl of warm water for 5 minutes before cracking them. The difference is subtle but noticeable in the final texture.
Let the Dough Rest If Needed: If your dough feels too soft to scoop, don’t panic. Let it sit at room temperature for 10-15 minutes—the flour will hydrate and the dough will firm up. Alternatively, you can refrigerate it for 20 minutes, but this recipe works best when the dough is at room temperature.
Bake One Sheet at a Time: I know it’s tempting to throw both sheets in the oven at once, but the heat distribution suffers and you’ll end up with unevenly baked cookies. Trust me, I’ve tried it. The extra 10 minutes is worth it for cookies that all bake the same way.
Variations & Adaptations
Once you’ve mastered the basic recipe, feel free to experiment. Here are some variations I’ve tried and loved:
- Brown Butter Pecan Chocolate Chip Cookies: Toast ½ cup of chopped pecans in a dry skillet over medium heat for 3-4 minutes until fragrant. Fold them in along with the chocolate chips. The nutty pecans double down on the brown butter flavor in the best way.
- Gluten-Free Version: Substitute the all-purpose flour with a 1:1 gluten-free baking flour blend (I like King Arthur’s Measure for Measure). Add an extra tablespoon of milk or water if the dough seems too dry—gluten-free flours absorb more liquid.
- Dark Chocolate Sea Salt Variation: Use only dark chocolate chips (70% cacao or higher) and double the flaky salt on top. The bitter chocolate and salty finish create a sophisticated cookie that’s perfect for dessert after a fancy dinner.
- Milk Chocolate and Toffee Bits: Swap half the semisweet chips for milk chocolate and add ½ cup of toffee bits. This version is sweeter and more indulgent—great for kids or anyone with a serious sweet tooth.
- Vegan Adaptation: Use vegan butter (I recommend Miyoko’s or Earth Balance) and replace the eggs with flax eggs (2 tablespoons ground flaxseed mixed with 6 tablespoons water, let sit for 5 minutes). The texture will be slightly less chewy, but the flavor is still fantastic.
Serving & Storage Suggestions
These cookies are best served warm, when the chocolate is still melty and the edges are crisp. Let them cool for about 5 minutes on the baking sheet, then transfer them to a plate and serve immediately. They pair beautifully with a cold glass of milk, a scoop of creamy homemade vanilla ice cream, or a cup of strong coffee. For a truly decadent dessert, sandwich two cookies around a scoop of ice cream and roll the edges in mini chocolate chips—instant ice cream sandwiches.
To store leftover cookies (if you have any), place them in an airtight container at room temperature. They’ll stay soft and chewy for up to 5 days. If they start to dry out, pop one in the microwave for 10 seconds—it’ll bring back that just-baked softness. You can also freeze the baked cookies for up to 3 months. Layer them between sheets of parchment paper in a freezer-safe container, and thaw at room temperature when you’re ready to eat.
For make-ahead convenience, scoop the dough into balls and freeze them on a baking sheet until solid, then transfer to a freezer bag. You can bake them straight from frozen—just add 2-3 minutes to the baking time. This is my go-to strategy for having fresh cookies on demand without the mess.
Nutritional Information & Benefits
Let’s be honest—these are cookies, not health food. But they do use real, recognizable ingredients, which I appreciate. Here’s the estimated nutritional breakdown per cookie (based on 24 cookies):
- Calories: 220
- Fat: 12g (7g saturated)
- Carbohydrates: 28g (18g sugar)
- Protein: 3g
- Fiber: 1g
- Sodium: 150mg
On the plus side, dark chocolate contains antioxidants and flavonoids that can support heart health in moderation. The brown butter, while high in fat, adds a richness that means you’re satisfied with one or two cookies instead of a whole batch. If you’re watching your sugar intake, you can reduce the granulated sugar to ¼ cup—the cookies will be slightly less crisp but still delicious. For those with gluten sensitivities, the gluten-free variation works beautifully without sacrificing texture or flavor.
Conclusion
These chewy brown butter chocolate chip cookies have become my signature bake, and I’m honestly a little proud of that. They’re not complicated—they’re just a classic recipe made better by one simple technique. The brown butter adds a warmth and depth that makes every bite feel special, whether you’re baking for a holiday party or just because it’s Tuesday and you deserve a cookie.
I hope you give them a try and make them your own. Maybe you’ll add extra sea salt like I do, or fold in some toasted pecans, or eat them straight off the baking sheet while no one’s watching (I won’t tell). If you make a batch, I’d love to hear how they turned out. Drop a comment below or tag me in your photos—there’s nothing better than seeing someone else enjoy a recipe that started with three burned pans of butter and a lot of determination.
Happy baking, friends. You’ve got this.
Frequently Asked Questions
Can I use salted butter instead of unsalted?
Yes, but reduce the added salt in the dough to ½ teaspoon. The salted butter will add enough salt on its own, and you can always sprinkle extra flaky salt on top after baking.
Why did my cookies turn out flat?
Flat cookies usually mean the butter was too warm when you mixed the dough, or you used too much sugar. Make sure your brown butter has cooled to room temperature before mixing. Also, check that your baking soda is fresh—old baking soda loses its leavening power.
Can I make these cookies ahead of time?
Absolutely. You can prepare the dough, scoop it into balls, and freeze them on a baking sheet. Once frozen, transfer the dough balls to a freezer bag. Bake straight from frozen, adding 2-3 minutes to the baking time. Fresh cookies anytime you want them.
How do I get perfectly round cookies?
Right after the cookies come out of the oven, use a round cookie cutter or a glass that’s slightly larger than the cookies. Gently swirl it around each cookie to nudge the edges into a perfect circle. This works best when the cookies are still warm and soft.
Can I use white whole wheat flour instead of all-purpose?
Yes, you can substitute up to half the all-purpose flour with white whole wheat flour. The cookies will have a slightly nuttier flavor and denser texture, but they’ll still be delicious. Don’t use regular whole wheat flour—it’s too heavy and will make the cookies dry.
Pin This Recipe!
Perfect Brown Butter Chocolate Chip Cookies

These chewy brown butter chocolate chip cookies have crispy edges, soft centers, and an unmistakable nutty richness from browned butter. They’re simple to make with no chill time required and deliver deep, toffee-like flavor in every bite.
- Prep Time: 15 minutes
- Cook Time: 12 minutes
- Total Time: 27 minutes
- Yield: 24 servings 1x
- Category: Dessert
- Cuisine: American
Ingredients
- 1 cup (2 sticks) unsalted butter
- 1 cup packed brown sugar (light or dark)
- ½ cup granulated sugar
- 2 cups all-purpose flour (spooned and leveled)
- 2 large eggs, room temperature
- 2 teaspoons vanilla extract
- 1 teaspoon baking soda
- 1 teaspoon fine sea salt
- 2 cups chocolate chips (mix of semisweet and dark)
- Flaky sea salt (for sprinkling, optional)
Instructions
- Brown the butter (5-7 minutes): Place butter in a light-colored saucepan over medium heat. Stir occasionally as it melts. The butter will foam, then the foam will subside, and brown specks will form at the bottom. When it smells nutty and the specks are deep amber, remove from heat immediately and pour into a heatproof bowl.
- Cool the brown butter (10-15 minutes): Let it cool until warm but not hot (about 110°F). You can speed this up by placing the bowl in the fridge for 5 minutes, stirring every minute.
- Mix the wet ingredients (3-4 minutes): In a large bowl, combine cooled brown butter, brown sugar, and granulated sugar. Whisk vigorously for about 2 minutes until it looks like wet sand and thickens slightly. Add eggs one at a time, whisking well after each. Stir in vanilla extract until smooth and glossy.
- Combine the dry ingredients (2 minutes): In a separate bowl, whisk together flour, baking soda, and salt until no lumps remain.
- Fold in the flour mixture (1-2 minutes): Add dry ingredients to wet in two additions, folding gently with a rubber spatula or wooden spoon until just combined. Stop when a few streaks of flour remain.
- Add the chocolate chips (1 minute): Fold in chocolate chips until evenly distributed. The dough will be thick and slightly sticky. If too soft, let rest for 5 minutes.
- Preheat the oven (10 minutes): Set oven to 350°F (175°C). Line baking sheets with parchment paper.
- Scoop and shape (5 minutes): Using a 1.5-tablespoon cookie scoop or two spoons, portion dough into balls. Place 2 inches apart on prepared baking sheets (about 8 per sheet).
- Bake (10-12 minutes): Bake one sheet at a time in the center of the oven. Cookies are done when edges are golden brown and centers look slightly puffed and underdone. For chewier cookies, bake 10 minutes; for crispier edges, bake 12 minutes.
- Cool and sprinkle with salt (5 minutes): Let cookies cool on baking sheet for 5 minutes. While warm, sprinkle a tiny pinch of flaky sea salt on top. Transfer to a cooling rack to cool completely or serve warm.
Notes
Don’t rush the brown butter—it goes from perfect to burnt in about 30 seconds. Watch for the foam to subside and the milk solids to turn amber; the smell should be nutty and toasty. Measure flour correctly by spooning and leveling to avoid dry cookies. Use room temperature eggs to prevent lumpy batter. Bake one sheet at a time for even results. For make-ahead, freeze dough balls and bake from frozen, adding 2-3 minutes to baking time.
Nutrition
- Serving Size: 1 cookie
- Calories: 220
- Sugar: 18
- Sodium: 150
- Fat: 12
- Saturated Fat: 7
- Carbohydrates: 28
- Fiber: 1
- Protein: 3
Keywords: brown butter chocolate chip cookies, chewy chocolate chip cookies, easy cookie recipe, no chill cookies, homemade cookies


