Love this? Save it for later!
Share the inspiration with your friends
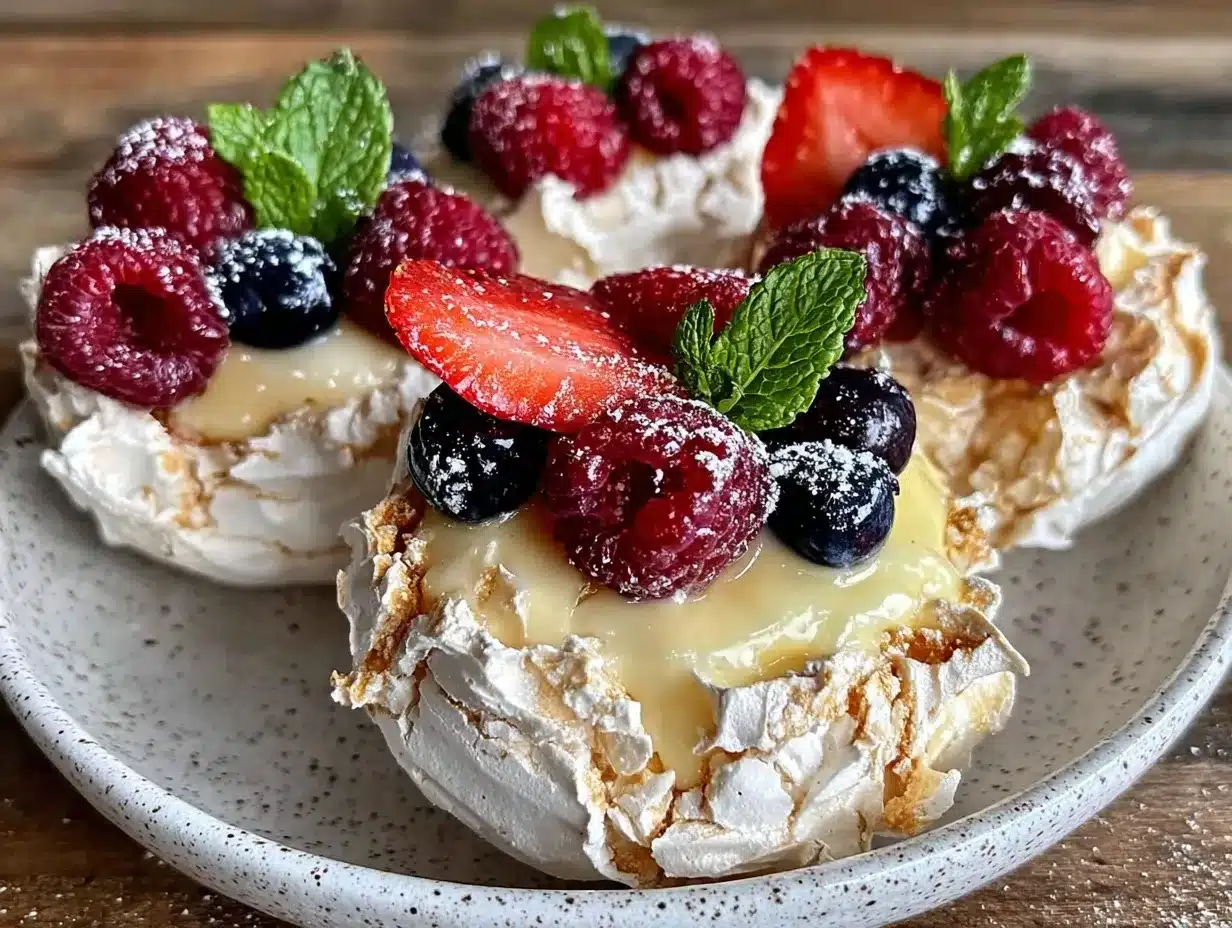
“I wasn’t expecting to find such a dreamy dessert scribbled on the back of a vintage postcard,” I said aloud, holding the faded paper between my fingers. It was a lazy Sunday afternoon at a tiny flea market, the kind where you never know what treasures you’ll stumble upon. There, nestled between old vinyl records and chipped teacups, I found a handwritten recipe for mini pavlova nests. The combination of crisp meringue, tangy lemon curd, and fresh berries sounded like summer in a bite.
Honestly, I was skeptical at first. I’d tried meringue before, and let’s just say it didn’t always go smoothly. But something about the idea of these petite, delicate nests called to me—like a whisper from the past, promising something special. That afternoon, as I made a bit of a mess (and forgot to preheat the oven), I realized these mini pavlova nests were more than just a pretty dessert. They had this light, airy elegance that felt celebratory but also perfectly casual.
Maybe you’ve been there—chasing a dessert that’s as impressive to serve as it is simple to make. These mini pavlova nests with lemon curd and fresh berries have stuck with me ever since because they’re just that. They’re the kind of treat that makes you pause, close your eyes after the first bite, and smile. And let me tell you, once you try them, they’ll become your go-to for everything from brunch gatherings to last-minute dinner party desserts.
Why You’ll Love This Recipe
After testing countless meringue recipes in my kitchen (including some spectacular flops), this version of perfect mini pavlova nests became a favorite for so many reasons. It’s not just about the taste—it’s about how approachable and rewarding this recipe truly is.
- Quick & Easy: Ready in under an hour, these nests are perfect for when you want a stunning dessert without fussing for hours.
- Simple Ingredients: No need for exotic items—just egg whites, sugar, lemon curd, and fresh berries, all likely sitting in your fridge or pantry.
- Perfect for Any Occasion: Whether it’s a cozy weekend brunch, a festive holiday dessert, or a casual dinner with friends, these mini pavlovas shine.
- Crowd-Pleaser: Kids and adults alike love the crunchy exterior and marshmallow-soft center combined with zesty lemon and juicy berries.
- Unbelievably Delicious: The balance of sweet, tangy, and fresh flavors with that melt-in-your-mouth texture is simply unbeatable.
This recipe isn’t just another pavlova—it’s a perfected mini version that nails the texture with a subtle crisp that gives way to a tender cloud of meringue inside. The lemon curd isn’t overly tart, and the fresh berries add a pop of color and brightness that makes every bite feel like a celebration. Honestly, I keep coming back to this recipe because it’s both impressive and forgiving—two qualities that are hard to find in dessert recipes!
What Ingredients You Will Need
This recipe uses simple, wholesome ingredients to create those iconic crisp-and-soft mini pavlova nests topped with luscious lemon curd and fresh berries. Most are pantry staples, and the fresh berries bring a seasonal touch. Here’s what you’ll need:
- Egg Whites (4 large, room temperature): The base for the meringue—room temperature whites whip up fluffier and higher.
- Granulated Sugar (1 cup / 200 g): Fine sugar works best to dissolve smoothly; I recommend Domino for consistent texture.
- Cornstarch (1 teaspoon): Helps stabilize the meringue and gives the nests that signature marshmallowy center.
- White Vinegar or Lemon Juice (1 teaspoon): Adds acidity to stabilize the egg whites during whipping.
- Lemon Curd (about 1 cup / 240 ml): For that tangy, creamy filling; you can use store-bought or homemade.
- Fresh Berries (1 cup / 150 g): A mix of strawberries, blueberries, and raspberries works beautifully; in summer, swap with fresh local berries for a seasonal twist.
- Vanilla Extract (optional, 1/2 teaspoon): Adds a subtle depth to the meringue flavor.
If you want a gluten-free dessert, this recipe fits perfectly as is. For a dairy-free lemon curd option, you can substitute with coconut-based lemon curd or a citrus glaze. The key is to pick fresh, ripe berries and fresh eggs for the best texture and flavor. I’ve had great results with Organic Valley eggs and always keep a small jar of lemon curd from Tiptree in my pantry for quick dessert fixes.
Equipment Needed
- Electric Mixer (stand or hand-held): Essential for whipping egg whites to stiff peaks; a balloon whisk can work but takes more effort.
- Baking Sheet: A rimmed sheet works best to keep parchment paper flat.
- Parchment Paper or Silicone Baking Mat: Prevents the pavlova from sticking and helps with even baking.
- Spoon or Piping Bag with Large Round Tip: For shaping the mini nests; piping gives a neater finish, but a spoon works well too—trust me, I’ve done both.
- Spatula: For folding ingredients gently and scraping the bowl clean.
- Cooling Rack: Helps the nests cool evenly without sogginess.
If you don’t have a stand mixer, a hand mixer will do just fine. When I first made these, I didn’t own fancy tools and used a regular whisk and patience—though it definitely took longer! Investing in a good mixer is worth it if you plan to make meringues often. Also, keep your bowls and beaters clean and grease-free for the best whip.
Preparation Method
- Preheat your oven to 250°F (120°C) and line a baking sheet with parchment paper or a silicone mat. This low temperature is key for drying the meringue without browning.
- Separate the egg whites carefully into a large, clean bowl. Make sure no yolk sneaks in, or the whites won’t whip properly. Let them come to room temperature for about 15 minutes for better volume.
- Start whipping the egg whites on medium speed until they become frothy, about 2-3 minutes. Then gradually add the sugar, one tablespoon at a time, while increasing to high speed. This slow addition helps the sugar dissolve fully, which prevents a gritty texture.
- Whip until stiff, glossy peaks form—this can take 7-10 minutes. You know it’s ready when the meringue holds its shape and the sugar granules are undetectable when rubbed between your fingers.
- Gently fold in the cornstarch, vinegar, and vanilla extract using a spatula. The vinegar stabilizes the structure, and cornstarch helps create that soft center.
- Shape the nests: Use a spoon or a piping bag to place six to eight mini mounds on the baking sheet. Then, using the back of a spoon or your finger, create a small well in the center of each mound to hold the lemon curd and berries later.
- Bake for 1 hour and 15 minutes at 250°F (120°C). The pavlovas should feel dry to the touch and lift easily from the parchment. After baking, turn off the oven and leave them inside with the door slightly ajar for another hour to cool completely. This slow cooling prevents cracks and keeps the texture perfect.
- Once cooled, carefully transfer the pavlova nests to serving plates. Fill each nest with about 2 tablespoons of lemon curd and top generously with fresh berries.
- Serve immediately for the best texture—crispy outside, marshmallow-soft inside with a burst of bright citrus and berry freshness.
Pro tip: If your meringue isn’t stiff enough or you see sugar graininess, keep whipping. And if you accidentally overbeat, don’t panic—fold in a tiny bit of unwhipped egg white to rescue it. Also, be patient with the slow cooling; rushing this step often leads to cracks or chewy spots.
Cooking Tips & Techniques
Getting meringue just right can be tricky, but a few learned tricks make these mini pavlova nests foolproof. First, always use a clean, grease-free bowl and beaters. Even a hint of fat can stop egg whites from whipping properly. I’ve learned this the hard way after a few frustrating batches.
Adding sugar slowly is key to creating that glossy, stable meringue. Dumping it all at once can weigh the whites down and cause weeping during baking. If you’re ever in doubt, taste a little between your fingers; it should feel smooth, not gritty.
Temperature matters—room temperature egg whites whip better, and the low, slow bake prevents browning while drying the meringue thoroughly. Resist the urge to crank up the oven for a faster bake; it just leads to cracked, browned nests.
When shaping your nests, uniform size helps them bake evenly. Using a piping bag can make this easier, but a spoon and a little patience work too. Also, don’t overcrowd your baking sheet—give each nest enough space to puff slightly without sticking.
Finally, the cooling step inside the warm oven is a game-changer. It prevents sudden temperature shifts that cause cracks. I learned this after a batch cracked all over when I pulled them out too soon. Leaving them in the oven with the door cracked open makes the texture perfect every time.
Variations & Adaptations
While the classic lemon curd and fresh berries pairing is divine, there are plenty of tasty ways to switch things up depending on your mood or dietary needs.
- Tropical Twist: Replace lemon curd with passion fruit curd and top with mango and kiwi slices for a bright, exotic flavor.
- Chocolate Lover’s Version: Add a tablespoon of cocoa powder to the meringue and fill the nests with chocolate ganache and raspberries.
- Nut-Free & Vegan Adaptation: Try aquafaba (chickpea brine) whipped with sugar instead of egg whites, and use a dairy-free lemon curd substitute with coconut cream.
- Seasonal Berry Swaps: In autumn, swap berries for poached pears and cinnamon-spiced compote for a cozy flavor.
- Personal Favorite Variation: I once added a dollop of whipped mascarpone mixed with honey on top of the lemon curd for an extra creamy layer—highly recommend trying this for a richer treat.
Serving & Storage Suggestions
Serve these mini pavlova nests fresh at room temperature or slightly chilled. The contrast of the cool lemon curd and berries against the crisp meringue is what makes this dessert so special. For a beautiful presentation, arrange the nests on a large platter garnished with extra fresh berries and a sprinkle of powdered sugar.
Pair with a light sparkling wine or a cup of Earl Grey tea for a delightful afternoon treat. For brunch, these nests complement a spread of savory quiches or a fresh garden salad beautifully.
Because meringue loves to soak up moisture, store the nests separately from the lemon curd and berries. Keep baked nests in an airtight container at room temperature for up to two days. Refrigerate lemon curd and fresh berries separately and assemble just before serving.
If you have leftovers, assembled nests can be refrigerated for up to 4 hours but expect the meringue to soften slightly. To refresh, serve immediately after assembly for that perfect crisp-soft texture.
Nutritional Information & Benefits
Each mini pavlova nest (including lemon curd and berries) contains approximately 180-220 calories, depending on portion size and lemon curd sweetness. These nests are naturally gluten-free and relatively low in fat, with the main source of calories coming from sugar and egg whites.
Egg whites provide a good source of high-quality protein, while fresh berries add antioxidants, vitamins, and fiber. Lemon curd, when homemade with fresh lemons, offers a vitamin C boost, though it is sugary, so moderation is key.
This dessert fits nicely into most balanced diets, especially when enjoyed as an occasional treat. For those watching sugar intake, you can reduce sugar in the meringue slightly or choose a sugar-free lemon curd alternative.
Conclusion
Perfect mini pavlova nests with lemon curd and fresh berries are more than just a pretty face—they’re a dessert that’s approachable, delicious, and adaptable. Whether you’re making them for a special occasion or a spontaneous sweet craving, they bring a little magic to the table without a mountain of effort.
I love this recipe because it reminds me that sometimes, simple ingredients and a bit of patience create something truly memorable. Plus, they’re fun to make, even if you get a little flour on the counter or forget a step (like I did that first time!).
Give this recipe a try, and don’t be shy about adding your personal twist. I’d love to hear how your mini pavlovas turn out—drop a comment or share your berry variations. Happy baking!
FAQs
- Can I make the lemon curd from scratch?
Absolutely! Homemade lemon curd is easy and tastes amazing. Use fresh lemons, sugar, eggs, and butter, cooking gently until thickened. - How do I prevent my pavlova from cracking?
Bake at a low temperature and let the nests cool slowly in the oven with the door slightly open to avoid rapid temperature changes. - Can I prepare the meringue nests ahead of time?
Yes! Store baked nests at room temperature in an airtight container for up to two days. Add lemon curd and berries just before serving. - What if I don’t have cornstarch?
Cornstarch helps with texture but is not absolutely essential. You can try omitting it but expect a slightly different center texture. - Are mini pavlova nests gluten-free?
Yes, this recipe is naturally gluten-free since it uses egg whites, sugar, and fruit without any flour.
Pin This Recipe!
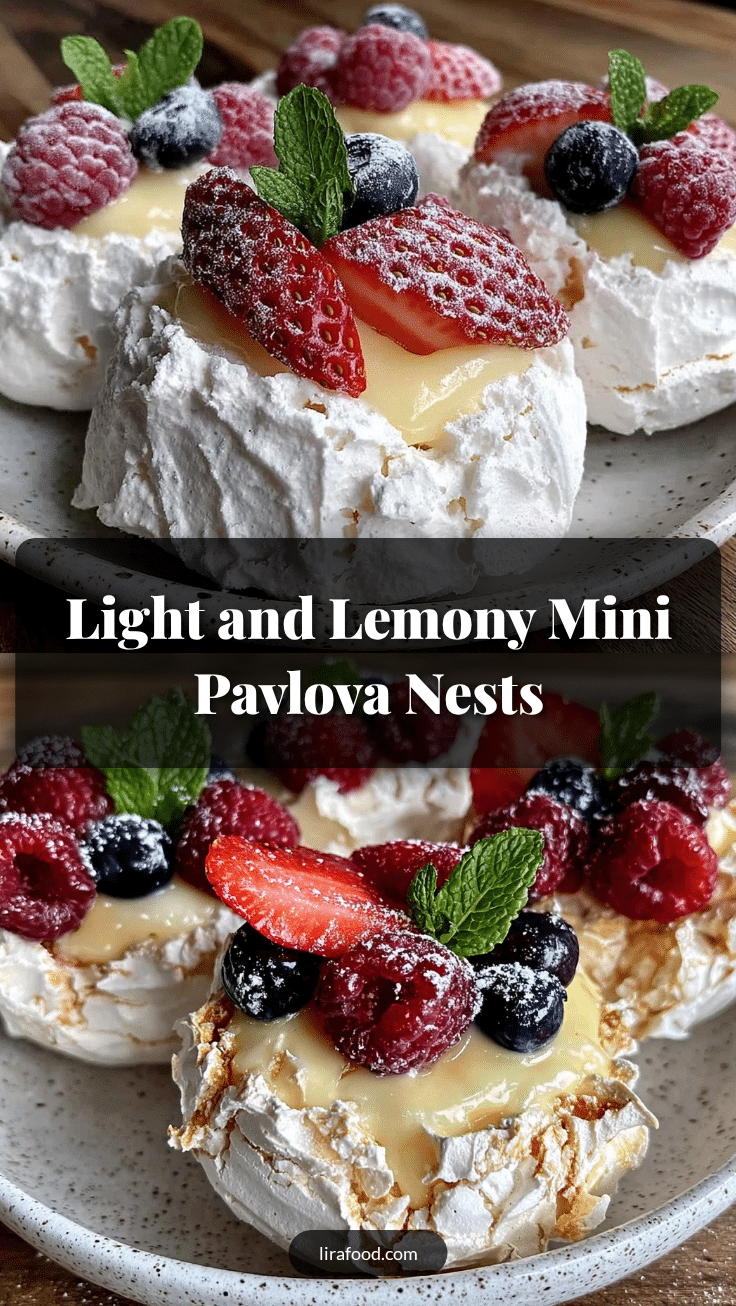
Perfect Mini Pavlova Nests Recipe with Lemon Curd and Berries
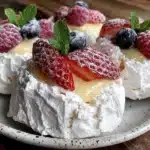
Delicate mini pavlova nests with a crisp exterior and marshmallow-soft center, topped with tangy lemon curd and fresh berries. A quick, easy, and impressive dessert perfect for any occasion.
- Prep Time: 20 minutes
- Cook Time: 1 hour 15 minutes
- Total Time: 2 hours 35 minutes
- Yield: 6 to 8 mini pavlova nests 1x
- Category: Dessert
- Cuisine: Australian/New Zealand
Ingredients
- 4 large egg whites, room temperature
- 1 cup (200 g) granulated sugar
- 1 teaspoon cornstarch
- 1 teaspoon white vinegar or lemon juice
- 1 cup (240 ml) lemon curd (store-bought or homemade)
- 1 cup (150 g) fresh berries (strawberries, blueberries, raspberries)
- 1/2 teaspoon vanilla extract (optional)
Instructions
- Preheat your oven to 250°F (120°C) and line a baking sheet with parchment paper or a silicone mat.
- Separate the egg whites carefully into a large, clean bowl, ensuring no yolk is included. Let them come to room temperature for about 15 minutes.
- Whip the egg whites on medium speed until frothy, about 2-3 minutes. Gradually add sugar one tablespoon at a time while increasing to high speed.
- Whip until stiff, glossy peaks form, about 7-10 minutes. The meringue should hold its shape and feel smooth when rubbed between fingers.
- Gently fold in cornstarch, vinegar, and vanilla extract using a spatula.
- Shape six to eight mini mounds on the baking sheet using a spoon or piping bag. Create a small well in the center of each mound.
- Bake for 1 hour and 15 minutes at 250°F (120°C). After baking, turn off the oven and leave the nests inside with the door slightly ajar for another hour to cool completely.
- Once cooled, transfer the pavlova nests to serving plates. Fill each nest with about 2 tablespoons of lemon curd and top generously with fresh berries.
- Serve immediately for the best texture.
Notes
Use room temperature egg whites for better volume. Add sugar slowly to avoid graininess. Cool pavlovas slowly in the oven with the door ajar to prevent cracks. Store baked nests separately from lemon curd and berries to maintain crispness.
Nutrition
- Serving Size: 1 mini pavlova nest
- Calories: 180220
- Sugar: 35
- Sodium: 10
- Fat: 0.5
- Saturated Fat: 0.1
- Carbohydrates: 40
- Fiber: 1
- Protein: 3
Keywords: mini pavlova, lemon curd, fresh berries, meringue dessert, easy pavlova recipe, gluten-free dessert, summer dessert