Love this? Save it for later!
Share the inspiration with your friends
I want a pumpkin dessert that doesn’t require me to get out the mixer, chill dough, or roll anything out. That’s the thought that stopped me mid-step in the kitchen last Tuesday. I had a can of pumpkin puree in the pantry, a block of cream cheese softening on the counter, and a bag of gingersnap cookies staring at me from the cupboard. And honestly? I did not have the energy for a full-blown pumpkin cheesecake with a water bath and a springform pan and all that fuss. But I wanted that combination—the tangy cream cheese, the warm pumpkin spice, that snappy gingersnap crunch—more than I wanted to admit.
So I did what any reasonable person would do. I crushed the cookies, melted some butter, pressed it into a pan, and figured the rest out as I went. That first batch came out of the oven looking a little messy around the edges, but one bite in and I knew I had stumbled onto something worth repeating. The gingersnap crust gave this deep, molasses-y warmth that a graham cracker crust just can’t touch. And the pumpkin layer? Silky, spiced, and not too sweet. I’ve made them four times since that first spontaneous Tuesday, and I’m finally confident enough to share exactly how they come together. These bars are the kind of dessert that makes you close your eyes after the first bite—and that’s not something I say lightly.
Why You’ll Love These Pumpkin Cheesecake Bars
- No Water Bath Needed. Traditional cheesecake requires a steamy water bath to prevent cracking. These bars bake up perfectly without one. Less fuss, same creamy result.
- Gingersnap Crust Is a Game Changer. I’ve tested this with graham crackers, shortbread, and vanilla wafers. Nothing compares to the spicy-sweet depth of crushed gingersnaps. The molasses and ginger notes complement the pumpkin filling in a way that feels intentional, not accidental.
- Simple Ingredients. You likely already have most of these in your kitchen. No fancy extracts, no obscure spices. Just real, pantry-friendly staples that come together beautifully.
- Perfect for Fall Gatherings. Whether it’s Thanksgiving dessert, a Halloween party, or just a cozy Sunday afternoon, these bars travel well, slice cleanly, and look impressive on a plate with minimal effort.
- Make-Ahead Friendly. These bars actually taste better after a night in the fridge. The flavors meld, the texture firms up, and slicing becomes effortless. You can make them two days ahead without any loss of quality.
- Crowd-Pleaser. I’ve brought these to three different gatherings now, and every time, someone asks for the recipe. They appeal to pumpkin lovers and cheesecake lovers alike—and even people who claim they don’t like pumpkin desserts have gone back for seconds.
What makes these bars different from the dozens of pumpkin cheesecake recipes out there? It’s the crust, plain and simple. Most recipes treat the crust as an afterthought, but here, the gingersnap layer is just as important as the filling. It provides texture, flavor contrast, and that little bit of spice that keeps every bite interesting. Plus, the ratio of filling to crust is deliberately balanced—you get enough creamy pumpkin cheesecake to feel satisfied, but the crust never gets soggy or lost.
What Ingredients You Will Need
This recipe uses simple, wholesome ingredients that work together to create something genuinely special. Most of these are pantry staples, especially if you do any fall baking at all. Here’s what you’ll need, broken down by component.
For the Gingersnap Crust
- 2 cups crushed gingersnap cookies (about 8 ounces, or roughly 40 cookies depending on brand). I recommend Nabisco or a bakery brand for the best molasses flavor. Avoid the soft, chewy style—you want the crisp kind.
- 5 tablespoons unsalted butter, melted. Salted butter works in a pinch, but unsalted gives you more control over the overall salt level.
- 2 tablespoons granulated sugar. This helps the crust hold together and adds a touch of sweetness that balances the spicy cookies.
- Pinch of salt. Just a small one—about 1/8 teaspoon. It brightens all the flavors.
For the Pumpkin Cheesecake Filling
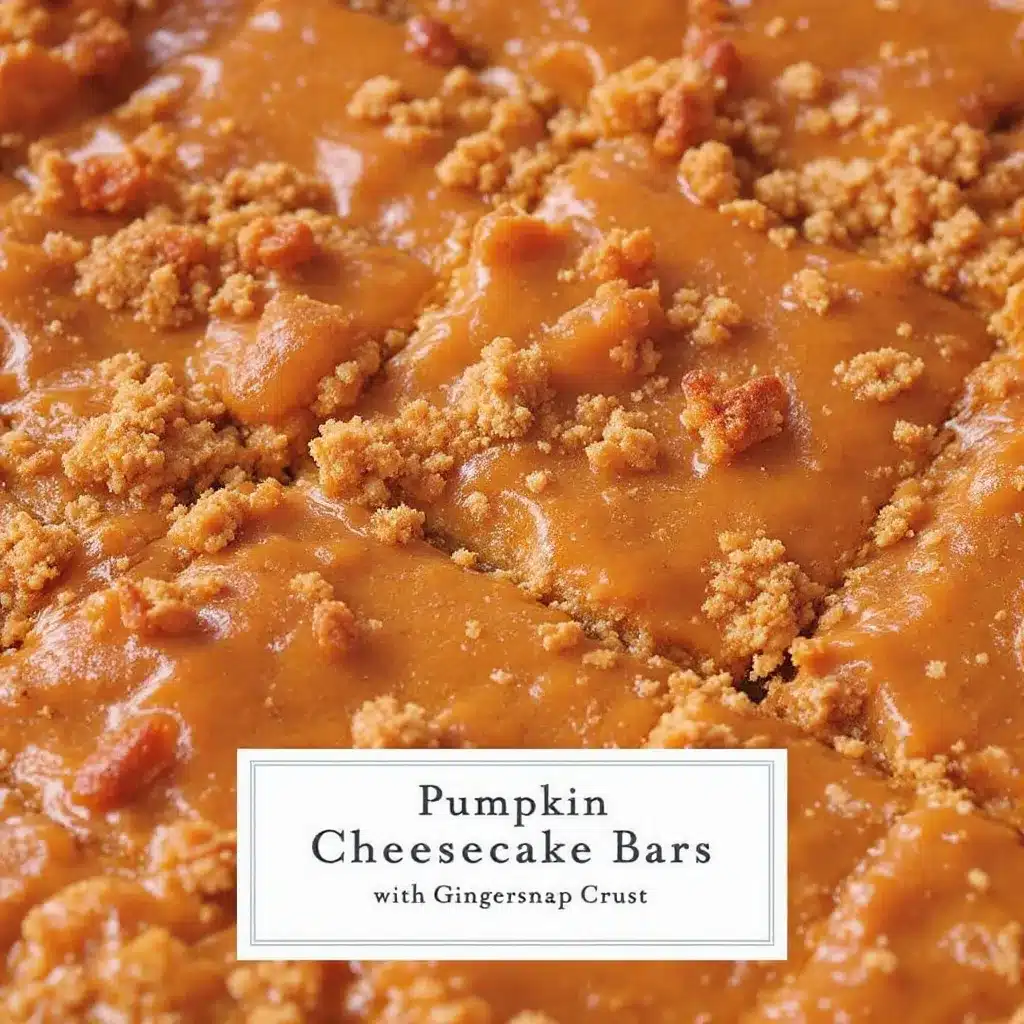
- 16 ounces cream cheese, softened to room temperature. Two standard blocks. Full-fat is best here for texture and richness. Low-fat cream cheese will work, but the filling won’t be as lush.
- 3/4 cup granulated sugar. Not too much—the pumpkin and spices do a lot of the heavy lifting.
- 1/2 cup packed light brown sugar. This adds moisture and a subtle molasses note that echoes the crust.
- 3 large eggs, room temperature. Cold eggs can cause the batter to seize up. Let them sit on the counter for 30 minutes before starting.
- 1 1/2 cups pumpkin puree. Not pumpkin pie filling—just pure pumpkin. Libby’s is my go-to brand because it’s consistently thick and not watery.
- 1 teaspoon vanilla extract. Pure vanilla, not imitation, if you can swing it.
- 2 teaspoons pumpkin pie spice. Or make your own with 1 teaspoon cinnamon, 1/2 teaspoon ginger, 1/4 teaspoon nutmeg, 1/4 teaspoon cloves, and a pinch of allspice.
- 1/2 teaspoon ground cinnamon. Extra cinnamon because I believe in it.
- 2 tablespoons all-purpose flour. This helps stabilize the filling and prevents cracking.
For the Optional Topping
- 1 cup heavy cream, cold. For whipped cream, if you want to get fancy.
- 2 tablespoons powdered sugar. Just enough to sweeten the cream without making it heavy.
- 1/2 teaspoon vanilla extract. For flavor.
- Caramel sauce, for drizzling. Store-bought or homemade—both work great here. A salted caramel is especially good with the gingersnap and pumpkin combo.
Equipment Needed
You don’t need a lot of fancy tools for this recipe, which is part of its charm. Here’s what you’ll need to pull it off.
- 9×9-inch baking pan. An 8×8 works too, but the bars will be slightly thicker and may need a few extra minutes in the oven. A metal pan gives you cleaner edges than glass.
- Parchment paper. This is non-negotiable. Line the pan with two overlapping sheets, leaving overhang on all sides. You’ll thank me later when you lift the entire block of bars out in one piece.
- Food processor or zip-top bag and rolling pin. A food processor makes quick work of crushing the cookies, but a bag and a rolling pin works just fine. I’ve done it both ways. The bag method is oddly satisfying.
- Mixing bowls. You’ll need a medium bowl for the crust and a large bowl for the filling.
- Electric hand mixer or stand mixer. A hand mixer is perfectly adequate here. A whisk and some elbow grease can work, but you’ll want the mixer for getting the cream cheese truly smooth.
- Spatula. For scraping down the bowl and spreading the filling evenly.
- Measuring cups and spoons. Standard set.
- Cooling rack. Optional but helpful for even cooling.
If you don’t have a food processor, don’t let that stop you. I’ve made this crust using the bottom of a heavy skillet to crush the cookies in a bowl. It’s not as fast, but it gets the job done. And if you’re looking for a budget-friendly option, a basic hand mixer from any grocery store will work just fine for the filling.
Preparation Method
Let’s walk through this step by step. I’ve included timing estimates and sensory cues so you know exactly what to look for at each stage.
Step 1: Prepare the Pan and Preheat
Preheat your oven to 350°F (175°C). Line a 9×9-inch baking pan with parchment paper, leaving about 2 inches of overhang on two opposite sides. This creates handles for lifting the finished bars out later. Lightly spray the parchment with non-stick spray for extra insurance.
Step 2: Make the Gingersnap Crust
Place 2 cups of gingersnap cookies in a food processor and pulse until you have fine, uniform crumbs. You should have about 1 3/4 cups of crumbs. If you’re using the bag method, seal the cookies in a zip-top bag and crush them with a rolling pin until no large pieces remain. Transfer the crumbs to a medium bowl. Add 2 tablespoons of sugar and a pinch of salt, then pour in 5 tablespoons of melted butter. Stir with a fork until all the crumbs are evenly moistened. The mixture should look like wet sand and hold together when you squeeze it in your fist. Press the mixture firmly and evenly into the bottom of the prepared pan. Use the bottom of a measuring cup or a flat-bottomed glass to really compact it. Bake the crust for 8 minutes, then set it aside to cool slightly while you make the filling. Leave the oven on.
Step 3: Beat the Cream Cheese
In a large mixing bowl, beat 16 ounces of softened cream cheese with an electric mixer on medium speed until smooth and creamy—about 2 minutes. Scrape down the sides and the bottom of the bowl with a spatula. You want absolutely no lumps at this stage. Add 3/4 cup granulated sugar and 1/2 cup packed light brown sugar, then beat for another 2 minutes until the mixture is light and fluffy. Scrape the bowl again.
Step 4: Add the Eggs
Add the 3 room-temperature eggs, one at a time, beating on low speed after each addition just until the yolk disappears. Overbeating at this stage can incorporate too much air, which can cause cracks later. The batter should look smooth and glossy. Scrape the bowl one more time.
Step 5: Add the Pumpkin and Spices
Add 1 1/2 cups pumpkin puree, 1 teaspoon vanilla extract, 2 teaspoons pumpkin pie spice, 1/2 teaspoon ground cinnamon, and 2 tablespoons all-purpose flour. Beat on low speed until just combined. Stop and scrape the bowl, then give it one more quick mix. The batter should be a uniform orange-tan color, thick but spreadable. It should smell like fall in a bowl—warm, spiced, and inviting.
Step 6: Assemble and Bake
Pour the pumpkin cheesecake filling over the pre-baked crust. Use a spatula to spread it evenly to the edges. Give the pan a gentle tap on the counter to release any air bubbles. Bake at 350°F (175°C) for 35 to 40 minutes. The edges should look set and slightly puffed, but the center should still jiggle slightly when you gently shake the pan—like a firm Jell-O, not liquid. A toothpick inserted 1 inch from the center should come out mostly clean, with a few moist crumbs. If the toothpick comes out wet with batter, bake for another 3 to 5 minutes and check again.
Step 7: Cool and Chill
Place the pan on a cooling rack and let the bars cool completely at room temperature—about 1 to 1.5 hours. Once cool, cover the pan with plastic wrap and refrigerate for at least 4 hours, but preferably overnight. This step is crucial. The bars need time to set properly, and the flavor deepens as they rest. I know it’s hard to wait, but trust me on this.
Step 8: Slice and Serve
Once fully chilled, lift the entire block of bars out of the pan using the parchment overhang. Place it on a cutting board. Use a sharp knife to slice into 16 squares (4 rows by 4 rows). For clean slices, wipe the knife clean between each cut with a damp paper towel. Serve cold or at room temperature. If you’re adding whipped cream and caramel sauce, do that just before serving.
Cooking Tips and Techniques
I’ve made this recipe enough times to know where things can go sideways. Here’s what I’ve learned the hard way so you don’t have to.
Room temperature ingredients matter. I know it’s tempting to use cold cream cheese straight from the fridge, but it will leave you with lumpy batter no matter how long you beat it. Let the cream cheese sit on the counter for at least an hour. For the eggs, submerge them in a bowl of warm water for 5 minutes if you forgot to take them out ahead of time.
Don’t overmix after adding the eggs. This was my biggest mistake on my first attempt. I beat the batter enthusiastically after each egg, and the bars came out with a soufflé-like rise that collapsed into cracks. Mix on low speed and stop as soon as the yolk disappears. The filling should be smooth, not fluffy.
The jiggle test is your friend. Overbaked cheesecake is dry and crumbly. Underbaked cheesecake is soupy. The sweet spot is when the edges are set and the center wobbles like a firm custard. If you’re unsure, err on the side of slightly underdone—it will continue to set as it cools.
Let it cool gradually. After baking, I like to crack the oven door open and let the bars sit in the warm oven for 10 minutes before taking them out. This gradual temperature change reduces the risk of cracking. It’s a small step that makes a noticeable difference.
Patience with chilling is not optional. I once tried to cut into these bars after only 2 hours in the fridge. The slices were messy, the crust crumbled, and the filling stuck to the knife. Give it the full 4 hours minimum. Overnight is genuinely better. The texture firms up, the flavors meld, and you get those clean, beautiful slices that make people think you spent hours on presentation.
Variations and Adaptations
One of the best things about this recipe is how adaptable it is. Here are some variations I’ve tried and loved.
Gluten-Free Version. Use gluten-free gingersnap cookies for the crust. Many brands are naturally gluten-free, but check the label. Replace the 2 tablespoons of all-purpose flour in the filling with a gluten-free all-purpose blend or almond flour. I’ve tested this with Bob’s Red Mill 1-to-1 Baking Flour, and the texture was virtually identical to the original.
Dairy-Free Adaptation. Use dairy-free cream cheese—I like Kite Hill or Violife—and a plant-based butter alternative for the crust. Miyoko’s European Style Cultured Vegan Butter works particularly well. The filling will be slightly less rich, but still delicious. Just make sure all your ingredients are at room temperature for the best texture.
Pumpkin Spice Latte Bars. Add 1 tablespoon of instant espresso powder dissolved in 1 tablespoon of hot water to the filling along with the pumpkin. The coffee flavor amplifies the spices without making the bars taste like coffee. It’s a subtle twist that coffee lovers will notice and appreciate.
Brown Butter Gingersnap Crust. Brown the 5 tablespoons of butter in a small saucepan over medium heat until it turns golden brown and smells nutty—about 3 to 4 minutes. Let it cool slightly before mixing with the cookie crumbs. This adds an extra layer of toasty, nutty flavor that pairs beautifully with the pumpkin filling. It’s a small extra step with a big payoff.
Mini Bar Version. Press the crust into a 24-cup mini muffin tin lined with paper liners. Fill each cup with about 1 tablespoon of crust and 2 tablespoons of filling. Bake for 18 to 20 minutes. These are perfect for parties or portion control. Just reduce the chilling time to 2 hours since they’re smaller.
Serving and Storage Suggestions
These bars are versatile enough to fit almost any occasion. Here’s how I like to serve and store them.
Serving Temperature. I prefer these bars chilled straight from the fridge. The cold filling contrasts beautifully with the warm spices. But they’re also excellent at room temperature—just let them sit out for 15 to 20 minutes before serving. If you’re adding whipped cream, do it right before serving so it doesn’t deflate.
Presentation Ideas. For a simple presentation, dust the tops with a little cinnamon or pumpkin pie spice before slicing. For something more decadent, drizzle each bar with caramel sauce and add a dollop of whipped cream. A few candied pecans or gingersnap crumbs on top add nice texture. If you’re serving these for Thanksgiving, arrange them on a platter with fresh cranberries and rosemary sprigs for a festive look.
Complementary Dishes. These bars pair beautifully with a hot cup of coffee or spiced chai. For a dessert spread, serve them alongside a decadent bourbon pecan chocolate layer cake or a classic homemade banana pudding for contrast. They also work well after a rich meal—the pumpkin and spice are satisfying without being heavy.
Storage Instructions. Store leftover bars in an airtight container in the refrigerator for up to 5 days. Layer them with parchment paper between each row to prevent sticking. The bars actually taste better on day two or three as the flavors continue to meld. I’ve never had them last longer than that, but they should be fine for up to a week if properly stored.
Freezing Instructions. These bars freeze beautifully. Once fully chilled and sliced, arrange the bars in a single layer on a baking sheet and freeze for 1 hour. Then transfer them to a freezer-safe container with parchment between layers. They’ll keep for up to 3 months. Thaw overnight in the refrigerator before serving. Do not thaw at room temperature—the condensation can make the crust soggy.
Reheating. These bars are meant to be served cold or at room temperature, so reheating isn’t necessary. But if you want a warm dessert experience, microwave a single bar for 10 to 15 seconds. The filling will soften slightly, and the spices will become more aromatic. Just don’t overdo it, or the crust will lose its crunch.
Nutritional Information and Benefits
Here’s the estimated nutritional breakdown for one bar (based on 16 servings, without optional toppings).
| Nutrient | Amount Per Serving |
|---|---|
| Calories | 285 |
| Total Fat | 17g |
| Saturated Fat | 10g |
| Cholesterol | 85mg |
| Sodium | 210mg |
| Total Carbohydrates | 30g |
| Dietary Fiber | 2g |
| Sugars | 21g |
| Protein | 5g |
| Vitamin A | 120% DV |
| Calcium | 6% DV |
| Iron | 8% DV |
Health Benefits of Key Ingredients. Pumpkin is packed with vitamin A, which supports eye health and immune function. It’s also a good source of fiber and antioxidants. The cream cheese provides calcium and protein, while the ginger in the crust has anti-inflammatory properties. Cinnamon is known for its blood sugar-regulating effects. Of course, this is still a dessert—but it’s one that offers a few nutritional perks alongside the indulgence.
Dietary Considerations. This recipe contains gluten, dairy, and eggs. For gluten-free and dairy-free adaptations, see the variations section above. This is not a low-calorie or low-fat dessert, but it’s a reasonable indulgence when enjoyed in moderation. One bar is satisfying enough to curb a sweet craving without going overboard.
Frequently Asked Questions
Can I use pumpkin pie filling instead of pumpkin puree?
No, do not use pumpkin pie filling. It’s already sweetened and spiced, which will throw off the sugar and spice balance in this recipe. Stick with 100% pure pumpkin puree. Libby’s is the most reliable brand, but any store brand works as long as the only ingredient is pumpkin.
Why did my cheesecake bars crack on top?
Cracks usually happen from overbaking, overmixing, or sudden temperature changes. To prevent them, don’t overbeat the batter after adding the eggs, bake just until the center is slightly jiggly, and let the bars cool gradually. If they do crack, don’t worry—the cracks are usually shallow and can be covered with whipped cream or caramel sauce. No one will know.
Can I make these bars in a different size pan?
Yes, but you’ll need to adjust the baking time. For an 8×8-inch pan, the bars will be thicker and may need 40 to 45 minutes. For a 9×13-inch pan, double the recipe and bake for 30 to 35 minutes. For a springform pan, you can make a full cheesecake version—just use 1.5 times the crust and filling amounts and bake for 50 to 55 minutes.
How do I get clean, neat slices?
Chill the bars thoroughly—at least 4 hours, preferably overnight. Use a sharp knife and wipe it clean with a damp paper towel between each cut. For the cleanest slices, you can also dip the knife in hot water and dry it off before cutting. This helps the knife glide through the filling without dragging.
Can I skip the parchment paper lining?
I strongly recommend against it. The parchment overhang is what allows you to lift the entire block of bars out of the pan in one piece. Without it, you’ll have to dig the bars out with a spatula, and they’ll likely crumble. If you absolutely must skip it, line the pan with non-stick foil instead, but parchment is really the best tool for the job.
Final Thoughts on These Pumpkin Cheesecake Bars
These pumpkin cheesecake bars with gingersnap crust have become my official fall dessert, and I don’t see that changing anytime soon. They hit every note I want from a seasonal treat—warm spices, creamy texture, that satisfying crunch from the crust—without demanding a full afternoon of effort. The recipe is forgiving enough for a beginner baker but impressive enough for a holiday table, and that’s a rare combination.
What I love most about these bars is how they make people feel. I’ve watched guests take a bite, pause, and then look at the plate with genuine surprise. It’s the kind of dessert that doesn’t announce itself loudly but delivers quietly and completely. And honestly, that’s my favorite kind of cooking—the kind that speaks for itself.
If you make these, I’d love to hear how they turn out. Leave a comment below and let me know if you tried any variations, what you served them with, or just how fast they disappeared at your gathering. And if you’re looking for another cozy dessert to round out your fall baking, don’t miss this grandma’s sour cream coffee cake with walnut streusel—it’s the perfect companion for a crisp autumn morning. Happy baking, friends.
Pin This Recipe!
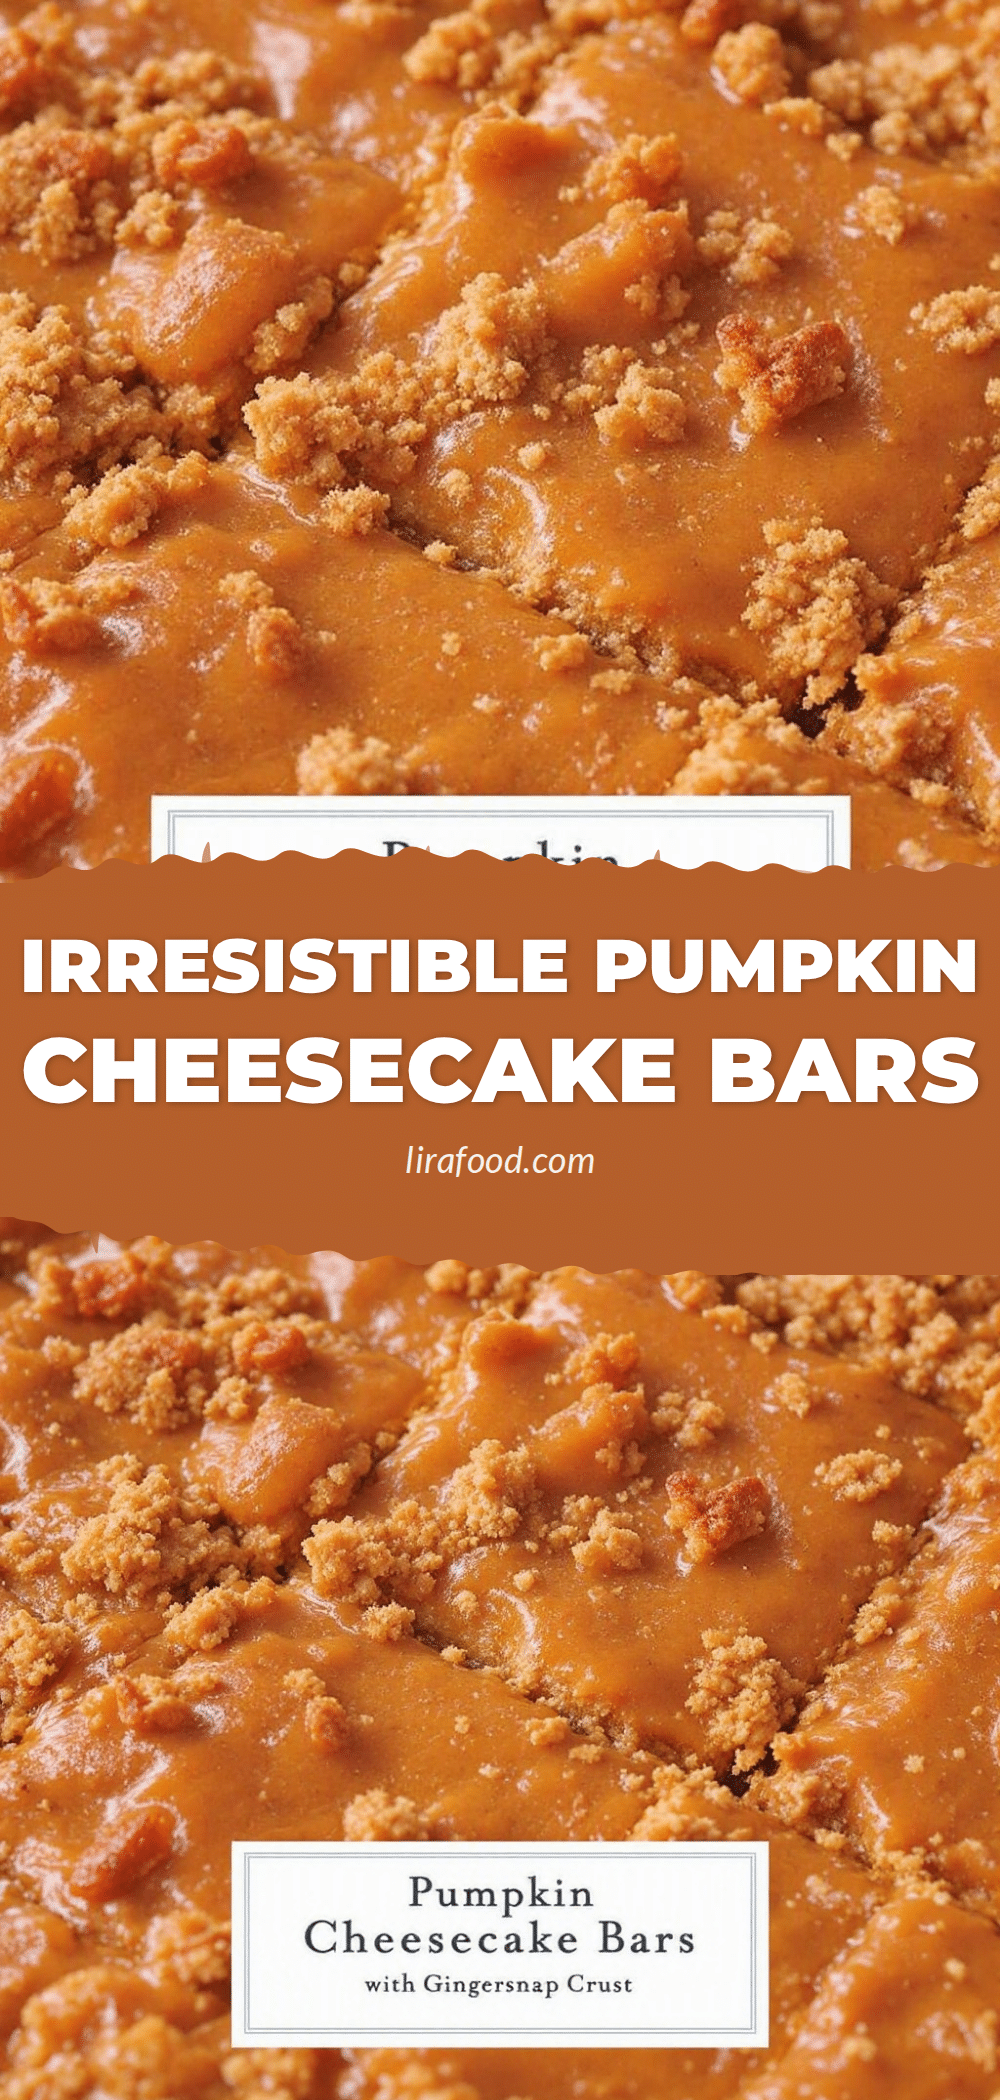
Perfect Pumpkin Cheesecake Bars with Gingersnap Crust
These pumpkin cheesecake bars feature a spicy-sweet gingersnap crust and a silky, spiced pumpkin filling. No water bath needed, they’re easy to make and perfect for fall gatherings.
- Prep Time: 20 minutes
- Cook Time: 35 to 40 minutes
- Total Time: 4 hours 55 minutes (includes chilling)
- Yield: 16 bars 1x
- Category: Dessert
- Cuisine: American
Ingredients
- 2 cups crushed gingersnap cookies (about 8 ounces or 40 cookies)
- 5 tablespoons unsalted butter, melted
- 2 tablespoons granulated sugar
- Pinch of salt (about 1/8 teaspoon)
- 16 ounces cream cheese, softened to room temperature
- 3/4 cup granulated sugar
- 1/2 cup packed light brown sugar
- 3 large eggs, room temperature
- 1 1/2 cups pumpkin puree (not pumpkin pie filling)
- 1 teaspoon vanilla extract
- 2 teaspoons pumpkin pie spice
- 1/2 teaspoon ground cinnamon
- 2 tablespoons all-purpose flour
- 1 cup heavy cream, cold (for optional topping)
- 2 tablespoons powdered sugar (for optional topping)
- 1/2 teaspoon vanilla extract (for optional topping)
- Caramel sauce, for drizzling (optional)
Instructions
- Preheat oven to 350°F (175°C). Line a 9×9-inch baking pan with parchment paper, leaving 2 inches of overhang on two opposite sides. Lightly spray with non-stick spray.
- Make the crust: Pulse gingersnap cookies in a food processor until fine crumbs form (or crush in a zip-top bag with a rolling pin). Transfer to a medium bowl. Add 2 tablespoons sugar and a pinch of salt, then pour in 5 tablespoons melted butter. Stir until mixture resembles wet sand and holds together when squeezed. Press firmly into the bottom of the prepared pan. Bake for 8 minutes. Set aside to cool slightly. Keep oven on.
- Beat cream cheese: In a large bowl, beat 16 ounces softened cream cheese with an electric mixer on medium speed until smooth and creamy, about 2 minutes. Scrape down sides and bottom.
- Add sugars: Add 3/4 cup granulated sugar and 1/2 cup packed light brown sugar. Beat for another 2 minutes until light and fluffy. Scrape bowl again.
- Add eggs: Add 3 room-temperature eggs, one at a time, beating on low speed after each addition just until yolk disappears. Do not overmix. Scrape bowl.
- Add pumpkin and spices: Add 1 1/2 cups pumpkin puree, 1 teaspoon vanilla extract, 2 teaspoons pumpkin pie spice, 1/2 teaspoon ground cinnamon, and 2 tablespoons all-purpose flour. Beat on low speed until just combined. Scrape bowl and mix once more.
- Assemble and bake: Pour filling over pre-baked crust. Spread evenly. Tap pan gently on counter to release air bubbles. Bake at 350°F for 35 to 40 minutes. Edges should be set and slightly puffed; center should jiggle slightly when shaken. A toothpick inserted 1 inch from center should come out mostly clean with a few moist crumbs.
- Cool and chill: Place pan on a cooling rack and cool completely at room temperature, about 1 to 1.5 hours. Cover with plastic wrap and refrigerate for at least 4 hours, preferably overnight.
- Slice and serve: Lift bars out of pan using parchment overhang. Place on cutting board. Slice into 16 squares (4×4). Wipe knife clean between cuts. Serve cold or at room temperature. Add whipped cream and caramel sauce just before serving if desired.
Notes
Room temperature ingredients are crucial for a smooth batter. Let cream cheese sit out for at least 1 hour. For eggs, submerge in warm water for 5 minutes if forgotten. Do not overmix after adding eggs to prevent cracks. The jiggle test is key: edges set, center wobbles like firm Jell-O. Let bars cool gradually by cracking oven door open for 10 minutes after baking. Chilling for at least 4 hours (preferably overnight) is essential for clean slices and best flavor. For gluten-free, use gluten-free gingersnaps and gluten-free flour blend. For dairy-free, use dairy-free cream cheese and plant-based butter.
Nutrition
- Serving Size: 1 bar
- Calories: 285
- Sugar: 21
- Sodium: 210
- Fat: 17
- Saturated Fat: 10
- Carbohydrates: 30
- Fiber: 2
- Protein: 5
Keywords: pumpkin cheesecake bars, gingersnap crust, fall dessert, pumpkin dessert, cheesecake bars, no water bath, easy pumpkin recipe


