Love this? Save it for later!
Share the inspiration with your friends
The little plastic tombstone had a crack running through the word “RIP.” My daughter handed it to me like it was a sacred relic, her fingers sticky from the crushed Oreo crumbs she’d been sneaking straight from the bag. “Mom,” she said, with the kind of seriousness that only a six-year-old can pull off, “we need to make the spooky cups again. For the school party.” I looked at that cracked tombstone and remembered the first time I made these Easy Halloween Graveyard Pudding Cups three years ago, for a last-minute playdate I’d completely forgotten about until my son reminded me at 3 PM. I’d thrown them together with stuff I already had in the pantry, honestly not expecting much. The kids went absolutely silent when they saw them on the table. Then they started laughing. Then they ate every single one before the parents even had a chance to take a picture.
That’s the thing about these little cups of dirt and ghosts. They’re not just a dessert. They’re an experience. They’re the kind of thing that makes Halloween feel like Halloween, without requiring you to spend hours in the kitchen or hunt down weird ingredients. I’ve made these Easy Halloween Graveyard Pudding Cups for classroom parties, trunk-or-treat events, and even a grown-up Halloween dinner where the adults fought over the last one. Every single time, they disappear. There’s something about digging through crushed cookies to find a gummy worm that just hits different, you know? It’s playful and spooky and completely low-effort, which is exactly what I need when October gets chaotic.
I still have that cracked little tombstone, by the way. It’s in my Halloween decoration bin, tucked next to a fake spider web that’s seen better days. Every year, when I pull it out, I think about how a simple dessert made from pudding and cookies turned into a tradition. That’s the quiet magic of a recipe that actually works. It doesn’t need to be fancy. It just needs to be good.
Why You’ll Love This Recipe
Let me tell you why these Easy Halloween Graveyard Pudding Cups have become my go-to for every spooky season gathering. I’ve tested this recipe at least a dozen times across different occasions, and it never fails to deliver. The best part? You don’t need to be a baker to pull these off.
- No-Bake & Quick: These come together in about 15 minutes of active time. The hardest part is waiting for the pudding to set in the fridge, and honestly, that’s just an excuse to clean up the kitchen or pour yourself a cup of coffee.
- Simple Ingredients: You probably have most of this stuff in your pantry right now. Instant pudding mix, milk, Oreos, and some candy decorations. No weird trips to a specialty store required.
- Perfect for Halloween Parties: Whether it’s a classroom celebration, a trunk-or-treat event, or just a cozy night watching spooky movies, these cups fit right in. They’re portable, individual-sized, and easy to grab.
- Crowd-Pleaser for All Ages: I’ve seen toddlers and grandparents both go back for seconds. There’s something universally appealing about chocolate pudding and crushed cookies.
- Endlessly Customizable: You can switch up the cookie type, change the pudding flavor, or go wild with different candy decorations. Every batch can be a little different.
What really sets this recipe apart from other Halloween desserts is the texture. Most graveyard cups end up with a soggy cookie layer that just feels sad. I figured out a trick after a few failed attempts—layering the crushed cookies in a specific way and letting them sit just long enough to get that perfect crumbly-but-not-mushy texture. It’s a small detail, but it makes a huge difference. Plus, I’ve tested this with both homemade pudding and the boxed stuff, and honestly? The boxed version works better for this. It sets up firmer and holds its shape when you’re adding the decorations. Sometimes the simple route is the best route.
These Easy Halloween Graveyard Pudding Cups are the kind of dessert that makes you look like you put in way more effort than you actually did. And honestly? That’s my favorite kind of recipe.
What Ingredients You Will Need
This recipe uses simple, everyday ingredients to create something that looks impressive without any fuss. Most of these are pantry staples, especially if you’ve got kids who love sweets. Here’s what you’ll need to gather.
- 2 (3.9 oz) boxes instant chocolate pudding mix — I use Jell-O brand because it consistently sets up firm and has that rich chocolate flavor that works perfectly with the cookies. The instant kind is non-negotiable here; cook-and-serve pudding won’t set up properly for this recipe.
- 3 cups cold whole milk — Whole milk gives the pudding a creamier texture that holds up better when you’re layering. You can use 2% in a pinch, but avoid skim milk. It makes the pudding too thin and watery.
- 1 (14.3 oz) package Oreo cookies — Regular Oreos work best. Double Stuf is fine too, but you’ll end up with extra cream filling that can make the “dirt” layer a bit greasy. I’ve tried this with generic chocolate sandwich cookies, and they just don’t crush the same way. Stick with the real deal.
- 1 (8 oz) tub Cool Whip, thawed — This gets folded into the pudding to make it lighter and fluffier. You can use homemade whipped cream if you prefer, but Cool Whip holds its shape better over time, especially if you’re making these a day ahead.
- 12-15 gummy worms — Pick your favorite brand. I like the sour ones for an extra little kick, but regular works great too. You’ll want a mix of colors for visual interest.
- 12-15 candy pumpkins or candy corn — These add a pop of orange color against the dark “dirt.” Candy pumpkins are easier to find around Halloween, but candy corn works just as well.
- 5-6 Milano cookies or rectangular cookies — These become your tombstones. Milano cookies have that perfect rectangular shape, but any similar cookie will work. You’ll want about 2-3 per cup, depending on size.
- Black decorating gel or black icing pen — For writing “RIP” or spooky messages on the tombstones. A tube of black gel from the baking aisle works perfectly.
- 12 small clear plastic cups (5-7 oz size) — Clear cups are essential here. The whole point is seeing the layers of dirt, pudding, and worms. I’ve used both plastic and glass, but plastic is safer for kids’ parties.
Ingredient Tips & Substitutions
If you need a gluten-free version, use gluten-free chocolate sandwich cookies and gluten-free pudding mix. The rest of the ingredients are naturally gluten-free. For a dairy-free option, swap the milk for oat milk or almond milk, use dairy-free pudding mix, and substitute the Cool Whip with a dairy-free whipped topping. I’ve tested the dairy-free version with oat milk, and it sets up just fine, though the texture is slightly less creamy. For a less sweet version, you can use reduced-fat Oreos and sugar-free pudding mix. The taste is still great, just a little lighter.
Equipment Needed
You don’t need any fancy gadgets for these Easy Halloween Graveyard Pudding Cups. Here’s what you’ll need to have on hand.
- Large mixing bowl — For making the pudding. Any standard size works.
- Whisk — For mixing the pudding with the milk. You can use a hand mixer if you want, but a whisk works just fine.
- Food processor or zip-top bag with rolling pin — For crushing the Oreos. I prefer the food processor because it gives you a more even crumb, but a zip-top bag and a rolling pin (or even a heavy skillet) works perfectly. Just make sure the bag doesn’t have any holes, or you’ll end up with cookie dust everywhere.
- Small knife or offset spatula — For spreading the pudding mixture evenly into the cups.
- Measuring cups and spoons — For the milk and any optional decorations.
- Small piping bag or zip-top bag with corner snipped — For writing on the tombstones with the black gel. You can also just use the tube directly, but a bag gives you more control.
- Refrigerator space — You’ll need room to chill the cups for at least 2 hours. Make sure they’re level so the pudding sets evenly.
I’ve made these with just a bowl, a whisk, and a plastic bag for crushing cookies. The food processor is nice but not necessary. If you’re making these with kids, the bag-and-rolling-pin method is actually more fun. Just be prepared for a little mess.
Preparation Method
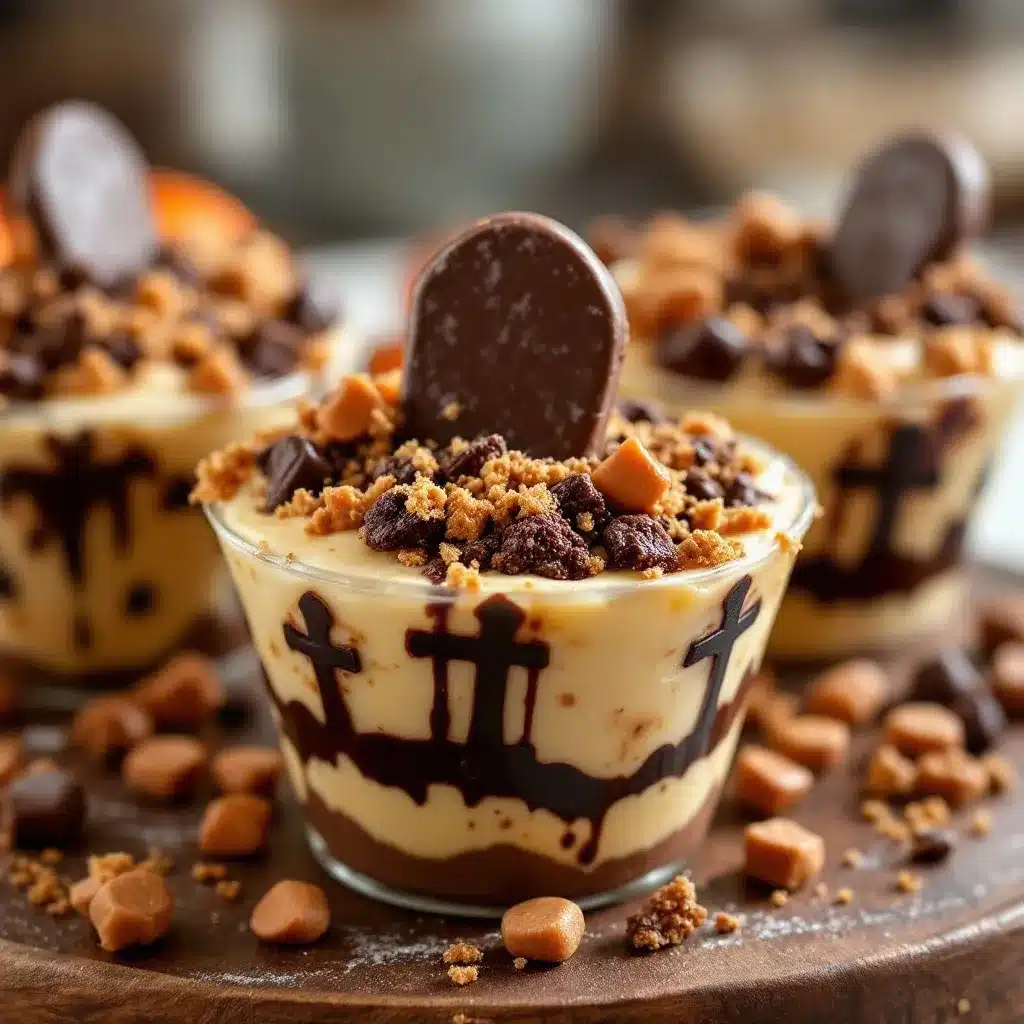
Let me walk you through this step by step. I’ve made these Easy Halloween Graveyard Pudding Cups so many times that I could do it in my sleep, but I’ll share all the little details that make them turn out perfectly every time.
Step 1: Make the Pudding
In a large mixing bowl, whisk together the two boxes of instant chocolate pudding mix and 3 cups of cold whole milk. Whisk vigorously for about 2 minutes until the mixture thickens. You’ll notice it start to get really thick right around the 90-second mark. That’s when you know it’s working. Let it sit for 5 minutes to fully set up. Don’t rush this part. The pudding needs that time to reach the right consistency, or your layers will be too runny.
Step 2: Fold in the Cool Whip
Once the pudding has set, add the entire tub of thawed Cool Whip. Gently fold it into the pudding using a rubber spatula. Don’t stir it vigorously—you want to keep the mixture light and airy. Fold until you don’t see any white streaks. This usually takes about 20-30 gentle folds. The mixture should be smooth, creamy, and a shade lighter than the original pudding. If you’re using homemade whipped cream, make sure it’s stiff enough to hold its shape. Soft whipped cream will make the mixture too loose.
Step 3: Crush the Oreos
Take the entire package of Oreos (cream filling and all) and crush them into fine crumbs. If you’re using a food processor, pulse about 10-12 times until you get a texture that looks like dark soil. You want some slightly larger pieces for texture, but no big chunks. If you’re using a zip-top bag, put about 8 cookies at a time in the bag, seal it tight, and go to town with a rolling pin. This takes about 3-4 minutes per batch. I usually do this while the pudding is setting up to save time. Set aside about 1/4 cup of the crushed cookies for the final topping.
Step 4: Prepare the Tombstones
Take your Milano cookies or rectangular cookies and use the black decorating gel to write “RIP” or other spooky messages on them. You can also draw little ghosts, bats, or pumpkins. Let them sit for a few minutes so the gel sets a little. If you’re making these with kids, this is the fun part. Let them go wild with the decorating. I’ve seen some creative ones over the years, including “BOO” and “DEAD” and one that just had a frowny face.
Step 5: Layer the Cups
Now comes the assembly. Take your clear plastic cups and start layering. Start with about 2 tablespoons of crushed Oreos at the bottom of each cup. Press it down gently with the back of a spoon so it forms a solid base. Next, add about 3 tablespoons of the pudding mixture. Spread it evenly with a small spatula or the back of a spoon. Add another layer of crushed Oreos (about 1 tablespoon), then another layer of pudding. You want to end with a pudding layer on top. The goal is to create distinct stripes of dark “dirt” and creamy chocolate pudding that you can see through the clear cup.
Step 6: Add the “Dirt” Topping
Sprinkle the reserved crushed Oreos over the top of each cup. You want a generous, even layer that completely covers the pudding. This is the “dirt” that the gummy worms will poke out of. Use about 1-2 teaspoons per cup, depending on the size.
Step 7: Decorate with Worms and Tombstones
Take a gummy worm and gently push it into the top of the cup so it looks like it’s crawling out of the dirt. You can position it halfway in, with the head poking out, or have it fully emerged and slithering across the top. Place one or two candy pumpkins or pieces of candy corn next to the worm. Finally, stick the decorated Milano cookie tombstone into the pudding at an angle, like a real graveyard marker. Repeat for all cups.
Step 8: Chill and Set
Place the cups in the refrigerator for at least 2 hours. This allows the pudding to fully set and the flavors to meld together. If you’re making these for a party the next day, they actually taste better after sitting overnight. The cookies soften just a little, and the pudding gets even creamier. Just don’t add the gummy worms and tombstones until about an hour before serving. If you add them too early, the worms can get a bit soggy from the moisture.
Sensory Cues
When you’re layering, the pudding should be thick enough that it doesn’t immediately run into the cookie layer. If it’s too thin, let it sit for another 5-10 minutes. The crushed Oreos should smell deeply chocolatey with that familiar vanilla cream note. When you bite into the finished cup, you should get a satisfying crunch from the cookie layer, followed by the smooth, creamy pudding, and then the chewy gummy worm. It’s a textural party in your mouth.
Cooking Tips & Techniques
After making these Easy Halloween Graveyard Pudding Cups more times than I can count, I’ve picked up a few tricks that make the process smoother and the results better. Let me share some of the lessons I learned the hard way.
The Cookie Crushing Mistake
The first time I made these, I crushed the Oreos into a fine powder. It looked like cocoa powder, not dirt. The problem was that the fine powder absorbed moisture from the pudding and turned into a paste. Not the look I was going for. You want the crumbs to be about the size of coarse sand. Some slightly larger pieces are fine, even desirable. They add texture and look more like real soil. Pulse your food processor in short bursts, or crush by hand with a rolling pin so you have more control.
Pudding Consistency
Instant pudding is finicky about milk temperature. Use cold milk straight from the fridge. If the milk is even slightly warm, the pudding won’t set up properly. I learned this when I was rushing and used milk that had been sitting out. The pudding was runny for hours. Also, don’t over-whisk. Two minutes is plenty. Over-mixing can break down the pudding and make it grainy.
Layering Order Matters
I’ve tried different layering orders over the years, and the cookie-pudding-cookie-pudding-cookie pattern works best. Starting with a cookie base prevents the pudding from making the bottom of the cup soggy. Ending with pudding on top gives the final “dirt” layer something to stick to. If you put the dirt directly on the second cookie layer, it just slides off when you add the decorations.
Timing Your Assembly
These cups come together fastest when you prep everything before you start assembling. Crush all the cookies, write all the tombstones, and have your worms and pumpkins ready to go. Once you start layering, you want to work quickly so the pudding doesn’t start setting in the bowl. I usually set up a little assembly line on my counter with all the components within reach. It makes the process feel less chaotic, especially if you’re making a big batch.
Multitasking Strategy
While the pudding is setting up after whisking, that’s the perfect time to crush your cookies and prepare the tombstones. You can also line up all your cups on a baking sheet so they’re easy to move to the fridge once assembled. The baking sheet trick is a lifesaver if your fridge shelves aren’t perfectly level.
Consistency Tip
If you want perfectly even layers, use a small cookie scoop or measuring spoon for the pudding. Eyeballing it works fine for a casual batch, but if you’re making these for a party and want them to look uniform, measure it out. I use a 2-tablespoon scoop for the cookie layers and a 3-tablespoon scoop for the pudding layers. It takes an extra minute but the results are worth it.
Variations & Adaptations
One of the best things about these Easy Halloween Graveyard Pudding Cups is how easy they are to customize. Here are some variations I’ve tried and loved.
Ghostly White Pudding Version
Swap the chocolate pudding for vanilla or white chocolate pudding. Use golden Oreos or crushed vanilla wafers for the “dirt.” Add ghost-shaped marshmallows or meringue cookies on top. This version looks like a snowy graveyard and is perfect if you have someone who doesn’t love chocolate. I made this for a friend’s Halloween party last year, and it was surprisingly popular.
Peanut Butter Cup Graveyard
Use chocolate pudding and crush peanut butter cookies instead of Oreos. Add mini peanut butter cups as decorations alongside the gummy worms. The salty-sweet combo is incredible. Just be aware of peanut allergies if you’re serving these at a school event. I usually make a separate batch for my son’s classroom with sunflower seed butter cups instead.
Vegan and Dairy-Free Option
Use dairy-free chocolate pudding mix (check the label, many brands are accidentally vegan), oat milk or almond milk for the liquid, and a coconut-based whipped topping. Crush vegan chocolate sandwich cookies. Most gummy worms are gelatin-free these days, but check the package to be sure. I’ve tested this version with oat milk and it works beautifully. The texture is slightly less creamy but still delicious.
Spider Web Graveyard
Add a spider web design on top of the “dirt” layer using white decorating gel or melted white chocolate. Draw a spiral starting from the center, then drag a toothpick outward from the center to create the web effect. Place a plastic spider ring or a chocolate spider on top. This is my daughter’s favorite variation.
Mini Shot Glass Version
For adult Halloween parties, make these in 2-ounce shot glasses. Use mini cookies for tombstones and tiny gummy worms. They’re perfect for a spooky dessert table and look adorable. I served these at a Halloween cocktail party last year and they were gone in minutes.
Gluten-Free Adaptation
Use gluten-free chocolate sandwich cookies (I like the Kinnikinnick brand) and ensure your pudding mix is gluten-free. Most instant pudding mixes are gluten-free, but always double-check the label. The rest of the ingredients are naturally gluten-free. I’ve made this version for a friend with celiac disease and she said it was the best Halloween dessert she’d had in years.
Serving & Storage Suggestions
These Easy Halloween Graveyard Pudding Cups are best served chilled, straight from the fridge. The cold temperature keeps the pudding firm and the cookies crunchy. Here’s how to serve and store them for the best experience.
Serving Temperature
Serve these cups cold. If they sit out at room temperature for more than 30 minutes, the cookies start to soften and the pudding can get runny. If you’re serving them at a party, keep them on a tray with ice packs underneath or set them out just before guests arrive. For a classroom party, transport them in a cooler and set them out right before the treat time.
Presentation Ideas
Arrange the cups on a black or orange platter for maximum Halloween effect. You can scatter extra gummy worms and candy pumpkins around the base of the cups for a more dramatic display. Add a few fake spider webs or plastic spiders to the platter for an extra spooky touch. I like to put a small sign next to the platter that says “Enter the Graveyard” with a spooky font.
Complementary Dishes and Beverages
These cups pair beautifully with a warm drink like our cozy warm vanilla milk sleep drink with cinnamon and honey. The contrast between the cold, creamy pudding and the warm, spiced milk is perfect for a cozy Halloween night. If you’re serving these at a party, consider adding some crispy fried Oreo funnel cake hybrid treats for a full Oreo-themed dessert table. For a savory option to balance the sweetness, our classic chicken pot pie recipe makes a great pre-dessert dinner. And if you want another no-bake option alongside these cups, the classic homemade banana pudding recipe is always a crowd-pleaser.
Storage Instructions
Store the cups in the refrigerator, covered with plastic wrap or a lid. They’ll keep for up to 3 days. The texture changes slightly over time—the cookies soften and the pudding firms up—but they’re still delicious. I actually prefer them on day two, when the flavors have had time to meld together. Don’t freeze these cups. The pudding gets icy and the texture becomes grainy when thawed.
Reheating
These are a cold dessert, so no reheating needed. If you’ve stored them and the pudding seems too firm, let them sit at room temperature for about 10 minutes before serving. That should bring them back to the perfect creamy consistency.
Flavor Development Over Time
The chocolate flavor deepens as the cups sit. The Oreo crumbs absorb some moisture from the pudding, creating a cake-like texture in the cookie layers. It’s a different experience from the freshly assembled cups, but equally delicious. If you’re making these for a party, I recommend making them the night before for the best flavor.
Nutritional Information & Benefits
Let’s be real—these Easy Halloween Graveyard Pudding Cups are a treat, not a health food. But here’s the estimated nutritional breakdown per serving (based on 12 cups).
Estimated Nutritional Values (per cup)
- Calories: 320-350
- Total Fat: 14g
- Saturated Fat: 7g
- Cholesterol: 15mg
- Sodium: 380mg
- Total Carbohydrates: 48g
- Dietary Fiber: 2g
- Sugars: 34g
- Protein: 5g
Health Benefits of Key Ingredients
Believe it or not, there are a few redeeming qualities here. The milk provides calcium and vitamin D, which are important for bone health. The cocoa in the chocolate pudding contains antioxidants called flavonoids, which can support heart health in small amounts. The Oreos have a bit of iron from the enriched flour. And the gummy worms? Well, they’re made of gelatin, which is a source of protein. It’s not much, but it’s something.
Dietary Considerations
These cups are not gluten-free unless you use gluten-free cookies and pudding. They contain dairy from the milk and Cool Whip. They’re nut-free if you use standard ingredients, but always check labels for cross-contamination warnings. The gummy worms may contain gelatin, so they’re not vegetarian or vegan unless you use plant-based gummy worms.
Allergen Information
Contains: milk, wheat, soy (from the Oreos). May contain traces of peanuts and tree nuts depending on the specific brands you use. Always read labels carefully, especially if you’re serving these to people with allergies.
Personal Wellness Perspective
I believe in balance. These cups are a once-in-a-while treat for special occasions. They’re not meant to be an everyday dessert. But when Halloween rolls around, I don’t stress about the sugar content. I focus on the joy of making something fun with my kids and watching their faces light up when they see the gummy worms crawling out of the dirt. That’s the real nutrition here—the kind that feeds the soul.
Conclusion
These Easy Halloween Graveyard Pudding Cups have become a staple in my house for a reason. They’re simple, they’re fun, and they deliver every single time. Whether you’re making them for a classroom party, a Halloween gathering, or just a cozy night in with the kids, they never disappoint. The best part is how customizable they are. You can make them as simple or as elaborate as you want. Add more worms, switch up the cookie type, or go wild with the decorations. There’s no wrong way to do it.
What I love most about this recipe is the reaction it gets. People see the layers of dirt and pudding, the gummy worms poking out, the little tombstones, and they can’t help but smile. It’s Halloween magic in a cup. And the fact that it takes less than 20 minutes to put together? That’s the kind of win I need in my life, especially during the chaos of October.
I’d love to hear how yours turn out. Drop a comment below and tell me what decorations you used, or share a photo of your graveyard cups. Did your kids help you make them? Did you try a fun variation? Let me know! And if you’re looking for more Halloween dessert ideas, check out our perfect rainbow birthday cake recipe for a colorful twist, or our classic homemade peanut butter cookies for a simple treat that never goes out of style.
Happy Halloween, and happy eating!
Frequently Asked Questions
Can I make these graveyard pudding cups ahead of time?
Yes! You can assemble the cups up to 2 days in advance. Just wait to add the gummy worms and tombstones until about an hour before serving so they don’t get soggy. The pudding actually tastes better after sitting overnight because the flavors have time to meld together.
What can I use instead of Milano cookies for tombstones?
Any rectangular cookie works. Graham crackers cut in half, shortbread fingers, or even store-bought wafer cookies are great alternatives. You can also use pretzel rods or candy melts shaped into rectangles. Just make sure they’re sturdy enough to stand up in the pudding without falling over.
How do I keep the gummy worms from getting soggy?
Add the gummy worms just before serving. If you need to prep ahead, store the worms separately and add them right before you set out the cups. You can also use dried fruit worms or sour gummy strips, which hold up better against moisture.
Can I use homemade pudding instead of instant?
I don’t recommend it. Homemade pudding is thinner and won’t set up firmly enough to hold the layers. Instant pudding is formulated to set quickly and hold its shape, which is exactly what you need for these cups. If you really want to use homemade, cook it until it’s very thick and let it chill for at least 4 hours before assembling.
How many cups does this recipe make?
This recipe makes 12 standard 5-7 ounce cups. If you’re using smaller cups (like shot glasses for a party), you can get 20-24 servings. If you’re using larger cups, you’ll get about 8-10. The layering amounts are adjustable, so feel free to scale up or down based on your needs.
Pin This Recipe!
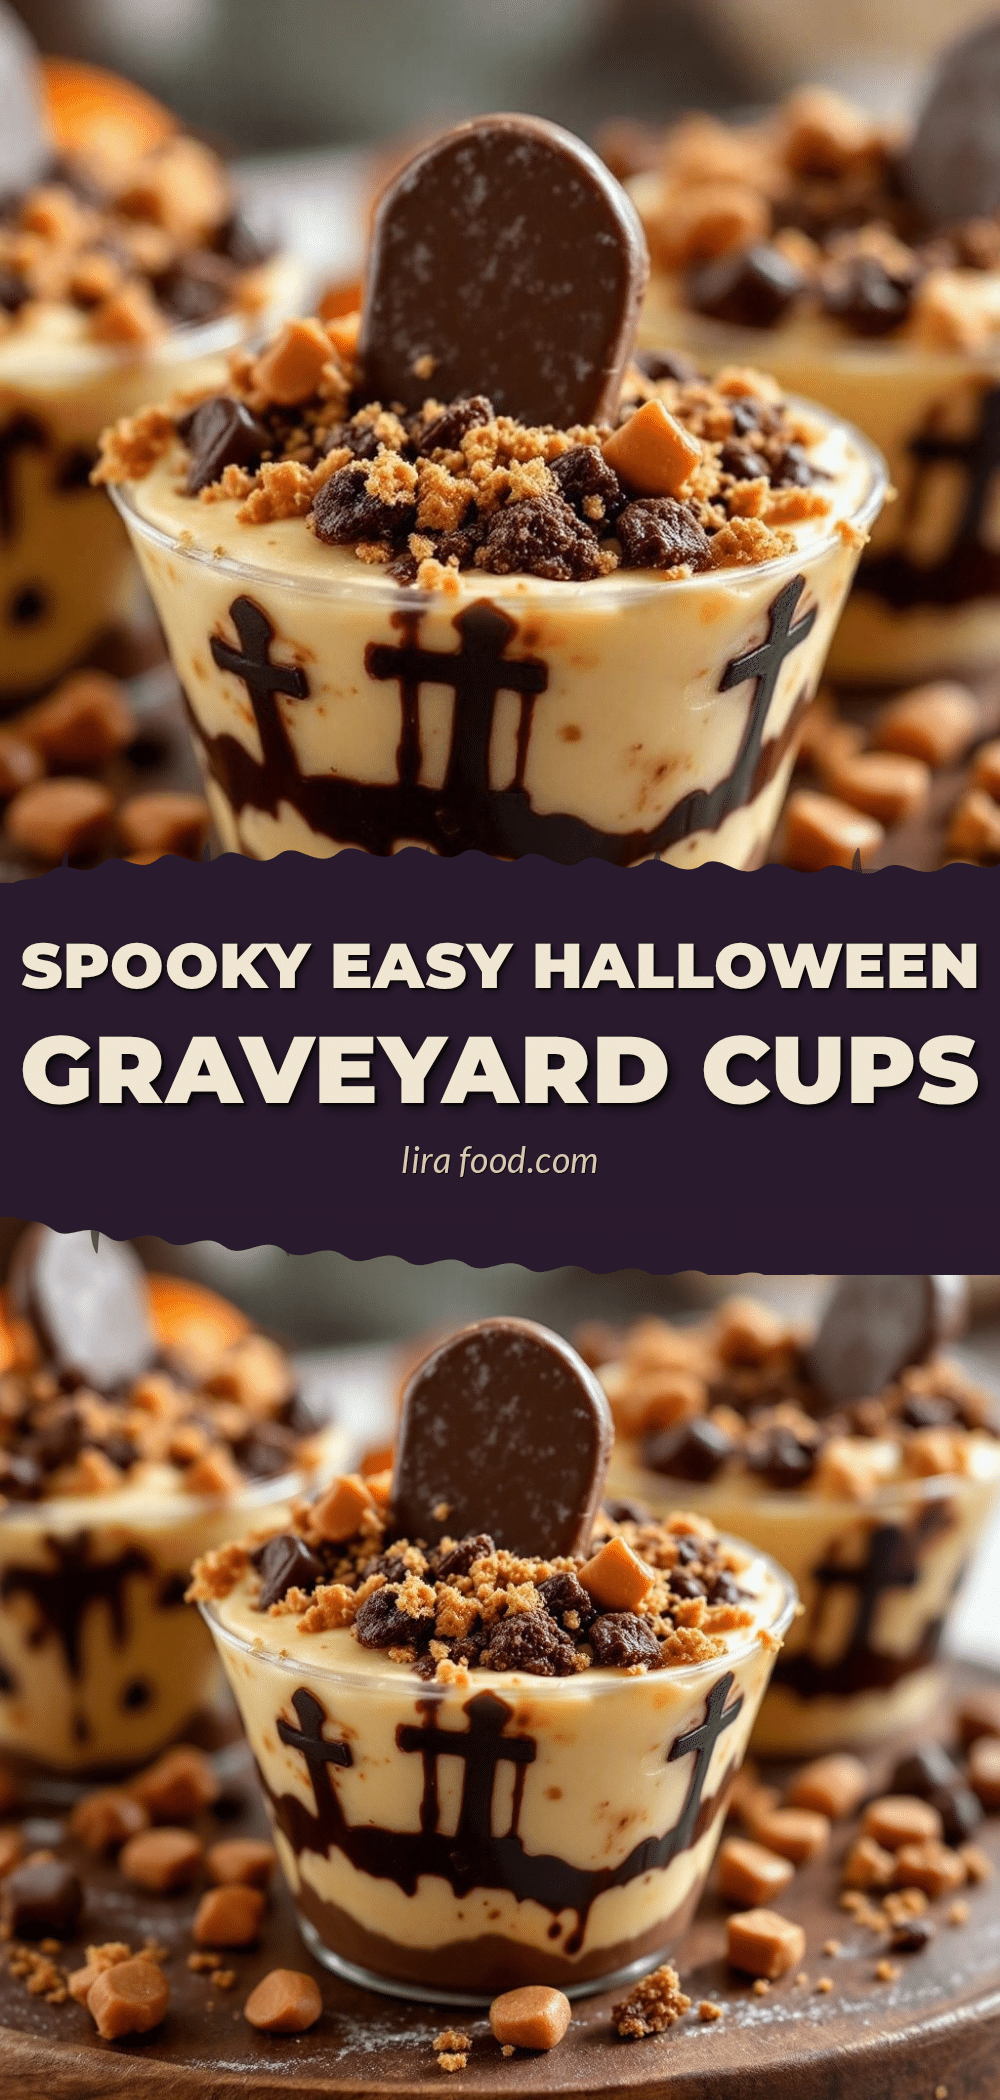
Easy Halloween Graveyard Pudding Cups: A Spooky Dessert
These no-bake Halloween graveyard pudding cups are a spooky and fun dessert made with layers of chocolate pudding, crushed Oreos, gummy worms, and cookie tombstones. Perfect for parties and easy to customize.
- Prep Time: 15 minutes
- Cook Time: 0 minutes
- Total Time: 2 hours 15 minutes (includes chilling)
- Yield: 12 servings 1x
- Category: Dessert
- Cuisine: American
Ingredients
- 2 (3.9 oz) boxes instant chocolate pudding mix
- 3 cups cold whole milk
- 1 (14.3 oz) package Oreo cookies
- 1 (8 oz) tub Cool Whip, thawed
- 12–15 gummy worms
- 12–15 candy pumpkins or candy corn
- 5–6 Milano cookies or rectangular cookies
- Black decorating gel or black icing pen
- 12 small clear plastic cups (5–7 oz size)
Instructions
- In a large mixing bowl, whisk together the two boxes of instant chocolate pudding mix and 3 cups of cold whole milk. Whisk vigorously for about 2 minutes until the mixture thickens. Let it sit for 5 minutes to fully set up.
- Once the pudding has set, add the entire tub of thawed Cool Whip. Gently fold it into the pudding using a rubber spatula until no white streaks remain.
- Crush the entire package of Oreos (cream filling and all) into fine crumbs using a food processor or a zip-top bag and rolling pin. Set aside about 1/4 cup of the crushed cookies for the final topping.
- Take the Milano cookies or rectangular cookies and use the black decorating gel to write ‘RIP’ or other spooky messages on them. Let them sit for a few minutes so the gel sets.
- Layer the cups: Start with about 2 tablespoons of crushed Oreos at the bottom of each cup. Press down gently. Add about 3 tablespoons of the pudding mixture. Add another layer of crushed Oreos (about 1 tablespoon), then another layer of pudding. End with a pudding layer on top.
- Sprinkle the reserved crushed Oreos over the top of each cup to create a ‘dirt’ layer.
- Gently push a gummy worm into the top of each cup so it looks like it’s crawling out of the dirt. Place one or two candy pumpkins or pieces of candy corn next to the worm. Stick a decorated Milano cookie tombstone into the pudding at an angle.
- Place the cups in the refrigerator for at least 2 hours to set. For best results, add gummy worms and tombstones about an hour before serving.
Notes
For best results, use cold whole milk and instant pudding mix. Add gummy worms and tombstones just before serving to prevent sogginess. The cups can be made up to 2 days ahead, but decorations should be added later. For a gluten-free version, use gluten-free chocolate sandwich cookies and gluten-free pudding mix. For a dairy-free version, use oat milk, dairy-free pudding mix, and dairy-free whipped topping.
Nutrition
- Serving Size: 1 cup
- Calories: 335
- Sugar: 34
- Sodium: 380
- Fat: 14
- Saturated Fat: 7
- Carbohydrates: 48
- Fiber: 2
- Protein: 5
Keywords: Halloween dessert, graveyard pudding cups, no-bake dessert, chocolate pudding, Oreo dessert, spooky treat, easy Halloween recipe


