Love this? Save it for later!
Share the inspiration with your friends
My brother-in-law Mike did not trust my Philly cheesesteak sliders. Not even a little bit. This is a man who once drove forty minutes to a specific gas station outside of Scranton because he swore they had the only real cheesesteak within a hundred miles. So when I told him I was making sliders for our family tailgate before the big game, he just sort of grunted and said, “Sure, Jen. Sliders.” Like I was bringing store-bought pigs in a blanket.
Here’s the thing—Mike had a point. Most sliders are dry. The bread gets soggy, the meat turns gray, and the cheese never really melts right. It’s a sad little sandwich situation. But I had been working on something. I’d spent a few weekends testing, failing, and testing again. The first batch was too greasy. The second batch had bread that fell apart. The third batch? Well, the third batch was the one I brought to that tailgate.
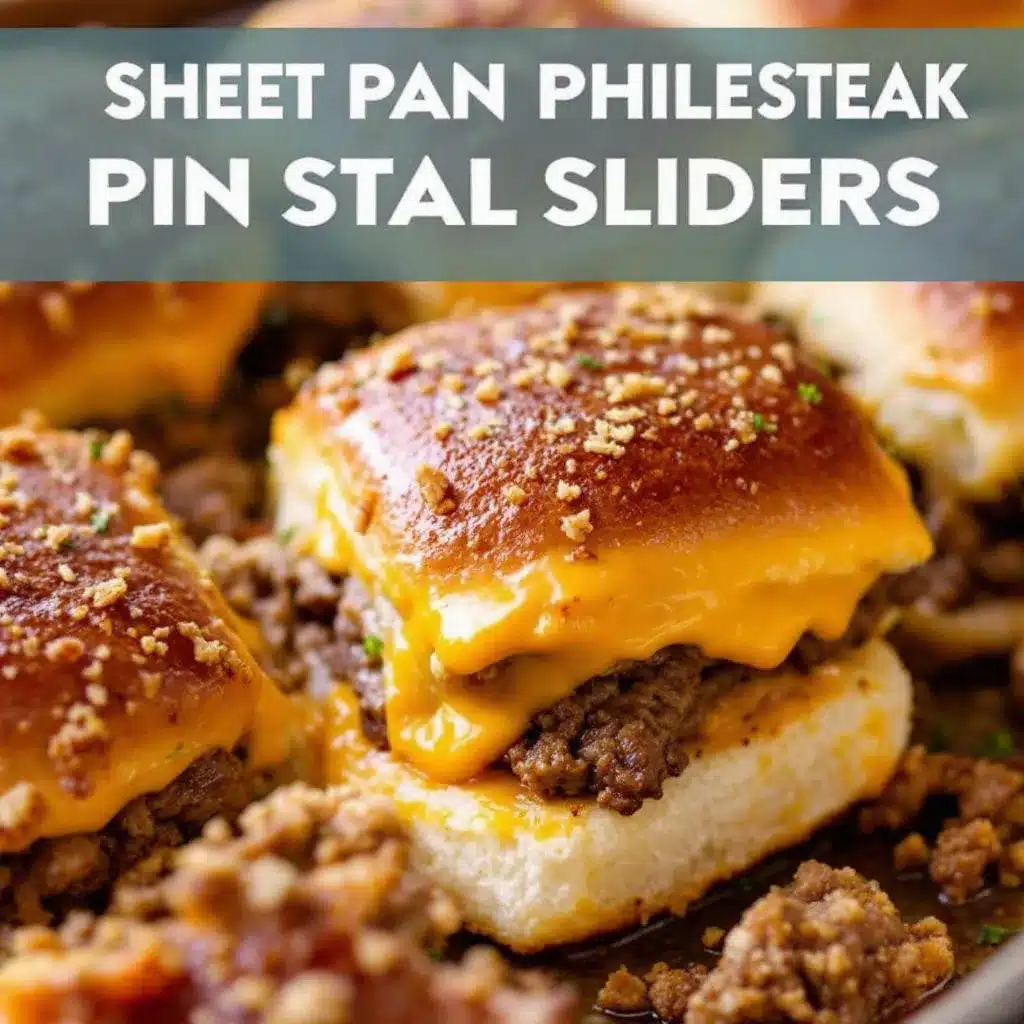
Mike took one bite. Then he took another. Then he looked at me with this weird expression—half confusion, half respect—and said, “Okay, these are actually good.” From Mike, that’s basically a standing ovation. Honestly, I think he ate six of them before kickoff. These Best Philly Cheesesteak Sliders aren’t just good for sliders. They’re good, period. The secret is in the meat, the bread, and a little trick with the cheese that I figured out by accident one Tuesday night when I was too lazy to do things the right way. Sometimes lazy works.
Why You’ll Love This Recipe
I’ve tested this recipe at four different tailgates now, plus a Super Bowl party and a random Tuesday dinner when I needed comfort food fast. Every single time, people asked for the recipe. That’s not me bragging—that’s just the truth. These sliders have a way of disappearing before you even sit down.
- Ready in under 30 minutes : From start to finish, you can have these on the table in about half an hour. That’s faster than ordering pizza, and trust me, it tastes way better.
- Simple ingredients you already know : Nothing fancy here. Steak, cheese, peppers, onions, and slider buns. You might need to grab a specific cut of beef, but everything else is probably in your kitchen right now.
- Perfect for game day : These hold up well in a slow cooker or on a warming tray. They don’t get sad and soggy like regular sandwiches. I’ve kept them warm for over an hour at a tailgate, and they were still fantastic.
- Crowd-pleaser guaranteed : My picky nephew ate three. My vegetarian sister-in-law ate two (she picked out the meat and admitted the bread and cheese were worth it). Even Mike approved, and that man has opinions about cheesesteaks.
- Next-level flavor without the fuss : The trick is caramelizing the onions and peppers just right, and using a cheese sauce that actually coats the meat instead of sliding off. No fancy techniques, just good cooking.
What makes these different from every other slider recipe online? It’s the way the cheese works with the meat. Most recipes use provolone slices that never really melt into the sandwich. I use a combination that gives you that gooey, stretchy, Philly-style cheese experience without needing a cheese whiz can. Plus, I figured out how to keep the bread from getting soggy, which is honestly the biggest problem with most sliders. These stay firm, toasty, and delicious right down to the last bite.
This is the kind of recipe that makes you look like a hero at a party. You walk in with a tray of these, and suddenly everyone wants to be your friend. I’m not saying these sliders will change your life, but I’m also not saying they won’t.
What Ingredients You Will Need
This recipe uses straightforward ingredients, but a few specific choices make a big difference. I’ve learned through trial and error which cuts of meat work best and which cheese combinations actually deliver that authentic Philly feel. Here’s what you need:
For the Meat
- 1 ½ pounds ribeye steak , thinly sliced (ask your butcher to slice it for cheesesteaks, or pop it in the freezer for 30 minutes and slice it yourself—much easier)
- 1 tablespoon olive oil , for cooking the meat
- 1 teaspoon kosher salt
- ½ teaspoon black pepper
- ½ teaspoon garlic powder
For the Vegetables
- 1 large yellow onion , thinly sliced (about 2 cups)
- 1 large green bell pepper , thinly sliced (about 1 ½ cups)
- 2 tablespoons unsalted butter
- Pinch of salt
For the Cheese Sauce
- 8 ounces provolone cheese , shredded (buy it in a block and shred it yourself—the pre-shredded stuff doesn’t melt as smoothly)
- 4 ounces cream cheese , softened to room temperature
- ¼ cup whole milk (or heavy cream for extra richness)
- 1 tablespoon unsalted butter
For the Sliders
- 12 slider buns (I prefer Hawaiian sweet rolls for the slight sweetness, but regular brioche buns work great too)
- 2 tablespoons melted butter , for brushing the tops
- 1 teaspoon sesame seeds (optional, but they look nice)
- ½ teaspoon garlic salt , for sprinkling on top
I recommend getting ribeye from a trusted butcher if you can. The marbling in ribeye gives you that rich, beefy flavor that makes Philly cheesesteaks famous. If ribeye isn’t available or is too pricey, sirloin works in a pinch—just make sure it’s sliced very thin. For the cheese, I’ve tested this with just provolone, and it’s fine, but adding cream cheese to the sauce gives it that extra creamy, melty texture that makes these sliders special. You can use whole milk or heavy cream depending on how indulgent you want to get. Heavy cream makes it richer, but whole milk works perfectly well.
For the buns, Hawaiian sweet rolls are my go-to. The slight sweetness balances the savory meat and cheese beautifully. If you’re gluten-free, use your favorite gluten-free slider buns—just watch the baking time, as they tend to dry out faster.
Equipment Needed
You don’t need a lot of fancy equipment for these sliders, which is part of why I love making them. Here’s what you’ll need:
- Large cast-iron skillet or heavy-bottomed pan : Cast iron holds heat beautifully and gives you that nice sear on the meat. If you don’t have cast iron, a stainless steel pan works fine—just make sure it’s preheated properly.
- Sharp chef’s knife : For slicing the meat, onions, and peppers. A dull knife makes this job much harder than it needs to be.
- Cutting board : Preferably a large one so you have room to work.
- Small saucepan : For the cheese sauce. A nonstick one makes cleanup easier.
- 9×13 baking dish : For assembling and baking the sliders. Glass or ceramic both work.
- Pastry brush : For brushing the melted butter on top of the buns. A silicone brush is easiest to clean.
- Aluminum foil : For covering the sliders while they bake, so the tops don’t burn.
If you don’t have a cast-iron skillet, don’t stress. I’ve made these in a regular nonstick pan, and they turned out great. The key is getting the pan hot enough to sear the meat, not boil it. A good instant-read thermometer is helpful for checking the internal temperature of the sliders, but honestly, I just go by look and feel now. When the cheese is bubbly and the tops are golden, they’re ready.
Preparation Method
Let me walk you through this step by step. I’ve made these so many times that I’ve got the rhythm down, and I’ll share all the little tricks I’ve picked up along the way.
Step 1: Prep the Meat
If your butcher hasn’t sliced the ribeye for you, pop the steak in the freezer for about 30 minutes. This firms it up just enough that you can slice it really thin—think paper-thin, like for a stir-fry. Once it’s sliced, season it with the salt, pepper, and garlic powder. Toss it around so every piece gets coated. Set it aside while you work on the vegetables.
Step 2: Caramelize the Onions and Peppers
Heat your large skillet over medium heat and add the 2 tablespoons of butter. Once it’s melted and bubbly, toss in the sliced onions and peppers. Add a pinch of salt—this helps draw out the moisture and speeds up the caramelization. Cook them for about 8 to 10 minutes, stirring occasionally. You want them soft and golden, with some brown bits starting to form. Don’t rush this part. The sweetness from properly caramelized onions is what makes these sliders sing. Once they’re done, transfer them to a bowl and cover to keep warm.
Step 3: Cook the Meat
In the same skillet (don’t wipe it out—all that flavor is gold), turn the heat up to high. Add the olive oil and let it get hot, about 30 seconds. Spread the sliced ribeye in a single layer. Let it cook undisturbed for about 1 minute—you want a good sear. Then stir it around and cook for another 1 to 2 minutes, until the meat is browned but still juicy. Don’t overcook it. The meat will continue cooking slightly when you bake the sliders, so err on the side of underdone. Remove the meat from the pan and set it aside with the vegetables.
Step 4: Make the Cheese Sauce
In a small saucepan over low heat, melt 1 tablespoon of butter. Add the cream cheese and stir until it’s soft and starting to melt. Slowly pour in the milk while stirring constantly. Add the shredded provolone a handful at a time, stirring after each addition until it’s fully melted. Keep the heat low—if the sauce gets too hot, it can separate and get grainy. Once everything is smooth and creamy, remove it from the heat. Taste it and add a pinch of salt if needed. The sauce should be thick enough to coat the back of a spoon but still pourable.
Step 5: Assemble the Sliders
Preheat your oven to 350°F. Slice the entire pack of slider buns in half horizontally, keeping them connected. Place the bottom half in your 9×13 baking dish. Spread the cooked meat evenly over the buns. Top with the caramelized onions and peppers. Pour the cheese sauce over everything, making sure it gets into all the nooks and crannies. Place the top half of the buns on top.
Step 6: Brush and Bake
In a small bowl, mix the melted butter with the garlic salt. Brush this mixture generously over the tops of the buns. Sprinkle with sesame seeds if you’re using them. Cover the dish with aluminum foil and bake for 10 minutes. Then remove the foil and bake for another 5 to 7 minutes, until the tops are golden brown and the cheese is bubbly around the edges. Let them rest for 2 minutes before cutting them apart and serving. This rest time is important—it lets the cheese set slightly so the sliders hold together better.
Cooking Tips & Techniques
I learned most of what I know about these sliders through trial and error. The first time I made them, I used pre-shredded cheese and ended up with a grainy, clumpy mess. The second time, I overloaded the buns and they fell apart. Here are the lessons I paid for so you don’t have to:
Slice the meat really thin. This is non-negotiable. Thick chunks of steak don’t work in sliders. You want the meat to be almost shaved, so it melds with the cheese and fits neatly into the bun. If you can’t get your butcher to do it, freeze the steak for 30 minutes and use a very sharp knife. I’ve also used a mandoline for this, but be careful—it’s easy to slice your fingers if you’re not paying attention.
Don’t overcrowd the pan. When you cook the meat, work in batches if necessary. If you pile too much meat in the pan, it steams instead of searing, and you lose that beautiful browned flavor. I usually cook the ribeye in two batches, giving each batch plenty of room.
Low and slow for the cheese sauce. This is the most common mistake I see. People crank up the heat to melt the cheese faster, and it separates into a greasy mess. Keep the heat on low and stir constantly. Be patient. The sauce will come together. If it does get too thick, add a splash more milk and stir vigorously.
Toast the buns first if you have time. This is an extra step, but it makes a huge difference. Before assembling the sliders, pop the bun halves in the oven for 3 to 4 minutes at 350°F, just until they’re lightly toasted. This creates a barrier that prevents the buns from getting soggy from the meat and cheese. I don’t always do this, but when I do, the sliders are noticeably better.
Let them rest before cutting. I know it’s hard to wait, but those 2 minutes of resting time make the sliders much easier to handle. The cheese sets up just enough that the filling stays in place when you bite into it.
Variations & Adaptations
One of the best things about this recipe is how flexible it is. I’ve made different versions for different crowds, and they’ve all been hits. Here are some of my favorites:
Spicy Jalapeño Version : Add 2 sliced jalapeños to the onions and peppers while they cook. For extra heat, drizzle some sriracha or hot honey over the meat before adding the cheese sauce. My brother-in-law Mike requests this version now. He says it’s the only way to eat sliders.
Mushroom and Swiss Version : Swap the provolone and cream cheese sauce for Swiss cheese. Add 8 ounces of sliced mushrooms to the onions and peppers. This version feels a little more refined, and it’s great for a dinner party or a fancy game day spread.
Chicken Philly Version : Use thinly sliced chicken breast instead of ribeye. Season it the same way, and cook it just until it’s done. This is a lighter option that still delivers on flavor. I’ve made this for friends who don’t eat red meat, and they loved it.
Low-Carb Version : Skip the buns and serve the meat, vegetables, and cheese sauce over a bed of lettuce or in a bowl. You can also use large portobello mushroom caps as the “buns.” It’s not quite the same experience, but it scratches the itch if you’re watching your carbs.
Vegetarian Version : Replace the meat with 2 cups of sliced portobello mushrooms and 1 cup of crumbled firm tofu (seasoned with soy sauce and garlic). The mushrooms give you that meaty texture, and the tofu absorbs all the flavors beautifully. I actually prefer this version sometimes—it’s lighter but still satisfying.
I once made a breakfast version of these sliders for a morning tailgate. I scrambled some eggs, added the caramelized onions and peppers, and used the same cheese sauce. I served them on toasted English muffins. It was ridiculous and amazing.
Serving & Storage Suggestions
These sliders are best served warm, right out of the oven. The cheese is stretchy, the buns are toasty, and everything is perfectly melty. I like to arrange them on a large platter with some pickled jalapeños on the side and a bowl of extra cheese sauce for dipping. Yes, more cheese sauce. Don’t judge me.
For a tailgate, keep the sliders warm in a slow cooker on the “warm” setting. Cover them with foil or a lid to trap the steam. They’ll stay good for up to 2 hours this way. I’ve also wrapped them individually in foil and kept them in a cooler—they stay warm for about an hour.
If you have leftovers (which rarely happens in my house), store them in an airtight container in the refrigerator for up to 3 days. To reheat, pop them in a 350°F oven for about 10 minutes, or until the cheese is bubbly again. The microwave works in a pinch, but the buns will get soft. I don’t recommend freezing these sliders—the texture of the buns and cheese changes too much.
These sliders pair beautifully with a classic homemade banana pudding for dessert—the creamy sweetness balances the savory sliders perfectly. If you’re planning a full tailgate menu, I also love serving them alongside flavorful grilled corn salad for a fresh, crunchy contrast.
Nutritional Information & Benefits
Let’s be honest—these sliders are indulgence food. But here’s the thing: ribeye is a good source of protein and iron, and the onions and peppers add some vitamins and fiber. The cheese provides calcium. So there are some redeeming qualities, right?
Here are the approximate nutritional values per slider (based on 12 sliders):
- Calories : 380
- Protein : 22g
- Fat : 24g
- Carbohydrates : 18g
- Fiber : 1g
- Sugar : 6g
- Sodium : 520mg
These sliders are not gluten-free (unless you use gluten-free buns), and they contain dairy. If you’re lactose intolerant, you can use dairy-free cheese and butter substitutes, but the texture will be different. I’ve tested it with vegan cheese, and while it’s not the same, it’s still pretty good.
From a wellness perspective, I think of these sliders as a treat. They’re perfect for special occasions, game days, or when you just need some serious comfort food. I don’t make them every week, but when I do, I enjoy every single bite without guilt.
Conclusion
These Best Philly Cheesesteak Sliders have become a staple at every gathering I host. They’re the recipe that people ask for, the one that disappears fastest, the one that makes me look like I know what I’m doing in the kitchen. And honestly, it’s not complicated. It’s just good ingredients, cooked with care, and a little bit of patience.
I’d love for you to try these and make them your own. Add more peppers, use a different cheese, throw in some jalapeños—whatever feels right to you. Cooking is about making things that taste good to you, not following rules. If you make these, come back and let me know how they turned out. Did you change anything? Did your family love them? Did your brother-in-law finally admit your sliders are better than gas station cheesesteaks? (Mine did, and I’m still not over it.)
Drop a comment below or tag me in your photos. I can’t wait to see what you create. Happy cooking, and see you at the next tailgate!
Frequently Asked Questions
Can I make these sliders ahead of time?
Yes! You can assemble the sliders completely (without the butter brushing) and refrigerate them for up to 24 hours. When you’re ready to bake, brush the tops with butter and bake as directed, adding an extra 5 minutes to the covered baking time since they’ll be cold.
What’s the best cut of meat for Philly cheesesteak sliders?
Ribeye is the gold standard—it’s well-marbled, tender, and flavorful. If ribeye isn’t available, sirloin or flank steak work well, but make sure to slice them very thin against the grain. Avoid lean cuts like top round, which can be tough.
Can I use pre-shredded cheese for the sauce?
I don’t recommend it. Pre-shredded cheese contains anti-caking agents that prevent it from melting smoothly. For the creamiest, stretchiest cheese sauce, shred your own provolone from a block. It takes an extra 2 minutes and makes a huge difference.
How do I keep the sliders from getting soggy?
Toast the buns lightly before assembling, and don’t overload them with sauce. Also, make sure the meat and vegetables aren’t too wet—drain any excess liquid from the pan before adding them to the buns. The butter brushing on top also helps create a barrier.
Can I freeze these sliders?
I don’t recommend freezing them. The texture of the buns and cheese changes significantly upon thawing and reheating. They’re best made fresh or refrigerated for up to 3 days. If you have leftovers, reheat them in the oven, not the microwave.
If you enjoyed this recipe, you might also love my juicy dad’s Italian dressing chicken for another easy, crowd-pleasing option that’s perfect for cookouts and gatherings.
Pin This Recipe!
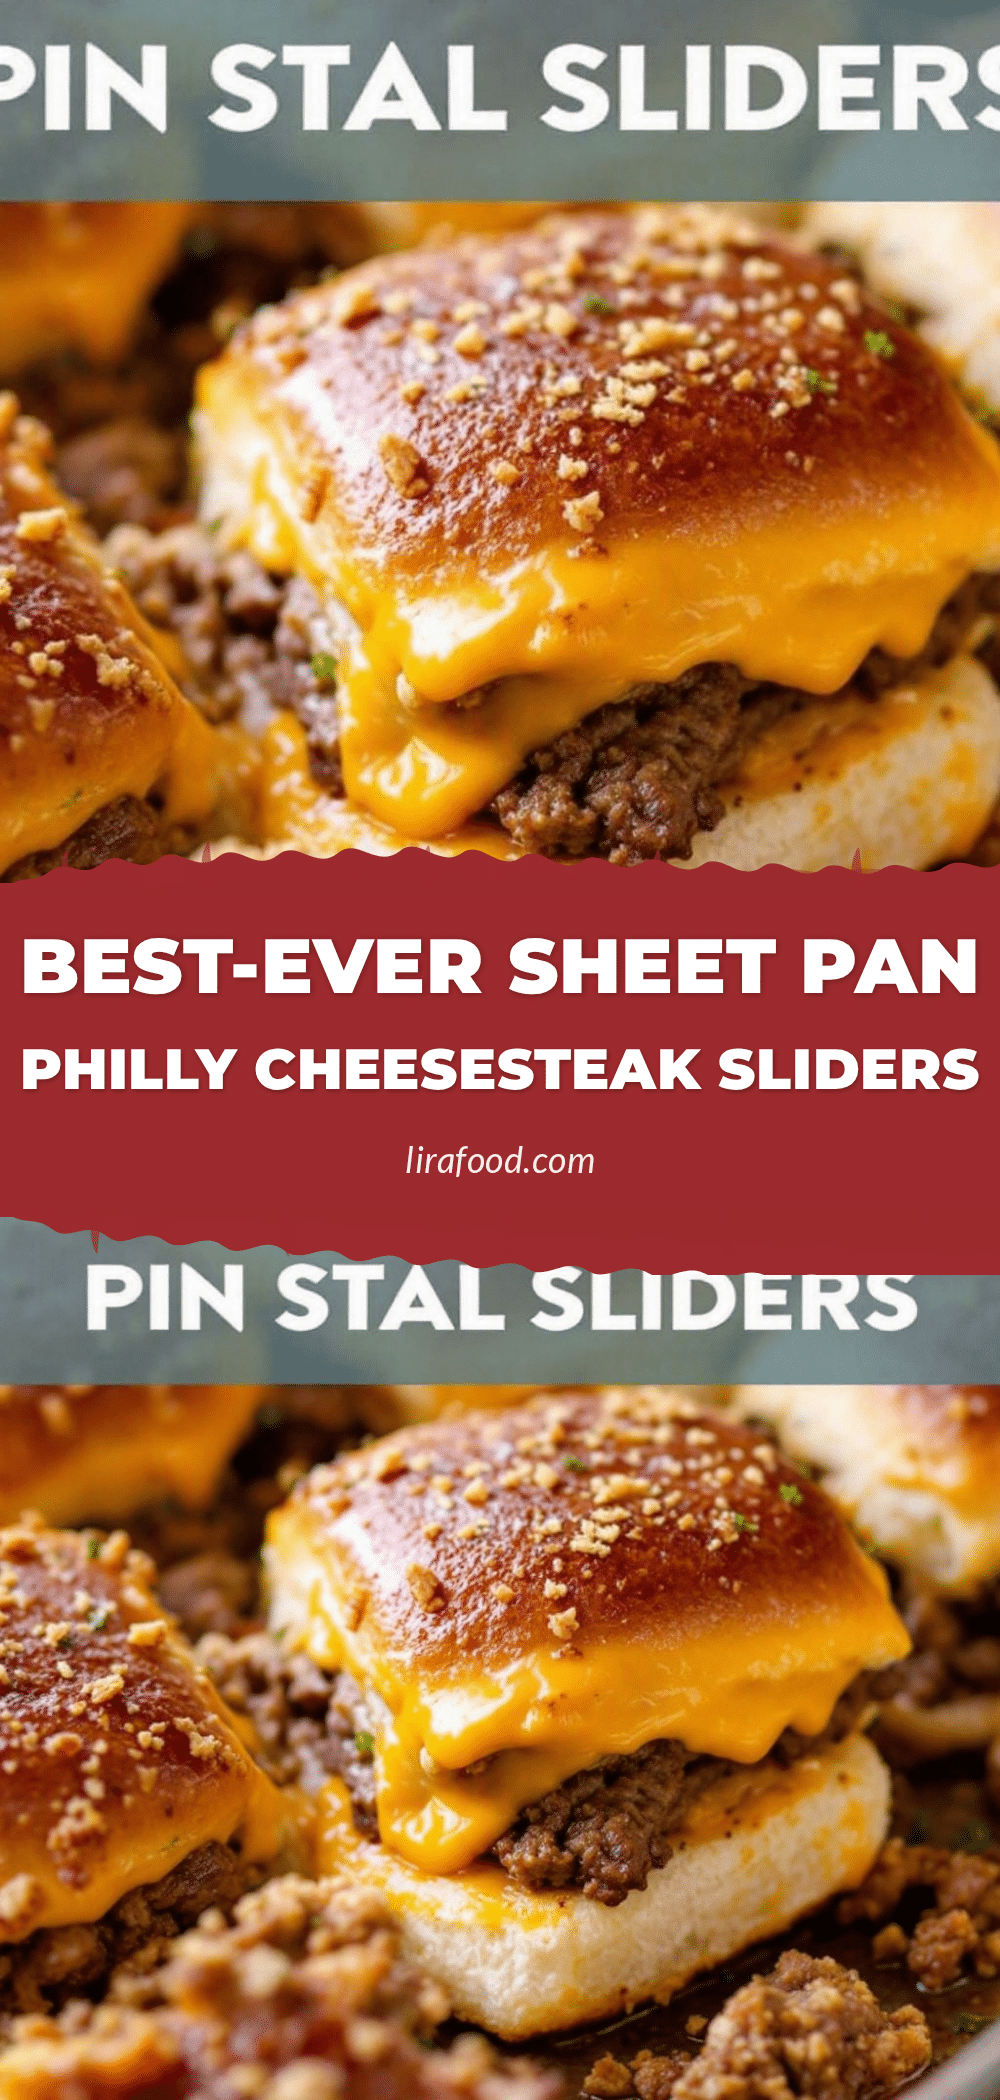
Best Philly Cheesesteak Sliders Easy Tailgate Recipe
These Best Philly Cheesesteak Sliders are ready in under 30 minutes and packed with flavor. Perfect for game day, they feature thinly sliced ribeye, caramelized onions and peppers, and a creamy cheese sauce on soft slider buns.
- Prep Time: 15 minutes
- Cook Time: 25 minutes
- Total Time: 40 minutes
- Yield: 12 sliders 1x
- Category: Main Course
- Cuisine: American
Ingredients
- 1 ½ pounds ribeye steak, thinly sliced
- 1 tablespoon olive oil
- 1 teaspoon kosher salt
- ½ teaspoon black pepper
- ½ teaspoon garlic powder
- 1 large yellow onion, thinly sliced (about 2 cups)
- 1 large green bell pepper, thinly sliced (about 1 ½ cups)
- 2 tablespoons unsalted butter
- Pinch of salt
- 8 ounces provolone cheese, shredded
- 4 ounces cream cheese, softened to room temperature
- ¼ cup whole milk (or heavy cream)
- 1 tablespoon unsalted butter
- 12 slider buns (Hawaiian sweet rolls or brioche)
- 2 tablespoons melted butter
- 1 teaspoon sesame seeds (optional)
- ½ teaspoon garlic salt
Instructions
- If your butcher hasn’t sliced the ribeye, pop the steak in the freezer for about 30 minutes to firm it up, then slice it paper-thin. Season with salt, pepper, and garlic powder. Set aside.
- Heat a large skillet over medium heat and add 2 tablespoons of butter. Add sliced onions and peppers with a pinch of salt. Cook for 8 to 10 minutes, stirring occasionally, until soft and golden. Transfer to a bowl and cover to keep warm.
- In the same skillet, turn heat to high and add olive oil. Spread the sliced ribeye in a single layer and cook undisturbed for 1 minute. Stir and cook for another 1 to 2 minutes until browned but still juicy. Remove from pan and set aside with vegetables.
- In a small saucepan over low heat, melt 1 tablespoon of butter. Add cream cheese and stir until soft. Slowly pour in milk while stirring constantly. Add shredded provolone a handful at a time, stirring until fully melted. Keep heat low to prevent separation. Remove from heat once smooth.
- Preheat oven to 350°F. Slice slider buns in half horizontally, keeping them connected. Place bottom half in a 9×13 baking dish. Spread cooked meat evenly over buns, top with caramelized onions and peppers, and pour cheese sauce over everything. Place top half of buns on top.
- Mix melted butter with garlic salt and brush generously over bun tops. Sprinkle with sesame seeds if using. Cover with aluminum foil and bake for 10 minutes. Remove foil and bake for another 5 to 7 minutes until tops are golden and cheese is bubbly. Let rest for 2 minutes before cutting and serving.
Notes
Toast the buns lightly before assembling to prevent sogginess. Let sliders rest for 2 minutes before cutting to help the cheese set. For best results, shred provolone from a block rather than using pre-shredded cheese.
Nutrition
- Serving Size: 1 slider
- Calories: 380
- Sugar: 6
- Sodium: 520
- Fat: 24
- Saturated Fat: 12
- Carbohydrates: 18
- Fiber: 1
- Protein: 22
Keywords: Philly cheesesteak sliders, tailgate recipe, game day food, slider recipe, cheesesteak sliders, easy appetizer