Love this? Save it for later!
Share the inspiration with your friends
I’d barely set the pie plate on the table when my sister-in-law reached for it with a fork. Not a slice. Just the fork. “I need to taste the filling,” she said, already scraping the edge. I’d spent maybe twenty minutes total on this thing—no oven, no fuss, just a bowl and a whisk and a bit of patience. And there she was, closing her eyes over a spoonful of spiced pumpkin cream. That’s when I knew this easy no-bake pumpkin pie with graham cracker crust was going to be a regular thing.
Honestly, I wasn’t even trying to reinvent the wheel. I just wanted pumpkin pie on a Tuesday afternoon without turning on the oven. The house was warm enough, the kids were restless, and I had a can of pumpkin staring at me from the pantry. So I grabbed some cream cheese, a box of graham crackers, and figured I’d wing it. What came out of that experiment was so good, I made it again the next week. And the week after that.
There’s something about a no-bake dessert that feels like cheating—in the best way. No worrying about cracks in the filling. No blind-baking a crust that shrinks down to nothing. Just a creamy, silky pumpkin filling that sets up firm in the fridge, cradled in a buttery graham cracker crust that crumbles perfectly with every bite. It’s the kind of recipe that makes you look like you spent hours in the kitchen when you really didn’t.
I’ve tested this one seven times now. Seven. Because I wanted to get the texture just right—not too firm, not too soft, with that unmistakable pumpkin pie spice warmth that hits you right in the nostalgia. And you know what? I think I finally nailed it.
Why You’ll Love This Recipe
Let me tell you why this easy no-bake pumpkin pie with graham cracker crust has become my go-to fall dessert. First off, it’s genuinely foolproof. I’ve made it with full-fat cream cheese and reduced-fat cream cheese, with homemade whipped cream and store-bought Cool Whip, and it works every single time. That’s the kind of reliability I need in my life.
- No Oven Required: This is the big one. You don’t need to heat up your kitchen, pre-bake a crust, or worry about over-baking the filling. Just mix, pour, and chill. It’s perfect for those warm fall days when you want pumpkin pie but don’t want to sweat over it.
- Simple Ingredients: Cream cheese, pumpkin puree, whipped topping, sugar, and pumpkin pie spice. That’s basically it. You probably have most of these in your kitchen right now. No fancy extracts or hard-to-find items.
- Make-Ahead Friendly: This pie actually gets better after a day in the fridge. The flavors meld together, the crust sets up perfectly, and you can make it a full 24 hours before serving. That’s a game-changer for holiday entertaining.
- Crowd-Pleaser: I’ve served this at Thanksgiving, at casual dinner parties, and just for a random Tuesday treat. Every single time, people ask for the recipe. Even the pumpkin pie purists in my family gave it a thumbs up.
- Perfect Texture: The filling is creamy but holds its shape. It slices cleanly. It’s not too dense, not too airy—just right. And that graham cracker crust stays wonderfully crisp because there’s no moisture from baking to soften it.
What makes this different from other no-bake pumpkin pies I’ve tried is the ratio. I spent a lot of time tweaking the amounts of cream cheese versus pumpkin, and the sweet spot is right where the tang of the cream cheese balances the earthy sweetness of the pumpkin. It’s not overly sweet, which means you can actually taste the spices. And the texture—oh, the texture. It’s like a pumpkin cheesecake mousse, but firmer. Trust me, you’ll understand when you take that first bite.
What Ingredients You Will Need
This recipe uses simple, wholesome ingredients that come together to create something truly special. The beauty of this easy no-bake pumpkin pie with graham cracker crust is that you don’t need a long list of obscure items. Here’s what you’ll need and why each one matters.
For the Graham Cracker Crust
- 1 ½ cups graham cracker crumbs (about 12 full sheets) — You can buy pre-crushed crumbs, but I prefer crushing my own. The texture is better. Just put the crackers in a zip-top bag and go at them with a rolling pin. It’s oddly satisfying.
- 6 tablespoons unsalted butter, melted — Use real butter here, not margarine. It makes a difference in flavor and how well the crust holds together. I usually use salted butter and just skip the added salt in the crust.
- 3 tablespoons granulated sugar — Just enough to sweeten the crust without making it candy-like. You could use brown sugar for a deeper flavor, but I like the clean sweetness of white sugar here.
- ¼ teaspoon salt — Only if you’re using unsalted butter. Salt balances the sweetness and brings out the toasty flavor of the graham crackers.
For the Pumpkin Filling
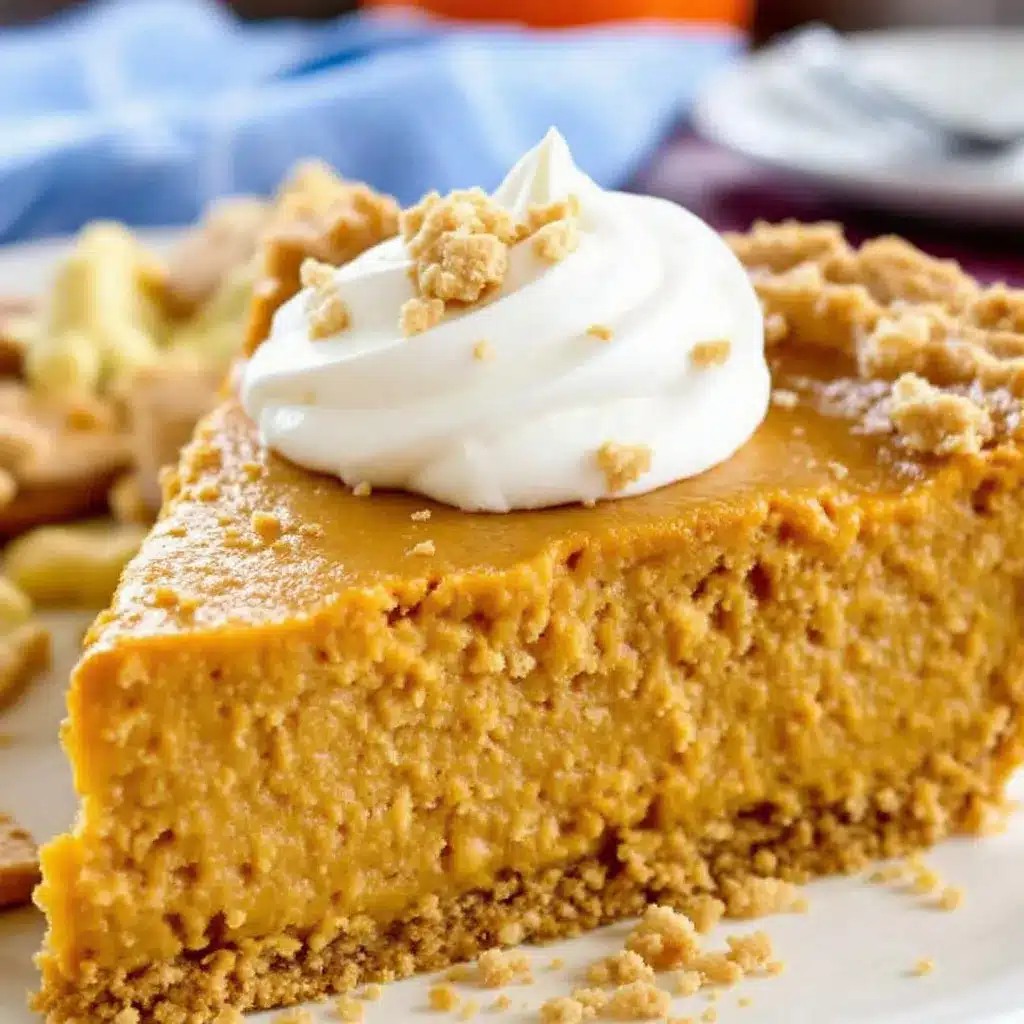
- 8 ounces cream cheese, softened — Full-fat is best for texture and stability. Let it sit on the counter for at least 30 minutes before you start. Cold cream cheese will give you lumpy filling, and nobody wants that.
- 1 cup pumpkin puree — Not pumpkin pie filling. Make sure you grab the 100% pure pumpkin. I like Libby’s brand for consistent results, but any brand works. If your pumpkin puree looks watery, pat it dry with a paper towel before using.
- ½ cup granulated sugar — This gives the filling structure and sweetness. You can reduce it to ⅓ cup if you prefer a less sweet pie.
- 1 teaspoon vanilla extract — Pure vanilla extract adds depth. The imitation stuff works in a pinch, but pure is better.
- 1 ½ teaspoons pumpkin pie spice — Store-bought is fine, but I make my own blend with cinnamon, nutmeg, ginger, and a tiny pinch of cloves. It’s fresher and you can adjust it to your taste.
- ¼ teaspoon salt — Salt is crucial here. It makes all the flavors pop and prevents the pie from tasting flat.
- 1 ½ cups whipped topping — Cool Whip works perfectly, or you can make your own stabilized whipped cream. If using homemade, make sure it’s stiff enough to hold its shape. Thaw the Cool Whip in the fridge overnight if it’s frozen.
For the Topping (Optional but Recommended)
- Additional whipped cream — For serving. I like to pipe it on in rosettes, but a dollop works just fine.
- Ground cinnamon or pumpkin pie spice — A light dusting on top makes it look pretty and adds a little extra flavor.
One thing I learned the hard way: make sure your cream cheese is truly softened. I once tried to rush it by microwaving it, and I ended up with little bits of melted cream cheese throughout the filling. Not the end of the world, but not as smooth as it should be. Room temperature is your friend here.
Equipment Needed
You don’t need a lot of fancy equipment for this easy no-bake pumpkin pie with graham cracker crust. That’s one of the things I love about it. Here’s what you’ll need:
- 9-inch pie plate — A standard glass or ceramic pie plate works great. I use a deep-dish one because I like a thick crust and plenty of filling. Metal works too, but glass lets you see if the crust is evenly pressed.
- Mixing bowls — You’ll need a medium bowl for the crust and a large bowl for the filling. Nothing special, just whatever you have on hand.
- Electric mixer — A hand mixer or stand mixer works. You can do it by hand with a whisk, but it takes some arm strength to get the cream cheese smooth. I’ve done it both ways, and the mixer is definitely easier.
- Measuring cups and spoons — For accuracy. Baking is a science, even when there’s no oven involved.
- Rubber spatula — For scraping the bowl clean and spreading the filling evenly. A good spatula is worth its weight in gold.
- Rolling pin or food processor — For crushing graham crackers. A rolling pin and a zip-top bag is the budget-friendly option. A food processor gives you more consistent crumbs in seconds.
- Plastic wrap or aluminum foil — For covering the pie while it chills. You don’t want it picking up weird flavors from the fridge.
If you don’t have a pie plate, you can use a 9-inch springform pan. The pie will be a little taller, and it’s easier to remove slices cleanly. Just make sure the pan is leak-proof. I learned that one the messy way.
Preparation Method
Let me walk you through this step by step. I promise it’s easier than it sounds, and the results are absolutely worth it.
Step 1: Make the Graham Cracker Crust
Start by crushing your graham crackers into fine crumbs. If you’re using a food processor, pulse until they’re uniform. If you’re going old-school with a rolling pin, put the crackers in a zip-top bag and crush them until no large pieces remain. You want a consistent texture so the crust holds together evenly.
In a medium bowl, combine the graham cracker crumbs, sugar, and salt. Pour the melted butter over the top and stir with a fork until all the crumbs are moistened. The mixture should look like wet sand and clump together when you squeeze it in your fist.
Press the mixture firmly into the bottom and up the sides of your pie plate. Use the bottom of a measuring cup or a flat-bottomed glass to really pack it down. Pay special attention to the edges—if they’re too thin, they’ll crumble when you cut the pie. Pop the crust in the refrigerator while you make the filling. This helps it set up and gives you a head start.
Step 2: Make the Pumpkin Filling
In a large bowl, beat the softened cream cheese with an electric mixer until it’s smooth and creamy. This usually takes about 2 minutes. Scrape down the sides of the bowl with your spatula halfway through. If there are any lumps, keep beating until they’re gone. Lumpy cream cheese means a lumpy filling.
Add the pumpkin puree, sugar, vanilla extract, pumpkin pie spice, and salt. Beat on medium speed until everything is well combined and smooth. Again, scrape the bowl to make sure there are no hidden streaks of cream cheese or pockets of spice.
Now comes the important part: fold in the whipped topping. Use your spatula and gently fold it into the pumpkin mixture until no white streaks remain. Don’t overmix or you’ll deflate the whipped topping, and the filling won’t be as light and creamy. You want it to be uniform but still airy.
Step 3: Assemble the Pie
Take your chilled crust out of the fridge. Spoon the pumpkin filling into the crust and spread it evenly with your spatula. Give the pie plate a gentle tap on the counter to release any air bubbles. Smooth the top as best you can—it doesn’t have to be perfect because you’ll likely cover it with whipped cream later.
Step 4: Chill the Pie
Cover the pie loosely with plastic wrap or aluminum foil. Refrigerate for at least 6 hours, but overnight is better. The filling needs time to set up properly. If you try to cut it too soon, it’ll be soft and messy. Trust me, I’ve been there. The patience pays off.
After the pie has chilled, it should be firm to the touch and slice cleanly. If you’re in a hurry, you can pop it in the freezer for about 3 hours, but the texture won’t be quite as creamy. The fridge method is worth the wait.
Cooking Tips & Techniques
I’ve made this easy no-bake pumpkin pie with graham cracker crust more times than I can count, and I’ve picked up a few tricks along the way. Here are the ones that make the biggest difference:
Don’t skip softening the cream cheese. This is the number one mistake people make. Cold cream cheese doesn’t blend well, and you’ll end up with lumpy filling. Let it sit on the counter for at least 30 minutes. If you’re in a rush, cut it into small cubes and let them sit for 15 minutes. That works in a pinch.
Pat your pumpkin puree dry. Pumpkin puree can be watery, especially some brands. If you notice your puree looks a little loose, spread it on a paper towel-lined plate and blot it gently. This extra step prevents a runny filling. I learned this after my first attempt came out a bit too soft.
Use a metal spatula for the crust. When pressing the graham cracker mixture into the pie plate, a metal measuring cup or spatula gives you more control than your fingers. You can get the crust even and compact without it crumbling. Plus, it’s less messy.
Chill the pie uncovered for the first hour. This helps the top set up a little before you cover it, so the plastic wrap doesn’t stick to the filling. After an hour, you can cover it without any issues. It’s a small step that saves you from a messy situation.
Taste the filling before you add the whipped topping. You can adjust the spices or sweetness at this point. Once the whipped topping is in, you can’t really change it. I always taste a tiny spoonful and add a pinch more cinnamon if it needs it. This is your chance to customize it to your liking.
Make the crust ahead of time. You can press the crust into the pie plate and refrigerate it for up to 2 days before adding the filling. This is a great time-saver if you’re planning for a holiday meal. Just wrap it tightly in plastic wrap so it doesn’t dry out.
Variations & Adaptations
One of the best things about this recipe is how easy it is to adapt. Here are some variations I’ve tried and loved:
Gluten-Free Version: Use gluten-free graham crackers or crushed gluten-free cookies. The rest of the ingredients are naturally gluten-free. I’ve used gluten-free ginger snaps before, and the spicy kick was amazing. Just make sure your pumpkin pie spice is certified gluten-free if you’re sensitive.
Dairy-Free Version: Use dairy-free cream cheese (I like Kite Hill or Miyoko’s) and a coconut-based whipped topping. The texture is slightly different—a little less firm—but the flavor is still fantastic. Chill it for the full 8 hours to make sure it sets up properly.
Spiced-Up Version: Add a pinch of cayenne pepper or an extra teaspoon of fresh ginger to the filling. The heat balances beautifully with the sweetness. I did this for a Friendsgiving once, and it was a hit. Just go easy on the cayenne—a little goes a long way.
Cookie Crust Variation: Swap the graham crackers for crushed shortbread cookies, ginger snaps, or vanilla wafers. Each one gives a different flavor profile. Ginger snaps add a warm, spicy note that pairs perfectly with the pumpkin. Shortbread makes it extra buttery.
Pumpkin Cheesecake Style: Add an extra 4 ounces of cream cheese and reduce the pumpkin puree to ¾ cup. The result is a denser, more cheesecake-like texture. It’s still no-bake, but it feels more indulgent. Serve it with a drizzle of caramel sauce for extra wow factor.
I once made this for a potluck using a chocolate cookie crust and a pinch of chili powder in the filling. People were skeptical at first, but the combination of chocolate, pumpkin, and a little heat was surprisingly good. Don’t be afraid to experiment!
Serving & Storage Suggestions
This easy no-bake pumpkin pie with graham cracker crust is best served cold, straight from the fridge. The filling should be firm but creamy, and the crust should be crisp. Here’s how to serve and store it:
Serving Temperature: Serve it chilled. If it sits out at room temperature for more than 30 minutes, the filling will start to soften. I usually take it out of the fridge about 10 minutes before serving, just to take the chill off. It’s perfect that way.
Presentation: Top each slice with a generous dollop of whipped cream and a light dusting of cinnamon or pumpkin pie spice. For a fancier look, pipe the whipped cream in rosettes using a star tip. A drizzle of caramel sauce or a sprinkle of toasted pecans adds a nice touch too.
Complementary Dishes: This pie pairs beautifully with a cup of coffee or a warm mug of spiced cider. If you’re serving it as part of a meal, it goes well with savory dishes like a Sunday pork roast with apple and sage stuffing or a classic chicken pot pie. The contrast between savory and sweet is lovely.
Storing Leftovers: Cover the pie tightly with plastic wrap or aluminum foil and store it in the refrigerator for up to 5 days. The crust will stay crisp for about 3 days, then it starts to soften a bit. It’s still delicious, just not as crunchy.
Freezing Instructions: You can freeze this pie for up to 2 months. Wrap it tightly in plastic wrap, then a layer of aluminum foil, and place it in the freezer. Thaw it in the refrigerator overnight before serving. The texture might be slightly softer after freezing, but it’s still really good. I’ve done this for holiday prep, and it works great.
How Flavors Develop: The spices actually intensify after a day or two in the fridge. The pie tastes even better on day two than it does on day one. The cinnamon and nutmeg have time to meld with the pumpkin and cream cheese. It’s one of those rare desserts that improves with age.
Nutritional Information & Benefits
While I wouldn’t call this a health food, this easy no-bake pumpkin pie with graham cracker crust does have some redeeming qualities. Here’s a rough breakdown per slice (based on 8 servings):
- Calories: Approximately 320-350 calories per slice
- Fat: 18-22 grams (mostly from cream cheese and butter)
- Carbohydrates: 35-40 grams
- Protein: 4-5 grams
- Fiber: 2-3 grams (thanks to the pumpkin)
- Sugar: 22-25 grams
Health Benefits: Pumpkin is packed with vitamin A, which is great for your eyes and immune system. It’s also a good source of fiber and antioxidants. The cream cheese provides some calcium and protein. And hey, it’s a no-bake dessert, so you’re not adding any extra heat to the kitchen—that’s a mental health benefit if you ask me.
Dietary Considerations: This recipe is vegetarian. For a gluten-free version, use gluten-free graham crackers. For a lower-sugar option, you can reduce the sugar to ⅓ cup and use a sugar-free whipped topping. The texture will be slightly different, but it still works.
Potential Allergens: This recipe contains dairy and gluten. It also contains wheat (from the graham crackers). If you have allergies, make sure to use appropriate substitutions. The dairy-free version I mentioned earlier works well for those who are lactose intolerant.
I’m not a nutritionist, and these numbers are estimates. But I do believe in balance. A slice of this pie, a good conversation, and a cozy evening—that’s a recipe for happiness right there.
Conclusion
This easy no-bake pumpkin pie with graham cracker crust has become my secret weapon for fall gatherings, holiday dinners, and those random days when I just need a little pumpkin in my life. It’s simple enough for a beginner baker but impressive enough to serve to company. And honestly, the fact that it doesn’t require turning on the oven is a game-changer.
I love this recipe because it reminds me that good food doesn’t have to be complicated. Sometimes the best things come from a bowl, a whisk, and a little bit of patience. The first time I made it, I was just trying to solve a problem—I wanted pumpkin pie without the hassle. But what I ended up with was something I genuinely look forward to making every fall.
I’d love to hear how yours turns out. Did you try any variations? Did you serve it with something special? Drop a comment below and let me know. And if you’re looking for more easy dessert ideas, check out my classic homemade banana pudding or this creamy homemade vanilla ice cream. Both are no-fuss and absolutely delicious.
Go ahead, make this pie. Your taste buds will thank you. And your oven? It’ll be happy for the break.
Frequently Asked Questions
Can I use pumpkin pie filling instead of pumpkin puree?
I wouldn’t recommend it. Pumpkin pie filling already has sugar and spices added, so it would throw off the balance of this recipe. Stick with 100% pure pumpkin puree for the best results. If you only have pumpkin pie filling on hand, reduce the sugar to ¼ cup and skip the pumpkin pie spice, but the texture might still be different.
How long does this pie need to chill?
At least 6 hours, but overnight is ideal. The filling needs time to set up properly, and the flavors develop as it sits. If you try to rush it, you’ll end up with a soft, messy pie. Trust me, the wait is worth it. For a firmer texture, you can chill it for up to 24 hours.
Can I make this pie in a different size pan?
Absolutely. You can use a 9-inch springform pan for a taller pie, or even individual ramekins for single servings. Just adjust the chilling time accordingly—smaller portions set up faster, usually in about 3-4 hours. If using a larger pan, you might need to increase the ingredient amounts slightly.
Why is my filling lumpy?
Lumpy filling usually means the cream cheese wasn’t softened enough. Make sure it’s at room temperature before you start. If you still end up with lumps, you can try beating the filling a little longer, but it won’t completely fix it. Next time, let the cream cheese sit out for at least 30 minutes, or microwave it in 10-second intervals until it’s soft.
Can I add nuts or chocolate to this pie?
Yes! Toasted pecans or walnuts make a great addition—sprinkle them on top of the filling before chilling, or fold them into the crust. You can also drizzle melted chocolate over the finished pie for a decadent touch. I’ve done a version with chopped dark chocolate folded into the filling, and it was incredible. Just be careful not to overmix if you’re adding anything chunky.
Pin This Recipe!
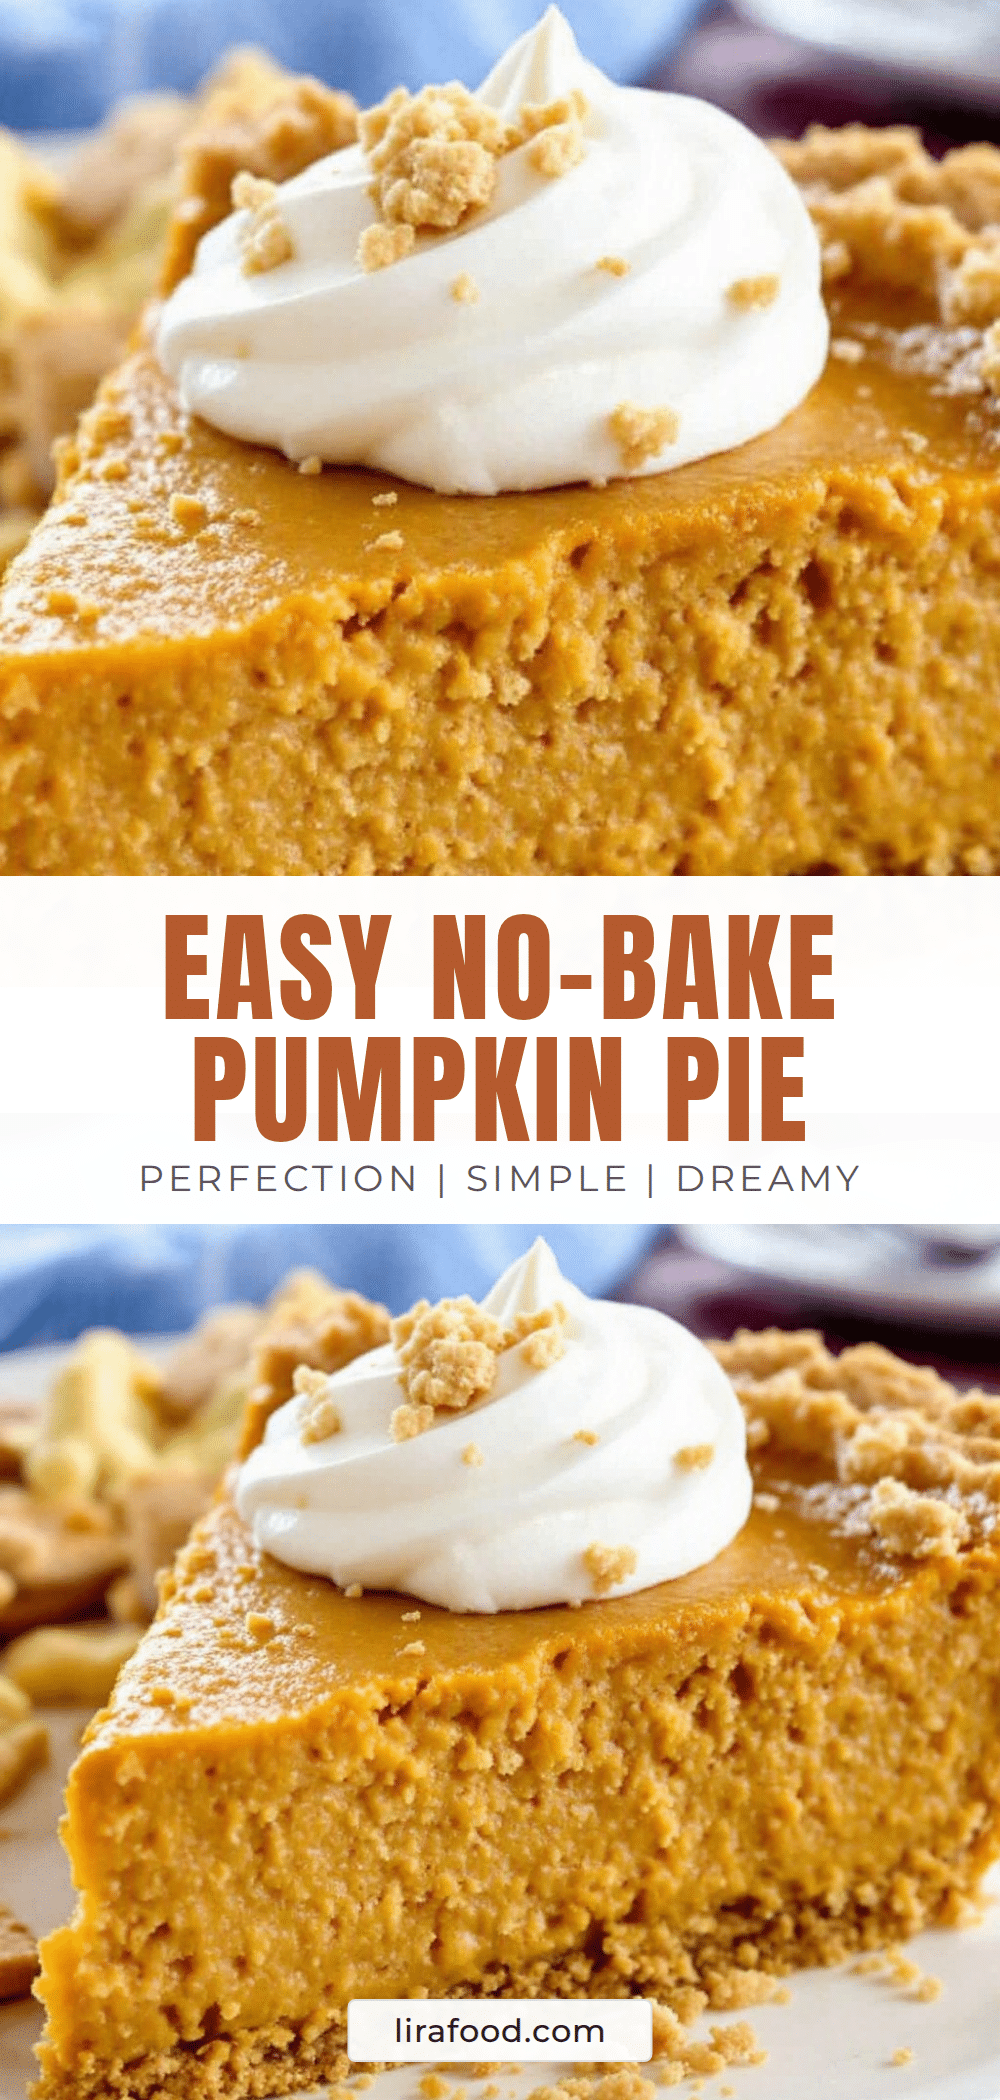
Easy No-Bake Pumpkin Pie with Perfect Graham Cracker Crust
A creamy, no-bake pumpkin pie with a buttery graham cracker crust that sets up perfectly in the fridge. It’s a foolproof fall dessert that requires no oven and tastes like pumpkin cheesecake mousse.
- Prep Time: 20 minutes
- Cook Time: 0 minutes
- Total Time: 6 hours 20 minutes (includes chilling)
- Yield: 8 servings 1x
- Category: Dessert
- Cuisine: American
Ingredients
- 1 ½ cups graham cracker crumbs (about 12 full sheets)
- 6 tablespoons unsalted butter, melted
- 3 tablespoons granulated sugar
- ¼ teaspoon salt (if using unsalted butter)
- 8 ounces cream cheese, softened
- 1 cup pumpkin puree (not pumpkin pie filling)
- ½ cup granulated sugar
- 1 teaspoon vanilla extract
- 1 ½ teaspoons pumpkin pie spice
- ¼ teaspoon salt
- 1 ½ cups whipped topping (e.g., Cool Whip or homemade stabilized whipped cream)
- Additional whipped cream for serving (optional)
- Ground cinnamon or pumpkin pie spice for dusting (optional)
Instructions
- Make the crust: Crush graham crackers into fine crumbs. In a medium bowl, combine crumbs, 3 tablespoons sugar, and ¼ teaspoon salt (if using unsalted butter). Pour in melted butter and stir with a fork until all crumbs are moistened and clump together when squeezed.
- Press the mixture firmly into the bottom and up the sides of a 9-inch pie plate. Use the bottom of a measuring cup or glass to pack it down. Refrigerate the crust while you make the filling.
- Make the filling: In a large bowl, beat softened cream cheese with an electric mixer until smooth and creamy, about 2 minutes. Scrape down the sides.
- Add pumpkin puree, ½ cup sugar, vanilla extract, pumpkin pie spice, and ¼ teaspoon salt. Beat on medium speed until well combined and smooth. Scrape the bowl again.
- Gently fold in the whipped topping with a rubber spatula until no white streaks remain. Do not overmix.
- Assemble the pie: Spoon the filling into the chilled crust and spread evenly. Tap the pie plate gently on the counter to release air bubbles. Smooth the top.
- Cover loosely with plastic wrap or aluminum foil. Refrigerate for at least 6 hours, preferably overnight, until firm.
- Serve chilled, topped with additional whipped cream and a dusting of cinnamon or pumpkin pie spice if desired.
Notes
Make sure cream cheese is at room temperature to avoid lumps. Pat pumpkin puree dry if it looks watery. For best texture, chill the pie overnight. The pie can be frozen for up to 2 months.
Nutrition
- Serving Size: 1 slice (1/8 of pie)
- Calories: 335
- Sugar: 23
- Sodium: 280
- Fat: 20
- Saturated Fat: 12
- Carbohydrates: 37
- Fiber: 2
- Protein: 4
Keywords: no-bake pumpkin pie, easy pumpkin pie, graham cracker crust, no-bake dessert, fall dessert, pumpkin dessert, Thanksgiving pie


