Love this? Save it for later!
Share the inspiration with your friends
My neighbor’s six-year-old son, Leo, looked up at me with frosting on his nose and said, “These are better than candy,” and I knew I had stumbled onto something real. He had grabbed a mini pumpkin pie cookie from the treat bag I was assembling for our building’s Halloween party, and instead of the usual sugar rush grab-and-run, he just stood there, chewing thoughtfully. That moment changed how I think about Halloween treats entirely.
I mean, don’t get me wrong—I love a good candy bar as much as the next person. But there’s something about handing out a homemade cookie that feels different. More intentional. And when it’s a mini pumpkin pie cookie that looks like a tiny, adorable pie in your hand? That’s the kind of thing people remember. These little guys pack all the cozy fall spices into a buttery, tender cookie that fits perfectly into treat bags without getting crushed.
Honestly, I started making these because I wanted something that would stand out among all the plastic-wrapped sweets. You know how it is—everyone brings candy to Halloween parties, but nobody brings cookies that actually look like miniature pies. The first batch I made disappeared before I could even bag them up. My kitchen smelled like Thanksgiving in October, and I wasn’t mad about it.
The best part? They’re way easier than they look. No pie crust wrestling, no rolling pins, no fuss. Just a simple cookie base with a pumpkin filling that tastes like your grandma’s pie but takes a fraction of the time. If you’re looking for something that’ll make people stop and ask, “Wait, you made these?”—this is it.
Why You’ll Love These Mini Pumpkin Pie Cookies
Let me tell you why these cookies have become my go-to for Halloween, and honestly, for every fall gathering from September through November.
- Quick & Easy: From start to finish, you’re looking at about 45 minutes. That’s faster than a trip to the store and back, and way more impressive than anything you can buy.
- Simple Ingredients: You probably have most of this stuff in your pantry right now. Canned pumpkin, basic baking staples, and a few spices. No hunting down obscure ingredients at specialty stores.
- Perfect for Halloween Treat Bags: They’re sturdy enough to survive being tossed in a bag with other goodies, but fancy enough that people think you spent hours on them. The mini size means they fit perfectly in those little cellophane treat bags.
- Crowd-Pleaser: Kids love them because they’re cookies. Adults love them because they taste like pumpkin pie without the commitment of a whole slice. I’ve watched people eat three in a row without blinking.
- Unbelievably Delicious: The texture is what gets me every time—a slightly crisp edge with a soft, almost pie-like center. The pumpkin filling stays creamy and spiced just right, while the cookie base gives you that satisfying buttery bite.
What makes these different from every other pumpkin cookie recipe out there? It’s the technique. Instead of just mixing pumpkin into cookie dough (which usually gives you a cakey, flat mess), I use a method where the cookie forms a little cup around a concentrated pumpkin filling. The result is a cookie that actually tastes like a pie, not just a pumpkin-flavored sugar cookie. I tested this recipe six times before I got it right—the first few batches were either too soggy or too dry. But once I figured out the balance? Game changer.
These cookies are the kind that make you close your eyes after the first bite. They’re comfort food reimagined—faster than pie, but with the same soul-soothing satisfaction. Perfect for impressing at Halloween parties without the stress, or turning a simple fall afternoon into something memorable.
What Ingredients You Will Need
This recipe uses simple, wholesome ingredients to deliver that classic pumpkin pie flavor without any complicated steps. Most of these are pantry staples, which means you can whip up a batch whenever the craving hits.
For the Cookie Base
- 1 ¾ cups all-purpose flour (spooned and leveled—don’t scoop straight from the bag or you’ll get too much)
- ½ cup unsalted butter, softened to room temperature (I use Kerrygold for the best flavor, but any good butter works)
- ⅓ cup granulated sugar
- ¼ cup packed light brown sugar (adds moisture and a hint of molasses flavor)
- 1 large egg yolk (save the white for something else—the yolk gives richness without making the dough too wet)
- 1 teaspoon vanilla extract (pure, not imitation, if you can swing it)
- ¼ teaspoon salt
For the Pumpkin Filling
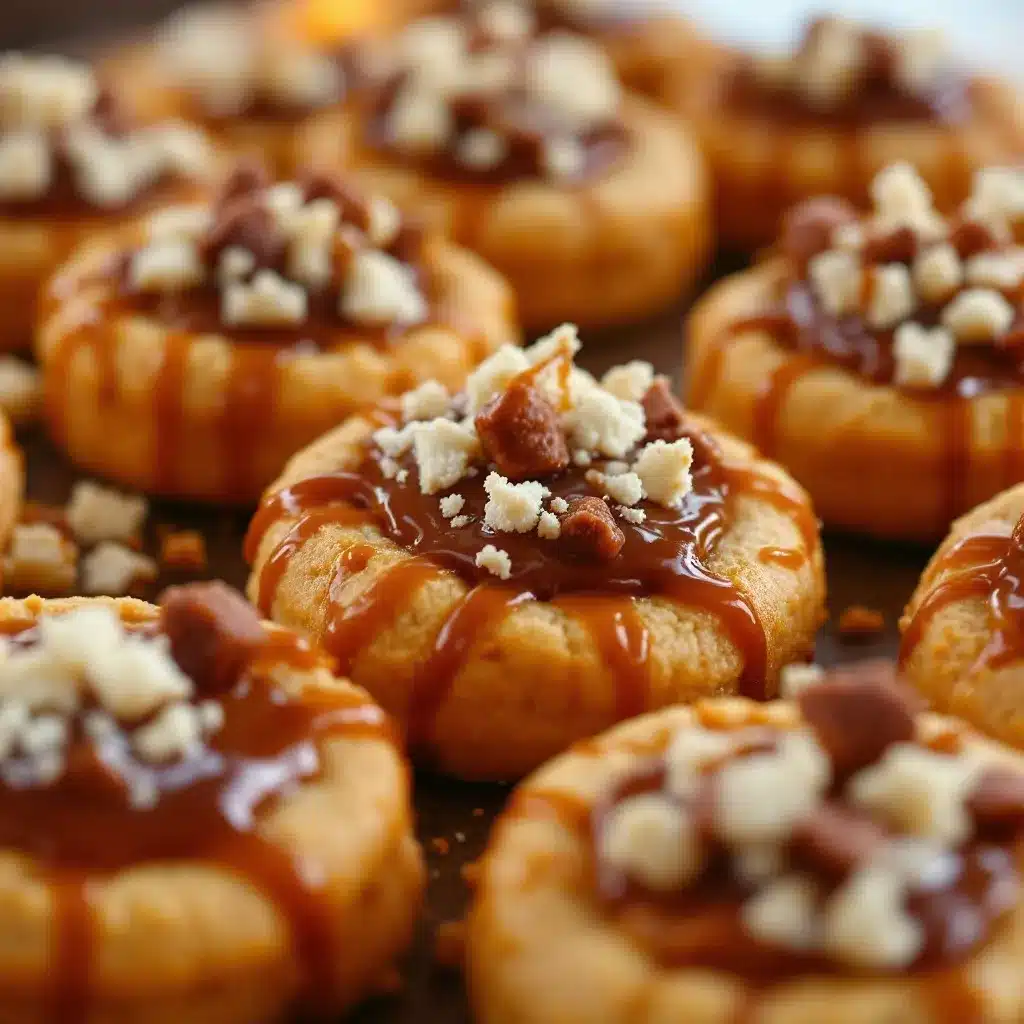
- ½ cup canned pumpkin puree (not pumpkin pie filling—make sure it’s 100% pumpkin. Libby’s is my go-to for consistent texture)
- 2 tablespoons brown sugar
- 1 tablespoon heavy cream (or whole milk in a pinch, but cream gives a richer texture)
- ½ teaspoon pumpkin pie spice (or make your own with ¼ tsp cinnamon, ⅛ tsp nutmeg, ⅛ tsp ginger, and a pinch of cloves)
- ¼ teaspoon cinnamon
- Pinch of salt
For the Topping
- ¼ cup heavy cream, whipped to soft peaks (optional, but highly recommended for that pie a la mode feel)
- 1 tablespoon powdered sugar (if whipping cream)
- ¼ teaspoon cinnamon for dusting
A few notes on ingredient selection: When it comes to canned pumpkin, I’ve tried store brands and they tend to be more watery. Libby’s has the most consistent texture, which matters here because we want a filling that’s thick enough to hold its shape in the cookie. If you only have pumpkin pie filling, don’t use it—it has added sugar and spices that will throw off the balance completely. Just grab the plain stuff.
For the butter, make sure it’s truly softened, not melted. If you microwave it, do it in 5-second bursts and check frequently. Melted butter will make the cookies spread too thin and you’ll lose that nice cup shape we’re going for. Room temperature butter should give slightly when you press it with your finger, but still hold its shape.
If you’re dairy-free, you can substitute the butter with a good vegan butter stick (I like Miyoko’s) and use coconut cream instead of heavy cream. The texture will be slightly different, but still delicious.
Equipment Needed
You don’t need anything fancy for these cookies, which is part of what makes them so great. Here’s what you’ll need:
- Mixing bowls (one medium, one small)
- Electric hand mixer or stand mixer (you can do this by hand with a wooden spoon, but a mixer makes creaming the butter and sugar much easier)
- Baking sheet (a light-colored metal pan works best—dark pans can cause the bottoms to brown too fast)
- Parchment paper or silicone baking mat (non-stick spray works in a pinch, but parchment gives the best results)
- Measuring cups and spoons
- Small cookie scoop or tablespoon (for consistent cookie sizes)
- Fork (for flattening the cookies and creating those classic pie crust edges)
- Cooling rack (absolutely necessary—letting them cool on the pan will make the bottoms soggy)
I’ve made these cookies with just a fork and a bowl before, and they turned out fine. The silicone baking mat is a nice-to-have, not a must. If you don’t have a cookie scoop, just use a tablespoon and roll the dough into balls with your hands. The fork is actually the most important tool here—it’s what gives these cookies their signature look and helps create that little well for the filling.
Preparation Method
Alright, let’s get to the fun part. Follow these steps carefully, and you’ll have a batch of mini pumpkin pie cookies that’ll make everyone think you’re a pastry chef.
- Preheat your oven to 350°F (175°C) and line a baking sheet with parchment paper. This is one of those steps where temperature really matters—too hot and the cookies will brown before the filling sets; too cool and they’ll spread into flat discs.
- Make the cookie dough: In a medium bowl, cream together the softened butter, granulated sugar, and brown sugar until light and fluffy. This takes about 2-3 minutes with an electric mixer on medium speed. You’re looking for a pale, fluffy texture—scrape down the sides of the bowl halfway through. Add the egg yolk and vanilla extract, then mix until just combined. Don’t overmix here, or the cookies will be tough.
- Add the dry ingredients: In a small bowl, whisk together the flour and salt. Gradually add this to the wet mixture, mixing on low speed until a soft dough forms. The dough should hold together when pinched but shouldn’t be sticky. If it feels too dry, add a teaspoon of milk. If it’s too sticky, add a tablespoon of flour.
- Shape the cookies: Using a small cookie scoop or tablespoon, portion out about 1 tablespoon of dough per cookie. Roll each portion into a smooth ball and place them on the prepared baking sheet, spacing them about 2 inches apart. You should get about 18-20 cookies from this dough.
- Create the wells: Here’s the trick—dip the bottom of a small measuring spoon or your thumb in flour, then gently press into the center of each dough ball to create an indentation. Don’t press all the way through; you want a well about ½ inch deep. The edges will crack slightly, which is totally fine—that’s where the pie crust look comes from.
- Bake the cookie bases: Pop the baking sheet in the oven and bake for 8 minutes. You want the cookies to be just set around the edges but still slightly soft in the center. They’ll continue to cook slightly after you take them out, so don’t overbake. Remove from oven and let them cool on the pan for 5 minutes.
- Make the pumpkin filling: While the cookies are baking, whisk together the canned pumpkin, brown sugar, heavy cream, pumpkin pie spice, cinnamon, and salt in a small bowl. The filling should be smooth and thick, not runny. If it looks watery, stir in an extra tablespoon of pumpkin puree.
- Fill the cookies: After the cookies have cooled for 5 minutes, use a small spoon to carefully fill each indentation with about ½ teaspoon of the pumpkin filling. Don’t overfill—the filling will puff up slightly as it bakes, and you don’t want it to spill over the edges.
- Bake again: Return the filled cookies to the oven and bake for another 6-8 minutes, until the filling is set and the edges of the cookies are lightly golden. The filling should look slightly puffed and matte, not shiny. Let them cool on the baking sheet for 5 minutes, then transfer to a cooling rack.
- Cool completely: This is the hardest part—waiting. Let the cookies cool completely on the rack before adding any toppings or bagging them up. The filling needs time to set, and if you try to move them too soon, they’ll fall apart. Trust me, I learned this the hard way.
A few sensory cues to watch for: When you press the indentation into the raw dough, the edges should crackle slightly—that’s a good sign. The baked cookies should smell like butter and vanilla, with a slight golden color on the bottom. The filling is ready when it’s no longer shiny and a toothpick inserted in the center comes out clean.
If you’re making these for a party, you can prep the dough and filling a day ahead. Just keep the dough wrapped in plastic in the fridge and the filling in an airtight container. When you’re ready to bake, let the dough sit at room temperature for 10 minutes before shaping, as cold dough is harder to work with.
Cooking Tips & Techniques
After making these cookies more times than I care to count, I’ve picked up a few tricks that make a real difference. Let me share what I’ve learned the hard way so you don’t have to.
The biggest mistake people make is overfilling the wells. I know it’s tempting to pile that pumpkin filling high, but less is truly more here. About ½ teaspoon per cookie is perfect. Any more and the filling will bubble over during the second bake, creating a sticky mess that’s hard to clean off the pan. Plus, the cookies won’t look as neat and professional.
Another common issue is soggy cookies. This happens when the pumpkin filling is too watery or when the cookies aren’t baked long enough in the first round. If your canned pumpkin seems watery (some brands are worse than others), let it sit in a fine-mesh strainer for 15 minutes to drain off excess liquid. And don’t skip that initial 8-minute bake—the cookies need to be partially set before you add the filling, or they’ll absorb moisture and turn mushy.
Timing is everything with these cookies. I like to prep the filling while the first bake is happening, so everything comes together seamlessly. Set a timer for the first bake, then another for the second. It’s easy to get distracted and let them go too long, especially when your kitchen starts smelling like Thanksgiving.
For consistent results every time, use a cookie scoop for the dough balls and a measuring spoon for the filling. Eyeballing it leads to uneven cookies that bake at different rates. Also, rotate your baking sheet halfway through each bake to ensure even browning—ovens have hot spots, and you don’t want half your batch overdone.
I once forgot to chill the dough on a hot summer day and ended up with cookies that spread into flat, sad discs. If your kitchen is warm, pop the shaped dough balls in the fridge for 15 minutes before the first bake. It helps them hold their shape and keeps those wells nice and deep.
Variations & Adaptations
One of the best things about this recipe is how adaptable it is. Here are some variations I’ve tried and loved:
Gluten-Free Version: Substitute the all-purpose flour with a 1:1 gluten-free baking flour blend. I’ve had good luck with Bob’s Red Mill 1-to-1 Baking Flour. The texture will be slightly more crumbly, so handle the dough gently. You might need to add an extra tablespoon of butter to compensate for the drier flour.
Vegan Option: Use vegan butter sticks (not margarine) and replace the egg yolk with 1 tablespoon of aquafaba (the liquid from a can of chickpeas) or a flax egg (1 tablespoon ground flaxseed mixed with 3 tablespoons water, let sit for 5 minutes). For the filling, use coconut cream instead of heavy cream. The cookies won’t be quite as tender, but they’ll still be delicious.
Spice It Up: For a bolder flavor, add ¼ teaspoon of cardamom or a pinch of cayenne pepper to the pumpkin filling. The cayenne adds a subtle warmth that pairs beautifully with the sweetness—think pumpkin pie with a kick. I tried this on a whim last fall and it was a hit at my Halloween party.
Chocolate Drizzle: Once the cookies are completely cool, drizzle melted dark chocolate over the top. The bitterness of the chocolate balances the sweet, spiced pumpkin filling perfectly. It also makes them look extra fancy for treat bags. Just melt ½ cup of dark chocolate chips with 1 teaspoon of coconut oil, then drizzle with a fork.
Mini Pie Crust Cookies: If you want to go full pie experience, use a store-bought pie crust instead of the cookie base. Cut the crust into small rounds, press them into mini muffin tins, fill with the pumpkin mixture, and bake at 375°F for 12-15 minutes. They’re more like actual mini pies than cookies, but equally adorable.
Savory Twist: Reduce the sugar in the cookie base to ¼ cup total, skip the pumpkin pie spice in the filling, and add ½ teaspoon of sage and ¼ teaspoon of black pepper. These make an unexpected appetizer for fall gatherings—I served them with a dollop of goat cheese on top and they disappeared.
For a fun peanut butter cookie variation, swap out ¼ cup of the flour for peanut butter powder and add 2 tablespoons of creamy peanut butter to the cookie dough. The peanut butter and pumpkin combination is surprisingly good—like a Reese’s meets pumpkin pie situation.
Serving & Storage Suggestions
These mini pumpkin pie cookies are best served at room temperature, which makes them perfect for parties and treat bags. If you’re serving them as a dessert, a light dusting of cinnamon on top makes them look beautiful. For an extra special touch, add a tiny dollop of whipped cream on each cookie just before serving—it turns them into bite-sized pies a la mode.
They pair wonderfully with a hot cup of coffee or a warm vanilla milk drink for a cozy fall evening. The spiced pumpkin flavor complements the warmth of cinnamon and honey beautifully. If you’re serving them at a Halloween party, set them out alongside a bowl of apple cider for a non-alcoholic option that everyone can enjoy.
Storage Instructions: Store the cookies in an airtight container at room temperature for up to 3 days. Layer them between sheets of parchment paper to prevent sticking. Don’t refrigerate them—the fridge dries out the cookies and makes the filling rubbery.
Freezer Instructions: These cookies freeze beautifully. Place them in a single layer on a baking sheet and freeze until solid (about 1 hour), then transfer to a freezer-safe bag or container. They’ll keep for up to 3 months. To thaw, let them sit at room temperature for 15-20 minutes. I like to freeze a batch in October and pull them out for Thanksgiving—they taste just as fresh as the day I made them.
Reheating: If you want that fresh-from-the-oven taste, pop the cookies in a 300°F oven for 5 minutes. This warms the filling and crisps up the edges slightly. Don’t microwave them—it makes the cookies tough and the filling gummy.
One thing I’ve noticed is that the flavors actually develop over time. Day-old cookies taste even better than fresh ones, as the spices have time to meld together. So if you’re making these for a party, baking them a day ahead is actually a smart move.
Nutritional Information & Benefits
Per cookie (based on 20 cookies, without whipped cream topping):
- Calories: 115
- Total Fat: 6g
- Saturated Fat: 3.5g
- Carbohydrates: 14g
- Fiber: 1g
- Sugar: 7g
- Protein: 2g
These numbers are estimates and will vary based on the exact ingredients you use. The good news is that compared to a slice of pumpkin pie (which can run 300-400 calories), these cookies offer that same satisfying flavor in a much more reasonable package.
Pumpkin is packed with vitamin A, which is great for eye health and immune function. It’s also a good source of fiber, which helps with digestion and keeps you feeling full. The cinnamon in the filling has anti-inflammatory properties and can help regulate blood sugar levels—not that we’re eating these for health reasons, but it’s nice to know they’re not completely empty calories.
If you’re watching your sugar intake, you can reduce the brown sugar in both the cookie base and the filling by half. The cookies won’t be as sweet, but the pumpkin flavor will shine through more prominently. For a lower-carb option, substitute the all-purpose flour with almond flour—just note that the texture will be more delicate and crumbly.
These cookies are vegetarian and can easily be made dairy-free or vegan with the substitutions mentioned earlier. They do contain gluten and eggs in the standard version, so keep that in mind if you’re baking for someone with allergies.
Conclusion
These mini pumpkin pie cookies have become my signature fall treat, and I can’t imagine a Halloween season without them. They’re the perfect combination of two beloved desserts—cookies and pumpkin pie—in a bite-sized package that’s ideal for treat bags, party platters, or just sneaking a few for yourself while you watch Hocus Pocus.
What I love most about this recipe is how forgiving it is. You don’t need to be a pastry chef to make these look beautiful. The little imperfections—the cracked edges, the slightly uneven filling—just make them look more homemade and charming. Every batch I make turns out a little different, and that’s part of the fun.
I’d love to hear how yours turn out! Tag me in your photos, leave a comment below with your variations, or share your own tips for making these cookies your own. Did you try the chocolate drizzle? The vegan version? Let me know what worked for you. And if you’re looking for more fall baking inspiration, check out my homemade banana pudding recipe or my rustic cherry pie for more seasonal treats that never disappoint.
Happy baking, and may your Halloween be filled with more homemade treats than store-bought candy!
Frequently Asked Questions
Can I use fresh pumpkin instead of canned?
You can, but you’ll need to roast and puree it first, then strain it through a cheesecloth to remove excess moisture. Fresh pumpkin has a higher water content than canned, so if you don’t strain it, your filling will be too runny. Canned pumpkin is actually more consistent and reliable for baking, which is why most recipes call for it.
Why did my cookies spread too much?
This usually happens for one of three reasons: your butter was too warm, you didn’t chill the dough, or your baking sheet was too hot. Make sure your butter is softened but not melted, and if your kitchen is warm, chill the shaped dough balls for 15 minutes before baking. Also, let the baking sheet cool completely between batches if you’re reusing it.
Can I make these ahead of time for a party?
Absolutely! You can make the cookie dough and filling up to 2 days ahead and keep them separately in the fridge. Assemble and bake the day of the party for best results. Or bake them completely, let them cool, and store them in an airtight container for up to 3 days. They actually taste better on day two as the flavors meld together.
How do I prevent the filling from making the cookies soggy?
The key is to not overfill and to make sure your pumpkin puree isn’t too watery. If your canned pumpkin seems thin, let it drain in a fine-mesh strainer for 15 minutes. Also, don’t skip the first bake—the cookies need to be partially set before you add the filling, or they’ll absorb moisture from the pumpkin.
Can I double this recipe?
Yes, this recipe doubles beautifully. Just make sure you have enough baking sheets and space in your oven. You might need to bake in batches, and remember to let the baking sheets cool between batches. The dough and filling can be made in larger quantities without any issue—I’ve made quadruple batches for Halloween parties before.
Pin This Recipe!
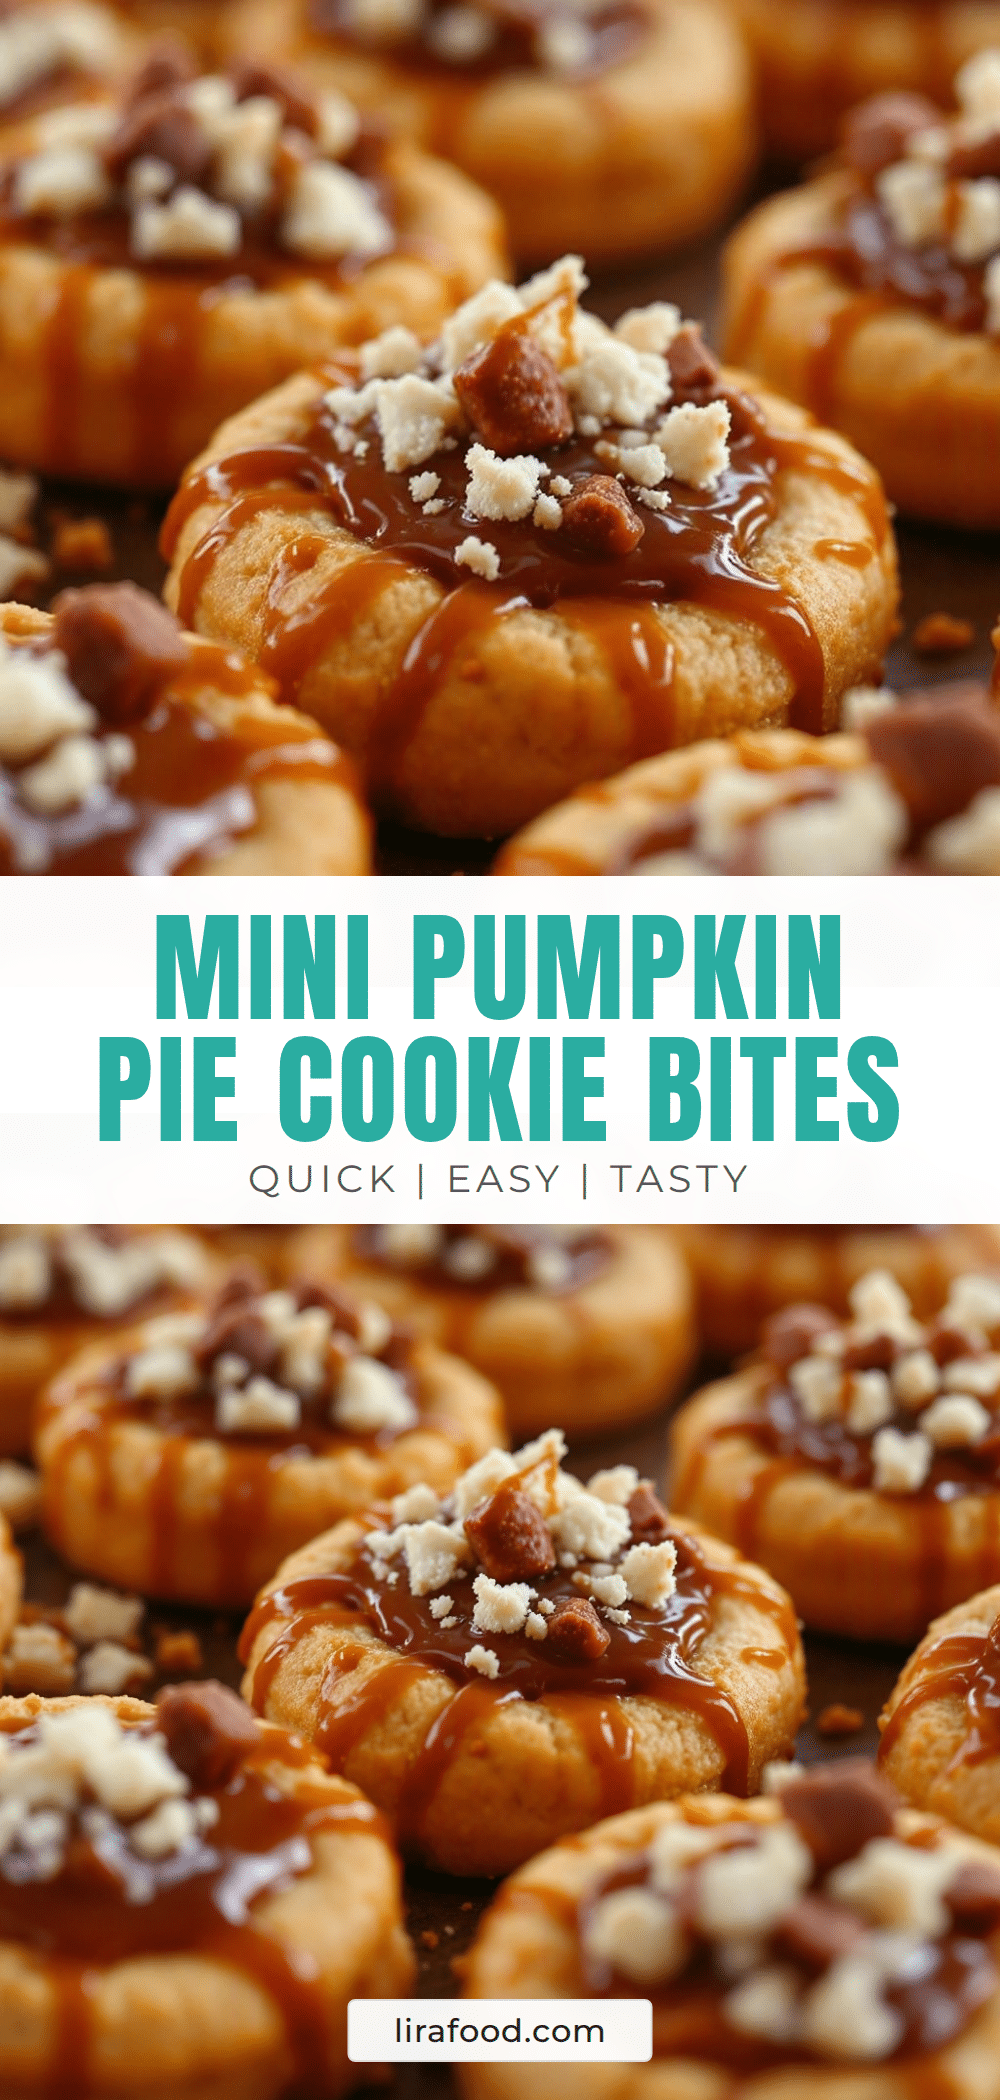
Easy Mini Pumpkin Pie Cookies for Halloween Treat Bags
These adorable mini pumpkin pie cookies combine a buttery cookie base with a creamy spiced pumpkin filling, creating a bite-sized treat that’s perfect for Halloween treat bags or fall gatherings. They’re easier than they look and pack all the cozy fall flavors into a portable, crowd-pleasing cookie.
- Prep Time: 15 minutes
- Cook Time: 16 minutes
- Total Time: 45 minutes
- Yield: 18-20 cookies 1x
- Category: Dessert
- Cuisine: American
Ingredients
- 1 ¾ cups all-purpose flour (spooned and leveled)
- ½ cup unsalted butter, softened to room temperature
- ⅓ cup granulated sugar
- ¼ cup packed light brown sugar
- 1 large egg yolk
- 1 teaspoon vanilla extract (pure preferred)
- ¼ teaspoon salt
- ½ cup canned pumpkin puree (100% pumpkin, not pumpkin pie filling)
- 2 tablespoons brown sugar
- 1 tablespoon heavy cream (or whole milk)
- ½ teaspoon pumpkin pie spice
- ¼ teaspoon cinnamon
- Pinch of salt
- ¼ cup heavy cream, whipped to soft peaks (optional, for topping)
- 1 tablespoon powdered sugar (if whipping cream)
- ¼ teaspoon cinnamon for dusting
Instructions
- Preheat your oven to 350°F (175°C) and line a baking sheet with parchment paper.
- Make the cookie dough: In a medium bowl, cream together the softened butter, granulated sugar, and brown sugar until light and fluffy, about 2-3 minutes with an electric mixer on medium speed. Add the egg yolk and vanilla extract, then mix until just combined.
- Add the dry ingredients: In a small bowl, whisk together the flour and salt. Gradually add this to the wet mixture, mixing on low speed until a soft dough forms. The dough should hold together when pinched but shouldn’t be sticky.
- Shape the cookies: Using a small cookie scoop or tablespoon, portion out about 1 tablespoon of dough per cookie. Roll each portion into a smooth ball and place them on the prepared baking sheet, spacing them about 2 inches apart. You should get about 18-20 cookies.
- Create the wells: Dip the bottom of a small measuring spoon or your thumb in flour, then gently press into the center of each dough ball to create an indentation about ½ inch deep. Don’t press all the way through.
- Bake the cookie bases: Bake for 8 minutes until the cookies are just set around the edges but still slightly soft in the center. Remove from oven and let them cool on the pan for 5 minutes.
- Make the pumpkin filling: While the cookies are baking, whisk together the canned pumpkin, brown sugar, heavy cream, pumpkin pie spice, cinnamon, and salt in a small bowl until smooth and thick.
- Fill the cookies: After the cookies have cooled for 5 minutes, use a small spoon to carefully fill each indentation with about ½ teaspoon of the pumpkin filling. Don’t overfill.
- Bake again: Return the filled cookies to the oven and bake for another 6-8 minutes, until the filling is set and the edges of the cookies are lightly golden. Let them cool on the baking sheet for 5 minutes, then transfer to a cooling rack.
- Cool completely: Let the cookies cool completely on the rack before adding any toppings or bagging them up. The filling needs time to set.
Notes
For best results, use canned pumpkin puree (not pumpkin pie filling). If your canned pumpkin seems watery, let it drain in a fine-mesh strainer for 15 minutes. Don’t overfill the wells—about ½ teaspoon per cookie is perfect. The cookies can be stored in an airtight container at room temperature for up to 3 days, or frozen for up to 3 months. Day-old cookies taste even better as the flavors meld together.
Nutrition
- Serving Size: 1 cookie
- Calories: 115
- Sugar: 7
- Sodium: 50
- Fat: 6
- Saturated Fat: 3.5
- Carbohydrates: 14
- Fiber: 1
- Protein: 2
Keywords: mini pumpkin pie cookies, Halloween cookies, pumpkin cookies, fall cookies, treat bag cookies, easy pumpkin cookies, mini pie cookies


